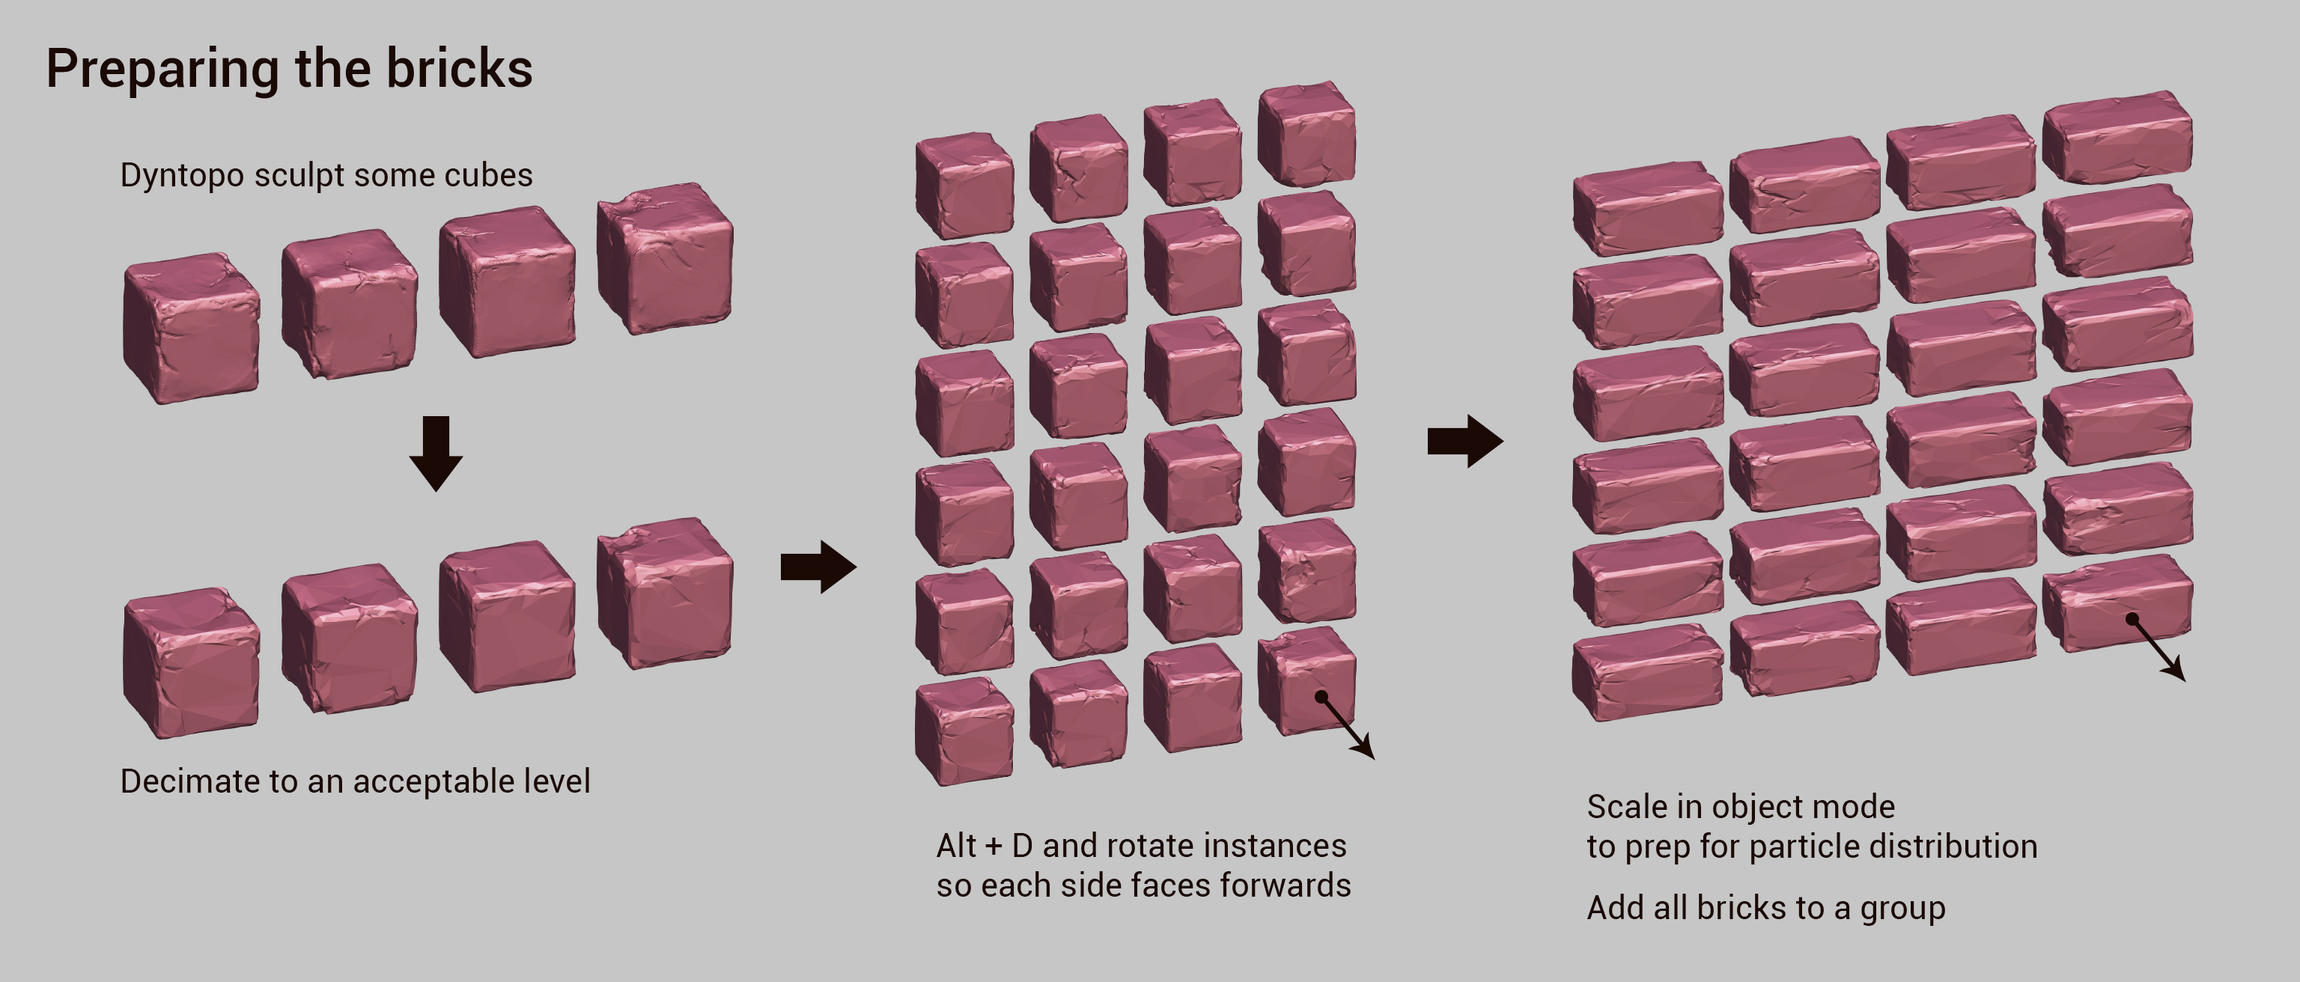
How I created the instanced bricks - this is an evolution of the technique I used for the floortiles in my Sulfur Crypt render (which I reused for this scene)
Sculpting on cubes, then rotating the bricks before scaling them lets you reuse the same sculpt multiple times; four initial bricks turns into 24 effective once each face is rotated to the front.
You could carry the technique further, rotating four times around the forward normal in 90-deg increments (what I did on the floortiles) before scaling, but I felt 24 bricks was plenty of variation. 96 would have been overkill.
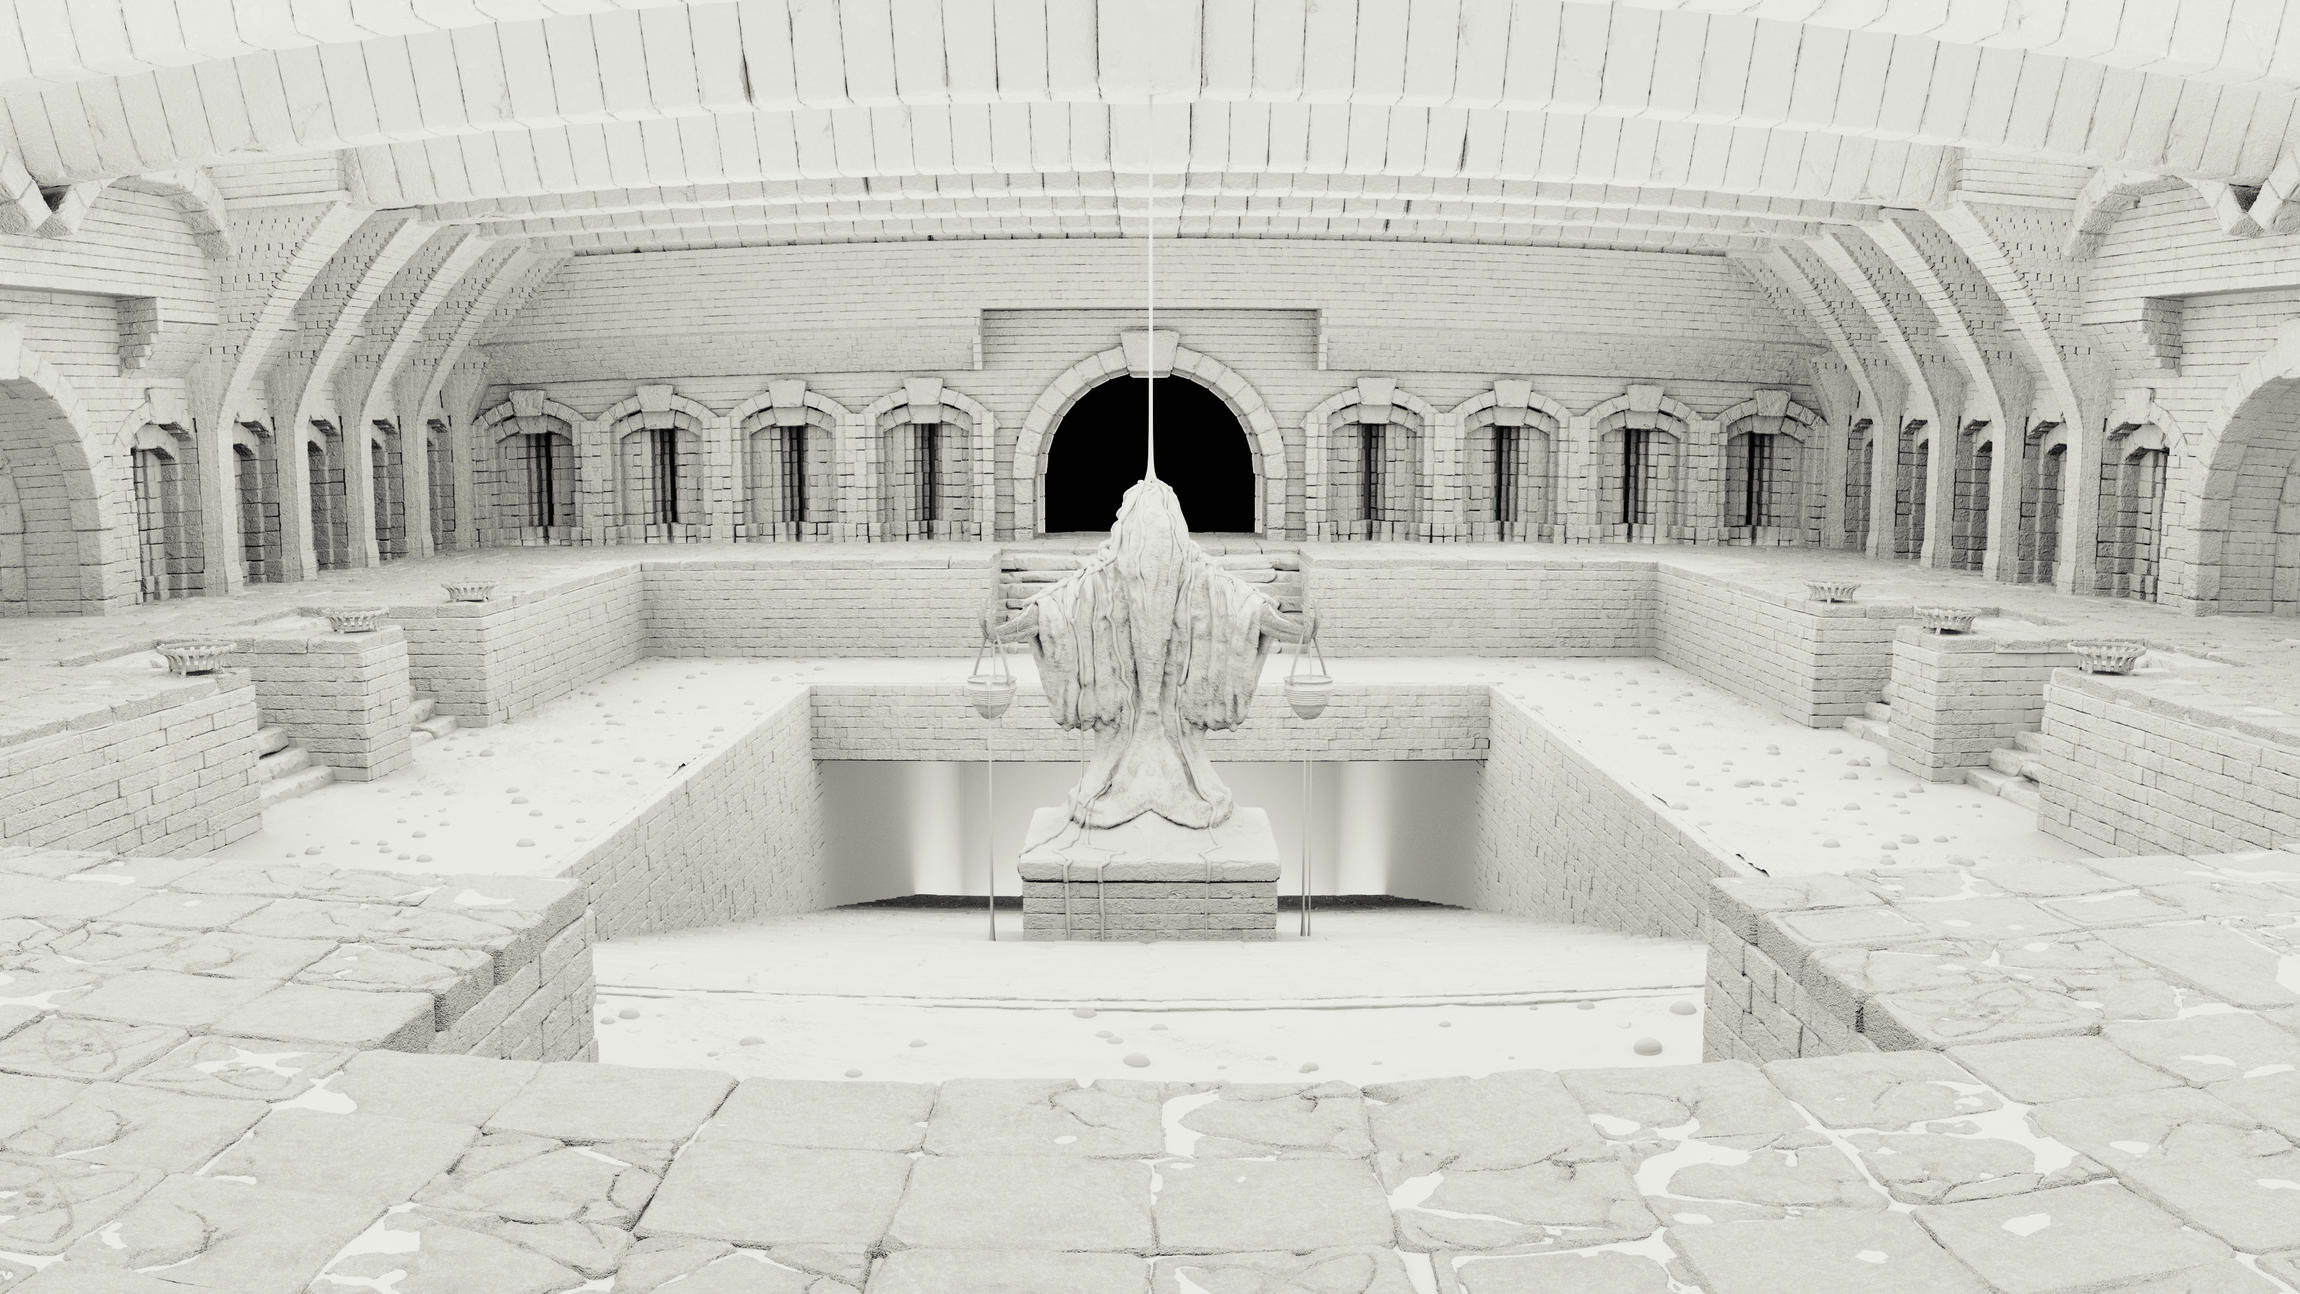
This step is pretty straightworward. Most of the brick emitters in my scene were simply X-aligned or Y-aligned, only a few were more complicated than that. Rotating the emitter in object mode gives you a fair bit of leeway in terms of angles, and you can even get away with a little bit of warping - visible in the AO pass on the entry/exit arches.
The beam support arches were a little trickier, and I ended up mostly winging them. I’m not 100% happy with how they turned out geometry-wise, but they work well enough in the render.
One thing I didn’t show in these images is I have a subtle displacement modifier on the emitter objects in the scene, just to give a bit of coherent variation in the depth of the bricks.
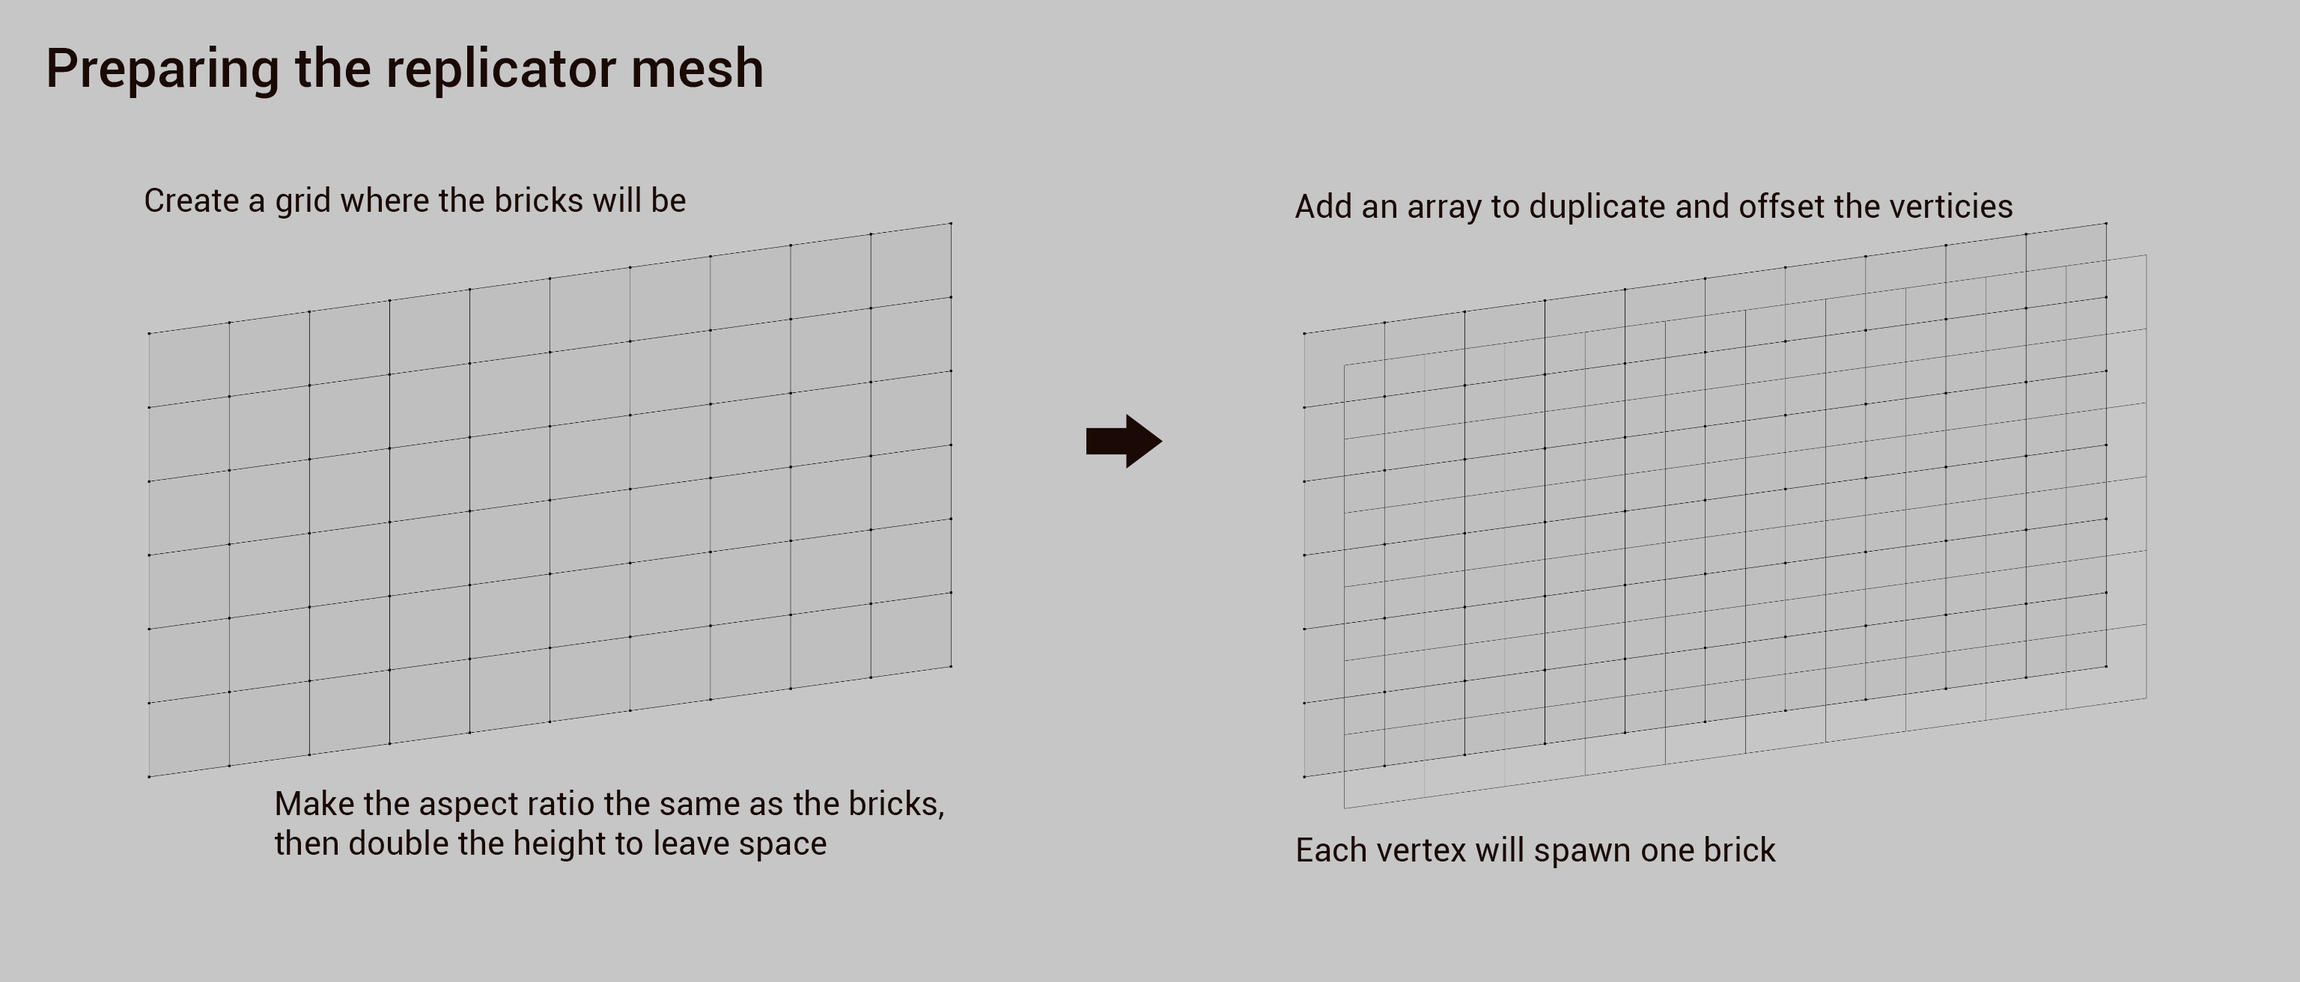
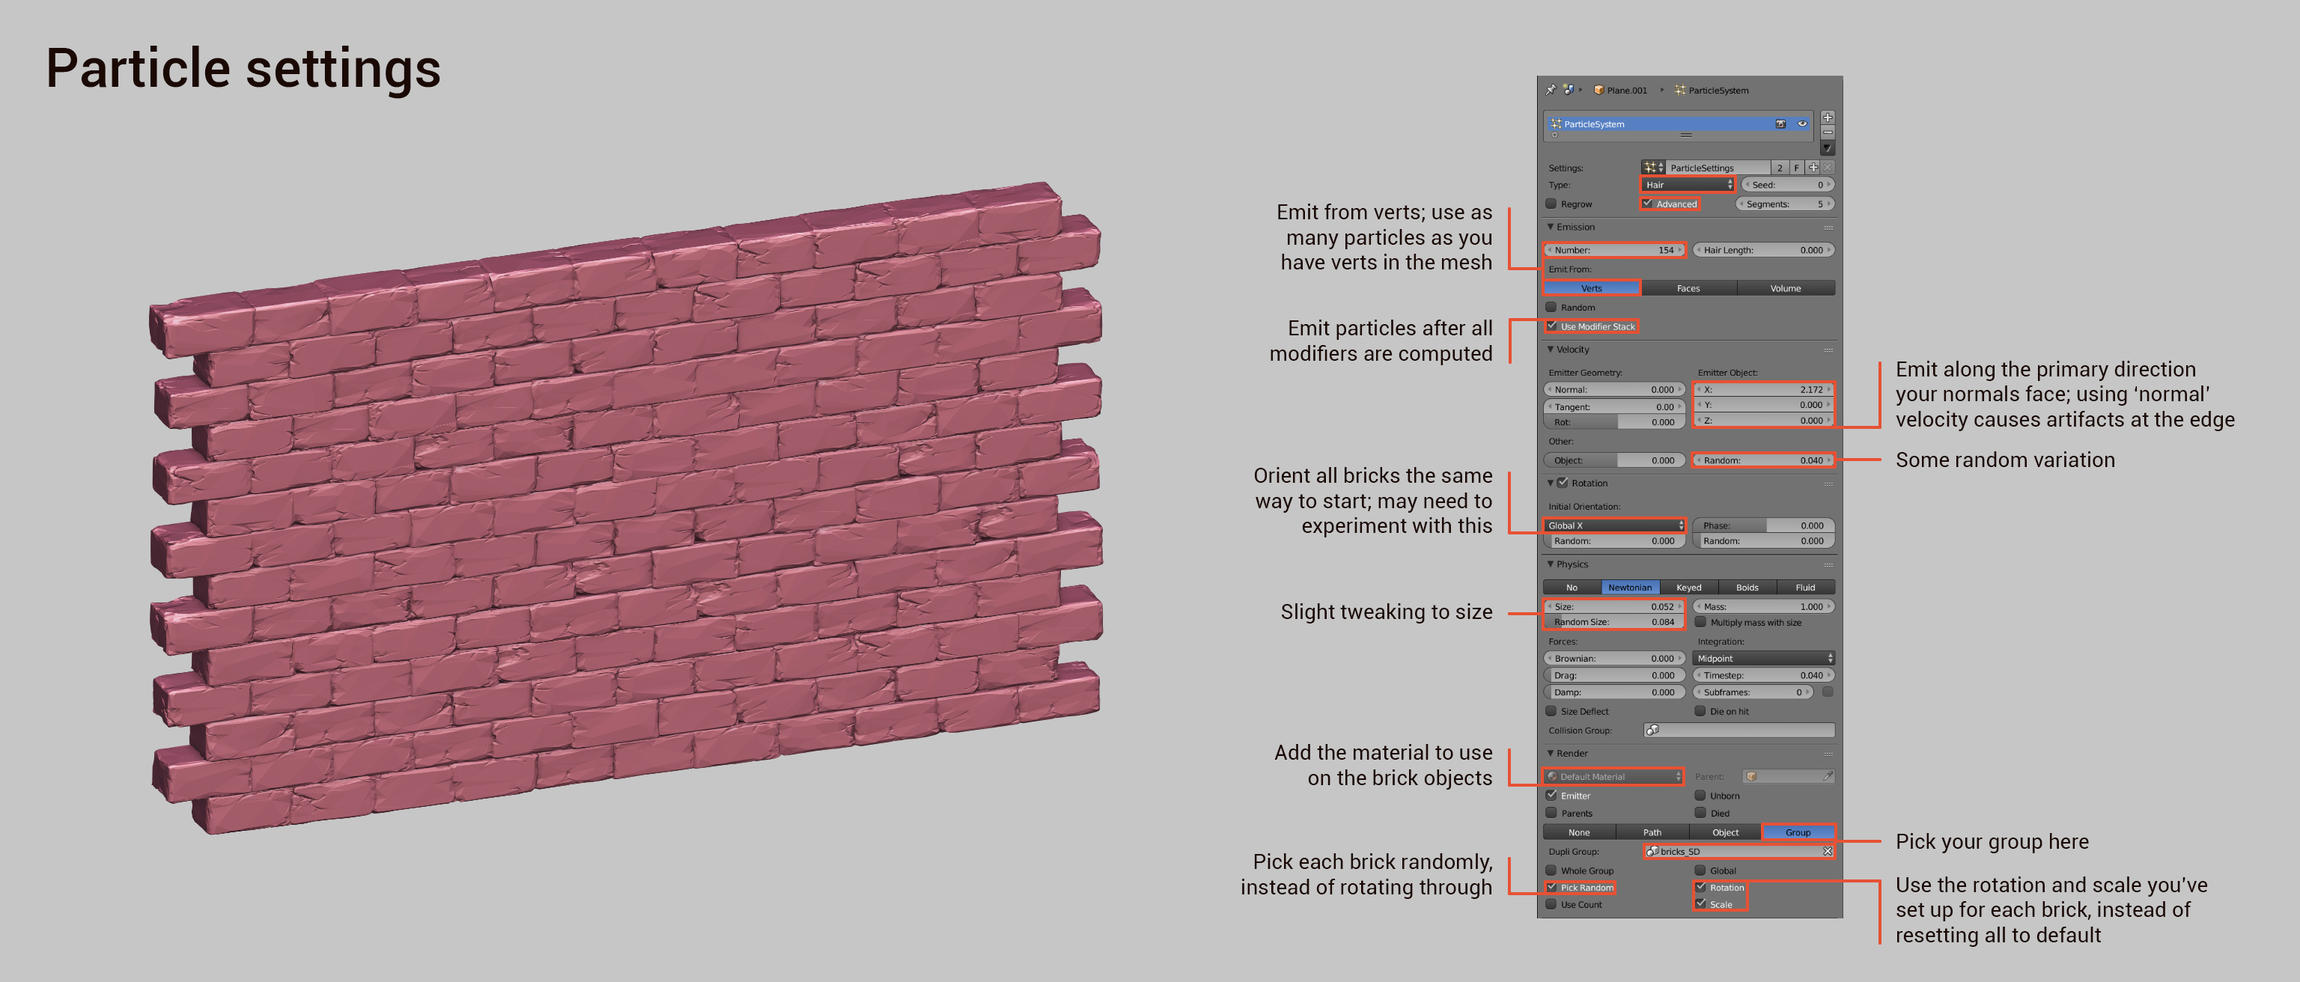
This stage requires the most tweaking to set up initially, but afterwards you can reuse the same particle system for each emitter. Just remember to make a copy before changing the emission count or rotation axis.
And that’s pretty much it. Once you have the geometry set up, creating a nice-looking shader is the easy part thanks to Cycles’ texturing tools, object-random input, and pointiness pass. (Using box mapping with an empty for object coordinates also helps)
Fun fact: there are 1,244 floortiles and 22,728 bricks in this scene.