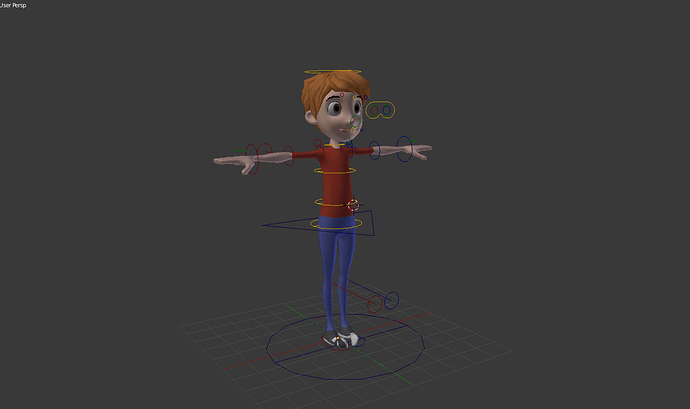
Hi there, i have downloaded a model and animated it but after a while of animation the feets turn inwards?? can someone tell me howto fix this?
I have attached the blend file, and can anyone else move the hand controllers? i cant?
Attachments
Eleven.blend (6.38 MB)
You need to check your armature. First of all, make sure the non deforming bones do not have deform checked, bone tab in properties. IE root, knee. Your weight painting is off, but minor. You can easily check this by turning the armature modifier off (little eye) and on. To fix your toes, you may have to change the constraint on your both your Def_toe bones to local space, you have them on world space. Your hand is because you have ik fk bones and your just selecting the wrong one. Delete the bone vertex groups in your mesh you don’t need, (check as you delete in case you need it back: be sure to save your file first and change on a copy .) Only the ones you turned off.
Okay first …
Select your Armature… Tab into Pose mode…
In your Properties Panel… > find the ‘Object Data’ Tab (the little man Icon) > now find the "Display’ Panel > put a Check next to ‘Axes’ … > this will now display the Axis orientation of all your individual bones…
This way you can always look at those to see what direction your bones are ‘rolled’ in…
Second… In that same Tab (the Object Data Tab (little man Icon)) > find the Panel that says ‘Skeleton’ (this is not very discriptive of that particular panel but none the less) in that Panel you will see the bone Layers… (not the same thing as the object layers)… > now forget about the layers marked ‘protected layers’ … those don’t do anything in your instance… (most likely)…
as you can see the regular ‘layers’ allow you to quickly hide or see the bones you want to manipulate…
find the layers that have a bone having to do with the feet…
In your case it looks like the very last upper layer…
if you will notice the bones are rolled over …
Thirdly… also note that you have Two Armatures… in your file… a Def Rigg (Deformer Rigg) and an Animation Rigg named ‘Eleven’… note that only one of these is connected to your Mesh… this is the Def Rigg so we don’t need to do anything to the other Rigg… (Eleven)…
So goto the Def Rig… on Object Layer 11… select it and set it so you can see the Axis… > Tab into Edit mode… and you will see that the Toe bones are rolled over… > if you look at the Right Hand Toolbar… in the ‘Transforms’ panel you will find a “Roll” setting… I like to have these set at Zero if I can… if not… then try to set them to what ever Roll their parent has or close to it…
So notice that in your file the Foot bone is Roll such that it wants to have the ‘Z’ Arrow pointing down… That is okay… but you want the Toe bone to be pointing down too… (which in your file it is not)
Now once you move these in Edit mode it might very well mess up what you have Set (if anything in pose mode)
So you will have to adjust this in Pose mode…
however that really does not fix the problem… if these bones were out of alignment when you did your weight paint… you will always have a hard time animating with them…
the best deal is to fix the bones to the proper Axis roll in Edit mode and Re-weight that area… or redo your AutoMatic weight process if you used that… then everything will work like you expect during animation…
Thanks for replys guys  i still cant get the fingers moving??? any ideas?
where did you say you got this Rigg?
Change roll (edit mode) Toes.R to 0° and all will be fine.
google eleven rig
