Lathenhorn, scaled terrain experiment


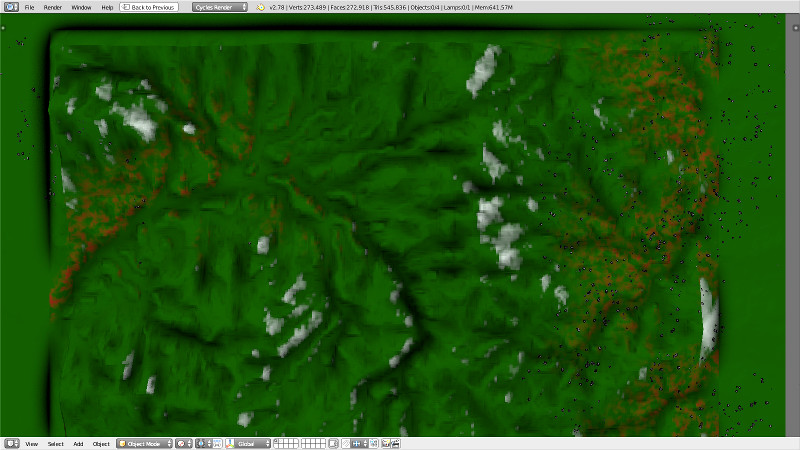
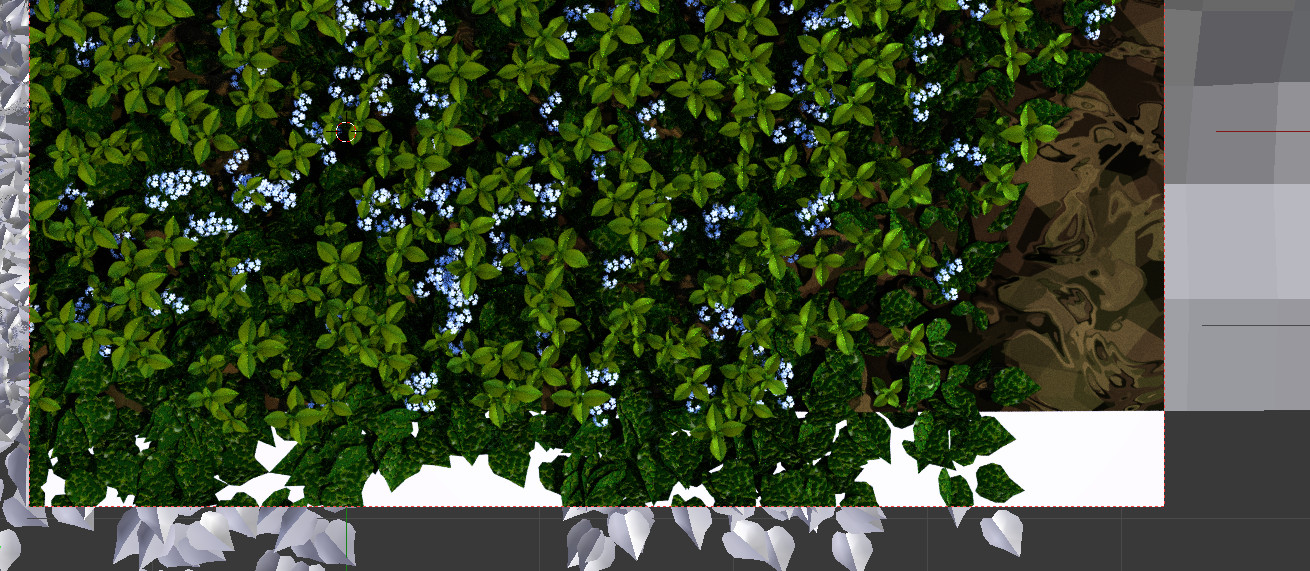
LATEST: Beginning to explore ground cover for economy and appearances sake.

I sample a lot of projects both in and out of Blender and my mind jumps from one to the next almost at random but mostly from pushes outside influences have. I’m reading The Name of the Wind (it IS as good as you’ve heard) and my mind is thrust again to Lathenhorn.

Background:
You’re never too old for imagination but you can be too old to find a reliable set of new D&D players. When I thought I had some noobies, I searched online high and low to gather inspiration to create a set of experiences, tales and storytelling tools. I found the “RPG Citymap Generator” which pounds out elementary maps of cities both large and small with stick-figure like accuracy and a handful of name and character generator sites that proved mostly to be fun. In a folder on my hard drive, a curated list of experiences, encounters and characters for players who never fully materialized. And it all centers on a fictional region, Lathenhorn.

Easily 200 pages into Patrick Rothfuss’s and the unrealized Lathenhorn no longer begged for attention; it demanded a legitimate shot at being visualized. My concept is not epic - quite the opposite. The intent is for a comfortable, quiet, though not Hobbit-like, chunk of land where new players could develop and explore D&D things quietly.

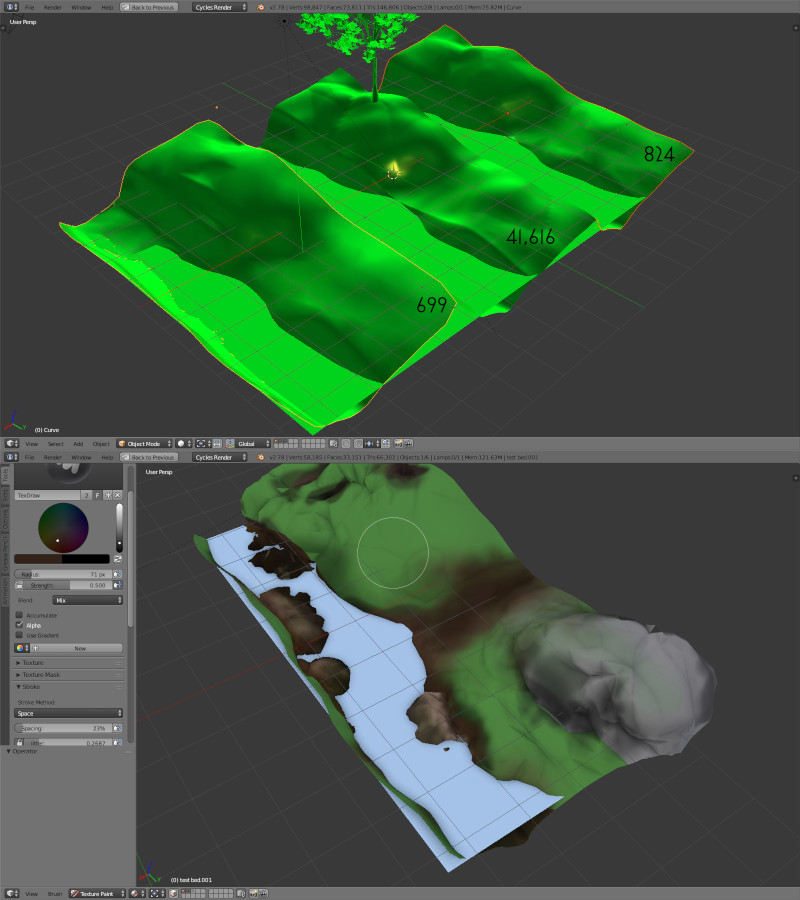
Preliminary Landscape Math:
I thought 2500 acres would be room enough for both safety and danger.
2500 acres is nearly 4 square miles. I’m laying it out for 2x2
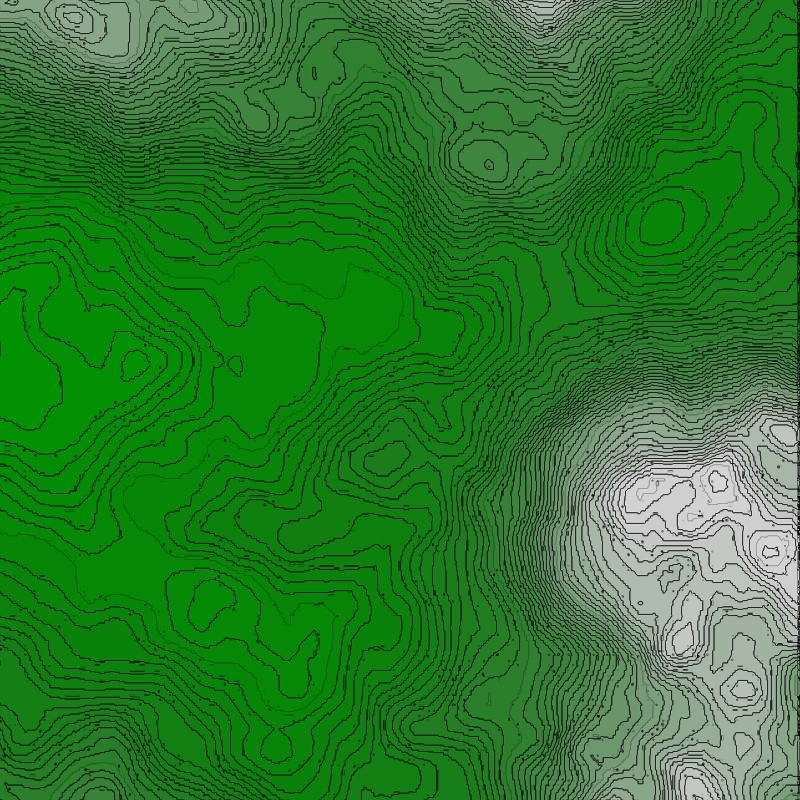
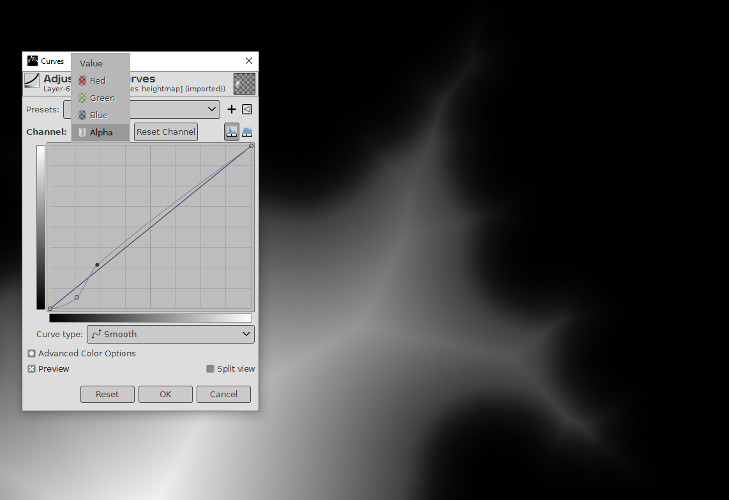
An ANT Landscape into 200 polygons means one square is 1/100th of a mile.
So the ANT landscape breaks to new elevation every 50-feet -ish.
An ambitious but still manageable 4000x4000 texture puts one pixel for about every .8 meters squared or 2.6 feet.
Every 50 square foot of land can hold only 18 or 19 pixels square of image.
If a person’s personal space is accounted for, each pixel is about that; a square bubble of 30-inches or so.
That start shows me no matter how great the landscape painting, each personal bubble can hold only one color.

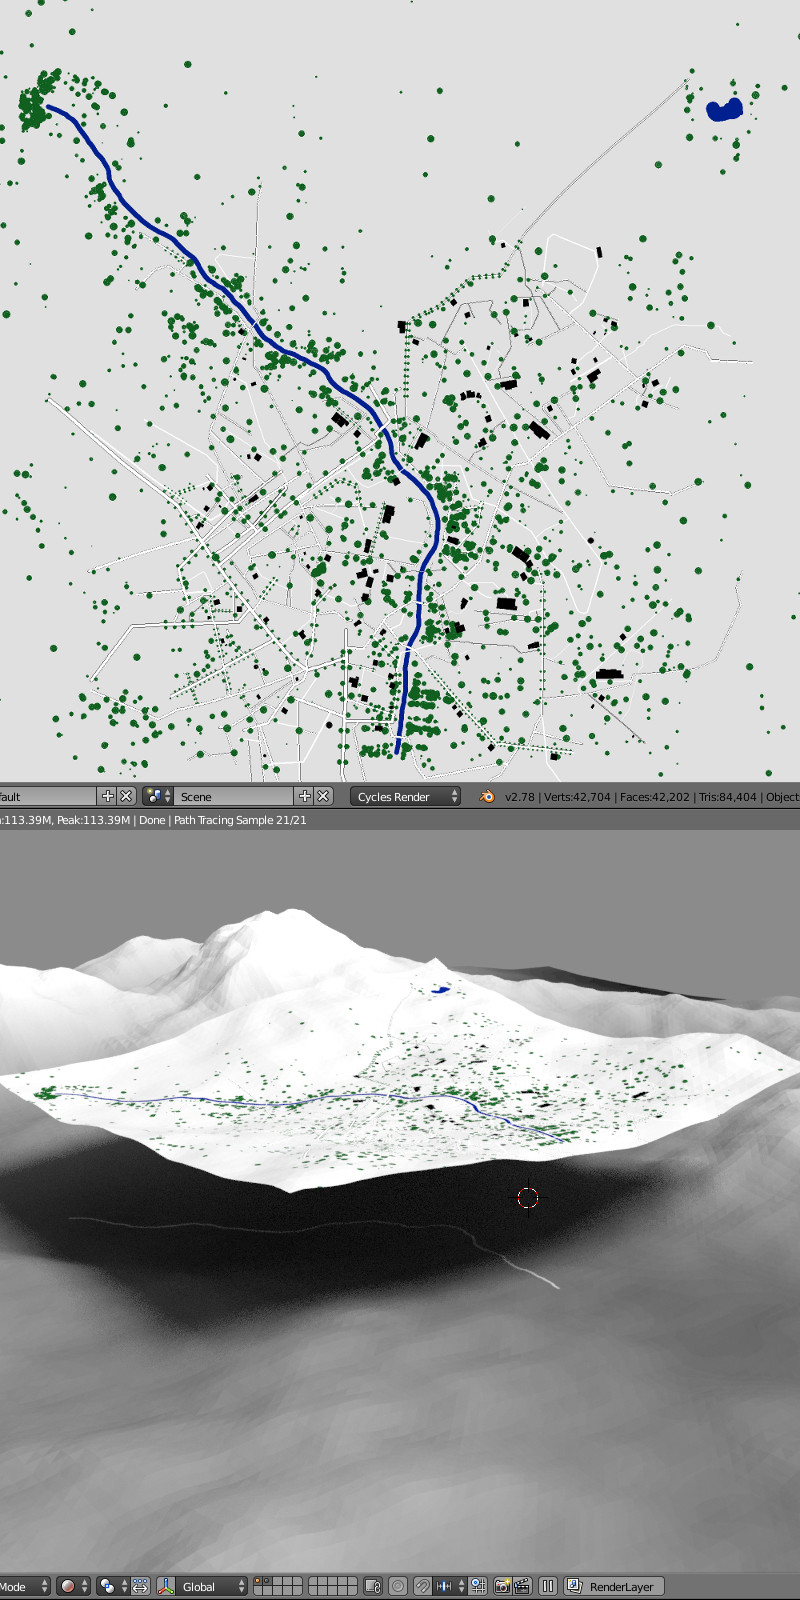
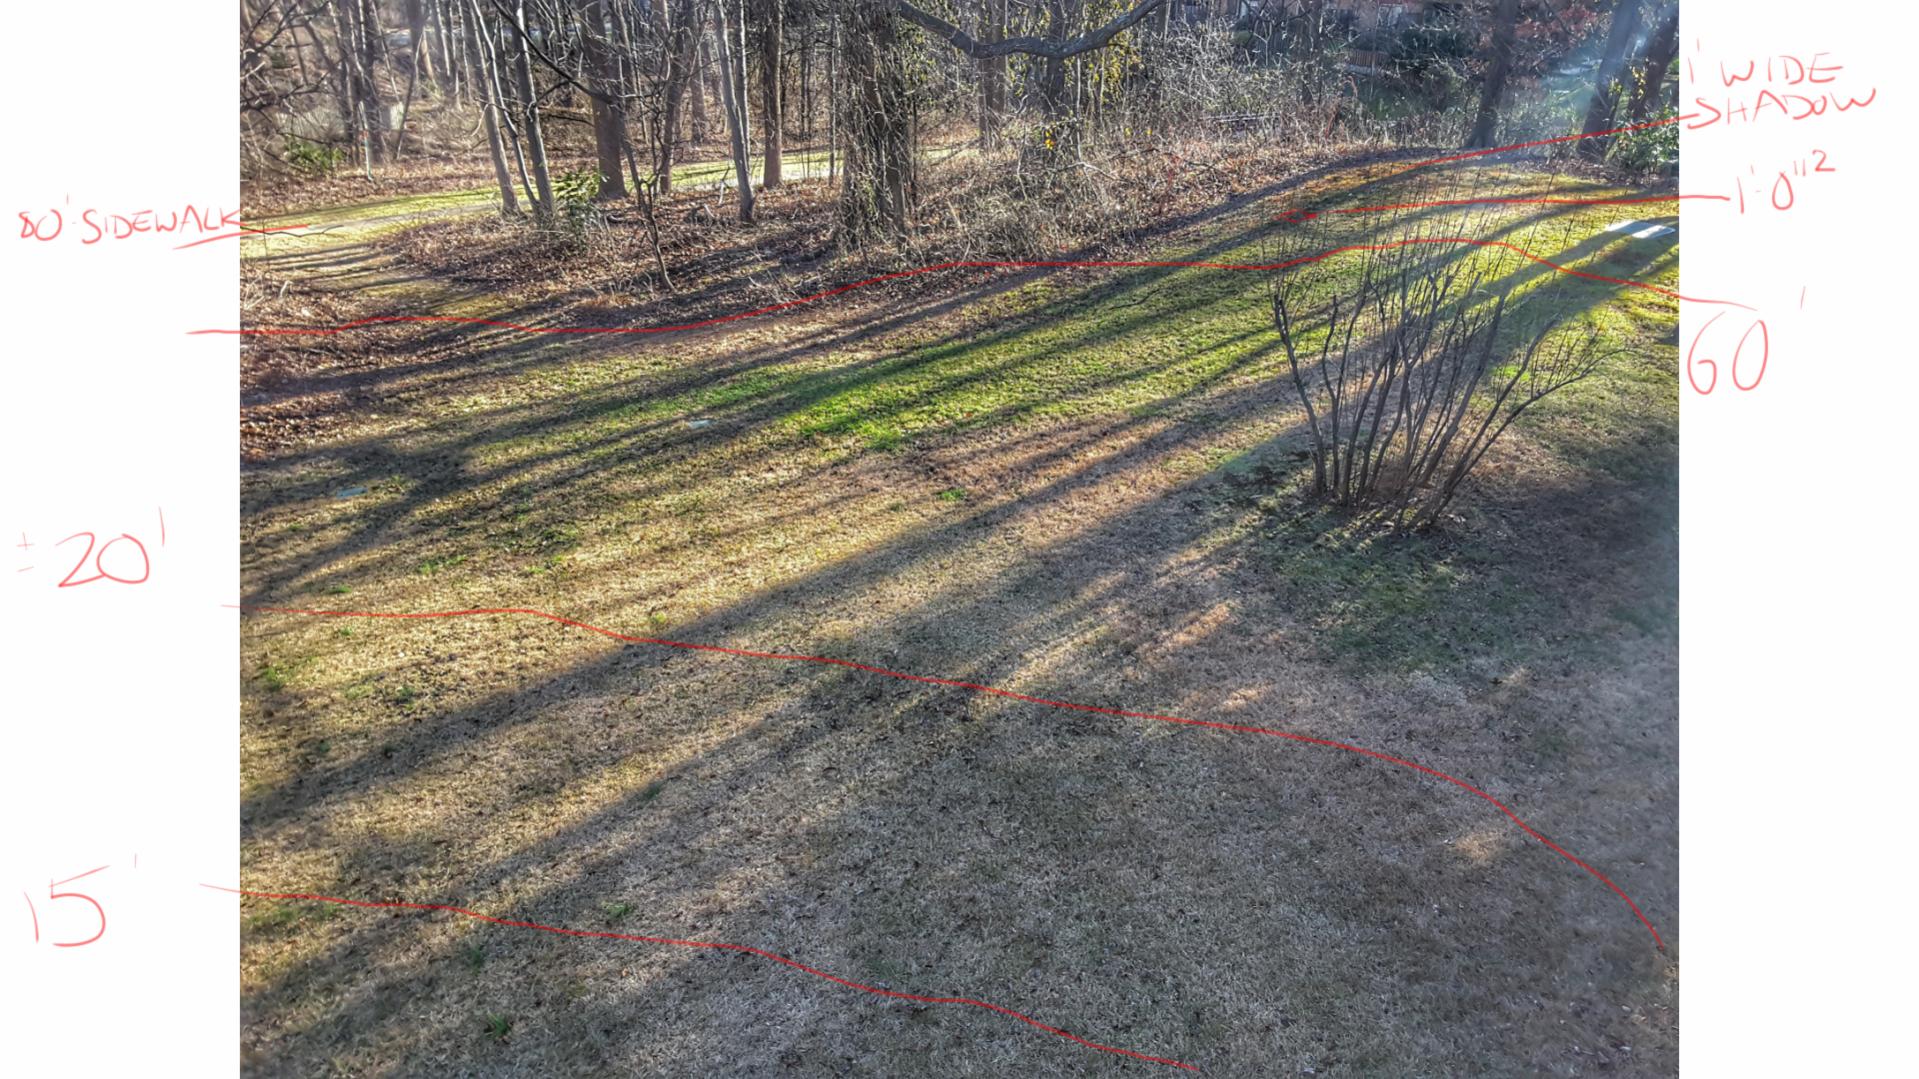
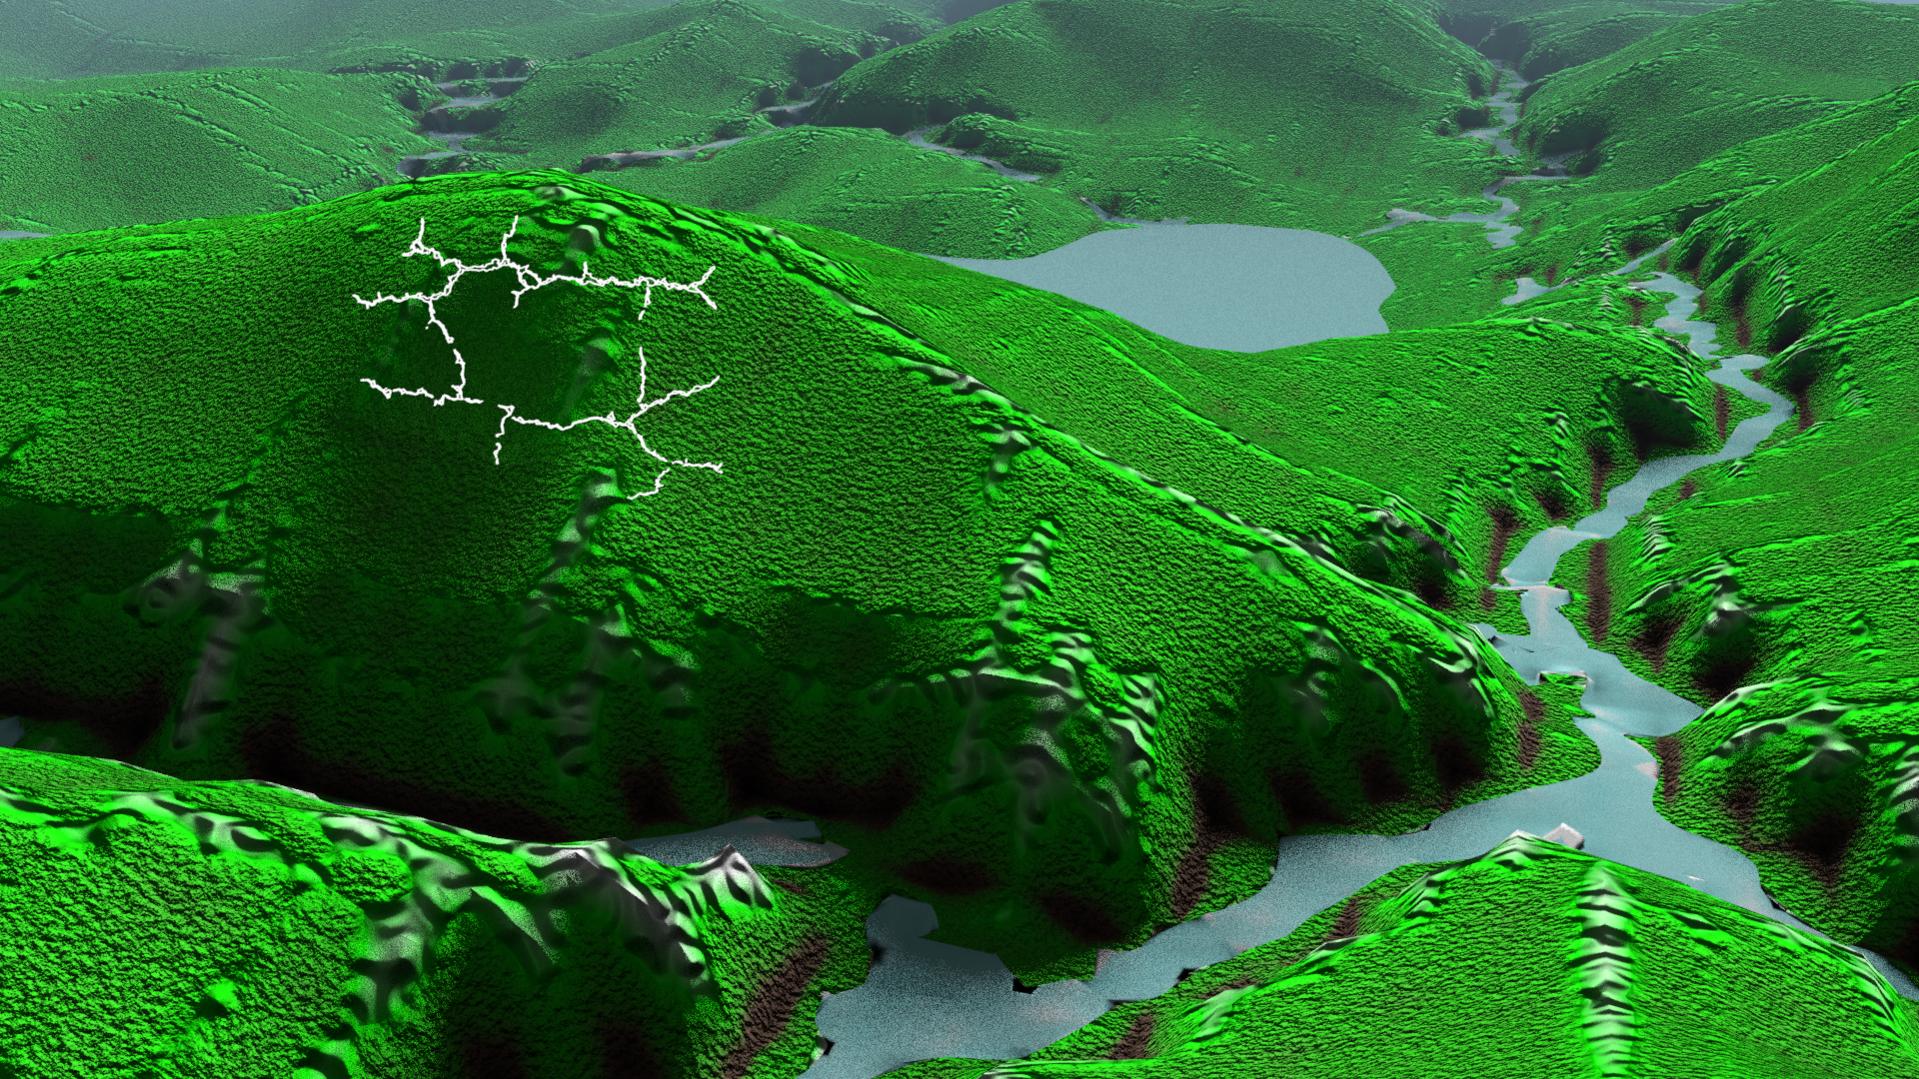
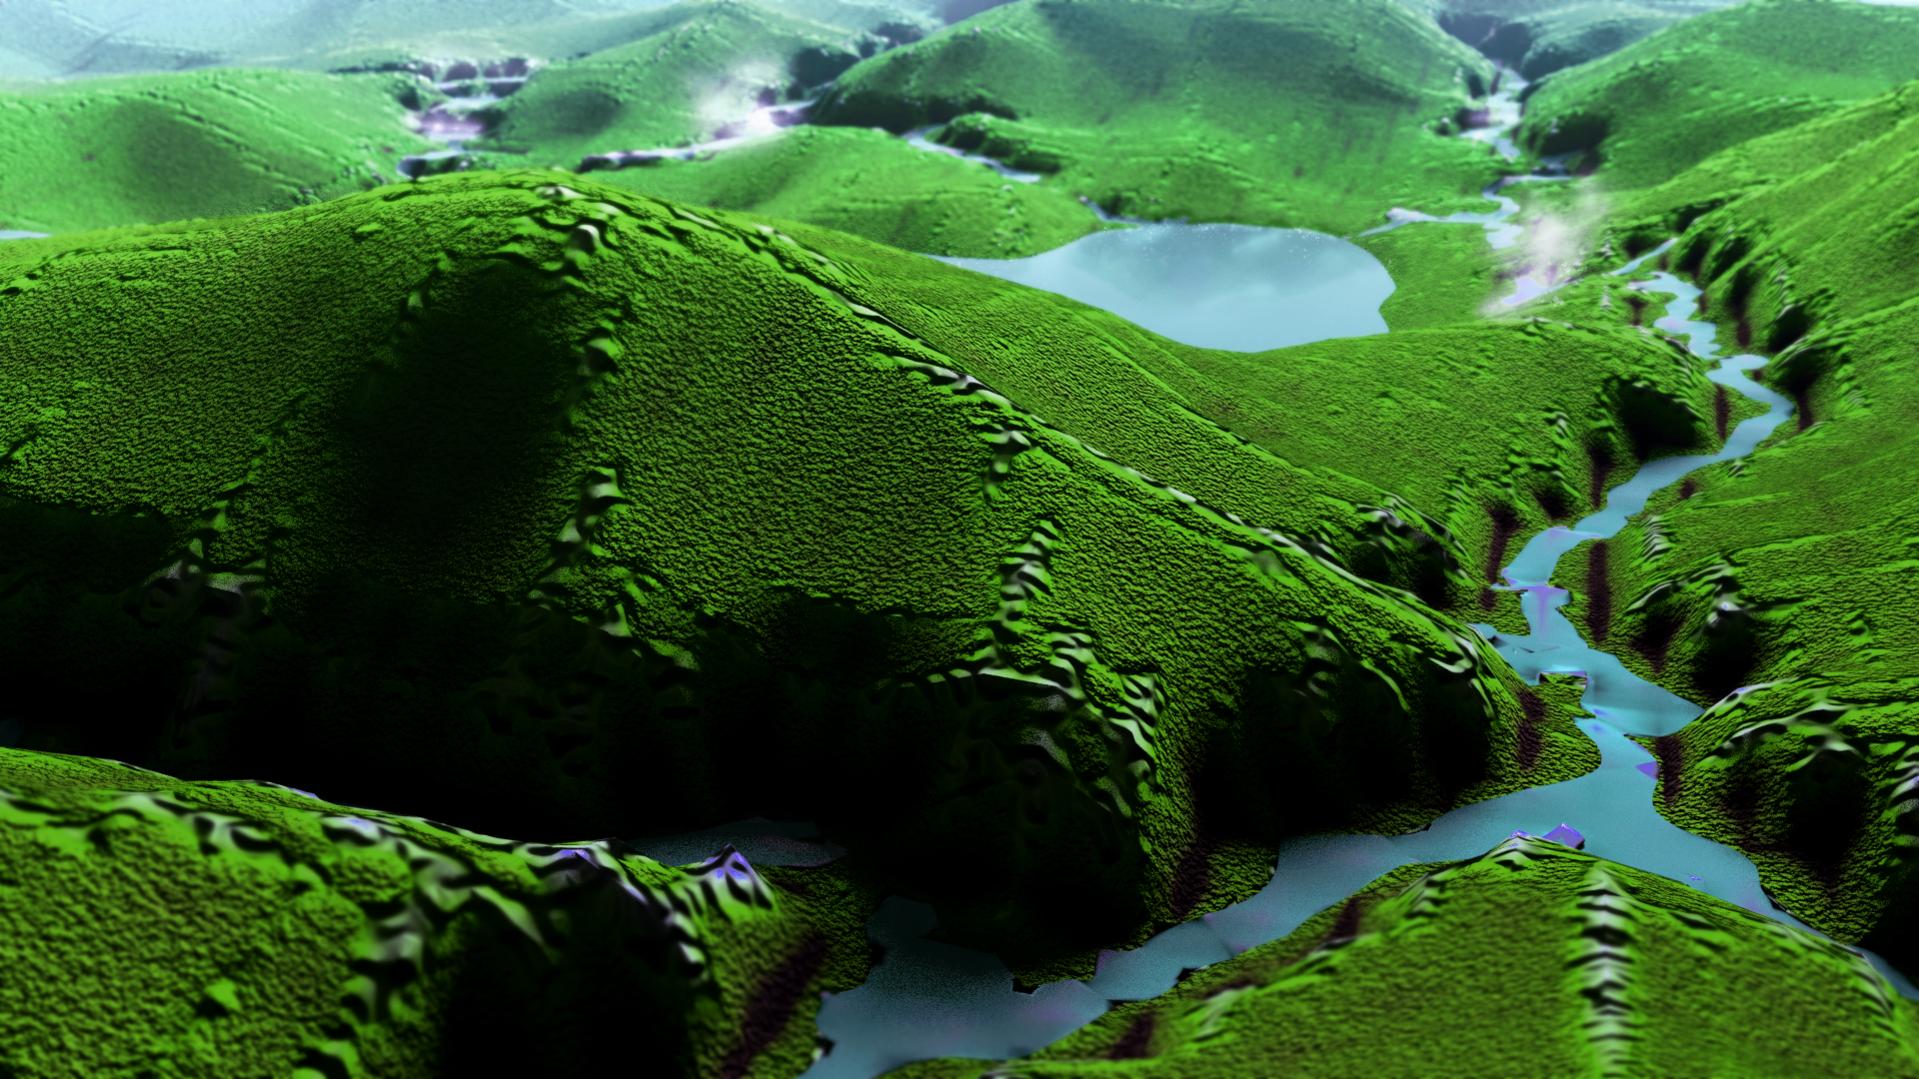
“Downtown” A Scale Anchor:
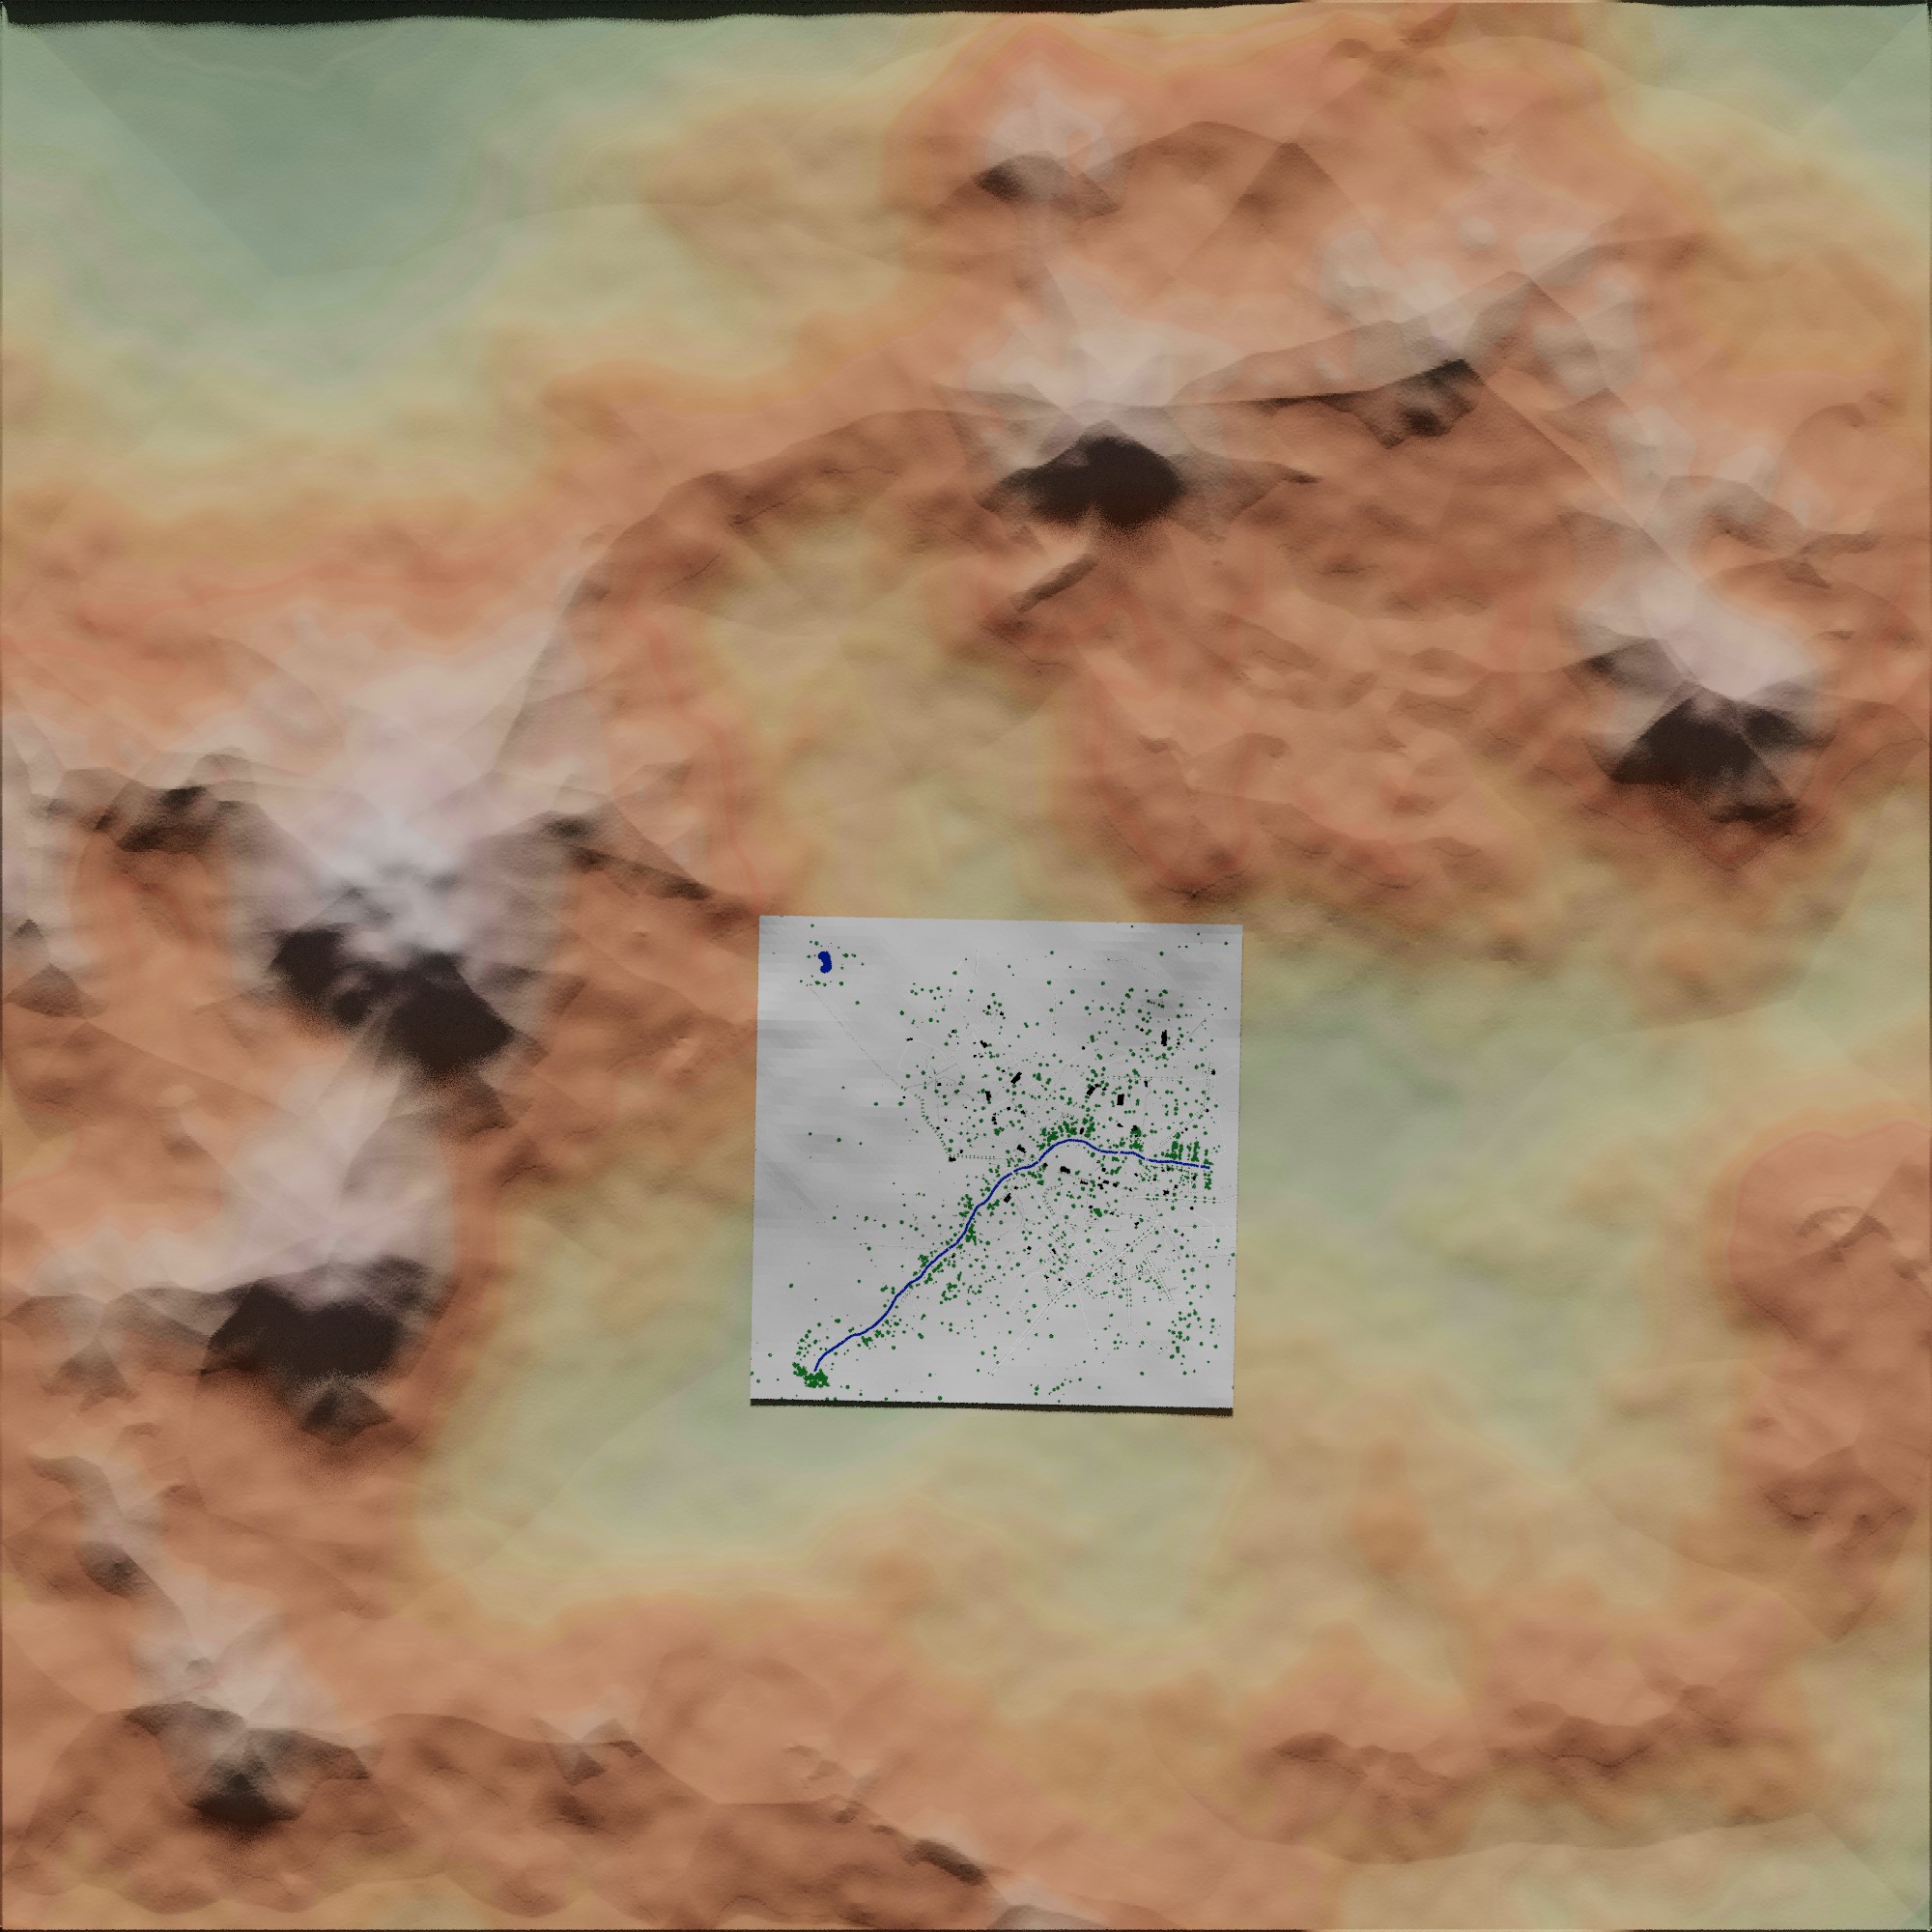
The RPG Citymap Generator spat out in 3 seconds, a simple graphic representing a major river through a city 750 meters square. I chose 750 so an urban target for the characters would take up about an eighth of Lathenhorn’s defined but unwalled boundaries. My rounding up and down and conversions back and forth will suck the large-scale accuracy right out the window but now I have an eye-opening landscape starting point. (For example, that river through the city will paint at 4 pixels wide when it’s supposed to be ten feet across.) Hardly stunning detail but that’s the kind of knowledge I wish to keep in mind during this look at terrain. Terrain is deceptively fractal and it’s hard to tell when you’re done or only just begun!

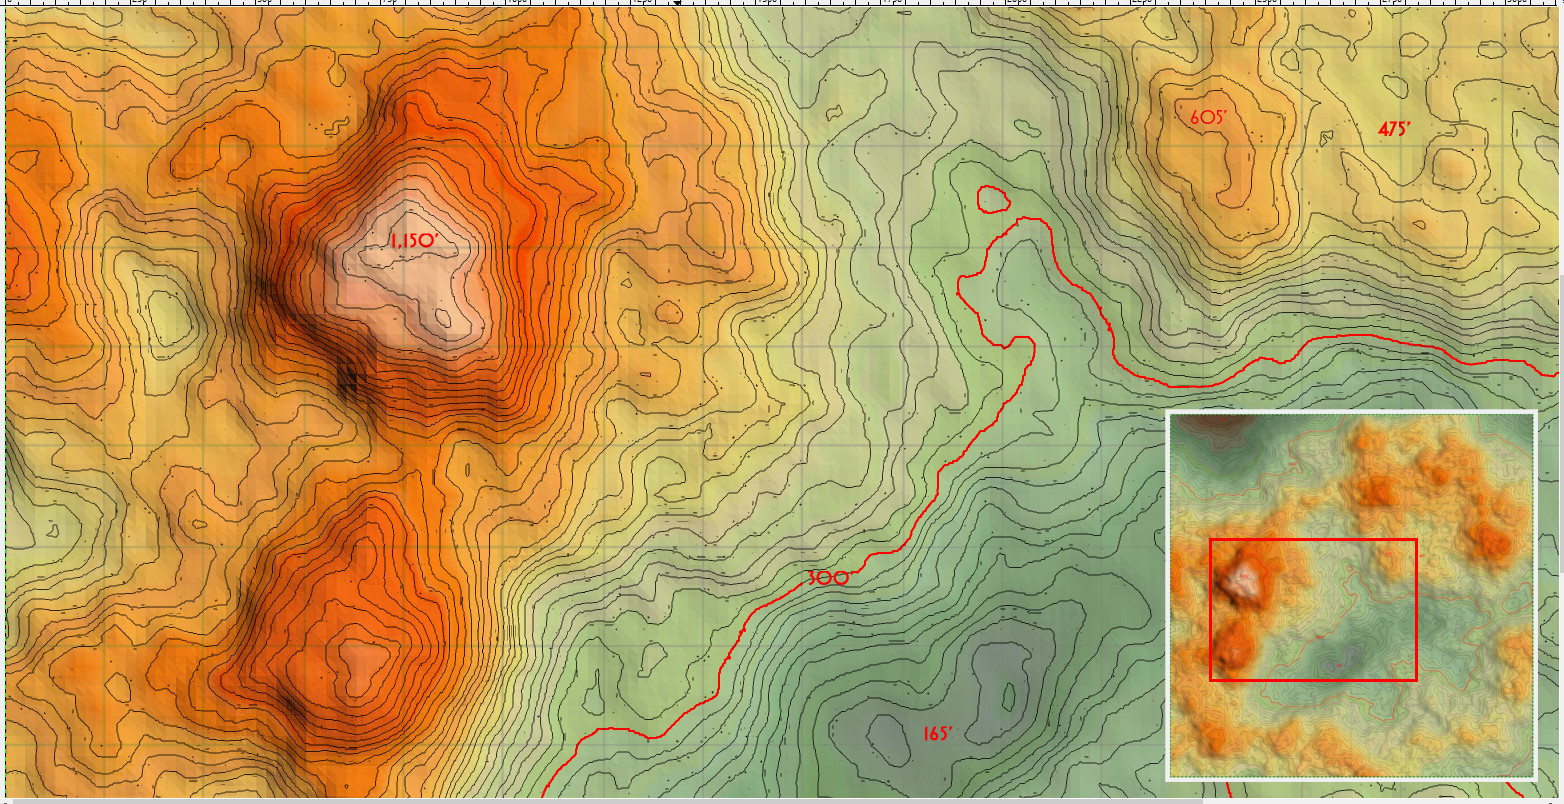
The long term goal is a pretty attractive 1-inch square of good detail for the camera and I think I know how to get there without 30 4000x4000 pixel maps.
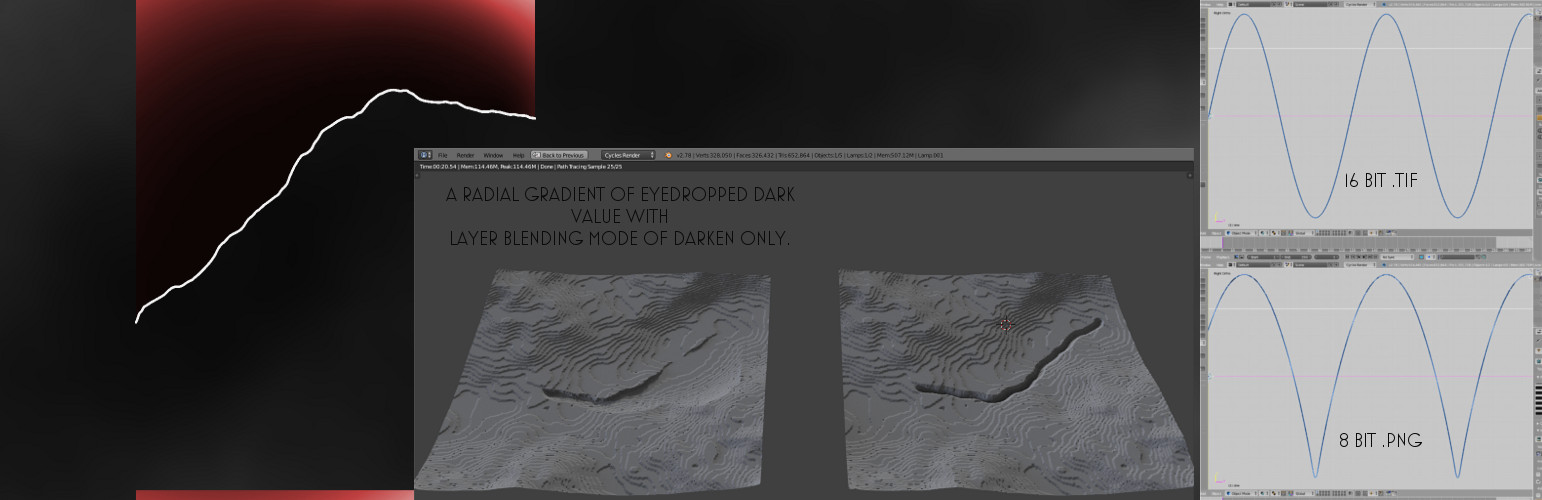
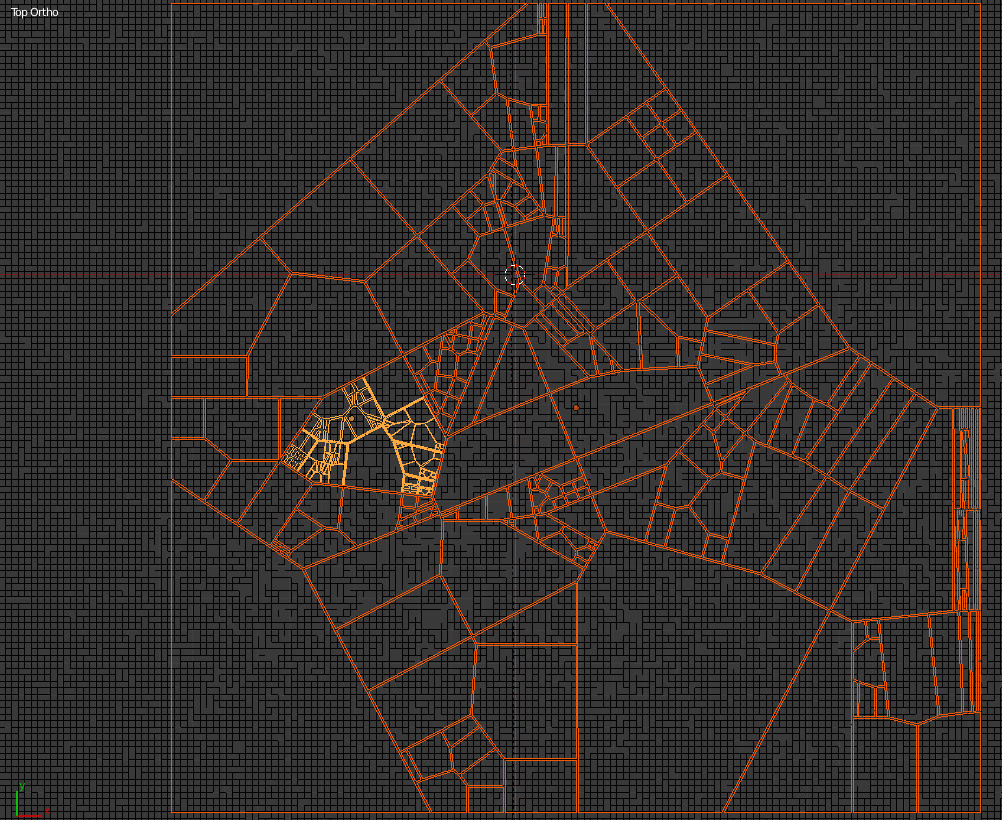
The short term goal is retrofitting the RPG generated river’s random path into the ANT Landscape’s random mesh to marry the two…

In the beginning, there was ANT Landscape.

I just dialed the numbers and setting in the F6 menu until I found a moderately interesting terrain that wasn’t full of epic mountains and impossible spikes. I already had the random 750m2 city with river, then had to match aesthetics so the river had a place and there were some hills here and there. With F6 still available, I was able to Shift+F and manipulate the camera to see what geographic obstacles appeared on the horizon at eye-level. As a surprise, ANT provided me with a hill taller than the others with two peaks. It will be called Twin Peaks and it is good.


After Import Images as Plane (addon to enable), Shrinkwrapped the 2000x2000 pixel bitmap of the “city” onto landscape. Using Curve, texture painting an approximation of the river onto the mesh.

Mesh ‘captured’ by emit material using Camera Data, distance method, to gather heightmap. I’ll extrapolate the rest of the river and use some manual painting methods in GIMP to bend the landscape mesh downhill to the river and create creases (a feature missing from ANT) to improve the land beyond standard Noise terrain.


At this point, you can pretend you’re a land survey team and create contours maps to better visualize flat or steep areas. The heightmap greys can be compressed to shorten the range between black and white, increase contrast, and run through a filter to detect edges in gradients. Each resulting line is a cut through some height. By varying the layer blend modes, you can reveal peaks, valleys, water, whatever. Here is the area I intend for the river to exit Lathenhorn’s territory. The contours tell me how much paint sculpting I have to do. The smallest pixel you see in black is roughly one person’s personal bubble in size.

It’s not so much for extreme accuracy as it is to help keep scale in mind. The distance between contour lines is lost on me I’m afraid - generating the heightmap required compressing a ColorRamp with Math Node so the actual spread from darkest to lightest is split between two texture Nodes. I will next create a measure stick for verticals so figure things out.

One last set of thoughts and cautions before turning to more serious work on this.

“Eating” ANT Landscapes away in order to blend that river in means keeping some old versions of the heightmap. Keeping them useful means blowing data storage limits. The 4000x4000 16-bit TIF render of the heightmap was almost 100MB whereas the junk jpg to work with was just 500kb

To test some theories, I don’t need more than the jpg to remind myself where things are. The ANT Landscape is a solid mesh, but before long, I’ll Displace another geometry based on the output of combined sculpting and painting which is why I’m keeping such careful track of pixels; to know how much to Displace to avoid wasted processor time.

Here’s the river-based scooping to test a theory. Using the river, I can, in GIMP, Magic Wand select both above and below to generate a natural looking uneven shelf at different points; slopes inside curves and ledges outside river bends (an expected behavior). Using Gradients painted at the darkest values here and there, I can bend the terrain gently “downhill” to the river’s edge without uniform slopes that look 3d-ish.

Where the terrain is bunched up, this gradient method shows promise over sculpting in Blender. By eye dropping the darkest value, I can make sure not to pierce the ground too much and at the same time, generate lovely beaches to visit. The image: GIMP Gradient colorized red showing Magic Wand cut at river; Plane displaced with that Gradient result - Plane displaced with very Blurred copy of river; even the blur, good to the human eye, can’t fool Blender at 8-bits making the Gradient technique far more acceptable.


The far right shows a Wave Texture SINE wave and how file types distort it. The 16-bit tif preserved it but it’s interesting to see what values are truncated and which are over-compensated - bottom over the SINE is 0-black, top is 255-white and everything in between should be an even trip. The 8-bit ‘bounce’ is very interesting and will ruin any landscape conversion for Displacement if you use it (especially LOW PARTS like the river!). So that’s extremely good to avoid.

Oh! Geek love loves Blender. This is awfully fun! Here’s your vocab word when hunting down color schemes for your atlas or self-made map images - Hypsometric tints which are the familiar elevation colors. With a set of them to reference, you can either rack your brain and adjust a color ramp accordingly or cram your landscape onto a/an hypsometric tint image you saved on your computer.


This was enormously gratifying and also really informative - light gray squares are every 1/10th mile or 520 feet. If you look at 100% actual size (a portion of 4000x4000 is shown), you can see the triangles from a “Flat” shading render. That’s so I know each poly from the ANT Landscape and every pixel from the texture map. The contour, however is from another render set to Smooth shading. I also created a ruler to measure every 50-feet, so the levels mark from a fictional 0-foot sea level that’s Blender X, Y: 0, 0

Make Your Own:
Prepare for two Orthographic renders from above: 1 with hypsometric tints and the other a heightmap. Simply, you could UV unwrap the mesh at a side view using bounds. Use that UVMap to texture the elevation colors Diffuse with shading and a low light source, size 0.0 (fakes “plan oblique relief” map maker technique); then render and F3 save. Use that same UVMap to texture a vertical Color Ramp from white to black Emission 1.0 ignoring shading; then render and F3 save. ¶ In your image editing tool, GIMP for me, load the colored render, then the height map on a layer above. Copy the heightmap and Filter > Find Edges. If the contours are too close or messy, tinker with the contrast of the image before running the filter. Greater contrast means fewer grays which means contour lines farther apart (most of the time). With black lines atop a white background, you can set Layer Blending Mode to Multiply over the color render. Detail as you wish. ¶ The light gray lines making squares are a feature of GIMP that doesn’t print. So I used a screenshot of an adjusted Grid to create a new layer and set it to Darken Only and lowered its opacity. At full strength, it’s distracting - now it’s barely visible in the lighter areas but still conveys units throughout.

Getting ahead of myself, I sent me an email for the future. From the past! Ooooo…


It’s my backyard from late Autumn. It’s all photograph, no 3d, but ‘scale’ was beginning to eat at me, so I took a picture from a deck. Then I marked the grass at 15 and 20 and more feet with eyeballed contours drawn over in red. A sidewalk, 80-feet away, was also telling. It hints at this: When to use geometry and when to use just texture. At some point, as game makers do, there should be a switch. This was just to help me get a grip on that.

Between the hypsometric contour map above and the 520-foot grid, I can step outside and visualize how severe or plain a slope is from a human point of view. That takes practice in Blender with that Shift+F camera, but this is my go at it. I’ve also decided on 12 as a random number for quantity of things in a nature library: 12 rocks, 12 trees, grasses, path types, crops and wood textures.

She’ll be coming around the mountains - I know because I just thought how to nab ridgelines for mountains that Blender doesn’t like making so much. Shapeburst or shape fill gradients. It’s so easy!


I don’t know why I didn’t think of it sooner; I’d been searching for GIMP brushes and toying with sampled alphas and whatnot. All you have to decide is where your erosion is most prominent. Use a contour at that height to create a selection, then, just fill that selection in. GIMP or what have you, stretches out and gets you started with ridge lines that you can wrinkle and goof around with.

If you fill a foreground to transparent (as I did) you can use Curves to adjust the Alpha just as you would R or G or B or Value. Now your ridges can be steep or shallow or, with a preserved layer of the original fill, some combination of the two.

My mind and laptop need a recharge, but that gray image above is absolutely promising and it’s based completely on the ANT Landscape (a new 4000x4000 16bit render). It won’t redesign the terrain like an earthquake, just sharpen up peaks and lessen the ‘noise’ look - but there’s more to consider I’ll babble about later.

GIMP 2.9 handles 16 and 32 and 64 bit stuff. The “regular” 2.8 doesn’t. It’s tough to find, but from here out, it’s what I’m using for this project.

The ridgelines show a step in the right direction. This is a not-very-good proof of concept. I’m just making this stuff up as I go and haven’t decided on priorities yet…


See, THIS is the base mesh with ridgelines Displaced - adjusted for height, then the base mesh heightmap Displaced - adjusted again for height all to examine that direction.

The ridgelines are shapeburst gradients (or whatever they’re called application to application) as Alpha. So the color doesn’t matter. But not knowing where I wanted erosion, silt and tilling and a lack of ridgelines, I piled on three layers since different altitudes will produce different shapebursts (since the extents of the selection is changing).

As an Alpha consideration, it’s not like adding it to the mesh is subtle. Had I used grays, I could specify ‘Lighten’ ‘Darken’ and what values to begin and end at. <- I know that’s confusing.

I’ll use this so-so image to place locations and occupations and “parts of town” and then settle on a way to fold in the ridgelines/decide on a workflow. I’m still putting off carving out for that river! And I keep false-starting for the waterfalls too. I know those will be really remarkable landscape features. Mesh still 200x200 (face every 52.8 feet) with textures at 4000x4000 (pixel every 2.64 feet), so there’s a lot of wasted pixels at the moment too.

A big help coming will be GIMP brushes. They jitter and dance and create spectacular textures in some cases. I’ll figure out how to make a few of my own to generate rock piles, rough patches and worn paths - but there are some clever people out there making pretty incredible PhotoShop and GIMP brush plugins!

gimp2.8 is not a good choice , it only supports 8 bit depth

the development branch of Gimp 2.9.4 supports 16 bit and 32 bit floating point images

and the 2.9.4 source is rather easy to compile and have along side 2.8

DEM’s are best in 16 bit signed format ( + - meters from sealevel)

or
use blender nodes to make a 32 bit floating point exr and use that as a displacement mod
i use that for planet dems
like this
http://forum.celestialmatters.org/viewtopic.php?f=4&t=878#p14650
or like this set of 5 images
http://imgbox.com/9N1Mp67h

a “distance transform” like in post #5 works sometimes but also needs a LOT of work done on it

there are also some tools for adding water erosion
like " Wilbur "

or the gis ( qgis and grass ) solutions like “r.landscape.evol” and “r.terraflow” or “r.watershed”

there is also a GIS mod for blender on github

a vid about using Qgis and blender

Thanks for the feedback! I’m already using the better GIMP. I can’t seem to get Wilbur to run on my Windows 10 but would like to in order to see its input. There will be a day that I go through the motions of GIS workflows but this project is pretend geography to keep myself busy while some other things happen.

Blender can provide some starting points to countrysides and country roads for the rural minded… or twitchy urban street and neighborhood cuts if you scale your perception that way.


I’m quietly carving mountain passes and laying in neighborhoods but letting Blender contribute its random ideas of acreage and dog leg roads and cart paths. One square mile provides for 640 acres and old property line maps from nearly anywhere in the world show that politics and money dictate boundaries before the terrain does.

with wilbur there is a odd “dot net” requirement
and i think a bit of a build oops with the 32 bit and 64 bit
http://www.fracterra.com/wilbur.html

Visual Studio 2015 redistributable package

the link is dead but do a search on Microsoft’s website
– i only run Linux

you might need to move some MS dll’s around

this is a 8bit copy of the 32bit float height map i eroded in wilbur

mostly i only use it for erosion

– blender , gimp and wilbur ( by way of gdal )

Break pixels! There’s procedural and there’s images. Mostly, basing procedural activity on images results in squares from the pixels which then defeats the point.

I don’t know how I’ll use this, but I started shepherding an image around in GIMP 2.9.4 (?) experimental and worked in Noise to add fidelity to the edges where an image drives Noise. By itself, the image scales to terribly large small details.


I was envisioning a rough irrigation stream through acreage. I wanted steep parts and shallow slopes to the water’s surface. Alone up close, the image conveys 5-foot 45-degree slopes all throughout. I used that blurry area to feed and withhold Noise in order to eat away at the slopes and create greater resolution. The ‘blow up’ is an HD times four render of a small 1000 pixels wide image as proof of concept.

I like it, but I’m not sure how to use it from any angle but nearly straight on! So, just a share idea.

Lesson learned. Had all kinds of experiments going and after texture painting and not saving but going for weight painting, lost the mediocre textures I had begun to like.

Tested contours, decimate and sculpting and painting. Got a lot of knowledge out of it. Ask if you’d like to know more…


Turned 41,616 polygons into 824 and felt pretty good about that. Decimate .01 but use the same UVMap. Then a ColorRamp by Emit lets you roughly Displace to something similar. This was a small scale set of trials - after losing the painting bits, I think I’ll just call it even and walk away for today.

After getting ready to prepare grasses and growth through Weight Painting…


All textures gone. (My creek bed was really cool. Rocks, sticks, etc.) Oh well.

Aha. Who knew about the Knife Project tool? I didn’t. I do now.
Ask if you want to know more, otherwise it’s just a Progress Folder.

Odd white shape was my cut path to test how this all might work best for me.


Please pardon the ridiculously elementary landscape! This is just a test. I did try pretty hard to concoct some interesting textures though - “Pointiness” based.

EDIT - Talked things over with GIMP. It said things could be way better, even for a simply landscape.


This is a very interesting way to use blender. I’m excited to see more progress! :slight_smile:
I think that a better water shader would make it much more believable, but as it’s all work in progress I believe that you are already aware of that… :wink:

I appreciate the kind words, Triastase. That water is awful just because it’s only blue. Straight blue. But a real effort will come along after I keep pushing new ideas…

Thanks to John! I have an old computer that runs Wilber 64 and oh my. For an old software there’s a huge amount of learning and fiddle bits and file outputs to help with erosion. The file outputs are numerous and completely Blender Friendly.

If you’re not opposed to mixing software usage then fire up Wilbur. I’m still working through tutorials; it’s really, REALLY not intuitive but the erosions are what I’m seeking.

This is output enhancing the rivers Wilbur calculated in post with hard blue as identifiers. It doesn’t reflect the heightmap river info.


If you’re a landscape geek, in 2015, a paper got circulated outlining ridged creation which, in simple terms, says if you draw the spines of valleys and peaks and add noise with tessellation, their software can do the rest. That got me curious to try contour sculpting and that was a flop in Blender (I didn’t execute it very well but I’d try a different workflow). But Wilbur lets you draw spines, dictate their height at certain points and pop the whole thing up, add Noise, flow, etc.

With a tablet input and patience, Wilbur could approximate existing landscape ridges artistically - not at all like GIPS geo data and lidar such and such. This attachment was from my exploration into Wilbur’s tessellation. Good times. Thanks again, John!

Strange update. Looks like junk but actually another proof of concept - placement of materials and texture driven particles by compass direction, slope and altitude like a landscape software.

Still very sloppy but now there can one day be moss in the south, unmelted snow to the north and grass on angles up to 30-degrees. More or less. :slight_smile: Long day, sick son. More later.


White blotches only face ‘east’ at highest points. Reddish only faces ‘east’ at slopes of 45-degrees and less (further blanked by Noise mix). “Rocks” following similarly to reddish color but only kind of. 30,000 objects texture driven with an Influence of 2.0 (out of 1.0?) and not behaving as expected for quantity or placement.

Nothing’s better than ground cover. Starting a few files just to toss some ideas on the ground. Camo goes a long way - junk polygon ground edges are broken up and when you can see the ground beneath loose ground cover, it’s hard to understand that it’s just low poly. This is a good thing. More dirt in the camo would be a better thing!

Variegation in greens is a good thing. Different greens at different heights is a still better good thing. The white flowers were yet just another test.

Nothing spectacular, but sharing just the same to float the thread up too. Do you Ground cover? What with have you found is best?