OK I’ve been fiddling a lot and I think I have a much better shadow compositing setup than I’ve been able to find anywhere else.
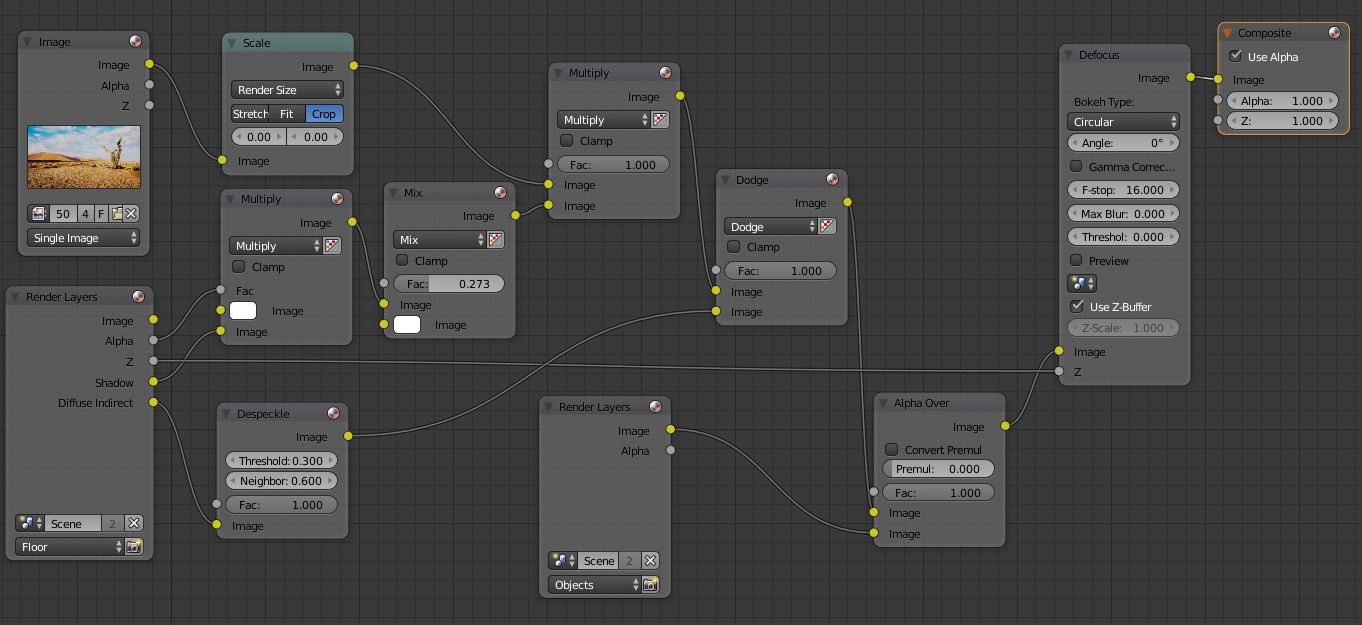
Basically the floor plane on the first layer with Shadow turned on, and Diffuse Indirect turned on. The Z channel can also be turned on and a DOF Blur compositing node can be added to make a realistic DOF effect that works with the photo you are compositing over. The second layer should contain all the objects that you are compositing over the photo. The benefits I’ve seen with this method is that it allows realistic interaction with the photo. Including shadows, caustics, and diffuse bounce lighting being cast on the floor plane. It also works well with transparency and reasonably well with reflections.
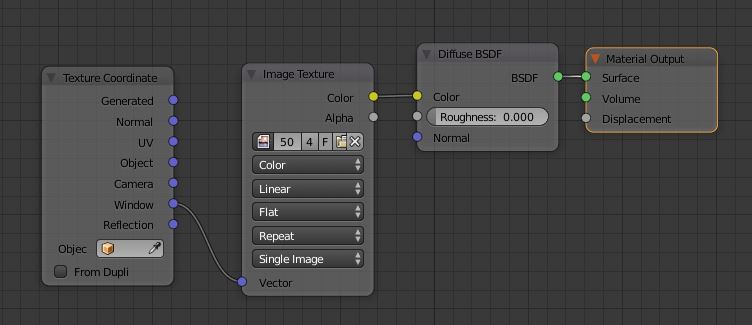
The floor plane should be made with the following material.
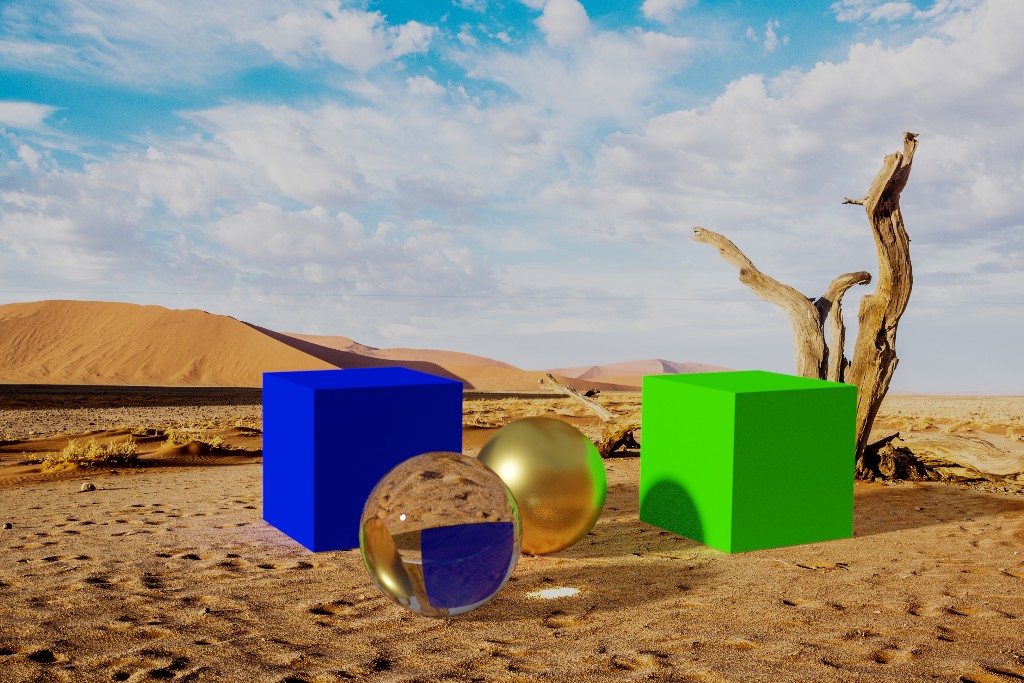
Notice the caustics working on the floor. The color cast from the blue cube on the sand. The sand casting tinted orange lighting on the objects. Refraction in the glass sphere and metallic gold sphere are decent.
The mix node can be used to control the intensity of the shadow. The dodge node can be used to control the intensity of the bounce light interacting with the photo.
Thanks man, you seriously render your images with 4096 passes? My computer would crash with such a intense render configuration.
Btw, since you gave something to me I figure I should give something to you in return, I have heavily refined one of dergoldstein’s models and reuploaded it on blendswap. I figure it would come in handy to you since you like to render a lot like most blender users do.
I’ve spent quite a lot of time rebuilding his model. It’s completely flat where it should be, unlike the old model. I mean, it’s a great model and all but I don’t think that the original topology and surface was any good.
Haha, no actually I usually render a really low amount of passes and minimal bounces because a little noise doesn’t bother me. I only set that up really high because it had caustics in it and I figured I wanted it to look decent if I was showing off the compositing setup. I usually turn off caustics and such because it takes too long to get a decent result.
Your model you posted looks really nice. A lot of detail in it. I honestly just got back into 3D after a 15 year hiatus. I last used Lightwave and honestly I’m amazed at how powerful blender is. It is fricking amazing but I’ve spent a lot of time just trying to get a character made, textured and rigged. Lots of learning to do.
Yeah, CGI stuff can be pretty tricky to learn and master but once you’ve invested enough time into it, it all just sits right into your brain, you know? Wow, 15 years? Did you take a break when you were 5 years old, I hear kindergarten can be really time consuming?
I’m 37. LOL. I actually started 3D when I was about 14 or 15 with a $300 program called TrueSpace. Saved up for a very long time to find out that you really couldn’t do animation with it. A lot of disappointment after mowing lawns and doing neighborhood chores. So I saved for a few more months and got Lightwave 5 for about $600 with the student discount. I even did some paid jobs while I was going to school. I used that for a long time until kind of stopping 3D when my daughter was born. Lately I’ve had an itch to do some character animation again and so I’ve been playing with blender for a little bit.
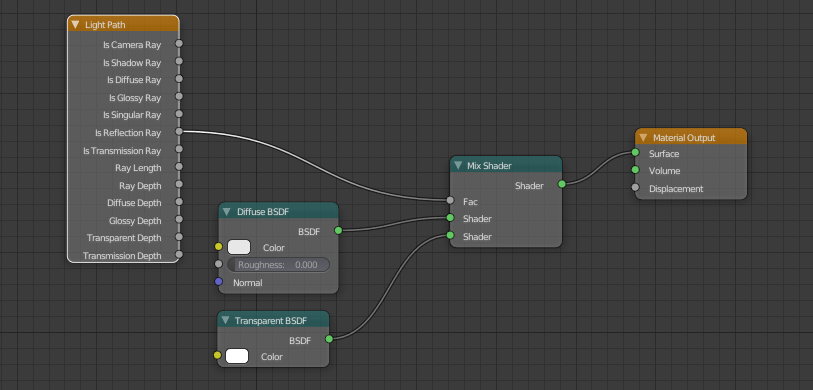
Not to continue to plug it (no reason to, really, it’s free), but my py addon will do a shadow catcher in cycles and set up all the compositing nodes, plus compositing adjustment.
Oh, and the better way to setup the ground plane using my catcher setup is, especially using a background image is:
This prevents the catching plane reflecting. Works with shadows, reflection, caustics etc. And you can tweak in post with a couple of sliders, or dig into the nodes for colour correction etc. if you want/need to.
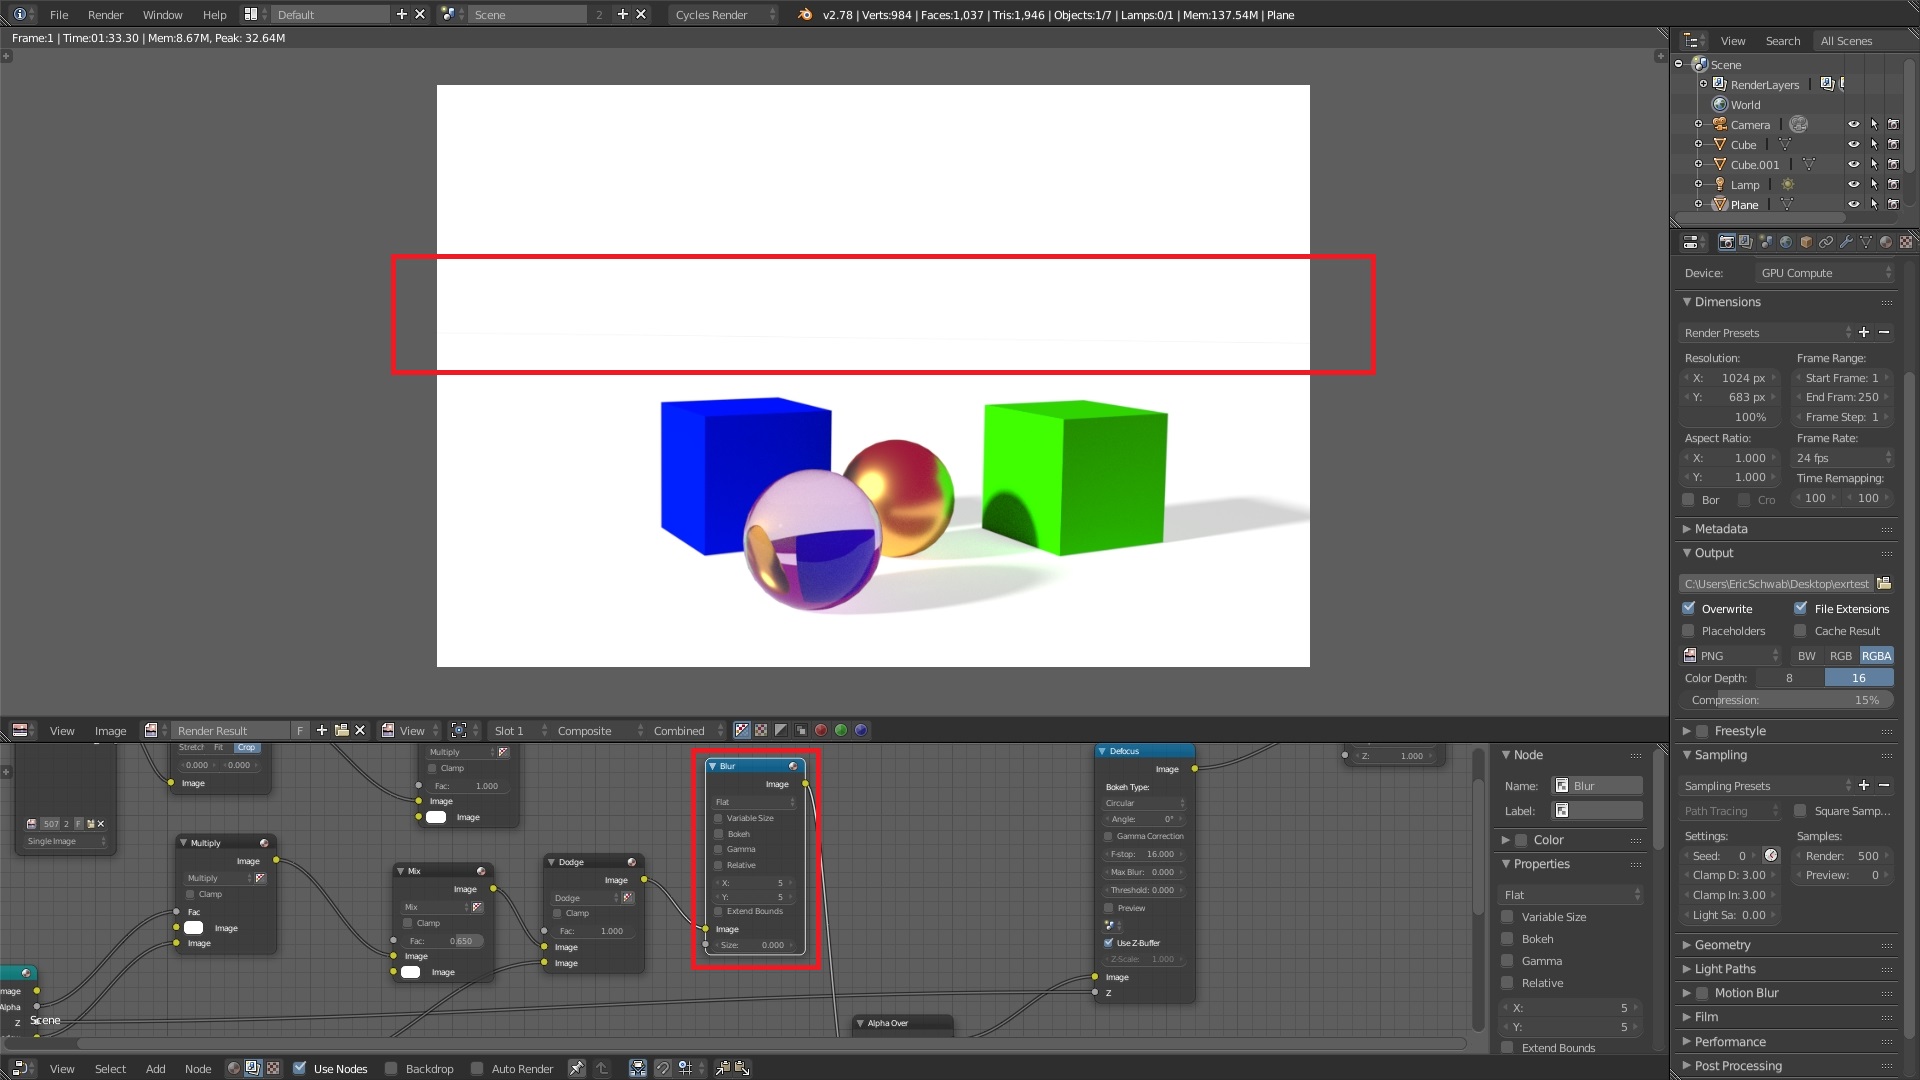
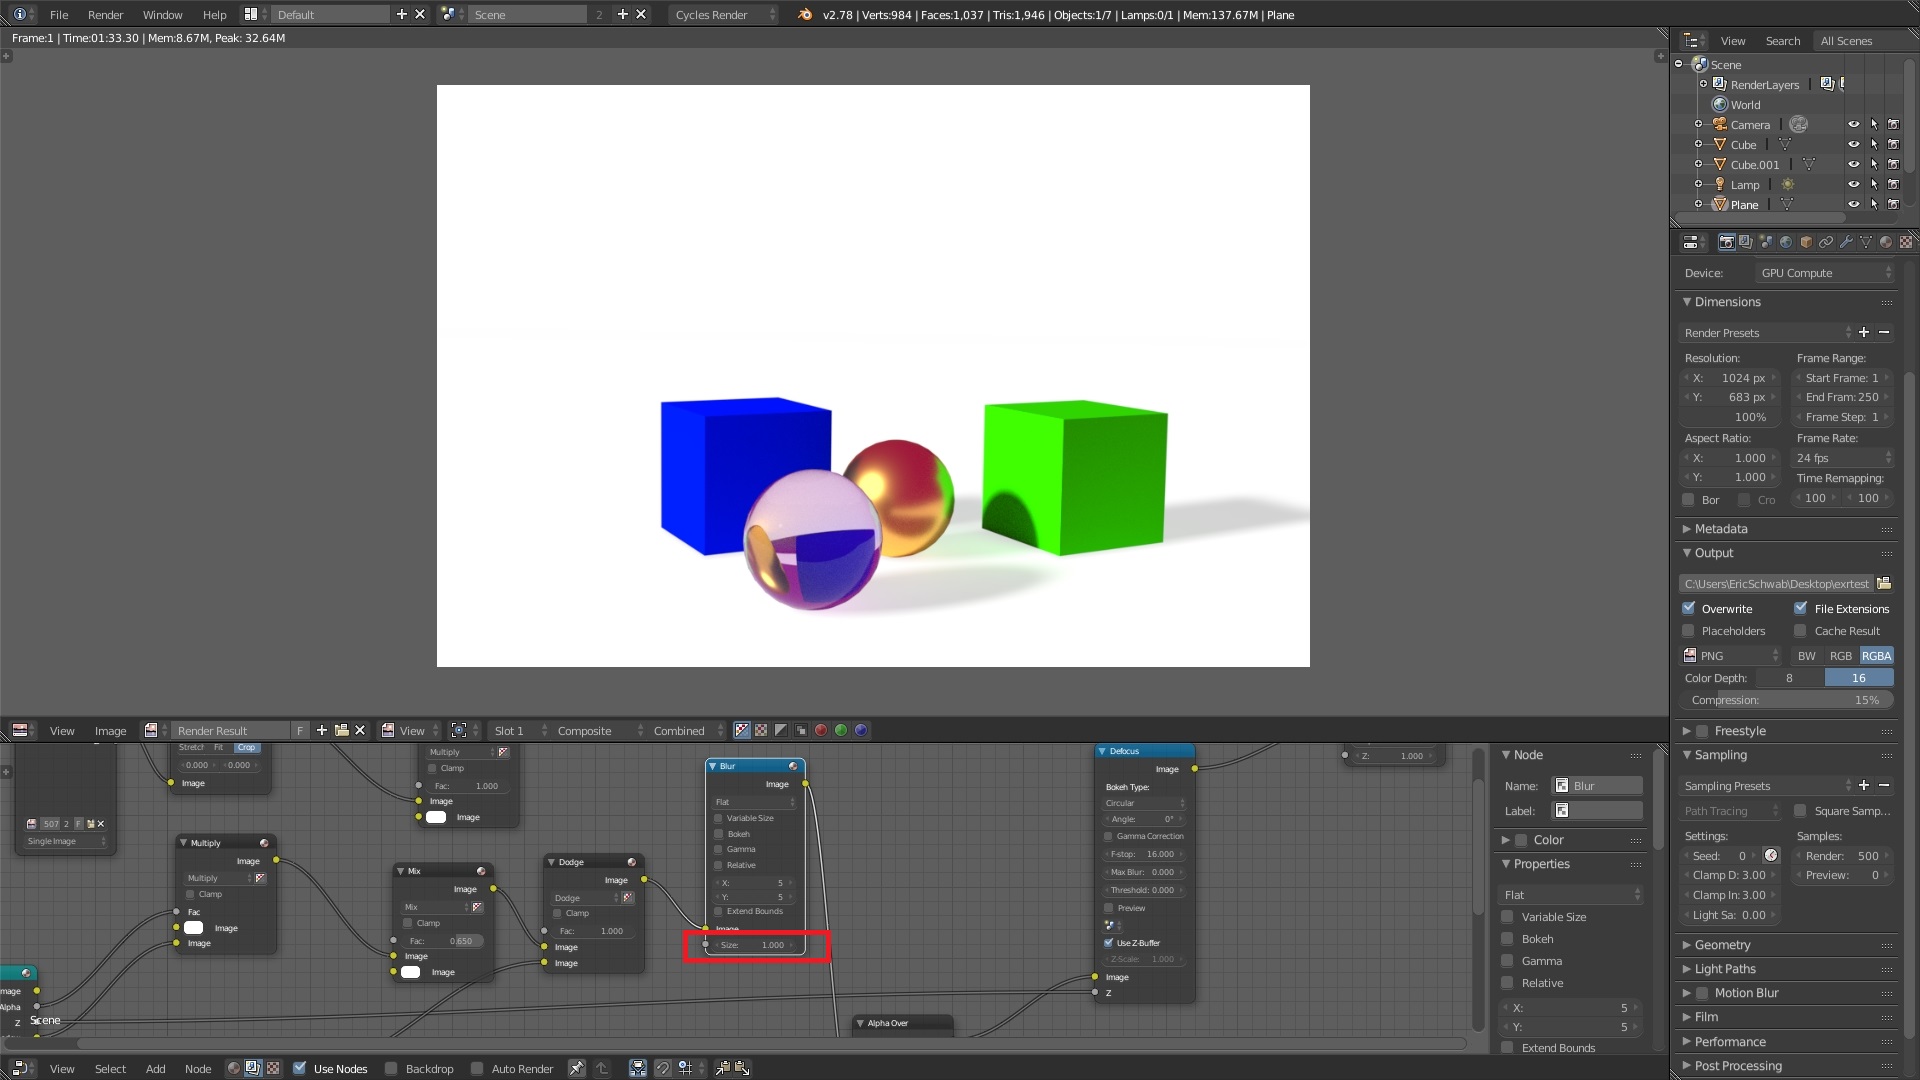
The only thing I could see wrong with your shadowcatcher @oashwab is that when I try to make a render with completely white background and only shadows on the floor it’s seems like there’s some sort of dark horizontal line between the floor plane and the background. I was a able to fix it by adding a blur node between Dodge and Alpha Over nodes, it blurs the shadows a bit but I don’t really mind as long as it eliminates the dark line. I’m totally new to compositing in Blender, so you’ll have to excuse me if I missed out an easy fix in the original node setup that does not require adding any new nodes but rather a simple change of the already existing parameters.
The only thing I can think is that it looks like you got rid of the multipy node between the scale and dodge that performed some magic with the original image. Instead of just using a white color node, is it possible to actually use a very small pure white image in the places that I put the image?
Also Roken, thanks for the link. Do you have instructions on how to use it?