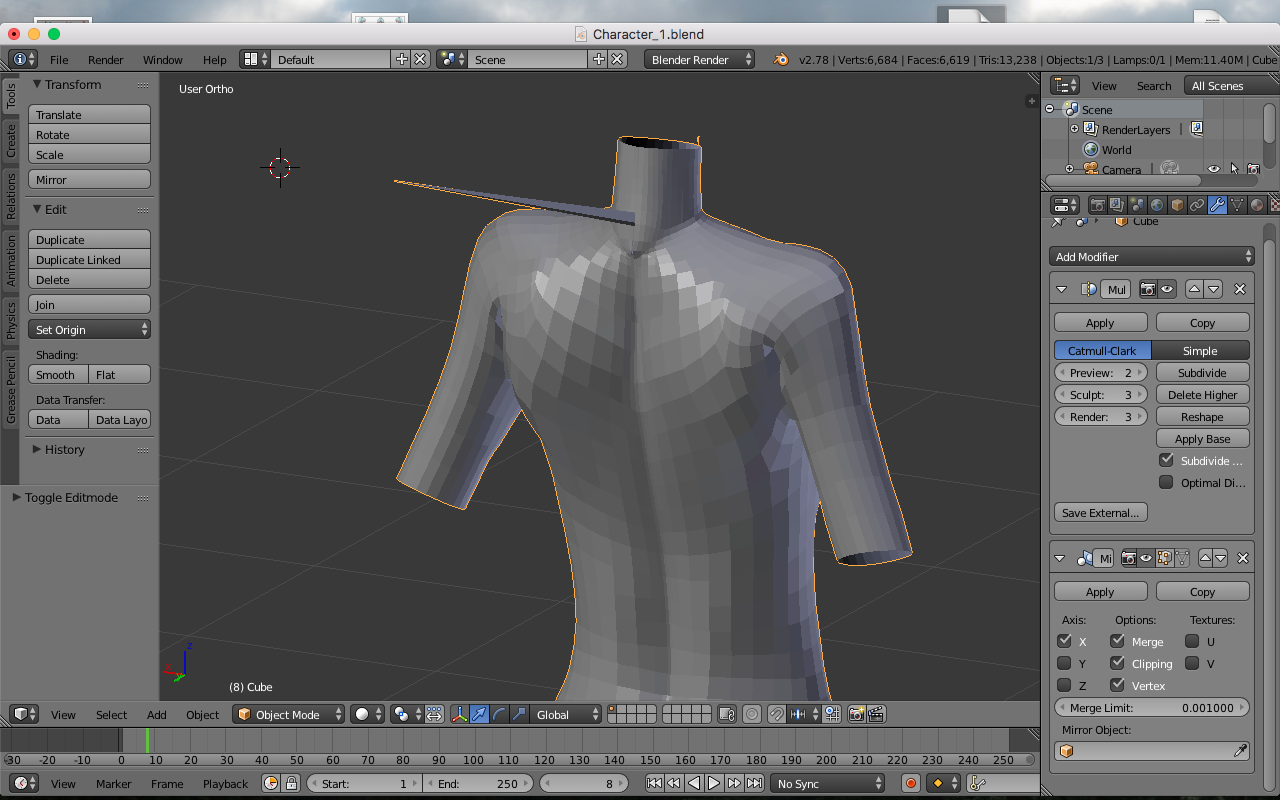
hey there. i recently started using blender and i am in the process of creating my first character with refernce to a youtube video. unfortunately when i started subdividing the mesh these weird sharp spikes started appearing everytime id subdivide. can someone please help me to figure out how to get rid of it iv been struggling for hours now.
^^ I agree with @GrimZA - we need to see the blend file, as you are new here (Welcome to BA by the way) you should post the blend file to pasteall.org/blends then post the link to your file here.
It looks like bad topology, but we are guessing without the file.
If I had to guess, I would suggest that you avoid making edits on lower subdivision levels, blender has issues with making edits on lower subdivision levels after you have subdivided past them.
And Mirror and multires may not go well together as well.
you guys are great. thank you for the responses up until now. iv attached the blend file. im still fairly new to this site so im not sure whether or not i did it the right way. if all else fails heres my email i could always send you guys the file via email.
Looks to me like you’re following the Daniel Kreuter tutorial. Personally, I’m not fond of how he does the torso using multires. You have a few doubles that you need to merge together. (Doubles are vertices that occupy the same space, it can lead to messy results.) Press spacebar to open the search menu and type in “Remove Doubles” and increase the Merge Distance to about .01. That should clear up the issue.
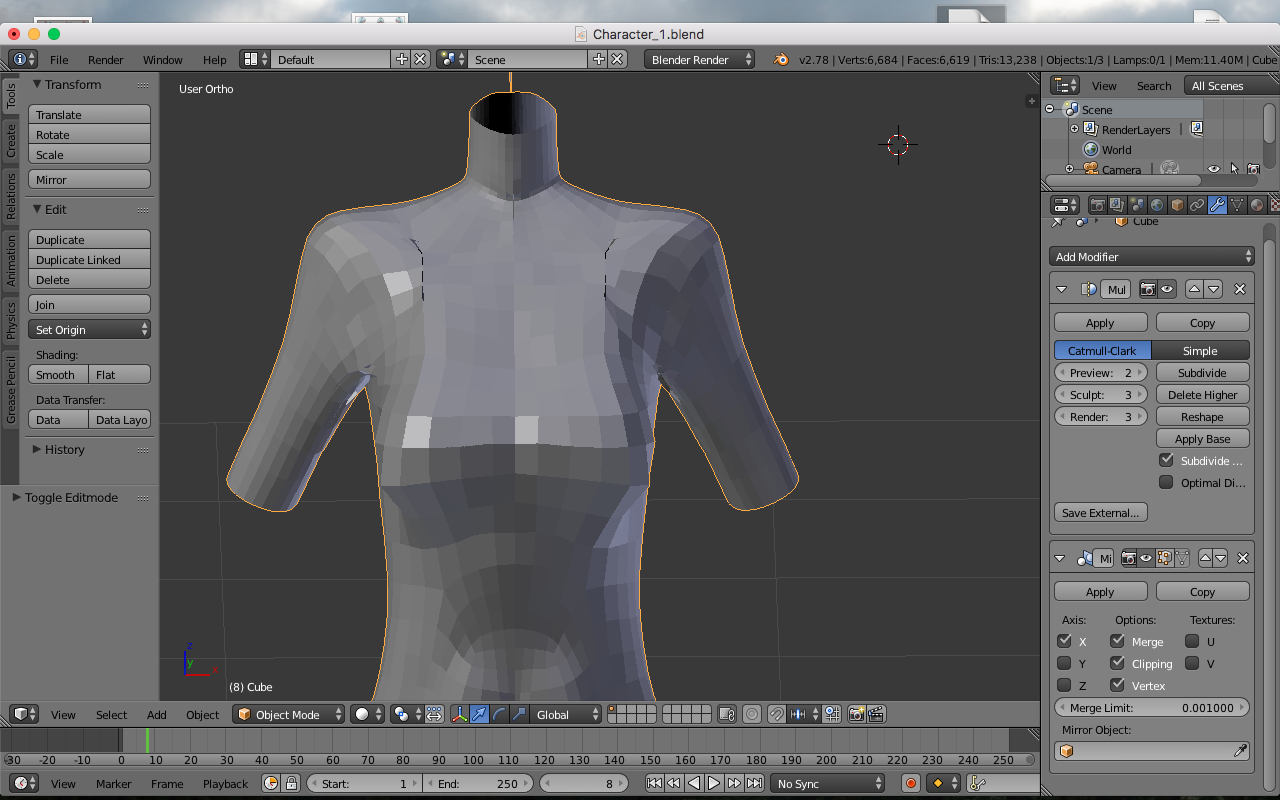
A few other edits you should make is to remove your current mirror modifier as it appears that one has already been applied before, and another mirror modifier would only create unnecessary overlap. Also, your cursor and mesh are off center. Alt G will center the mesh while Shift S will center your cursor.
Also, threads that require modeling assistance instead of featuring artwork should belong in Support / Modeling, not Artwork / WIP.
It had some double vertices and inner faces at the neck and points where the arms connected with the body, i deleted them and lightly cleaned up with the smooth tool.
thanks alot man i apreciate it. and i appreciate everyone whos helped me out so far. are there any youtube vids, tutorial series, or any material you guys could maybe suggest to me as a beginner? also Grim, could you explain how you went about doing what you did? i want to try it for future reference and to learn more.
For starters, selecting everything in edit mode and removing doubles like everyone suggested solves the first problem at the shoulders.
Turning off “limit selection to visible” and selecting face select mode will allow you to see and delete the inner faces near the shoulders and the neck (there are 3 at both arms and 2 at the neck so 8 in total). Deleting the mirror modifier and using the smooth tool while sculpting allows you to clean up the bumps and inconsistencies.
Thank you very much I appreciate the help. Tell me, I’m currently stuck with another issue. When trying to extend the legs, by investing a circle, when I add mirror, and try to extend it using E, it doesn’t extend, nor does it mirror. I’m now to the terminology forgive me. How can I go about that?
The multires modifier doesn’t play nice with the mirror modifier. If you have the sculp tools addon, you can use the symmetrize tool instead of the mirror modifier.
^Biskit is most likely following Daniel Kreuter’s second tutorial as I mentioned in my previous post. The topology and use of multires modifier definitely resembles his technique.
I’m following a Daniel kreauter tutorial at this point. I don’t understand what you said or what I have to do but il find out how to do what you recommended. Is it possible to get a good, clean looking sculpture without having to subdivide… My macs been taking a performance knock due to subdividing
I see. Most sculpting techniques involve making a rough sculpture and then retopologizing it, some people don’t like it though since it’s a bit more time consuming.
I’ll add a .zip for sculp tools below. Download it and then in blender, go to properties, addon tab and then select “install from file” and point it to the .zip. The addon can then be found in the “T” window under the sculp tab.
You can make low poly models with simple box modeling. You can also reuse them for a base mesh if you want to do higher poly sculpting with dynamic topology.
hey there again. iv started modeling the face of the character and once again iv ran into some issues… everytime i get to the nose area, my nose comes out looking very werid… also i notice that the mesh is very shiny. could you look at what iv done so far regarding the face and maybe give me some advice as to what i have doing wrong?
A to select everything, Ctrl N to fix normals. That should solve the “shiny” issue. Also, you have 8 doubles that should be removed in the eye area. Space bar, type in “Remove Doubles” should fix that.
As for the nose area, you may have to elaborate on what exactly looks weird. So far it looks fine, but I don’t understand what you are intending to do.
Select the face, select everything in edit mode (A), Open the specials menu (W) and select “remove doubles”.
On the right side window (N panel), disable matcap to get rid of the shininess.
Making normals consistent won’t work as expected since Blender can’t tell yet which part is the inside or outside until the face is more complete. Recalculate normals (ctrl+N with everything selected in edit mode) and then flip them (flip normals is in the W specials menu) so the darker shade is on the inside.