I’ve just started learning modeling with blender. I’ve seen a couple of Blender basics tutorials, and decided to start with a little hands-on practice project and learn along the way.
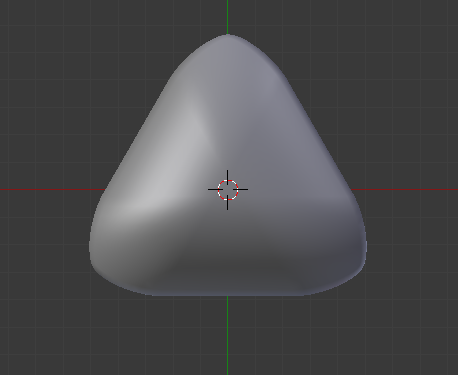
So I’m basically trying to model this:
I’ve decided to start with the easy part - the ears.
What I tried to do:
Started with a prism (3-sided cylinder).
Used Bevel (W, B) to transform it into kind of a capsule shape.
Deleted the center part of the capsule.
Moved the two remaining pieces close to each other, and connected them back together (W, E).
Then, scaled the resulting thing down along the Z axis, and applied smooth shading.
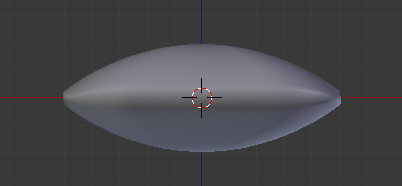
This is what I eventually ended up with:
It looks kinda OK, I guess… But the ears on the picture look more round (my shape still has these flat sides), and the perimeter of the ear is not as thin as in my shape.
Can someone suggest a better way of doing this, so it would look more similar to the picture?
Thanks!
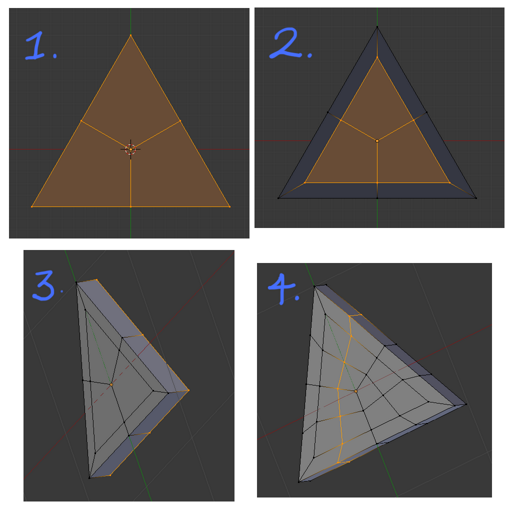
add circle ( with three faces )
subdivide
extrude a vertex from the side to the center, then face.
inset
extrude to give depth
make loop cuts
use proportional edit tool to warp into a spoon-like shape from profile.
You’re not actually making a mesh with vertices/edges/faces. It’s the form(s) you’re after, so that is the starting point. Modeling part is to use vertices/edges/faces to describe the surface of that form in 3 dimensions.
Once you see the forms you can start planning how to build it. Curved surfaces need more polygons than flat ones, and the steeper the angle, the more polygons to have same/similar face angles and equally smooth surface.
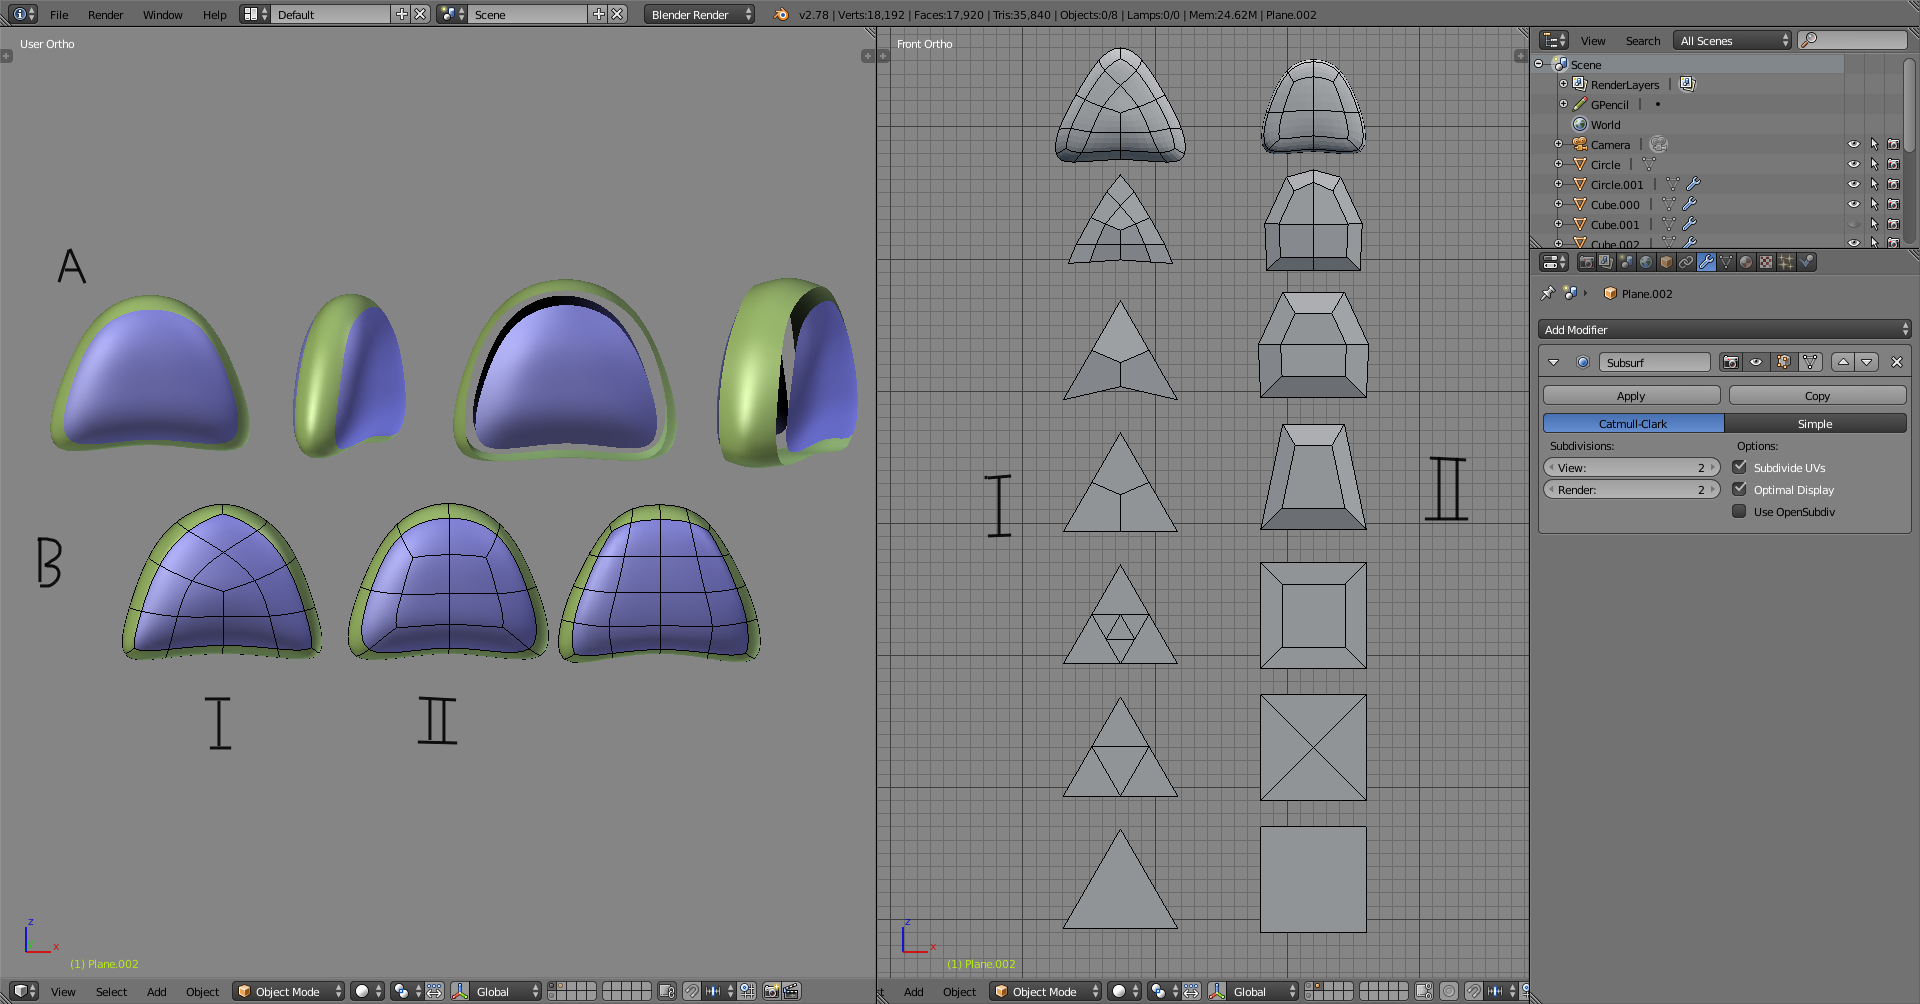
In the screenshot I’m using subdivision surfaces which puts most of those polygons in and I’m controlling it with the mesh I build. You could model one without but the direction/flow of those polygons would be the same, which the image shows.
B.
The side has a continuous loop of faces/polygons. Front and back can be filled almost however you like, but the face sizes shouldn’t radically change.
I:
mesh circle, 3 vertices, filled
subdivided (w -> subdivide)
middle triangle face selected and subdivided
middle triangle face selected and edges collapsed (X -> collapse edges)
vertices moved to start shaping the form
all selected, subdivided again (w -> subdivide smooth)
side edges extruded (e) to make the thickness
II:
plane
selected and poke faces (alt+p)
middle vertex selected and vertex bevel (ctrl+shift+b)
the rest is moving vertices and adding loop cuts (ctrl+r) to finalize the form
(the second, third and part of the fourth step can be replaced with a single inset (i) operation and adjusting depth at the sime time, but more tools to go through like that)
I like the second one better because it fills the front/back less and puts vertices to more meaningful positions for the form. All of that can change when the form changes, that’s why you start with that.
Edit:
Oh and stop cropping screenshots when asking questions. Most modeling questions also involve the wireframe, and if you show that in a screenshot, show it with solid faces so the wires behind don’t show through. But the most important file is an example .blend that gives access to what you don’t know to show, the problem, and where people can take shots from to answer you.