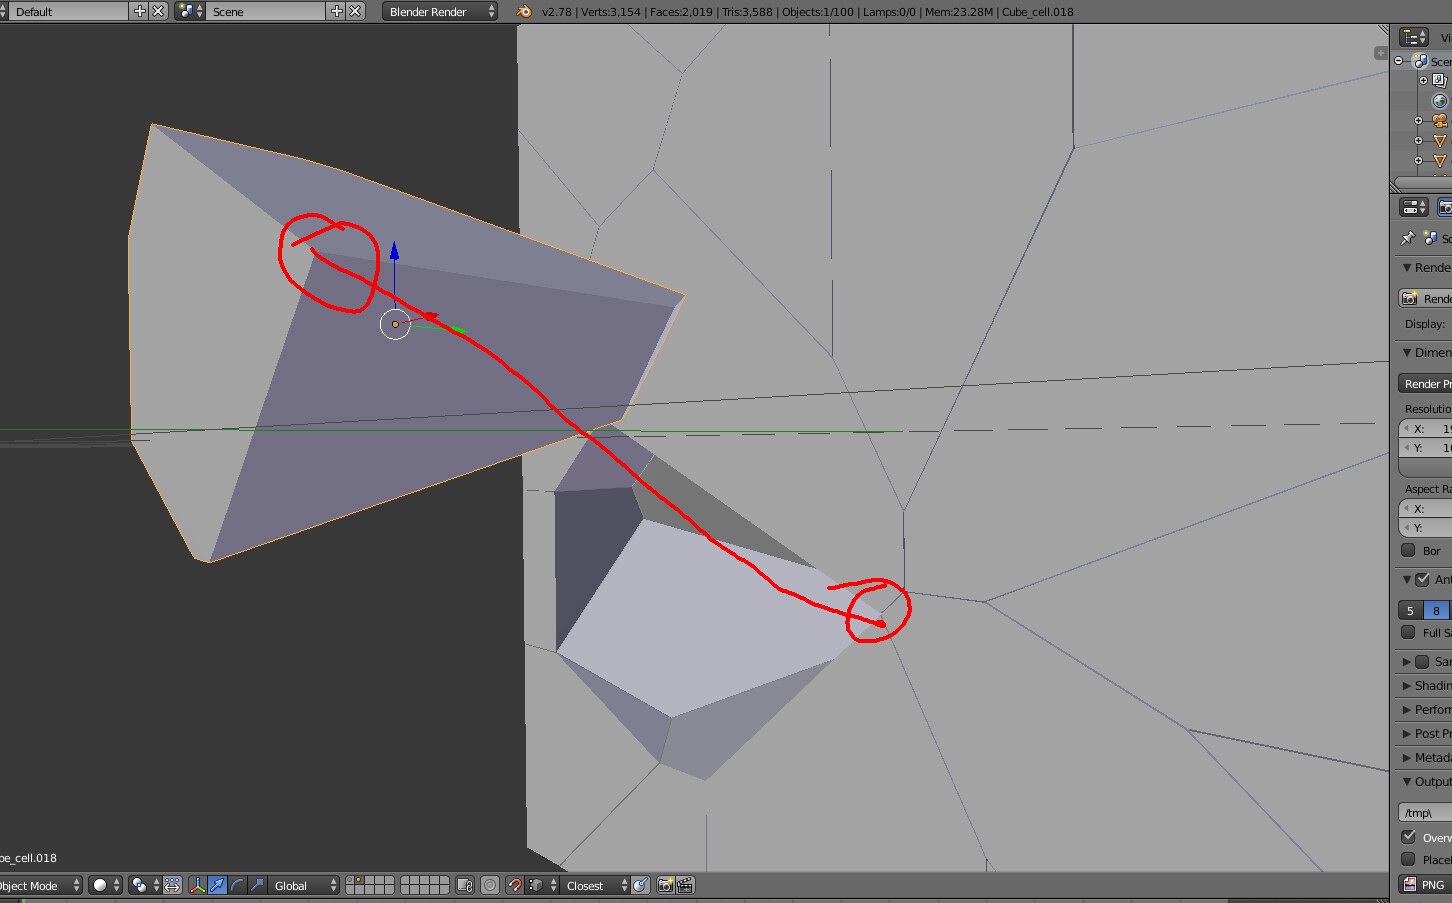
I made a cube fractured in Blender. somehow there was a part that sticked out a bit.
I want that piece to place back on the right spot.
How can i achieve this in Blender? Everytime I try to snap this in place it it does not what i want it do.
Not sure why this object snap isnt working for me.
when google this, I can’t find any useful solutions that fits my need and every time I’ll get Andrew Price on my screen.
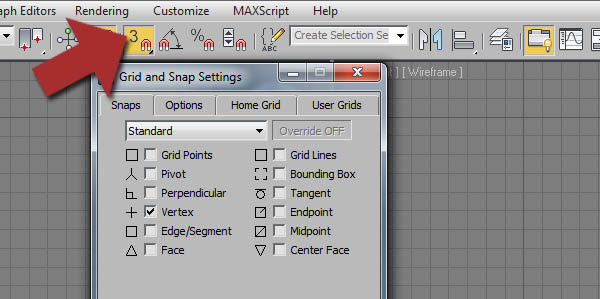
If google on 3ds max it shows a snap mode that seems to be very good.
Is there going to be any improvement in Blender 2.8. or is there a addon that works like in 3ds max?
There is no need for addons - current Blender’s functionality is more than enough for snapping like that. You can find all the snapping parameters in the header of any 3d View panel. You can turn snapping on by clicking the magnet icon, pressing shift+tab to toggle it, or holding ctrl while performing any transform operation. You need to select appropriate snap element and snap target. It is sometimes useful to manipulate object’s origin point - ctrl +shift + alt + c and snapping menu shift + s for snapping in object mode with “active” as snap target. In your case you could:
* move the object without snapping so the point you need to snap is the closest and then snap from there with ‘vertex’ snap element and ‘closest’ snap target
OR
* enter edit mode, select the vertex, shift+s -> cursor to selected, exit edit mode, ctrl + shift + alt + c -> origin to cursor, then use ‘active’ snap target
OR
* enter edit mode, hit a to select all, shift click the vertex two times to deselect it and select it again as the active element and use ‘active’ snap target in edit mode, only then when you leave edit mode objects origin remains where it was, so you can fix it with ctrl + shift + alt + c -> origin to geometry
You can also enable pie menus in the preferences (alt+ctrl+u). Origin pie menu comes with two new operators there - origin to selected and origin to bottom. Can be useful.
Thank you all for the feedback. I will go check that addon and origin Pie menu.
Object snap to closest point didnt work that great on this one. I tried the options there. This means indeed that I have to change the origin and the whole proces of doing that to place it on the right spot.
For one object it is oke. For 150 objects its very time consuming.
Really hope this improves. That would be a big plus for speed up
If you set pivot point to 3d cursor and then snap target to center it will snap the part of the mesh the cursor is on to the vertex you are snapping to, this way you will only need to snap the cursor to the vertex and can leave the origin alone. Enchanced 3d cursor addon might be usefull as it lets to snap cursor to vertex in object mode, if we are using addons after all. If that’s still too much work I would suggest trying to think of a way to solve the problem at a diferent stage of the process the problem appears in.
I tried the addons… I do not know what Enchanced 3d cursor is doing extacly. the NP station is working better
I hope they put in some improvements in Blender 2.8
I am sure they will make a lot of improvements in Blender 2.8, however I wouldn’t expect the parts that work just fine to be changed much. I am sorry, I don’t mean to be too hostile. Changes are good and wishing for improvements is really understandable, however it is not very productive to demand to change something because you haven’t learned how to use it yet. In my opinion, you should have some patience and master the existing tools to be able to productively suggest improvements for them.
No thank you Pyro. Blender is difficult to learn. Like MartinZ is telling it takes some time to master. There is allot in blender that I like very much. these things can be a pain in other programs.
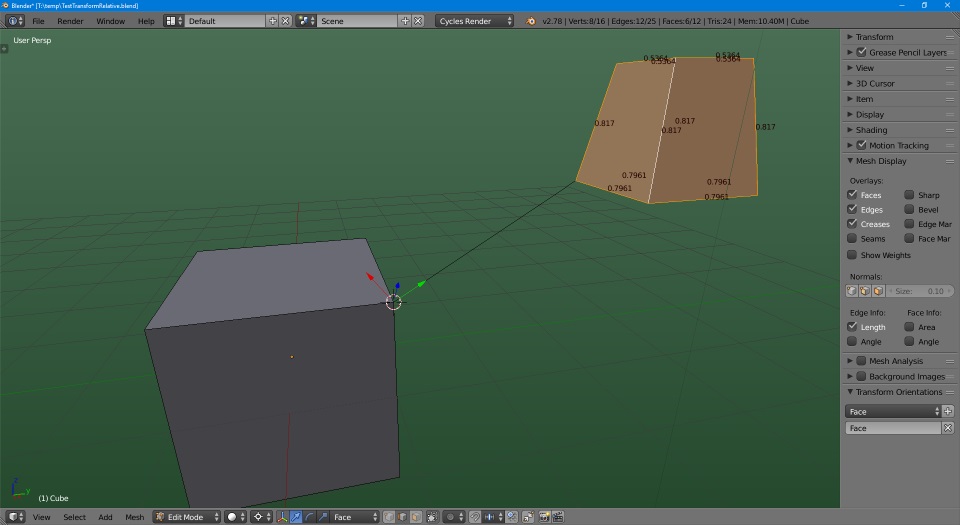
I know I’m a bit late in the game, but for what it’s worth, here’s another method I discovered using Blender’s standard mesh tools. (This assumes that you’re working in Edit Mode on a single mesh.)
Set your cursor to the target vertex, and switch to 3D Cursor pivot mode.
Create a line between the source vertex and the target vertex, turn on the length display in the “N” panel, and remember the value (or jot it down if you have a memory like mine).
Select the line and one adjacent line on the “child” mesh, select “Normal” in the Transform Orientation panel, and click the “+” to create a new orientation (it will be called “Face” in the drop-down list).
Transform the child vertices by the negative value of the connecting length, in this case “G , YY, -1.803”.
Note: I would turn off vertex merging before doing this. In my example, typing “1.8” before the “03” may merge the connecting vertices, which would distort the transform relative to the other vertices. You can always eliminate doubles after the transform.
As far as applying this to multiple meshes, you could save a little time by applying this script in the python console, changing the value as appropriate:
That way the vertex merging risk is eliminated. Of course, the ideal way would be to calculate the distance between the vertices and transform by the x,y,z vector, which would eliminate the need for connecting lines and transform orientations. But my python skills aren’t quite at that level (yet). A “relative transform” add-on would be awesome!
This is by far the worst advice I have ever heard of. I am sorry for being rude, but it is logical to be rude in this situation. You are suggesting a terrible way of doing it, unnecessarily complex and not fitting for the situation at all.
YukonCornelius, I did put my effort in explaining how snapping works, that’s what frustrates me. You should read that. I am sorry for my emotional response. My bad. But your teachings might confuse someone who does not now how to use snapping.
In your case you can set snapping to vertex and active - , switch to vertex mode in edit mode, select all vertices of the shape you want to snap by pressing L while hovering the mouse over it, make the vertex you want to snap active by deselecting it and selecting it again, press g, hold ctrl to activate snapping, and click on the vertex you want to snap to.
That’s all. It’s just using snapping functionality as it is and it is far less complex, faster and easier.
Hopefully this topic is not closed. I’ve watched tutorial but probably I missed something. I would like to level extruded elements on top of the cube and lost… The snap does not work. I tried face, active (Snap is ON) box.blend (742.1 KB)
Thank you in advance.
I can’t get my head around this either. Currently using 2.93. Turn on vertex snapping and check “active”… make the desired vertex active. try to snap it to another object vertex… the object just jumps around snapping to anything apart from the vertex I have made active.
There is a way to do this I’m sure but it seems completely broken at the moment.
WAW! Thank you for the reply. Thanks for going to the trouble of recording a video. And finally, thank you for providing a full blown solution to my problem.

 I am sorry, I don’t mean to be too hostile. Changes are good and wishing for improvements is really understandable, however it is not very productive to demand to change something because you haven’t learned how to use it yet. In my opinion, you should have some patience and master the existing tools to be able to productively suggest improvements for them.

 , switch to vertex mode in edit mode, select all vertices of the shape you want to snap by pressing L while hovering the mouse over it, make the vertex you want to snap active by deselecting it and selecting it again, press g, hold ctrl to activate snapping, and click on the vertex you want to snap to.