Secrop's Cycles "Loop" node

Secrop recently posted a python node which allows you to create iterative loops within cycles materials (e.g. one such application would be to change the scale of a texture with each iteration and overlay it back onto the original to create additional detail).

I’m still playing with it, but I believe it has the potential to be very powerful indeed. I just thought i’d show one interesting material I have managed so far.

It looks like a type of marble effect - but I haven’t created anything quite like it before I started using this loop node.


2 Likes

Did another test - this time using 3 iterations to mimic dispersion glass, but looping a single shader through the three primary colours and change in IOR rather than adding three separate ones.

Results are pretty much identical to the traditional method of adding shaders - but crucially you get a slight performance enhancement using the loop. The exact amount depends on the shader and render settings - but I have seen anywhere between a 1 - 7% gain


Another interesting one using Voronoi (8 iterations) - this time using micro displacements to achieve a ‘crumpled paper’ look


Another interesting rock/stone type texture with multiple levels of detail (18 iterations) - this time using musgrave


Or how about an Iron meterorite - again using musgrave ridged multifractal (20 iterations)


I am intrigued, very interesting. Keep going!

Note to self & those interested (source): Thread: [ADDON] Tools for Cycles PyNodes

@moony
:smiley: Nice & Thank you very much for showing/sharing your exploration & discoveries.

1 Like

interesting
but how is the iteration done can you elaborate !

thanks
happy cl

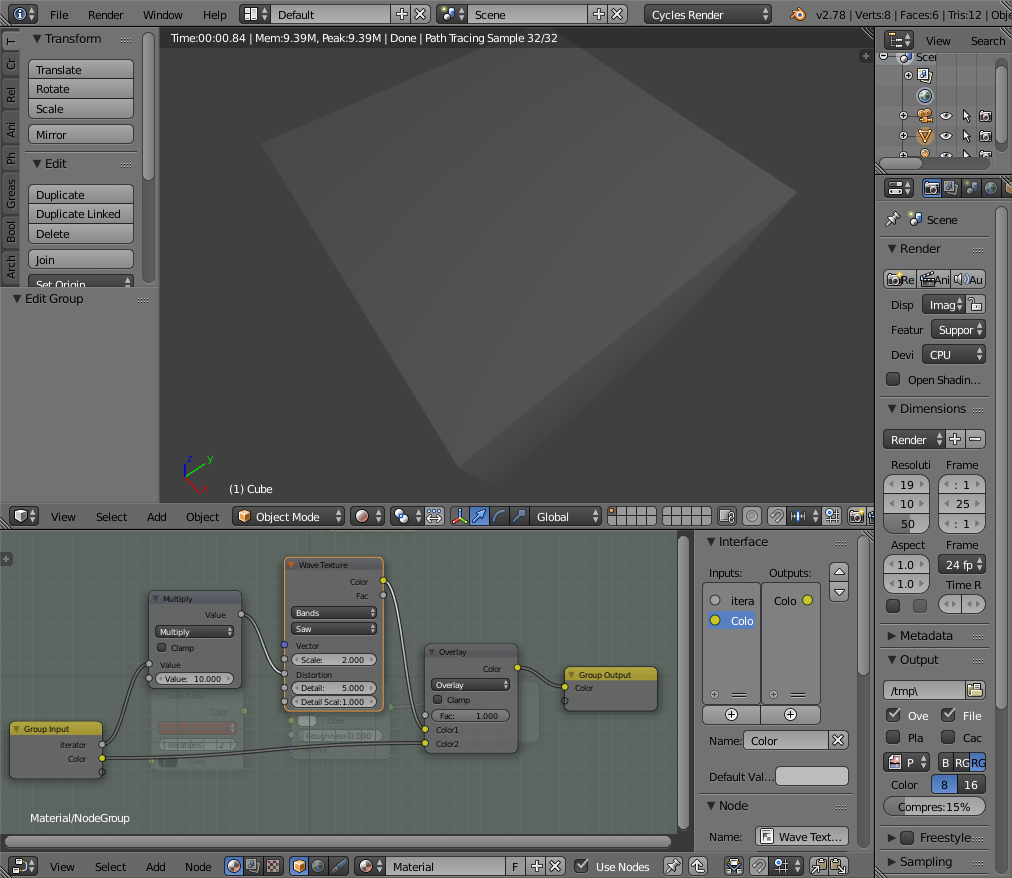
You first have to construct the node group. Start creating nodes, then shift-select them and add them to a group.

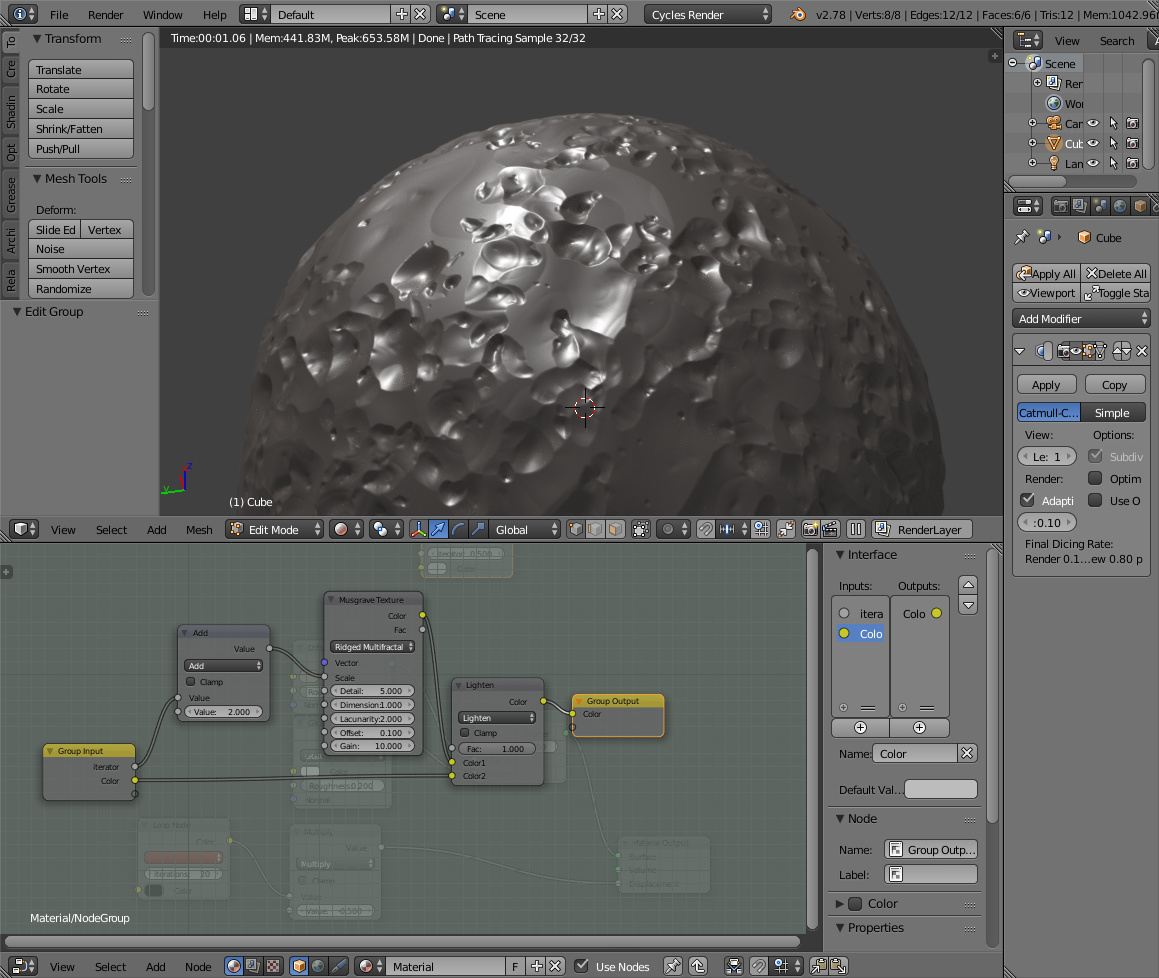
You’ll then have group with the nodes you selected above - plus group inputs and group outputs. Remember that you are using this node group to iterate a pattern or an aspect of the material - therefor you shouldn’t put all your material nodes into the group - only the parts you want to iterate.

One of the group inputs must be named “iterator” (note all lower case).

You also need at least one other input and a matching output. These must be the same type (e.g. value, colour etc) and must be named identically. You must also ensure that you don’t have any conflicts (i.e. dont have two group inputs or outputs named the same)

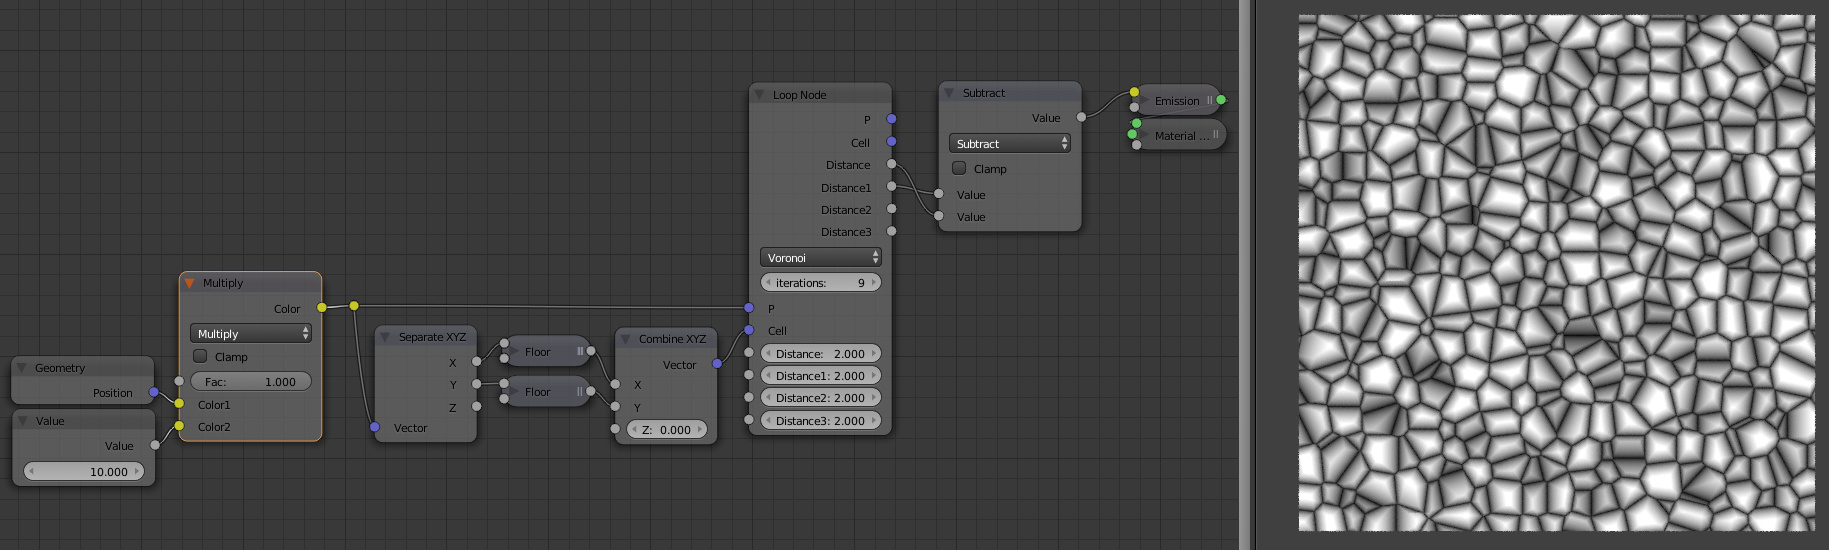
What you can then do is connect the “iterator” input via maths operations into the slot of a texture, shader etc - and essentially drive the value through an iteration.

For example - on the first iteration - the “iterator” input has a value of 1. If you run this through a math node set to multiply by 10 - your result for that iteration is 10.

For the second iteration - the “iterator” has a value of 2 - so going through the same math node now results in a value of 20.

If you were to run this math node into say the scale slot of a texture - the scale with each iteration would change and make the texture smaller with each iteration. Similarly if you ran the math node into say the “detail” slot of a texture - the texture would get more detailed with each iteration.

The crucial part now involves the matching input and output. To get the loop to work as intended - you need to pass the input value - then mix it with the texture - before finally passing to the matching output.

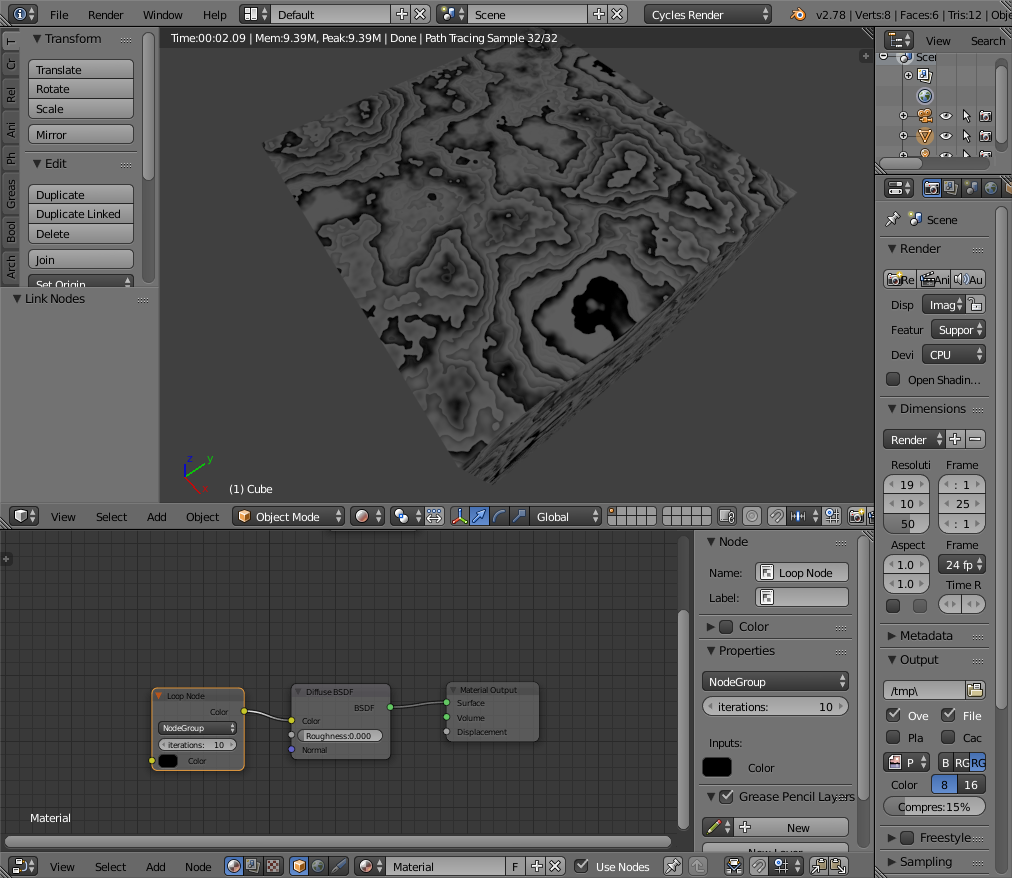
What this does is for each iteration it takes the value of the output of the group and loops it back to the input. So for example if you used an colour mix set to overlay what would happen is this:

Iteration 1 - pattern generated by the taxture - passed to the output node.
Iteration 2 - output from iteration 1 used as input for iteration 2 and overlayed with the pattern generated from iteration 2
Iteration 3 - output from iteration 2 used as input for iteration 2 and overlayed with the pattern generated from iteration 3
etc

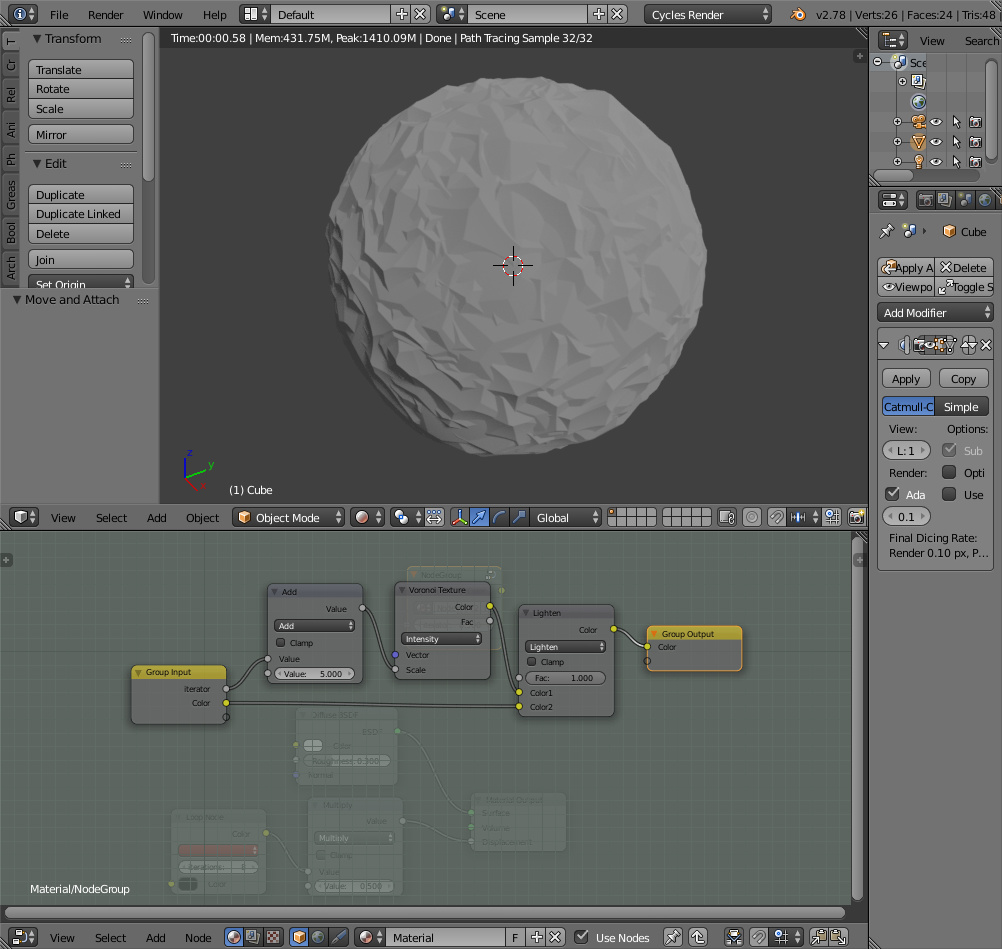
As you can see - if the pattern differes between iterations due to a difference in scale, detail etc - you quickly build up a far mnore complex pattern.

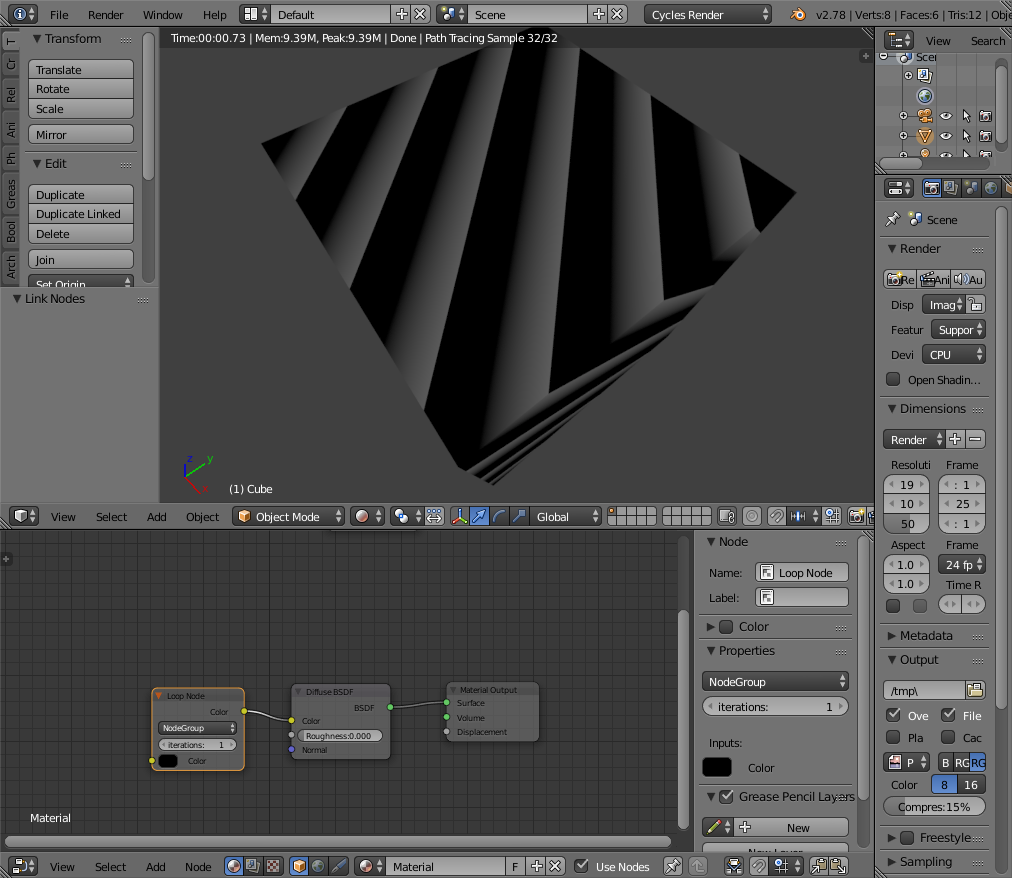
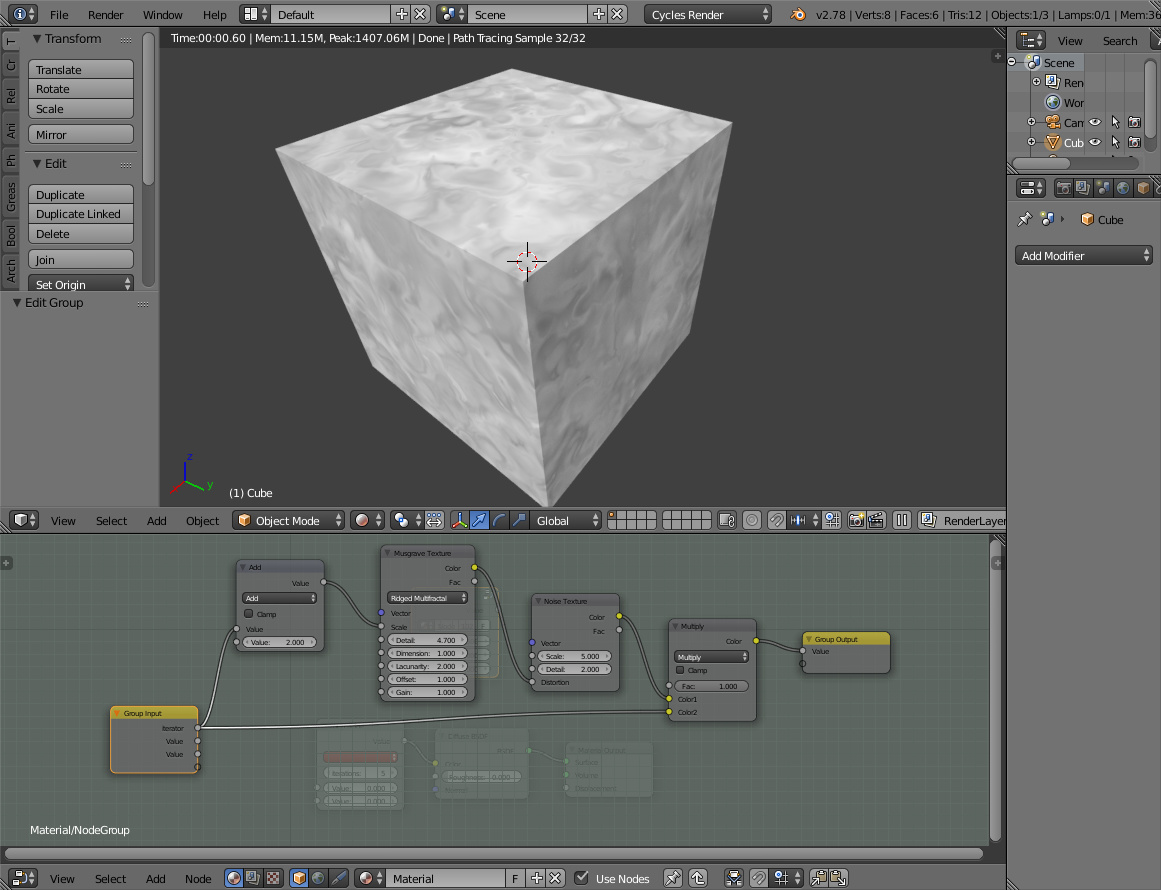
Once you are happy with your grouped node setup - close it by hitting tab, then add the “loop” node from the cycles shader/texture menu (it’ll appear under “custom nodes”).

Once you have added the node - you need to use the drop down list within it to select the name of your node group above.

If everything is ok - you should now find that your loop node now has the same inputs and outputs as the group you created above.

Connect the group output (e.g. colour) into the colour slot of a shader (e.g. diffuse) and then connect the diffuse to the material output as normal. Render and you should now see a pattern.

If for any reason you don’t see a pattern - go back into your group and play around with the maths. Because the textures tend to output values between 0 and 1 - multiplying these together iteratively, can quickly lead to a flat grey or black (e.g. multiplying pixel values of 0.1 * 0.3 * 0.2 * 0.1 = 0.0006).

1 Like

The following screenshots should illustrate the concept.

In the first screenshot I have created a node group that will overlay the wave texture multiple times. I am using the iterator to drive the detail of the wave texture - so with each iteration the texture will become more distorted. It is then overlayed with the output of the previous iteration (hence passing the colour value from the input node into the MixRGB node). At the moment however I have yet to add and connect the loop node - so you will actually see very little at this stage.


In this screenshot I have closed the group node I created above (by pressing Tab) and added the loop node and connected it up to a diffuse shader colour slot. Since the number of iterations is currently set to 1 in the loop node - we now see the basic wave texture (i.e. the first iteration result only).


In this screenshot I have now upped the number of iterations to 3 - and as you can see - we get two additional overlays of the wave texture, the original straight wave, plus one that is a little more distorted and a second that is even more so. Keep upping the number of iterations - and you will quickly get a very complex pattern emerging.


This is what the same nodegroup looks like after 10 iterations


i was thinking about this double pattern of lozenges
not certain if it can be controlled to get it !

happy c

Attachments


It’s hard to tell what the patter is from your photo

I think it looks like diamonds shape

but there is a double pattern
one very very dense
and another one with low density

there is a proc texture to do that like carbon or some cloth pattern
now is it possible to do it using iteration is a good question

thanks
happy cl

Attachments


You might actually be able to achieve that pattern without iterations. However, there are certain operations that can only be described recursively (ex. exact value of pi, advanced number sequences). A really good potential use for this is shaders with procedural content that is layered. For example, moon craters are notoriously difficult because craters can’t properly be created inside of other craters. Iterations would now make this possible.

Yep - in addition to creating patterns you can also layer shaders.

For example - in this screenshot I have layered a glossy shader, and recursively increased the roughness to create an interesting bloom effect. Of course - you can do this without the loop node - but the node group to do achieve this effect is a lot more complicated.

Also - an advantage of using the loop node is that you can add or remove layers of bloom by simply increasing or decreasing the loop iterator - rather than having to add in additional shader and mix nodes.


In this one - I am driving both the roughness and the anisotropy value - so as the reflection gets more diffuse, it also gets more anisotropic.


I think I am just scratching the surface with this, given you can also use recursive maths to drive vectors etc - the possibilities of this node could be infinite in scope and could make effects that were almost impossible previously.

You can still do the same thing without this node… but it will be pretty tedious (not to mention the node chaos in the editor)! :stuck_out_tongue:

But sure it’s a valuable tool for making complex nodes…
Voronoi2D with F0, F1, F2 and F3; and the F1-F0 in the screenshot:


ps. i’m using a patched version with the ‘floor’ function builtedin, thought it’s possible to adapt it with round( value - 0.5 ).

1 Like

This looks very promising in conjunction with something I’ve been playing with - spectral rendering in Cycles. If the pieces fit together properly, it could mean true spectral rendering is achievable in Blender!

Does anyone have a boilerplate blend file with this set up? I’d like to have a play but don’t have much time to set everything up.

Secrop does provide an example blend file in his thread over on the Python forum - link below, however you need to download the addon that includes the loop pynode and install it first (it only takes a few seconds though).

Secrop gives some simple instructions here:

He also provides an example blend here:

Thanks for that, I’ll see if I can get it working together.