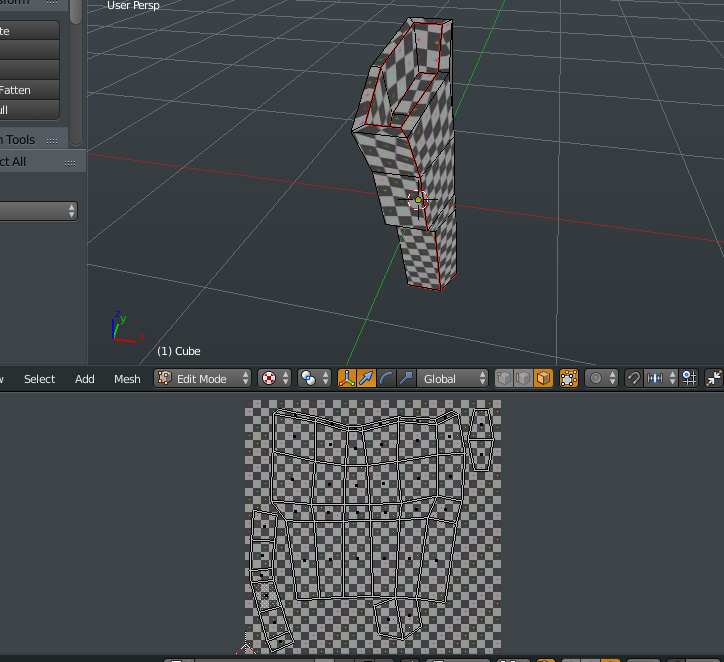
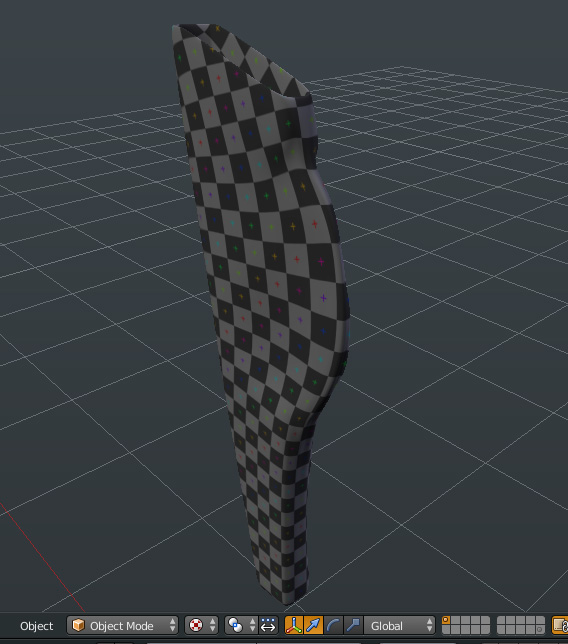
As title says. I dont have a clue what im doing wrong. I have a fairly simple piece im trying to uv. I am not a pro about uving, but i think i know enough to make a decent uv unwrap in this piece. In any case, i attached a picture of the piece and the uvs.
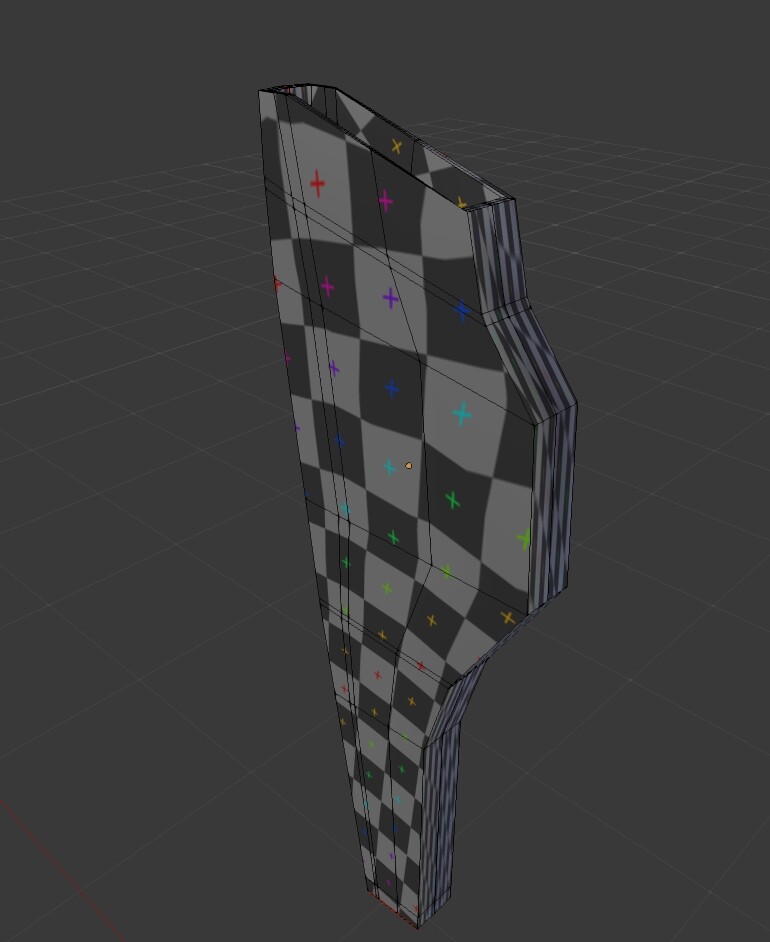
This is the result of the textures… totally distorted in the sides. Dont worry about the wavy aspect of the front , the piece has a multi-res and sculpt applied. But the sides… oh my, why???
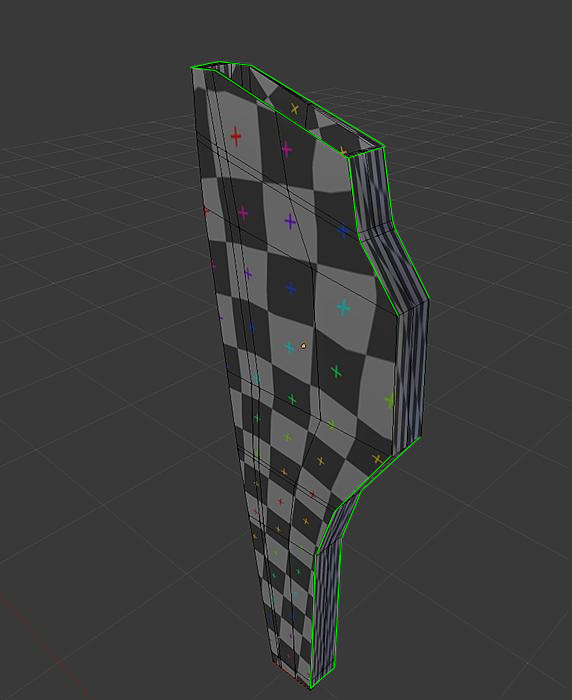
As you can see this is like just a box without the upper face (it is blended inside but the unwrap should be oke), so i placed a seam a long the left side, and a made the bottom “free” to unwrap correctly.
Can someone give me a clue about how to uv this? because i placed the seams in places i think it should get me a nice unwrap, but still i get streched rotated uvs and the textures appear amazingly distorted. Thanks in advance.
Always apply any object scale before unwrapping (Ctrl+A)
You don’t have to try and unwrap an object into a single island, therein lies distortions
Can someone give me a clue about how to uv this? because i placed the seams in places i think it should get me a nice unwrap, but still i get streched rotated uvs and the textures appear amazingly distorted. Thanks in advance
No blend file supplied (as you should be doing for ALL support questions) so we are unable to check your seam placement. If you get a poor result then most likely your seams placemnet is not good
I know i dont need to unwrap the whole object into an island, but this piece specifically should be able to unwrap without dividing it into parts. Besides it is going to be a holster and it is not good to see a seam in the front. Anyways, i even tried to unwrap the front and the back separatedly and the rest and i get exactly the same results. The sides appear totally way off about size and distorsion.
As for applying transformations, i do that all the time, but not in this case, because i suspect i cant do that because i have a multi-res modifier applied and im going to lost all my sculp work (i really dont know maybe im wrong about this).
I didnt supply a blend file because this is just a piece from a really large scene. I need to cut this piece into a single blend file.
EDIT: Added the blend file with this single piece.
Yes. Sometimes you just have to separate uv shells. The closer a piece is to being perfectly flat, the less distortion you’ll get.
Unwrapping is very like reverse papercraft. You’re starting with a complete model. You must find a way to get each surface flattened out on the table. So you choose the appropriate places to slice into the model to accomplish this. These are your seams. If you don’t choose correctly, you can’t flatten it out. In the real world that paper will get crushed or even rip, if you leave certain pieces connected. Which equates to the distortion you’re seeing.
The pieces don’t always have to be perfectly flat. Sometimes it’s beneficial to keep pieces connected. As in when you’re painting. You have fewer problems painting across surfaces. And spend less time correcting for seams. But that really only works where you have little in the way of clearly defined detail. So clean straight lines may be an issue. The same for text, or any kind of decal/symbols.
I’d suggest something like the seams below, to help the uvs relax a bit more. But it might be better to separate out that side piece completely. That would ease the distortion on it, and the other surfaces simultaneously.
Yup, i know what the process of unwrap is… im not that new
There is no way to unwrap without placing seams in that part of the object? thats precisely what i want to avoid… the seams should be in the part that is not visible in the image, not the opposite around. What i want is not to be able to see the seams in that place because the zip of the holster is precisely in the other side… so it will be logical to place the seam there…
I didn’t say you don’t know what unwrapping is. You’re making assumptions about my intent. I’m just stating my view on the subject, knowing that other people may be reading this thread. And I don’t actually know how experienced you are.
If it’s a holster, then I assume it’ll be resting against a character mesh. So you can hide the seams in areas where people aren’t typically going to bother looking. Unless they’re just nitpicking. Something like the image attachment. From there I’d apply some painting skills.
In my experience it’s rare to get a shape like that flattened out in such a way that there’s little distortion. Especially if you’re set on keeping as much as possible connected.
Thanks, the fact is, i tried so many unwrap ways and i always get the same result. I start to think that there is something wrong with the uv editor in the last version of blender. I will try your approach (i really just dont care anymore where the seams are…).
It is a holster but not for a character, but for a motorbike’s rifle (captain’s america bike) and in the back, where the zip is located its going to be a strap and two screws (after the smooth and the applied scult). Sadly, the part where the zip ISNT located is going to be the most exposed, and i wanted to avoid seeing seems in there. It is going to be a model for render purposes, and obviously the front part of the bike (where the holster is located) is going to be an important one.
Anyways, as i said, since everything i tried failed, i just dont relaly care about where the seams are located. My main problem is now, that the sides appear streched no matter what i do. I mean, i dont care much if the texture appears a little distorted or streched, its going to be a kinda small leather so it is not going to be too noticeable but of course, not like the results im getting. Far far from acceptable…
Tell ye what. How about you do a simple paint over showing the positions of the elements you’re talking about? The zip etc.
Any leather rifle holsters I’ve seen, would have a natural seam running down the center back. Exactly where you’re having the issue. Maybe you could use that to your advantage?
Sometimes it’s easier to cut all seams in regards to surfaces that have nearly common planes and stitch it all back together. Not the quickest thing to do, but the potential results aren’t all that bad.
Thats where exactly the zip is going to be, as i said two times already in my previous posts. If you pick the scene and you activate the multi-res modifier with the sculpting, you will see the streched part where the zip is going to be. Keep in mind, its not going to be a zip perse, just something similar to get the correct feeling. I wont even probably model the zip itself, since its not going to be seen anyways and i will have a strap and a extra screw to attach that part of the holster.
I know. But the problem is, it looks that i must have something activated in my blender version because i cant get that result. I always get streched uvs in the sides. Not a single approach you guys posted worked for me. I dont know why. Its not like i dont know where to place the seams. It is like the feature just doesnt work… Even placing a seam along the entire side to just crop it wont work. Still streched… wtf.
In the end, i just run out of patience. I just picked the sides and shrinked em manually in the uv editor until i get the right scale and thats about it. I cant waste so much time in a simple piece like this. Curious thing is, doing exactly the same in Maya, i got the uv mapping perfect in the first try. . . i thought uv mapping was one of the strong points of Blender… oh well.
I don’t know what you consider back, front or side. I don’t know what the orientation is. And I don’t like making assumptions. The tools have their short comings. Just like in any other app I’ve used. But any problems I’ve had with uvs have usually been because of my own mistakes.
I probably should’ve checked it first. As it’s something a lot of people miss. I’m just used to it. Your scale and location values are not applied. Location should be at 0 for each axis. And scale should be at 1.0 across the board.
Ok. Apply scale and locations while in object mode. Using Ctrl A. Go into edit mode.
Leave your seams as they are. Hit unwrap and tell me if the results are better.
Some stretching is inevitable with so many connected verts. But at least if flows a bit better.
But you dont lose the sculpt work made if you apply transformations? thats the only reason i didnt apply transforms. I did that in other piece and it totally messed up my sculpt and i needed to do it all over again.
Here’s something simple you can try, in order to retain the shape.
Make a duplicate of the holster and put it onto another layer. Make sure you name each object to avoid any confusion. Now. Apply the transforms and scale to the original object. Do not make any such changes to the duplicate. Instead put a shrinkwrap modifier onto the original and use the duplicate as your source. It might not be perfect. But it’s better than starting over.
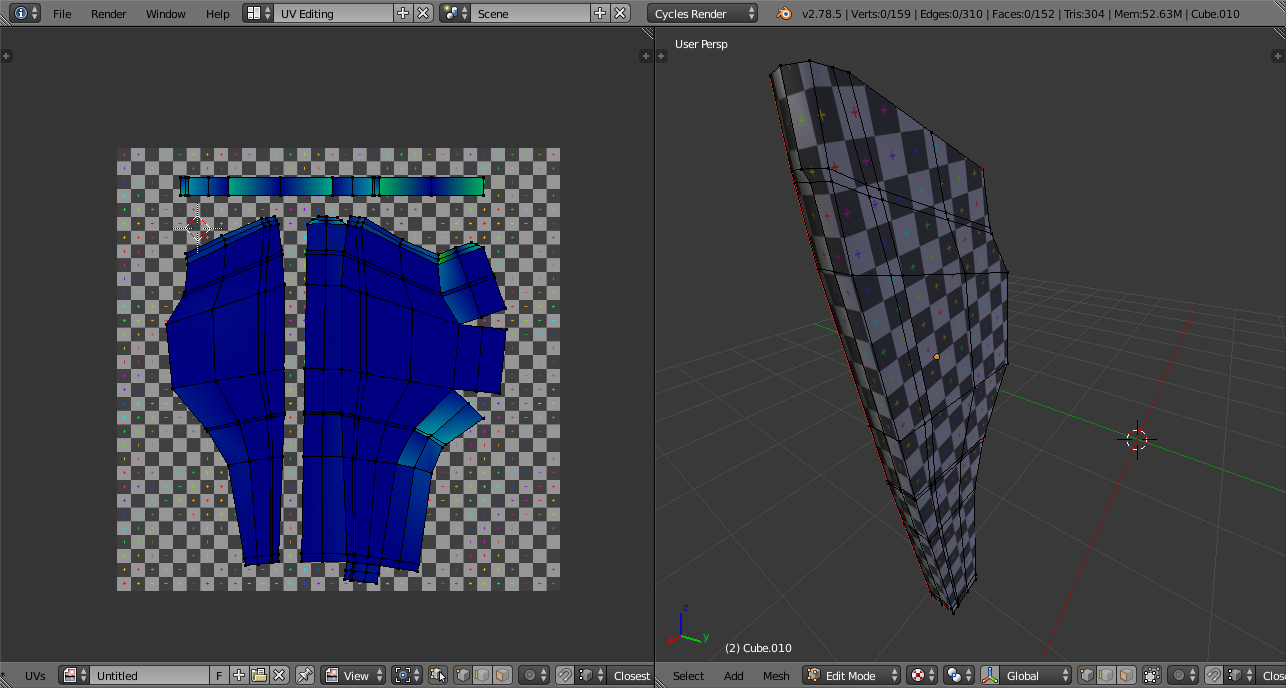
Thanks for the tip. I will keep it in mind for the next ocassion but in this case, as i said i just gave up and ended just streching manually the sides to make em proportional to the rest. This is the final result, not too bad keeping in mind i still didnt apply bumps, or refine the sculpt, and i still need to get rid of all that grain (that i dont have a clue how since im using already 600 samples in the render… but thats another story).
Here is the textured piece, so you can actually see how it was intended to be ->