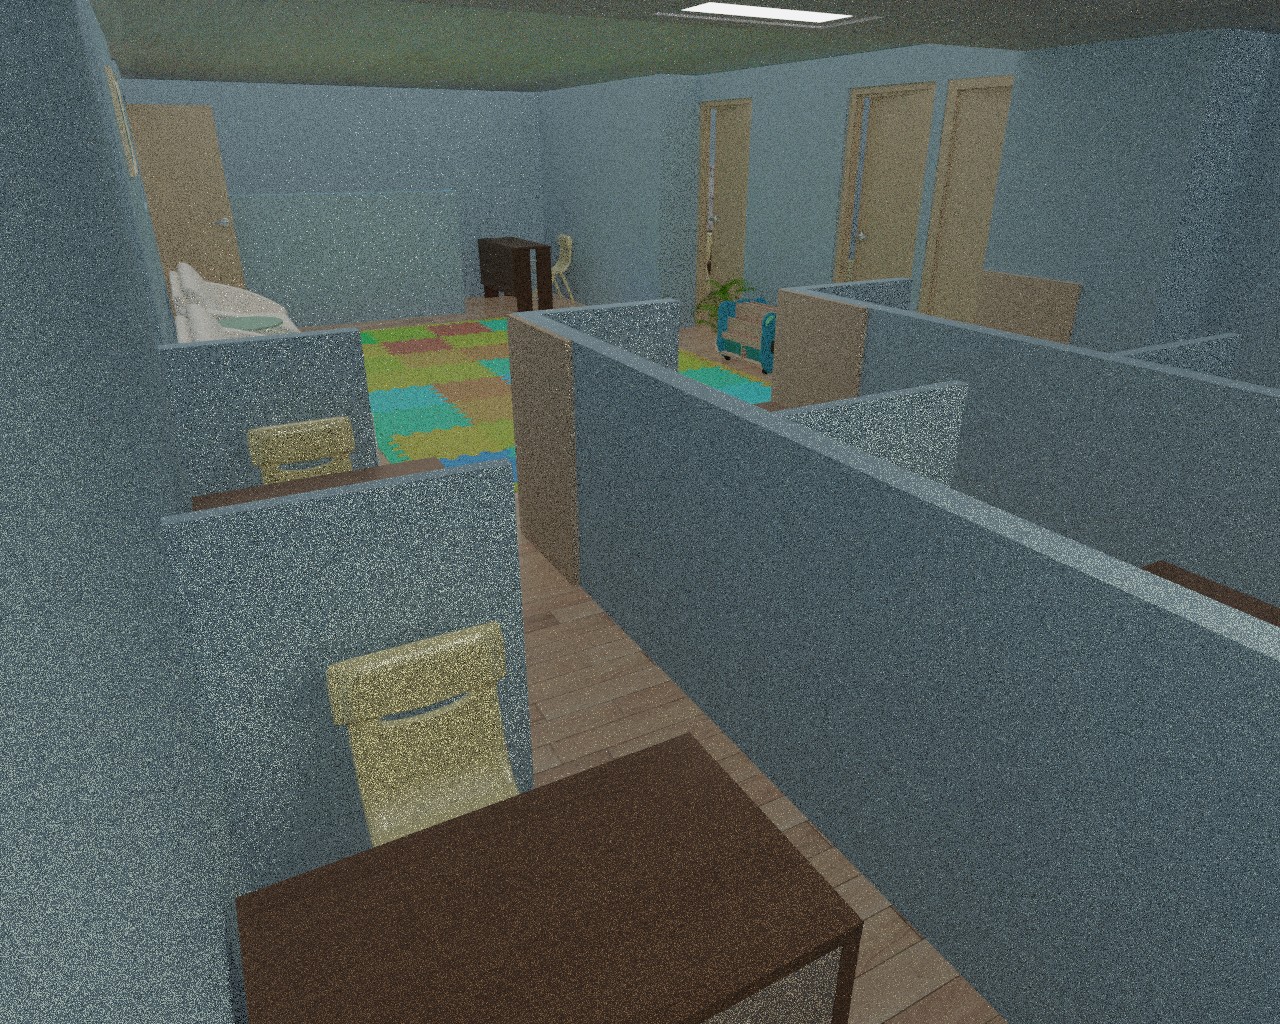
I have one office environment which is fully closed and no outdoor lights are coming in so i cant use hdri for lighting.
So how can i make it photorealistic? Should i change materials or how can i achieve that with others lamps?
Well an easy way is to setup your lighting like a real office… something that helps is IES profiles for your lights. Also set the lamp colour to match what office lamps have (as a blackbody temp)
Do you have ambient occlusion on? The lighting is very flat. Can you post the scene or the building part/lights?
[duplicate]
(Chuckle … “Photo-realistic? What’s that?!”) :yes:
Arizona Highways Magazine once had a photo of the interior of a hotel “on a bright sunny day.” Well, I was there when they took that photo … in the middle of the night!
Anytime you are lighting a scene, the first thing to do is to be sure that all areas of the scene are sufficiently and evenly lit. Then, you start “looking at the light” to decide where it would plausibly fall, in order to create the effects that you are looking for. Finally, you consider the “practical lights,” which are “the things within the scene, such as lamps or torches (or windows!) that are known to be ‘light sources’ in the real world.” It is often most expedient if none(!) of those objects actually add any light to the scene.
Notice also that “I never talked about ‘the real world.’” In a photo or a CG setup, “‘the real world’ has nothing to do with it.” The ‘real world’ is a messy place full of hard-to-control and un-dramatic light.
Photographs are very-artificial things: CG of course is completely so. Both are engineered to suit the very-hard constraints of the medium in which they are intended to be seen. They aren’t “real,” and they’re not that “realistic.” What they should be is plausible. Believable. “Acceptable ‘at a glance.’”
There’s a great scene in the movie of the musical, A Chorus Line, where Zach fairly-screams at a dancer: “Don’t Draw My Eye!” Remember that. Always. You can fairly get away with murder if you never “draw their eye.”
Also: “Think simple.” You don’t need HDRi for this. You don’t even need Cycles. What you need here, first of all, is a better camera angle. Then, you need nice, even lighting. (Cube-farms are remarkably boring places.) Next, you need to pick some “focal point,” and make it the brightest and/or most-contrasty point in the frame, knowing that this is where your viewer’s gaze will come to rest. Where is “the story” about to unfold? Lead the viewer’s gaze there, now. What’s irrelevant? Unimportant? Either position the camera so that it’s not in-frame to begin with, or light the scene to gently lead their eyes away.
For instance: “that slightly-open door is already interesting, if only because it’s different and because the camera is pointing at it.” (Is that a billy goat standing there in the haze?) Maybe have light shining out of it, because maybe that’s where the boss’s office is, and our protagonist is about to get fired. Okay, then … move the camera forward to sit on that cube-wall, eliminating the “who cares?” office equipment, desks and irrelevant chairs. Light the resulting scene dramatically.
Could you maybe tell us more about the project and it’s context. What are you trying to achieve? What is it that you already have - how is it lit right now? What real light sources would there be?
I tend to disagree with sundialsvc4 a bit about the importance of the real light. It is important. It should be a starting point even if you are aiming for exaggerated dramatic effects. It also depends on the context greatly - for example in interior visualization sometimes it is very important to visualize the actual lighting that is going to be there and all the dramatic (or not so dramatic - who wants constant drama where they live?..) effects are achieved with real lighting.
In this case, an office might actually be lit quite uniformly and the dramatic effects might need to be achieved more via composition, color and interior details. The lighting is still a problem, but you would need to address shaders as well as interior design and detail of the objects in the scene. You should try using Fresnel in your shaders and put some effort in creating more realistic materials and models. Try searching for a more interesting point of view as well and think of composition. IES lights could help, but I think first you need to address other problems in the scene. Try to find real products for the furniture and model them according to the actual scale. You can find free models to download as well just try to match them stylistically. Try Blendswap.
To be honest, there are really a lot of things that you could improve here - I don’t even know how to start, please don’t be discouraged by this. I would like to help if I can. And I think my help might be valuable. Maybe if you tell more about your context and situation I can find a more suitable advice for you so you are not overwhelmed by the complexity of interior visualization. Maybe post some screenshots of the whole space and describe in more detail what is it that you would like to achieve and why and what the context of this whole project is.
I have this task of getting photorealistic result of the environment. And It is done according to given measurements. So basically its an arch viz project I cant change models or scales. But i need to work with materials and lighting.
Well, I would advise using less color for the walls, I would try light grey or white or very slight tint of color, ceiling as well. They usually are not so drastic in interiors.
Use Filmic color management.
Try to make more materials - for example are the small walls separating the room in the middle going to be the same material as outside walls? Use diffuse mixed with glossy with Fresnel. I would also try finding better textures for wood, also the floor. Actually it might be a good idea to model the boards of the floor so you can control the gaps and use the memory efficiently not storing repeating patterns in a file. I am sharing a node setup on Blendswap that can distribute board texture randomly when you put a number of boards one after another in an image and enter the number in the node setup, use that if you want. Also use normal or bump and specular/roughness maps for your materials in addition to color.
I would set up the light first, then work on materials. I would try setting up the lights as they would be in reality. Maybe use IES, there is a plugin for Cycles. If you struggle to find real IES data for chosen lights, try using something similar. You can usually get IES data from expensive manufacturers like Deltalight (Deltalight.com). You can freely download it from them.
Then try adding more detail. Like for example the corners of walls are not sharp, they have a bevel of 2-4mm or so, furniture as well around 2 mm usually if it’s made of MDF, LMDP or wood, 1mm if they are made of metal. There are gaps between walls and objects and between parts furniture is made of.
I cant change models or scales
You have to, if you need a photo-realistic result. I am not only talking about scale here, I just suspected something might be wrong there, but about the proportions and detail of the models. For example the chairs there seem to be really low detail. Do you have any product photographs of the chairs?
Also: “plan your shots, now.”
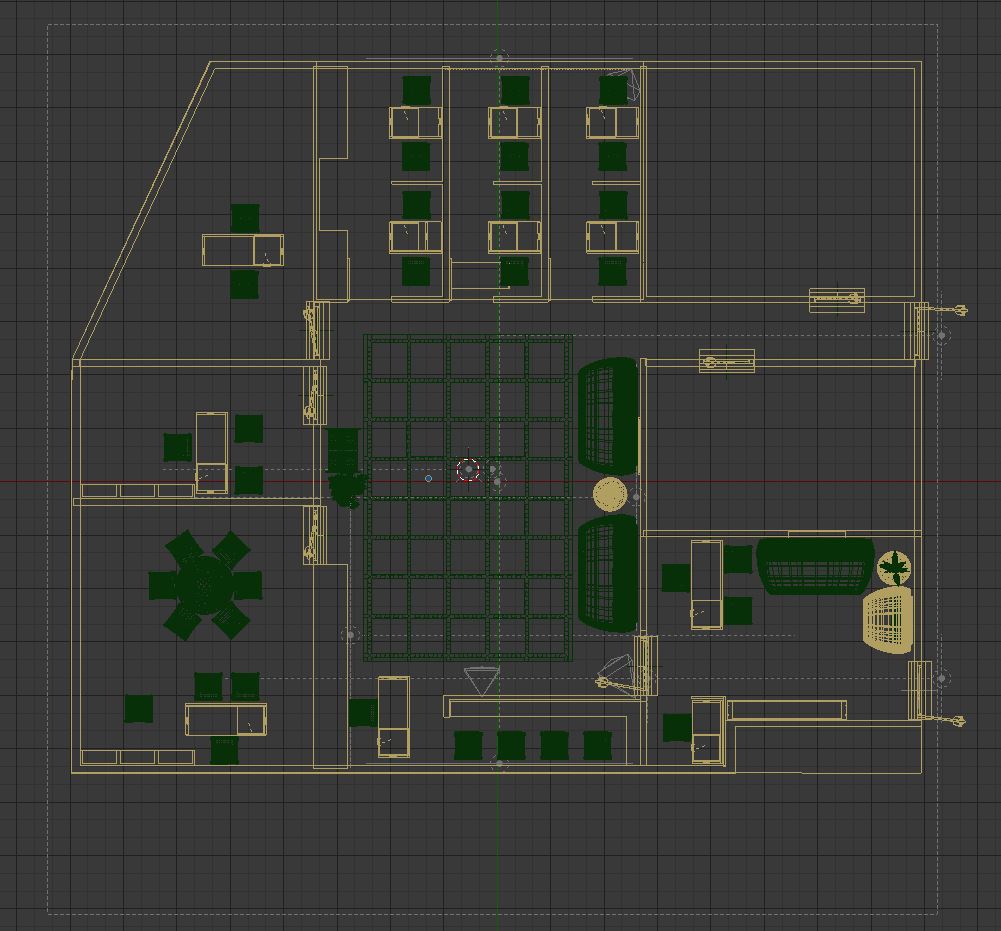
You’ve modeled a complete floor of a building. Now, before you actually start “dressing” portions of the set which might never be seen on-camera, determine(!) what things are going to be on-camera. These are the only areas of the set that actually need your materials, textures, or lighting attention.
“OpenGL Preview” renders, with “stamps,” are your best-est friend. :yes:
Usually, there are a series of shots starting with an overall “establishing shot” to tell the viewer that we have now entered a boring cube-farm. Then, there will be a quick series of tighter and tighter shots as the story advances. Many of these will only be on-camera for a few seconds, and the viewer will generally “see what s/he expects to see” there, as long as there are no visual surprises or inconsistencies. Only a very few of the shots will be important shots – lingering shots – where the viewer is actually going to look around and “take it all in,” or that are related to some important plot-point. Those are the only ones where lighting and detail are truly important, and then, only within the boundaries of the actual camera frame.
I’ll build-out a basic set – as you have done – to get the proportions and angles right. Then, I’ll paint it in a fluorscent orange material. In each shot, then, I will be eagle-eyeing to ensure that I never see “fluorescent orange” anywhere in-frame on any shot. I’ll set down the camera-tracks and position and label each camera, setting the render-distance ranges just long enough. Every subsequent step assumes those shots. Everything else remains orange. Forever. Orange, and unseen.
Build a library of assets, materials, textures and so-on, and link to them. (For instance, “a chair.” Panels used to assemble the cubes. A shelf.) (Again, “only if seen on-camera.”) Build these once, then duplivert copies of them into the scene. You need to establish the scale and then reference consistent real-world scales. If you only need to know that a particular object is “there in the room,” but it’ll never be on-screen, a simple (orange …) geometric shape (to the right scale) will do quite nicely as a stand-in.
Thank you very much for your replies. They were really informative.
I will adapt all the procedures you have mentioned and will see what result i get.
I have ies packs but i dont have their previews so its difficult for me to choose from.
I am already using filmic and in materials i have used layer weight->facing, instead of fresnel.
One needs to note though that you will need to make use of the curves panel to get the best results out of filmic (or otherwise you have issues with over/undersaturation and grey highlights).
Also to note about Sundial’s posts, I also disagree with him on numerous fronts not because he is wrong on many photographic practices, but because his posts seem stuck on practicing the legacy workflow from when the only built-in rendering option was BI (this from before the days of GI and physically-based shading).
- You don’t need to add invisible lights and other trickery to make things look ‘plausible’, Cycles will calculate the light correctly with no need for user intervention (the only time you might need to fake something is when placing larger lights as stand-ins for small sources to speed up rendering).
- You may sometimes have to model objects that will not be in the shot because of the use of GI and real specular (they can impact the visual appearance of the shading seen in front of the camera).
- A dramatic look can be easily done by using harsher contrasts or creating a space where some lights might be turned off or some bright light-source is on somewhere in the room (no need for faking), just make sure you don’t use AO as your primary source of lighting (or limit it as something that takes over after 3 or 4 bounces).
He still has good points, but workflows have changed due to better technology.
Thank A lot to everyone for giving me advice. But i guess for professional look I cant put dramatic lighting. It should be equally lit. I put ies lights and results were pretty good. But it still does feel like kinda fake. I have materials with necessary nodes like glossy and fresnel and layer weight.
[duplicate post - deleted]
I would like to respectfully reply to Ace Dragon’s comments simply by suggesting that he may have missed my most-essential point.
My essential suggestion was that you should carefully plan out “the movie,” before you undertake to “detail-shoot” any part of it.
Specifically(!): That you should postpone all such “detail planning” … including the decision, in the Blender case, of exactly what rendering technolog(y)(ies) to use in any given shot … as long as possible.
The strategy that I speak of has been called, “[Final-Cut!!] Edit, then shoot!”
Unless you are dealing with a video game, any “movie” is a series of disconnected shots, and all of them (in CG) are very expensive. So, instead of “painstakingly final-rendering lots of ‘footage’ and then trying to create a film out of it,” you want to do precisely the opposite:
- Use “preview renders” to let you cheaply(!) produce ‘lots of footage.’
- “Create a film out of it.” (Conventional film-editing thinking applies here.)
- Use this knowledge to let you final-render precisely the frames that you need … by whatever means seems most-expedient for each shot.
- Drop the final-render sequences in, one-by-one, as e-x-a-c-t(!!) replacements of their “preview” stand-ins.
From this perspective, then, "particular rendering-technologies (e.g. “BI vs. Cycles”) become … “a strictly Step #3(!) … and not before …” decision. And, this makes all the difference.
Step #2 is the proverbial “cutting-room floor,” and this workflow makes this “cutting room” even cheaper than it is in conventional movies. (“Waterworld,” anyone?) Because an OpenGL Preview render is an exact stand-in … frame-content-wise … for its final replacement, it can be used for “final-editing” purposes, long before the “blood, sweat, tears, and time” of the Final Shot are made.
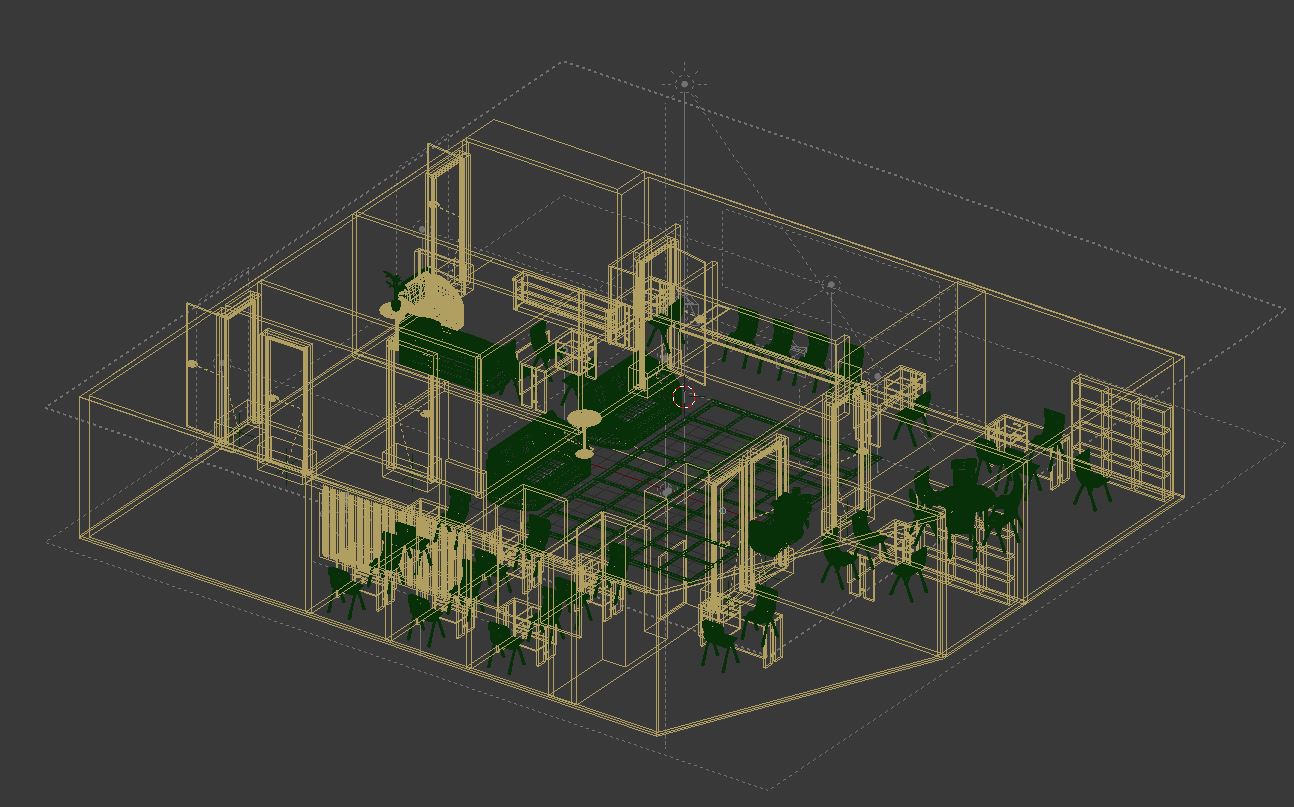
I usually model full scenes for interior visualizations despite of what is visible in one particular view in order for the designer to see the space better and be able to make design decisions better even though the final visualizations are for the client not the designer. It’s often easier to choose the angles you want for your renders and think of composition as you are working with space design, you are not designing the composition of the shot in 2d space of the camera view as in a movie. Plus it is usually essential to show as much of the scene as possible in architectural renderings so most of the time it’s not practical to have places that have no detail. Final result is often stills instead of movies or even baked interactive presentations where one can see everything. We haven’t done any complete interactive visualizations of any interior project as far, but we definitely have it as a goal in the studio I work for. Of course the main views should get more attention, but it’s not a bad idea to model everything in interior visualization. sundialsvc4, you might be missing the point that this area is completely different from movie making.
I’ve done a few interior office shots where environment lighting is under control - even completely shut out. My workflow is as follows (using filmic):
-
Set up environment lighting using real values. Just to make sure light transport through windows etc are actually handled correctly. Then turn off all environment lighting.
-
Set up real lighting for all lighting fixtures, I’ve had single offices/board room spaces having 60’ish various lights, incl indirect cove lighting (which is going to suck like crazy). Use real world data from the fixtures wrt strength and color. If using a bunch of tungsten lights image will come out very yellow tinted, re-balance for that in post.
-
Render out brute force the various lights in isolation, just to see what they contribute. Save the images for reference. If not that many lights, you can probably use these as well as the noise levels will be manageable - but with tons of lights it’s going to be messy.
-
Turn off all those lights or move them to different layer. Now setup replacement lighting where you pretty much fake everything:
- I always use two huge area lights to fake floor and ceiling bounces set to diffuse only.
- For ceiling spots I usually mix camera visible only discs with glossy visible only spots. If they need more detail I’ll create emission geometry that is sharp reflection visible only.
- For grid lighting I have a modelled grid light (tubes and everything) that is camera visible only, with area lights doing the main effect.
- For cove lighting I either bake the direct effect from it and use it as is, or bake then make it camera visible only and fill in the bounced lighting using area lights, or avoid baking completely and use one area light only for the direct effect (so two area lights per cove in total).
- Finally, I go through my scene and materials and make sure all materials except major bounce contributing surfaces have MIS turned off. Light sources such as computer screens, tiny computer LED sources etc - make sure MIS is turned off. I’ll do MIS on for ceiling, floors, walls, and some furniture, as well as big screens contributing a lot of lighting.
For combined lighting, indoors and outdoors, keep in mind that outdoor lighting will be very blue and indoor very yellow. Retoning in post to neutralize the yellow will make the blue even bluer. If you don’t want this shown (photographers hate this and may even gel up the windows) what you want to rebalance is the few outdoor components - NOT all those indoor lights.
For fluorescent ceiling tube lighting I tend to neutralize any discolorization they do in real life - about mid color temperature, since their actual color typically can’t be represented using blackbody (especially those horrible green ones).
Why all this work? I don’t have time to brute force true lighting to acceptable noise levels (might be different now with noise reduction, haven’t tried), and usually this is way more than our clients would typically expect. Where you want to go depends on the client. Maybe lighting isn’t even important at all! just the positioning of furniture. I’ve had cases where a single ceiling area plane was the only lighting.
But I too tend to disagree with sundialsvc4 - everything is not about making dramatic films - sometimes you only need to show a “good enough” image to a client where his arrays of desk needs to go and lighting - although as artists we could spend ages improving on it to reach film quality - comes low priority compared to what you need to show your client.
Put yourself in the clients place - what is it he wants? Chances are he doesn’t even care at all about how dramatic or well a scene is lit.
Denoiser on the buildbot version comes in handy and allows reduction of overall samples for this kind of scene. (Possible to run the test version of Blender from a folder extracted from a .zip so if it’s unstable or bugged it’s not risking your main production pipeline.) However denoising does tend to kill any detail where you have granular textures in the scene. Of course it’s also possible to do a materials index pass and have another render pass without denoising, if you want to preserve those areas by mixing in the compositor.
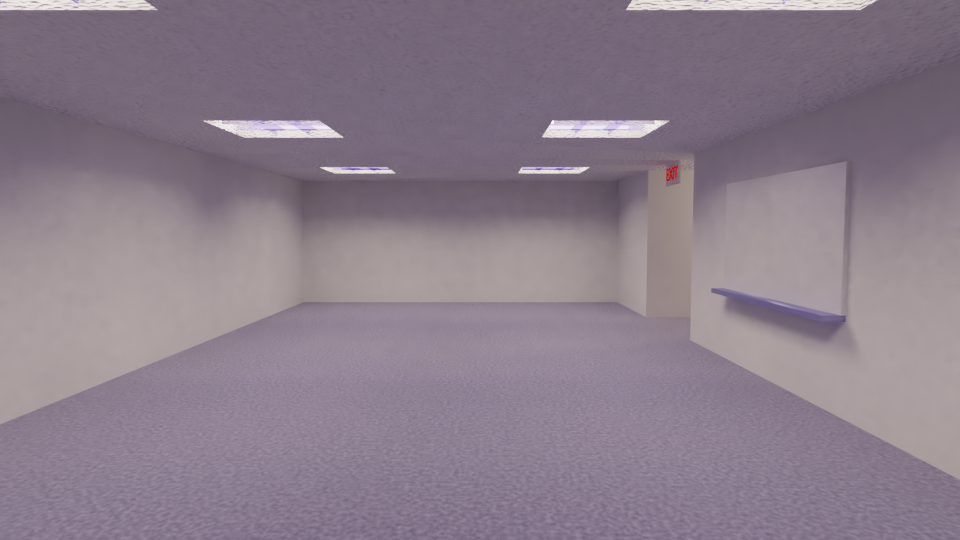
Yeah, boring test scene of some room with no furniture. But the space lighting is along the same lines as what you’re going for. Using mesh tubes with emission material to light the scene in the same way as fluorescent lamps. Blackbody at 5200K and “bright white” color temp. This is done at 500 samples, and it would be really grainy without the denoiser.