I was introduced to Blender 5 years ago but after 10 minutes of frustration I gave up. Since then I have tried getting into Blender a couple of times but with similar results. 4 weeks however, I gave it a serious shot. I watched some great turorials on Youtube by Blender Guru, set the Key layout to 3dsmax and got help from a friend who showed me the BMaxtools. And now at last, I am finally starting to get into Blender!
Ohh yeah, and I have been using 3ds max for 15 years, since version “3D Studio Max R3” So I am not completely new to the “3D game”
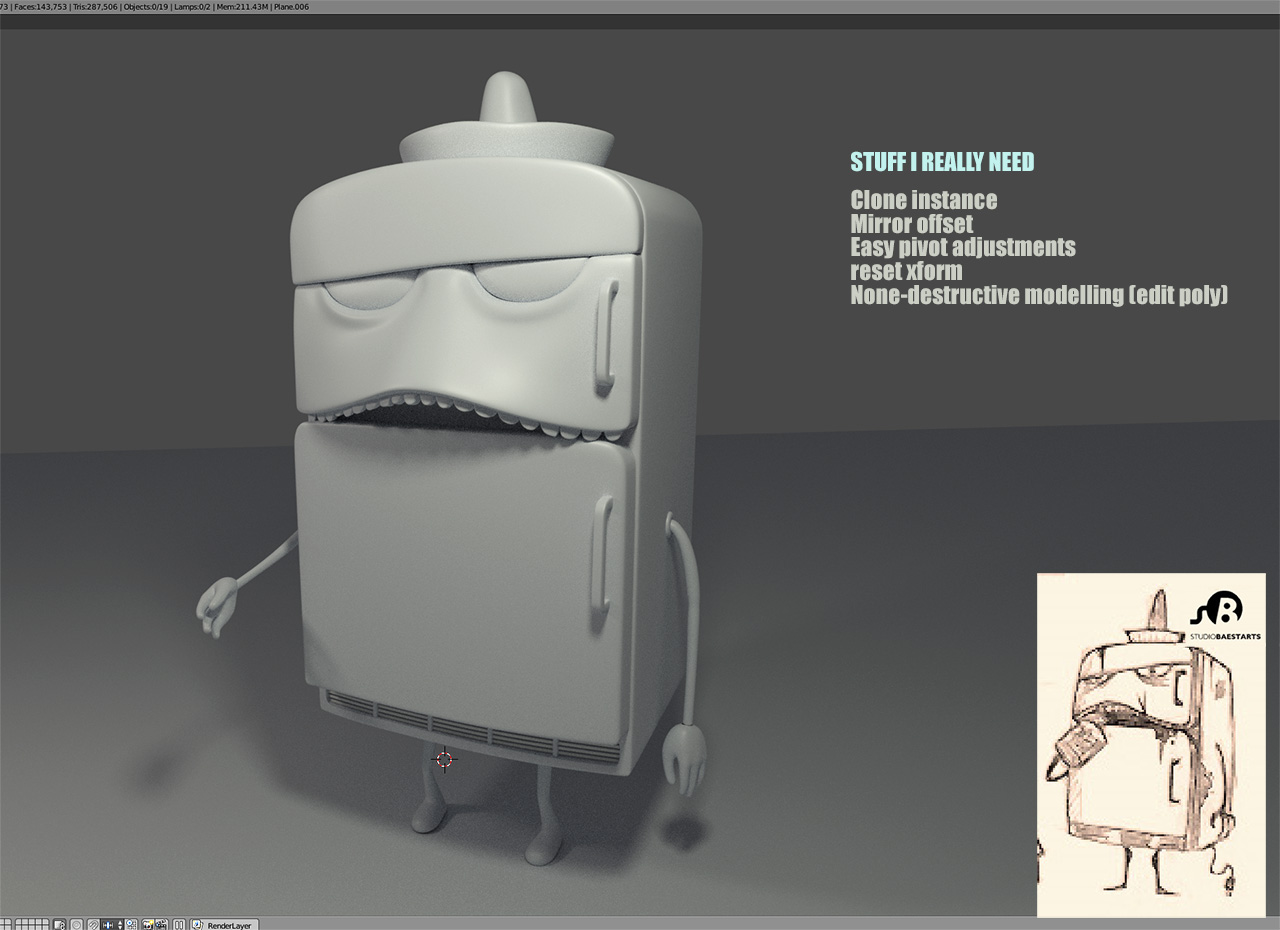
The model below is a full weekends work in Blender. Some minor things have taken me a very long time and I have looked up so much stuff on google but I am finally getting somewhere in Blender - huray. I still need to model the details and get the “bendy” shape but it will come, don’t worry.
Question 1) I still need to figure out a lot of stuff, like for instance how to model none destructively. So If I want to model all the cracks in the fridge cabinet but also want to keep the clean model. What is the best approach here? In Max I would put another edit poly modifier on top of the stack.
Question 2) What is the easiest way to reset a models transform and move the pivot point.
To Question 1) As far as I know there is no such thing as edit poly modifier in blender.
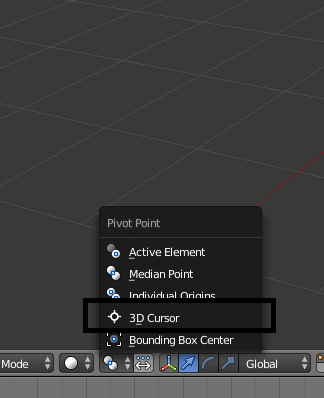
To question 2) not sure if you meant that, but you can apply the rotation and scaling values by pressing ctrl+a. To move the pivot point I normally set the 3d cursor to where I want the pivot point to be. Then in the tools panel you can find the option “set origin to”. There you can then choose the 3d cursor. I don’t know if you can manually push around the pivot point, an option would be to move the whole mesh in edit mode, but I think thats a very clumsy attempt
Not sure if you really should “model” all the cracks in the fridge at all in Blender. All the smaller details like minor cracks, bumps and scratches are normally displayed on the model using bump/normal map together with the “displace” modifier.
Another thing. I saw that you had written a lot on your image as well. On the topic “Clone instance”, the short answer is “use ALT+D”. Alt+D will clone an instance using all the properties from the original object, so if you change shaders and material it will be changed on all objects. Using Shift+D will creat a clean copy instead. Takes more memory, but every copy has it’s own properties.
Creating several instances of things could also be achieved using the “Array” modifier together with “Curve” modifier to get it to follow a specific path/track.
“Easy Pivot adjustment” you will do by pressing “GG” when a specific vertice is selected, then you can move it along the line and fine tune it as you want to.
Hi guys, thanks for the quick replies. @Strapazie - For me it’s just a bit cumbersome to first move the 3d cursor then move the pivot afterwards and finally move the 3d cursor somewhere else. But moving the whole mesh in edit mode is actually not a bad idea, thanks
@MagicGlow - yeah I can definitely use a map for the smaller details but I think the large cracks will look good with a bit of modelling.
Alt+D, I just tried it, that’s a life saver, thanks.
I am not sure what you mean by pressing “GG”, When I try it in edit mode it just moves my vertex on an axis, not the pivot point?
GG is for sliding a vertex or an edge or selected edge loop, can be very useful, although it does not use the origin point as orientation. Instead it uses general topology flow as orientation. Hope I explained that right.
Sorry @coindrop. Misunderstood your question. Not sure exactly what you want to achieve, but moving a pivot point you can do under the “Transform” menu for the object. Often a Blender user uses the 3d cursor instead. Go to edit menu, select the vertices you would like to have as an origin, snap the 3d cursor to it and then change the rotation to be around the 3d cursor:
Thanks for the explanation MagicGlow, it works but it also involves more steps, than what I am used to in max -maybe I should make a feature request
Here is an updated version with some cracks a plug and a beer bottle and also a new hand… I didn’t like the old one.
Next up will be unwrapping and materials.
Took a while to figure out how Blenders UV mapping worked and I ran into a few problems with shortcuts because I use the 3dsmax layout. Some things work quit well in Blender but overall I must say that 3dsmax is easier and faster when it comes to unwrapping. But in the end I got a pretty good result I think. Next up, textures and materials.
Finally got him unwrapped, I had to view a few tutorials and re-map some keys before I could get started.
I actually like the initial part in Blender where you set seams and so on but I think 3dsmax is easier and more intuitive when it comes to manipulating the UV’s afterwards and laying them out properly. Next up is texturing.
I haven’t uninstalled Blender yet
Started texturing. There are still some areas that need tweaking and the bottle need a glass material and some liquid inside.
Hi Strapazie, Thanks and sorry for the late reply.
I installed Substance painter a week ago and tried it out on this character. It works really well and I might buy an indie license when the trial expires.
This will be the end shot for this character (directly from substance painter) I might do a “pretty render” some time in Blender.
Thanks for all the comments, I have really learned a lot from this project - will start the next character this weekend