Tileable Building UV mapping problem

Hi Everyone,

Right now, I am making a building in Blender that can be tiled but I am having trouble unwrapping the UVs for the model. I have used Blender for quite awhile now but I am still not entirely familiar with it, especially in unwrapping UVs. While I do think I have kind of wrapped my head around it, there are some things that I still do not understand.

I have attached a photo as well as the .blend file for the model.


MelbourneBrickBuilding.blend (1.36 MB)

I need to know how I can go about unwrapping the top of the model that has been highlighted. If you look closely at some of the faces, particularly the one at the very bottom in the middle, the grid has sort of been warped across one corner to the other. Why is this happening? I also cannot figure out why some of the other faces appear warped and stretched as well. I just cannot seem to be able to mark the right seams in order to fix it.

Can somebody please help?
Thanks!

Goolog

Can anybody out there help? It’s been just over two weeks and I haven’t figured it out yet. I’d like to start working on it again but I am stuck on the UV maps.

I’m not to good at UV mapping too, but I know that this guy has some good UV mapping tutorials… Maybe you can continue after you’ve seen his videos.

The whole object consists of one connected mesh instead of multiple mesh parts, which means you have to use many seams to part it out for UV’s. As everything is in one object, you can’t use modifiers, linked duplicates, nor instances to help either.

There are also a lot of n-gons (faces with more than 4 sides) which can easily distort with normal unwrap. Some of those are also concave which are almost guaranteed to distort UV’s and texture. Distortion might also happen in the geometry for both concave n-gons and quadrilaterals because of triangulation,


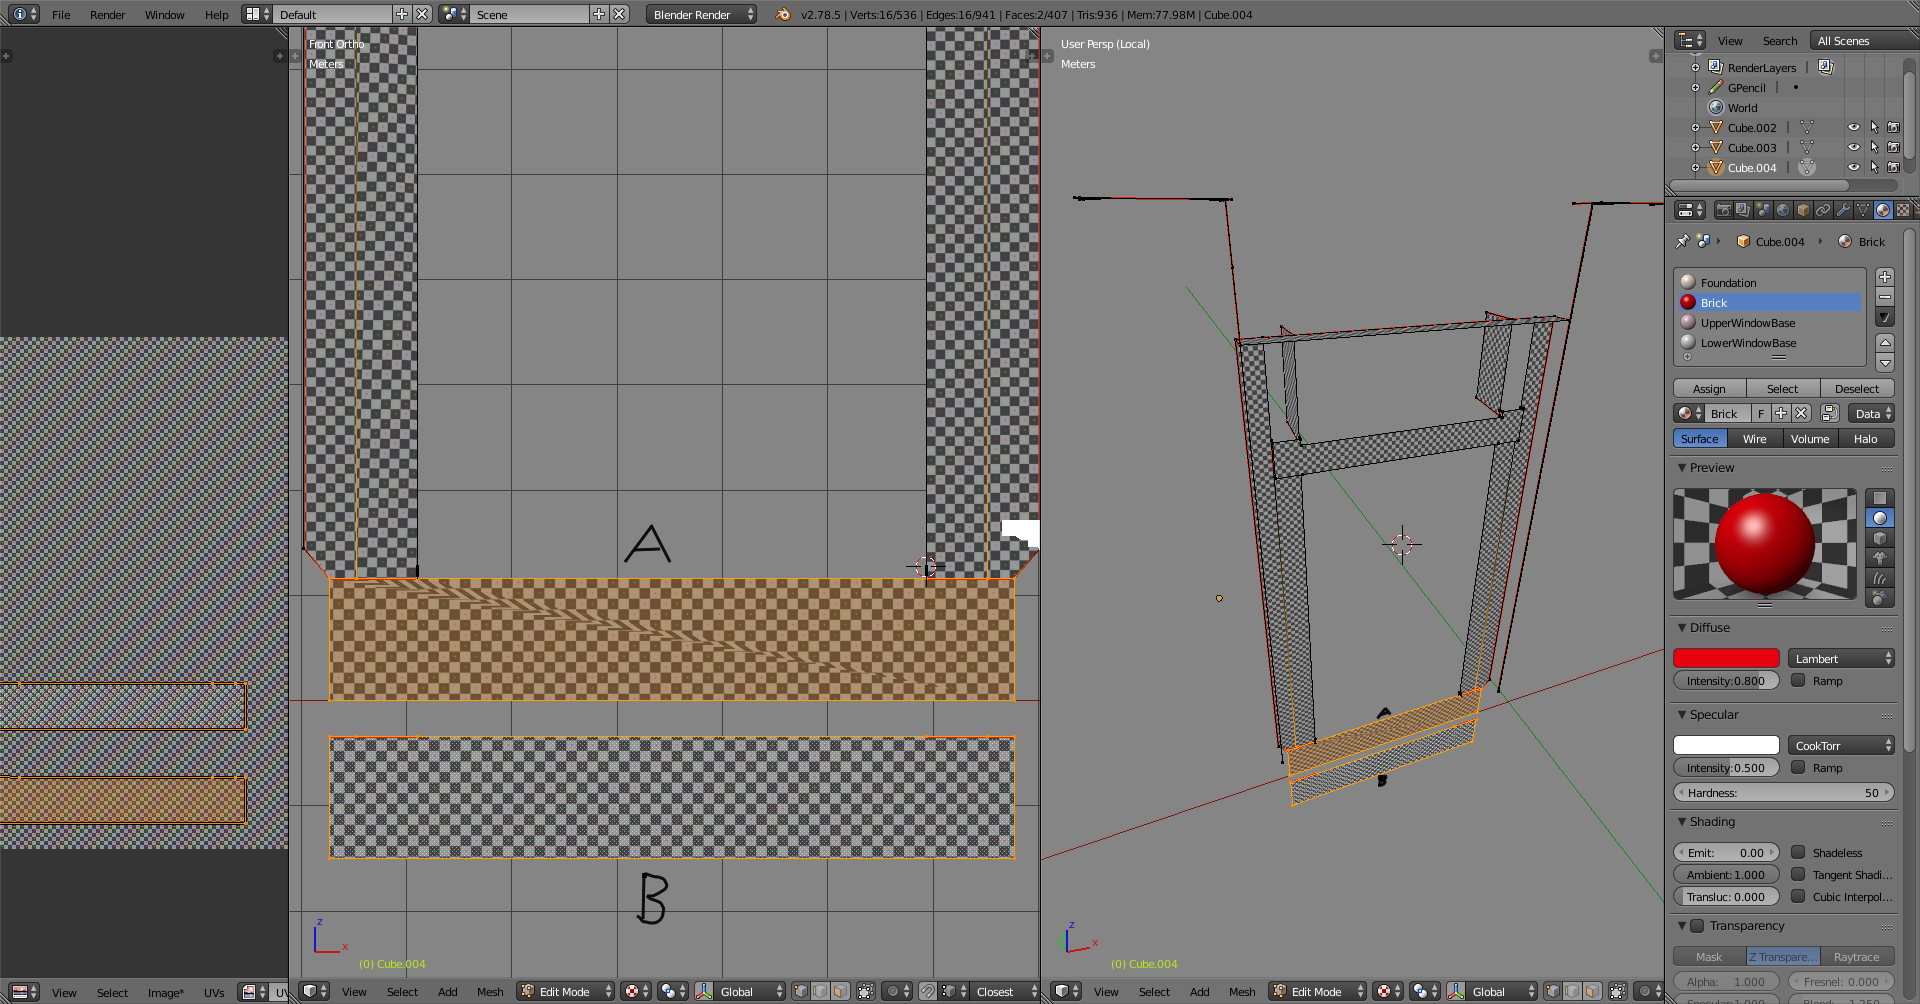
Only one face unwrapped at a time.
A. unwrapped with normal unwrap, U -> unwrap
B. projected from view, U -> project from view

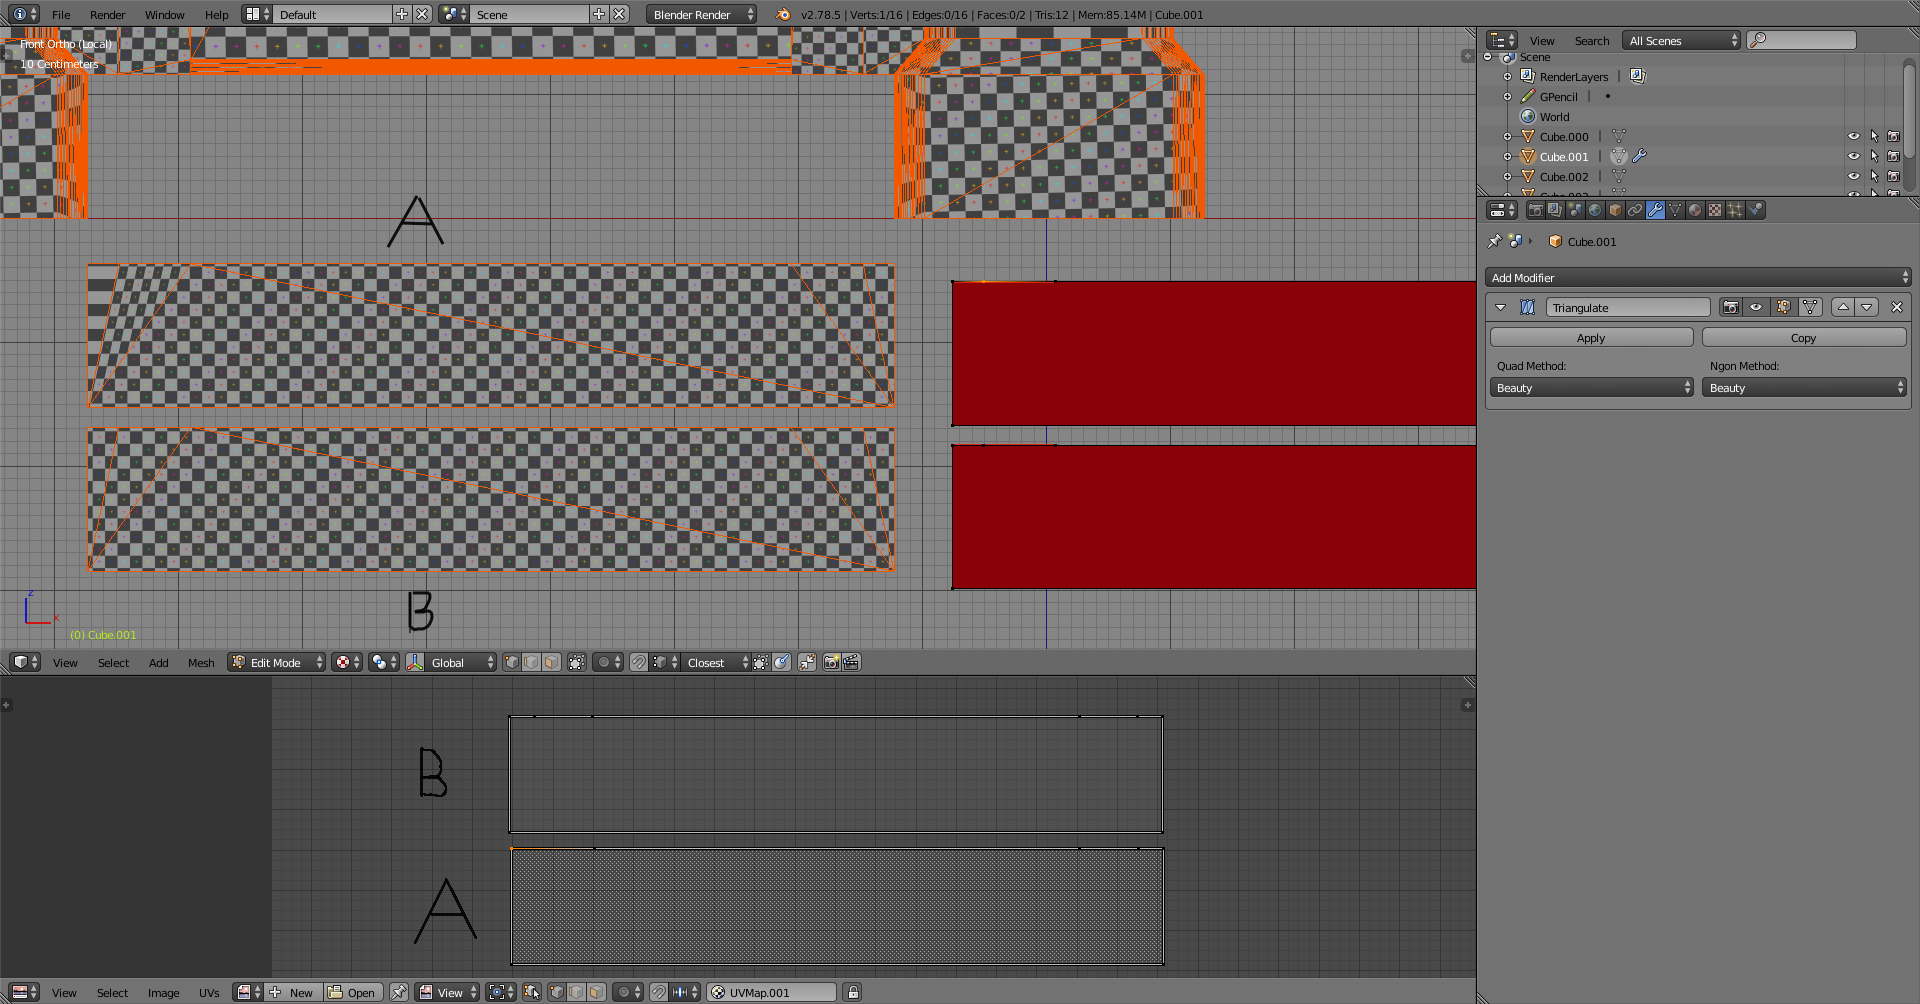
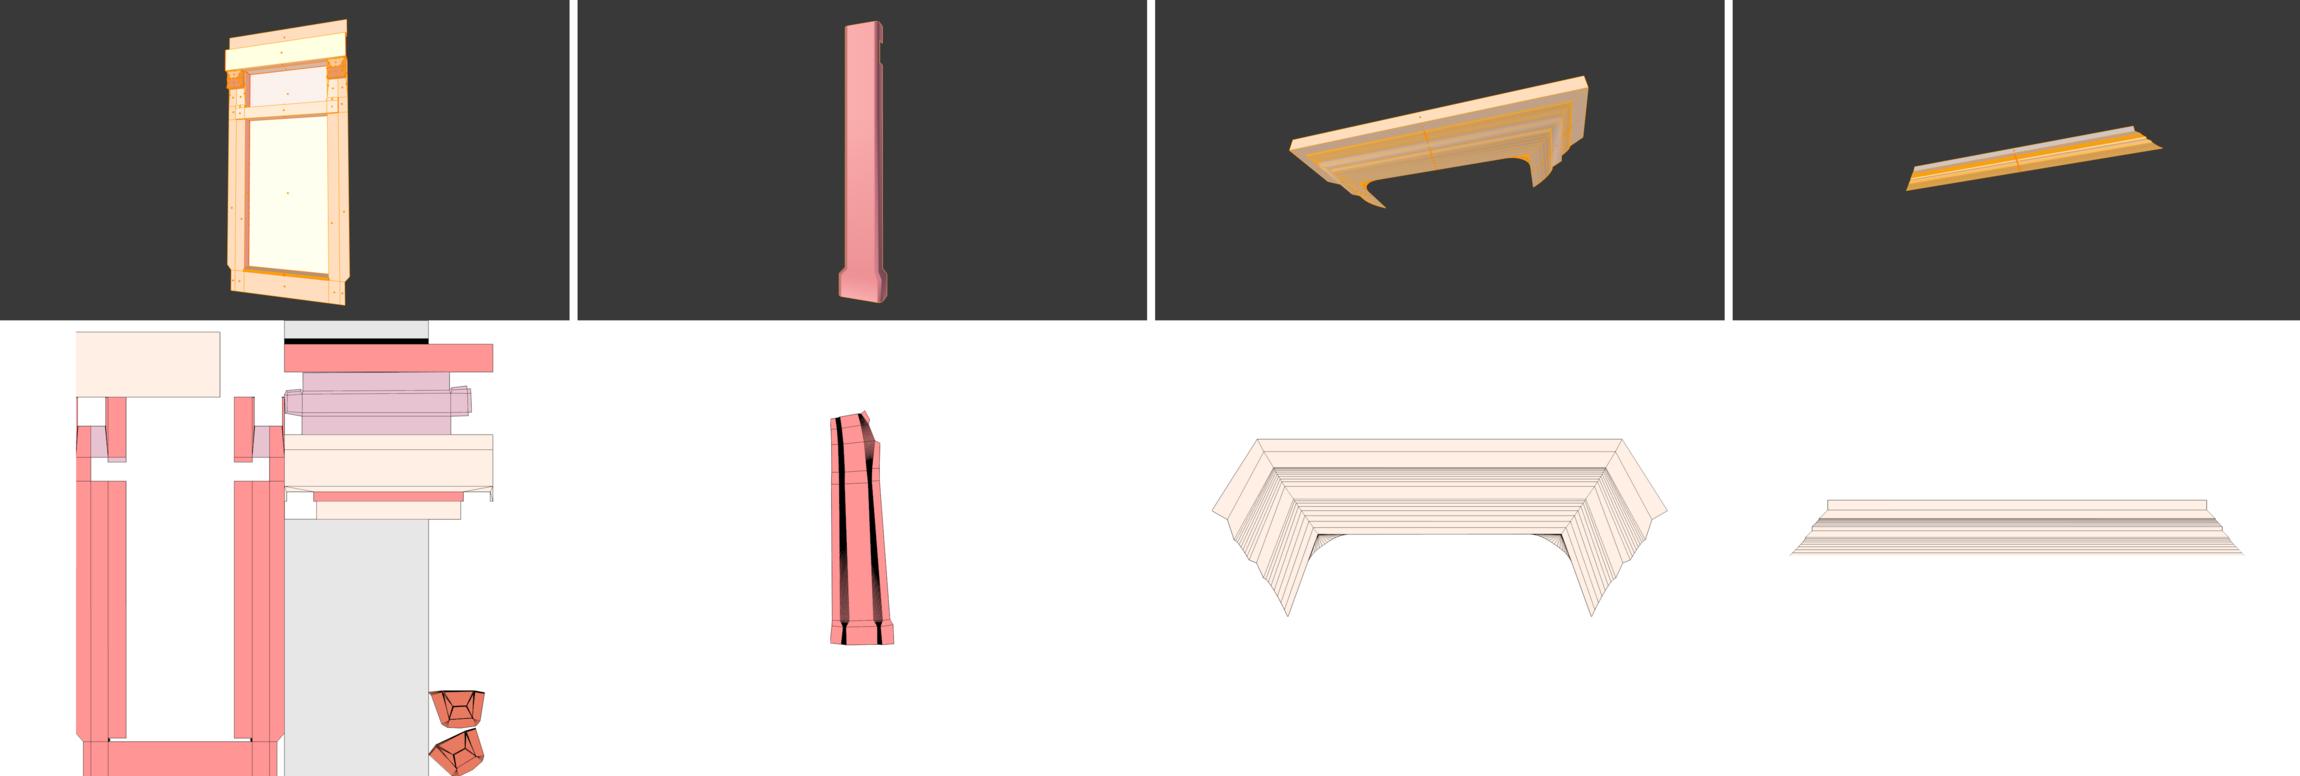
All faces in the right viewport are n-gons. One way to find them is with select menu -> select by trait -> faces by sides, and changing find criteria to greater than 4.


Even when using triangulate modifier to make the triangulation consistent between the two, it distorts because the unwrap got distorted. One UV vertex is on top of another.


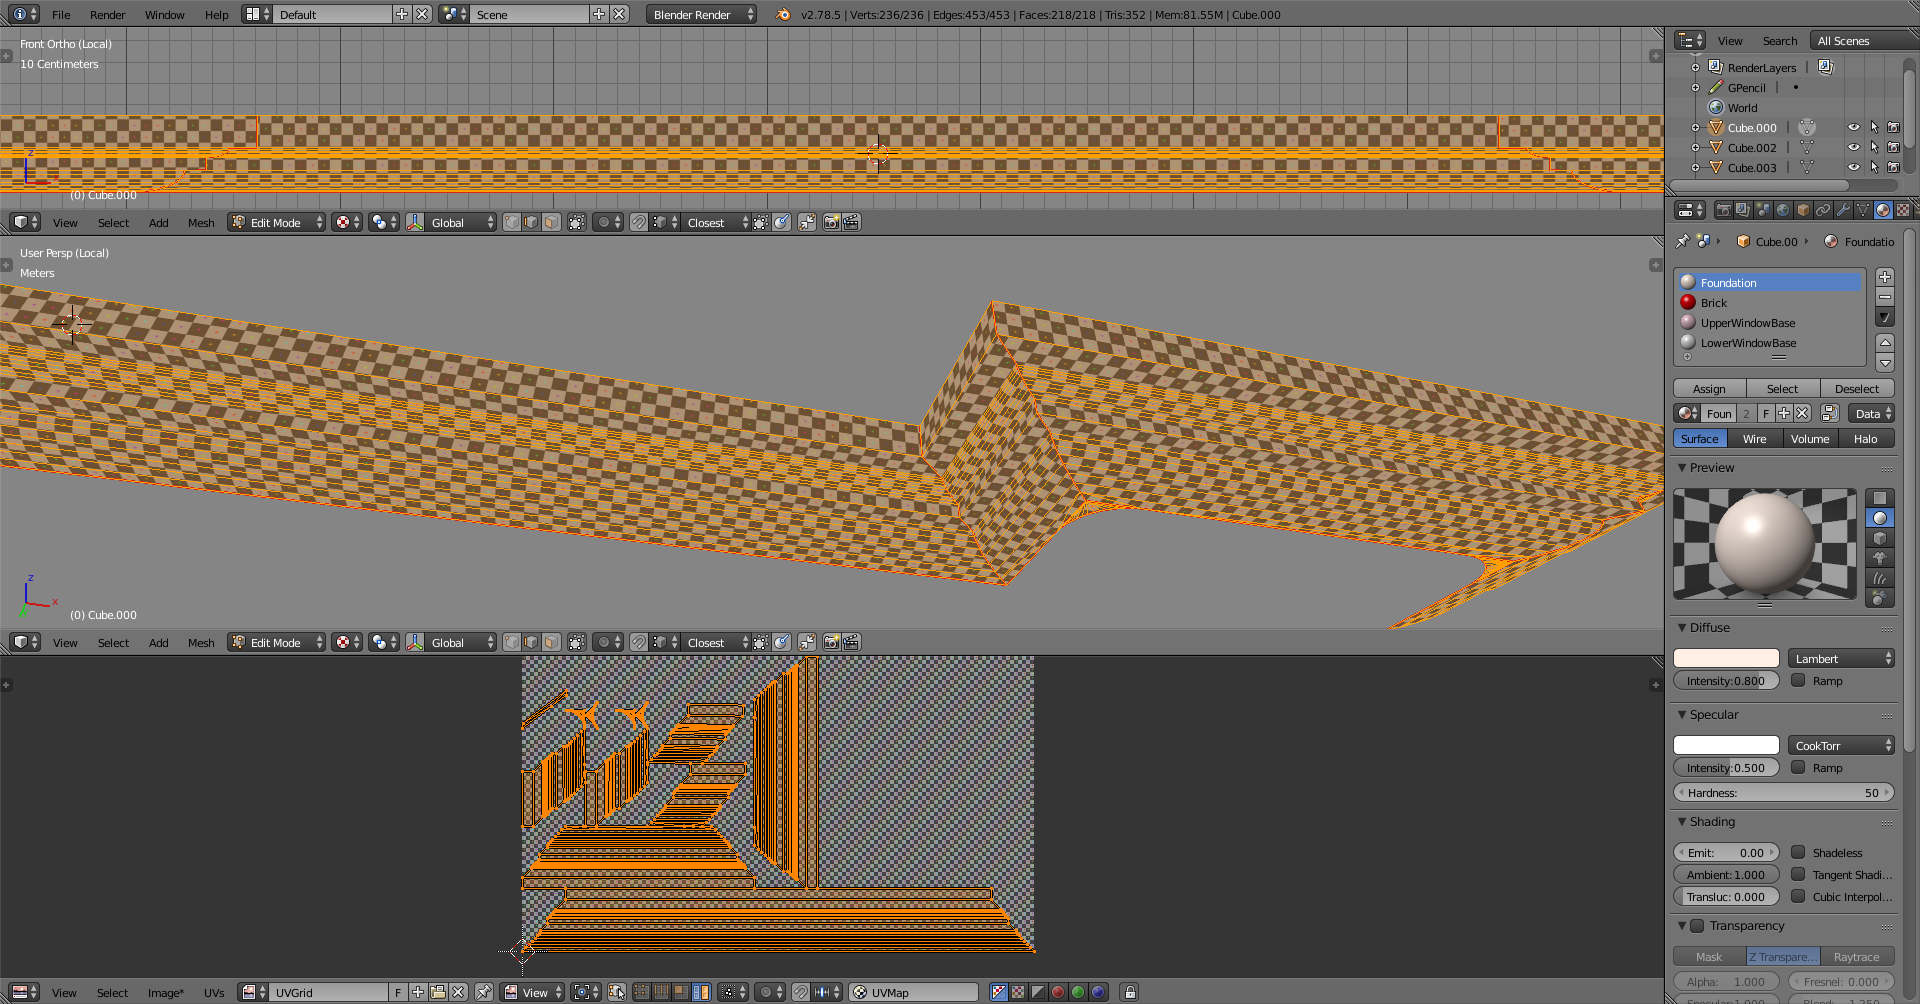
Unwrap tries to put the UV coordinates in such way that there is the least amount of distortion on the faces, and this one doesn’t open flat without distorting the faces. For it to have no distortion at all, you’d have to add seams on edges where the geometry makes a turn, separating the straight sections.

The UV islands that result from those don’t have straight 45 degree angles on each side, they’re stepped instead because of the profile.

If it was a real object and made of wood, it would most likely also have a cut on each turn. That way it’s easier to keep the wood pattern more consistent on a large area and easier to make, which is also what you’re trying to do for a virtual object.

Get rid of n-gons or at least know what you’re getting into when leaving them. Using multiple mesh parts or multiple objects may help replicating the work you do on one part of the model. Mirror modifier or symmetrize tool could also be useful.

Hey JA12, thank you for taking the time to make a reply to my post.


I have split the mesh into individual mesh parts as you suggested.

I also took another shot at unwrapping the UVs for them after getting rid of any and all ngons in the meshes.
These are the results:


I wasn’t entirely sure what to do about the first and the second mesh part and I wanted to see what you thought of the third and fourth. It wasn’t easy for me to make it so that the texture didn’t seem out of place with the third one and it was due to this that I wasn’t sure if the seems should actually be placed at the turns like you suggested.

What do you think?
Thanks! :slight_smile:

Meant something like
MelbourneBrickBuilding2.blend (266 KB)

progression in layers 2-4, where layer 4 contains unwrapped object. It’s also using mirror modifier to mirror the texture, but could also continue and get the UV’s without mirror to have unique texture space on both sides.

The amount of polygons displayed on the info editor is per visible scene layer.