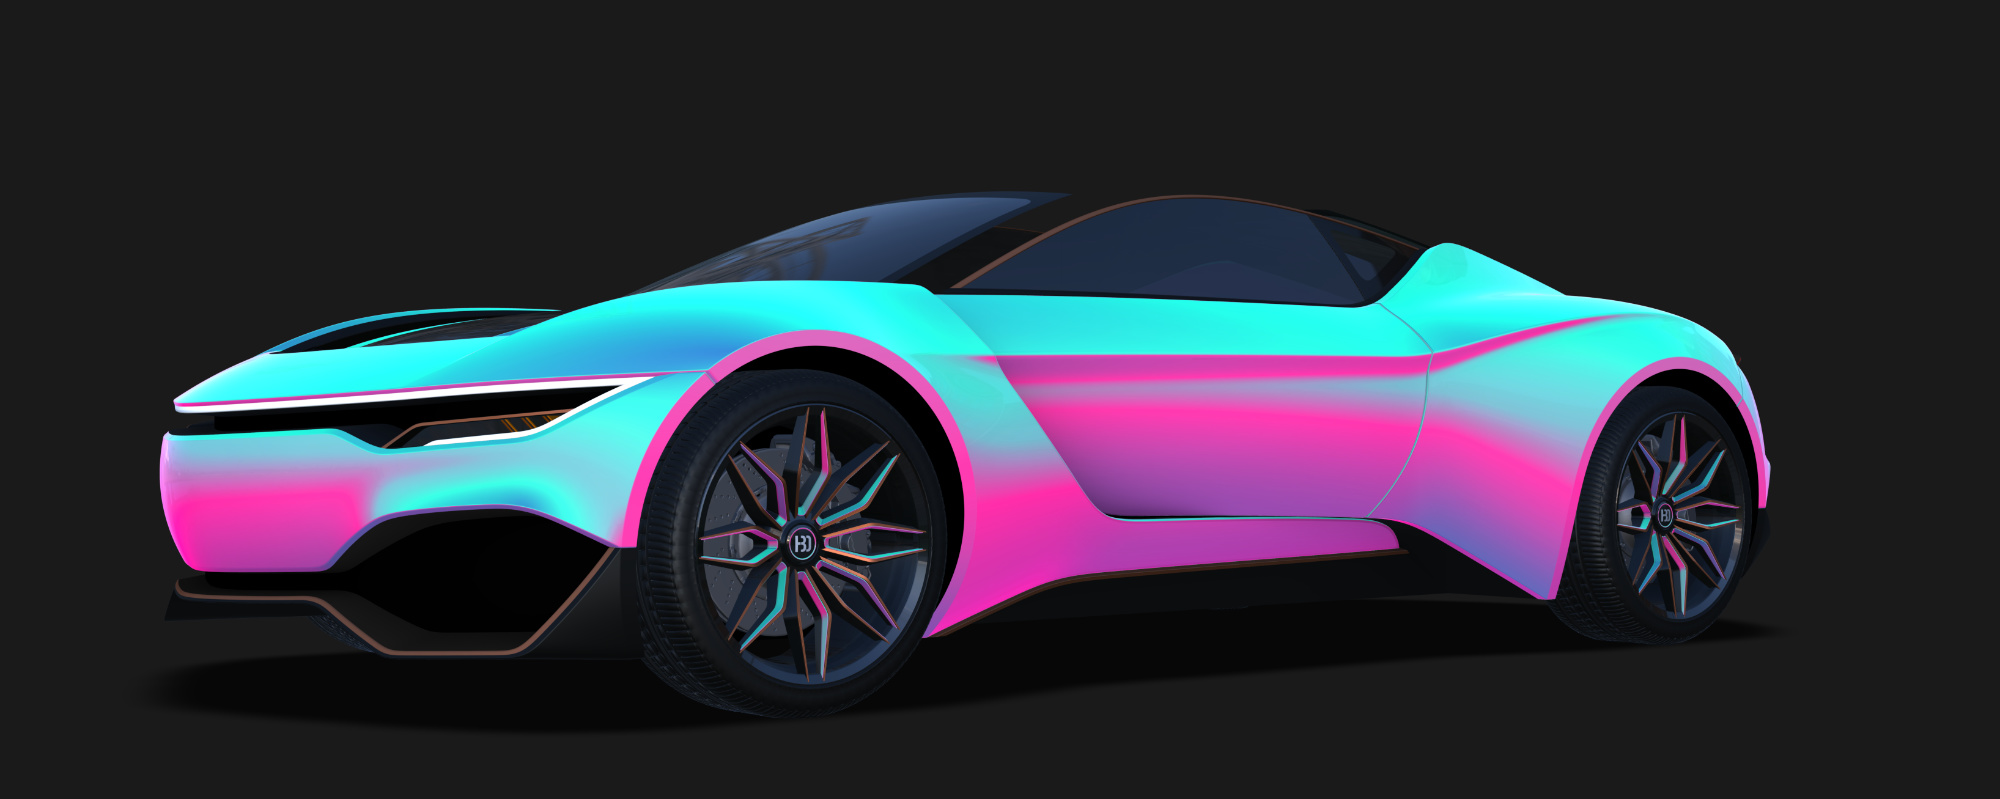
I found this image today which was created in autodesk alias, how would I go about achieving this same material in cycles?
Original author: https://www.linkedin.com/pulse/layered-shaders-alias-raymundo-burgueno
I found this image today which was created in autodesk alias, how would I go about achieving this same material in cycles?
It could be an iridescent effect, or it could simply be a rough glossy surface reflecting a pink floor and a turquoise sky.
If you look at the link though he has some sort of shader in Alias which does the effect, using a color ramp
I haven’t tried, but the layer weight node would probably allow something like that.
Looks like he’s using some kind of sphere, so maybe either hdri map or reflection coords? I’m only going to assume VRamp is a vertical ramp of colors. You can do this by coloring a sky and actually tracing environment reflections, or add the colors using reflection coordinates as a controlling factor to a ramp.
Based on the read (although quickly looked at so I could have missed something), the image itself doesn’t really tell me anything.
Take “Geometry” node, and connect “Normal” to “Separate XYZ” node. Take value “Z” and join it to “Math/Multiply” or “Color Ramp” (just for manipulation at the end). Then connect output value to factor of “Mix RGB” node and set there colors which you prefer. Now you can put the output to the Diffuse Shader.
I can’t find a seperate XYZ node in the node editor. Am I doing something wrong?
This is my first time trying to use the Node Editor, though I have used Shader Forge in Unity a little which I think is kind of similar.
“Separate XYZ” should be also in “Add->Converter”. In this case a “Separate RGB” works in the same way.
You are using a Blender Internal node (geometry) with a Cycles shader, I think. You might have switched render engines after you had added this node - you should re-add it, it’ll look different (lacking the two input fields at the bottom).
Here is my attempt:

