Sorry this is a little late. I was going to write something a couple days ago, but things got too busy. Here are a few things I thought of that might help.
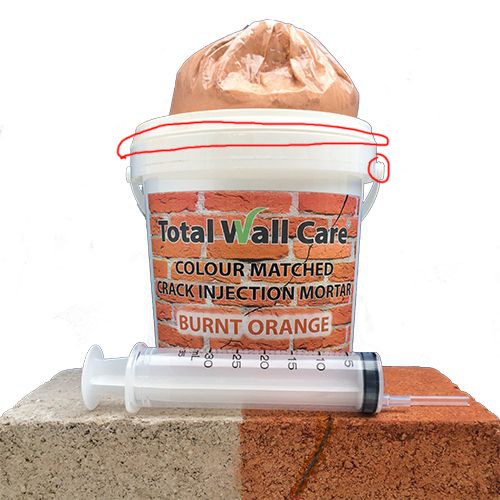
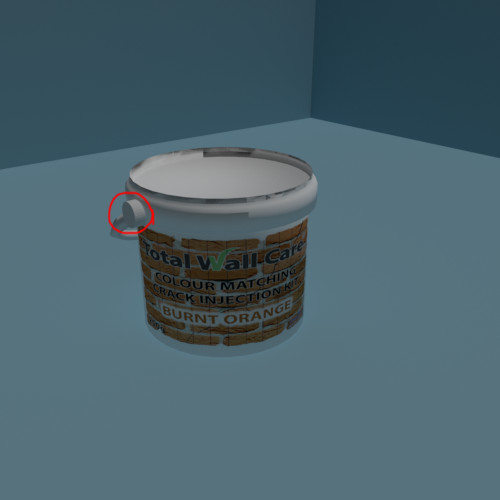
As far as the model goes, it looks like you have a good base for it, but it could help to add more detail to it. Adding things like the ring that goes in towards the top, separating the two top pieces, or the little ring that comes out on the circular part of the handle might seem small, but they can really add a lot to a model.
It looks like you’re using the Blender Internal Renderer. If you can, it would help to switch to Cycles instead. Even though you can get good results with the Internal renderer, it takes a lot more work and knowledge to get them, and in the end, takes about as long as Cycles to render anyway.
It could help to use a bevel modifier for sharp edges. In the real world, really sharp edges like the one I circled are very rare. Adding a slight bevel will make a small bend for the light to catch and look better. To have better control with the bevel modifier, have it set to weight. Then when you are in Edit Mode and have those edges selected, press control E to bring up the edge menu and select “Edge Bevel Weight” to control how much bevel you want on the edge.
If you’re using Cycles, I’ve found using a High-Dynamic Range image works very well for the lighting. The image with the paragraph below shows how to set one up in the world settings. There is also a video series about them here: http://www.creativeshrimp.com/hdr-lighting-in-blender.html You can also get some great free and paid HDRI’s here: https://hdrihaven.com
Also, if you are using Cycles, you can use a node setup like what is below to get an all white background, while still having an HDR image for the lighting. It basically uses one shader branch for what the camera sees, then uses the other one for all of the other types of calculations. You’ll also want to turn on Multiple Importance Sampling, that you can see on the right of the image, with a high map resolution to get rid of a lot of the noise.
When using the Blender Internal renderer, going to the world settings and turning Ambient Occlusion on to multiply brings more shading to the model and makes it look more 3-dimensional.
Another idea would be to do some posts on the Blender Stack Exchange: https://blender.stackexchange.com/. If you ask really specific questions like, “How do you make a plastic shader that looks like this image using the Blender Internal renderer?”, there might be some people who would answer who know how to do that specific thing.
Hope some of this helps! 


