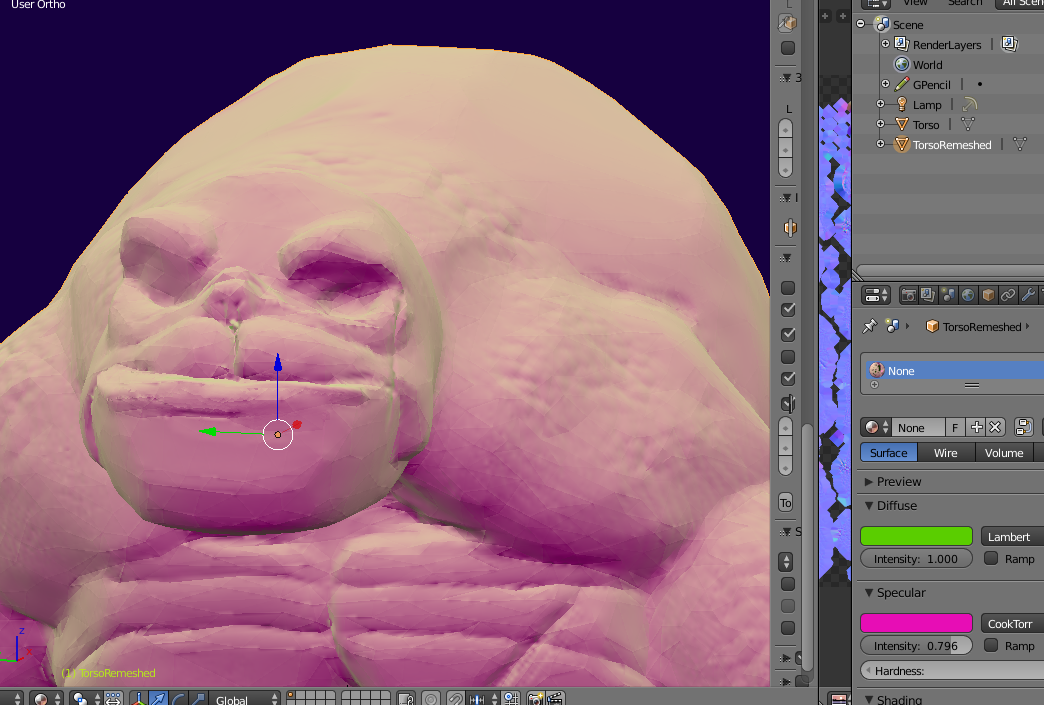
Having some issues. This is my first time baking a normal map. It seems to have come through okay but it’s looking weird on the lo poly mesh. I was thinking that maybe the problem was that the lo poly needed to be set to smooth shading, but I’ve tried clicking the tool shelf button for that multiple times and it’s not changing. Not sure what I’m doing wrong.
Also how do I increase the output resolution for my normal maps bake? I think some of this issue might be caused by how sloppy my UV stretching is. I’m just doing this is a first exercise, I’m not going to be animating it or anything, and it doesn’t need to run in a game engine, just on sketchfab. So if I can just get away with pumping up the normal map texture size then I’d like to do that.
EDIT: So I think I improved it a little by putting a shrinkwrap mod on the low poly and making sure that it completely enclosed the hi poly mesh, and then rebaking the normals. It’s a little better but still kind of wonky.
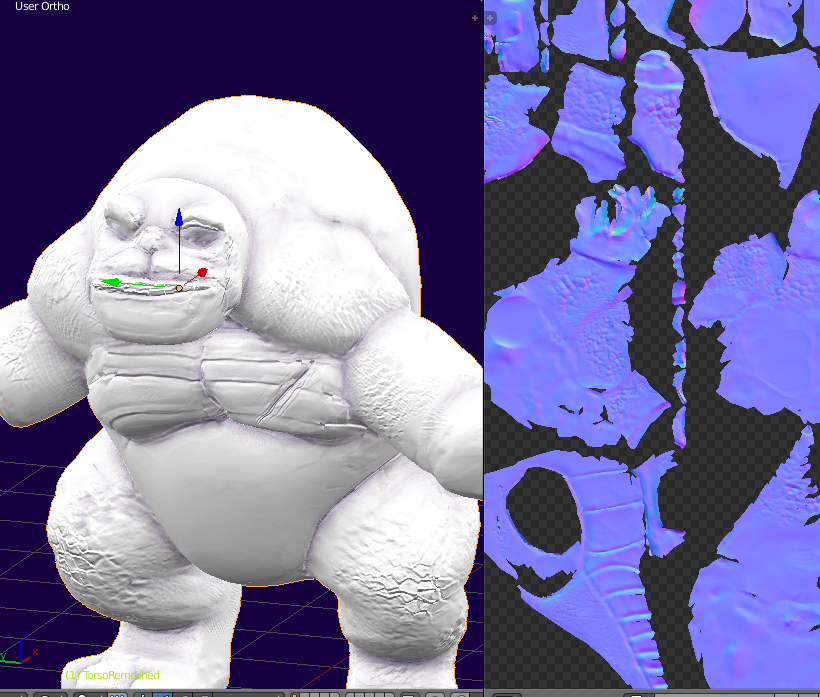
Okay so I found some of the problem. It seems that the remeshing program that I used creased some of the edges to be sharp. So I removed those. I also made the texture bigger when I rerendered it. It seems now my normal texture quality is better overall but now I have much worse artifacting problems? Why is this stuff artefacting like this?
I realize that I’m doing a shortcut here in a way, by using a decimated mesh of my hi poly instead of doing retopo by hand, but I’ve seen plenty of other similar projects that don’t seem to have this problem.
For example, if you look at the decimated mesh for this, using the wireframe viewing feature in Sketchfab, it’s about the same level of wonky bad edge flow as mine. Yet it looks much much better. What’s the deal?
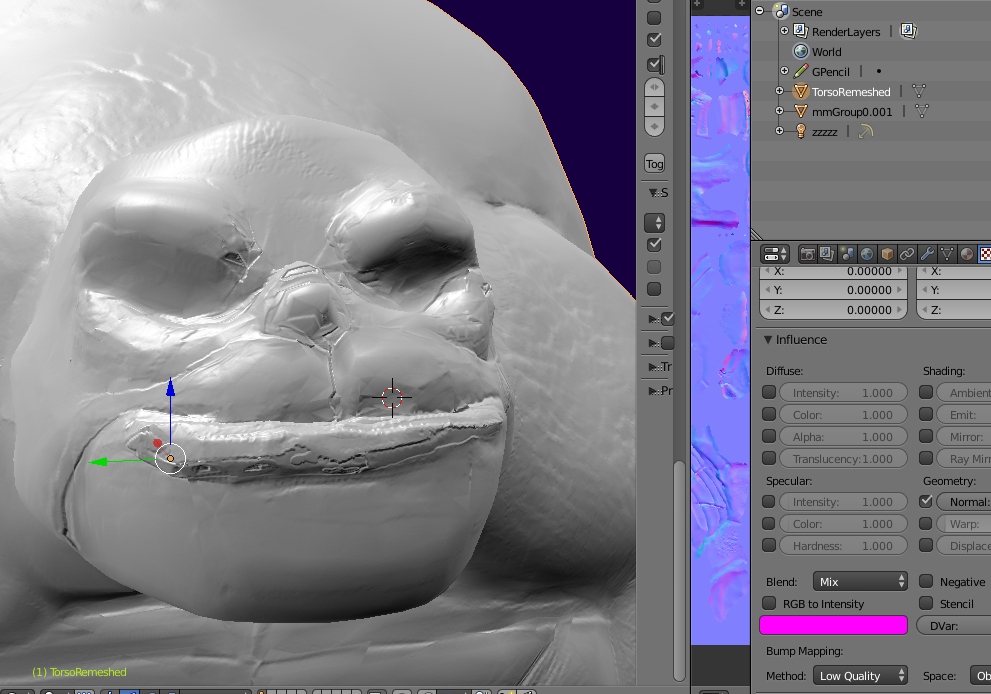
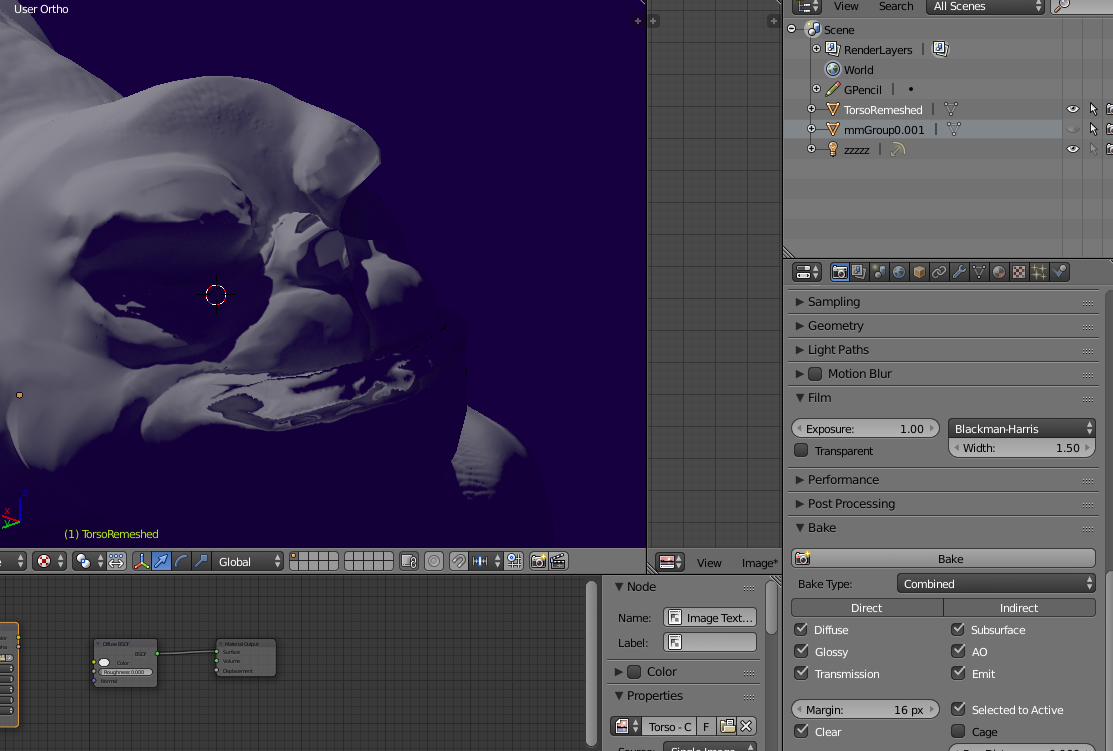
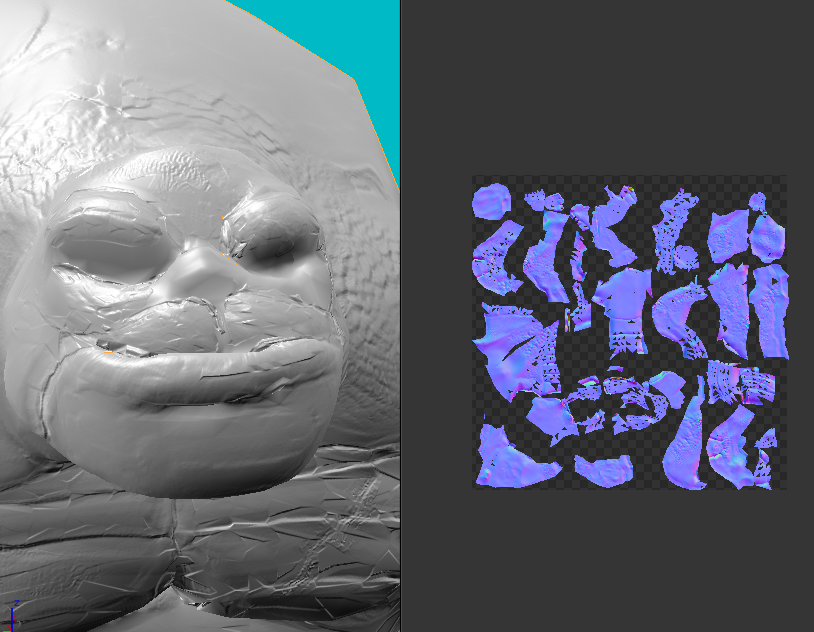
Just did a combined diffuse AO etc bake to see if maybe the issue could be fixed by baking the lighting into the surface and then applying that to a shadeless LoPoly, but this also turns up some weird artifacts. Maybe this has something to do with the LP having irregular normals? The HiPoly part has been checked for manifold issues in Mesh Mixer prior to this process so it should be fine.
Do you have the normal map plugged into the shader node group correctly - e.g. marked as non-color data and plugged into a normal map node before being plugged into the shader? Are you saving the normal map as a lossless PNG to avoid compression artifacts from file types like JPG? Are you baking the normals in Blender or in another program? Some normals don’t default bake to the format Blender is looking for.
Yeah I’m baking in Blender and I’ve tried both cycles and blender render. Also yeah I’m sure the normal map is hooked up correctly. I think the problem might have to do with the UV edges being poorly proportioned and poorly fractured so today I’m going to try and retopo it manually and see if I can get a better output.
Okay so after trying to use this auto decimated mesh and then use Smart UV unwrap, I decided that what I needed to do was just retopo it by hand, and then manually set seams and then unwrap it. Aaaaaaaand… I have no clue why it’s doing this.
I know my manual retopo wasn’t the best. It’s the first time I’ve done one and I was having a lot of trouble getting the add ons I downloaded to work (I tried RetopoFlow which kept crashing (though I was using the github version of it so maybe it’s not up to date), I tried SpeedFlow and Retopo MT but had trouble with those too, so I ended up mostly just using the extrude edge shrinkwrap method.
It’s very messy I know, but I feel like there’s got to be something else going on here?
Also if I put seams, does that help guide the smart UV unwrap at all?
Okay so the uv map isn’t perfect but it’s better. Def makes me see ways I should have done my retopo differently. Kind of would like the ability to just draw the lines where I think I’m going to draw the seams and then connect them all together using the extrude edge technique, if that makes sense. I feel like that would be a pretty good workflow.
Anyway it’s not the best but it’s okay I think. I’m going to try and do the bake again now.
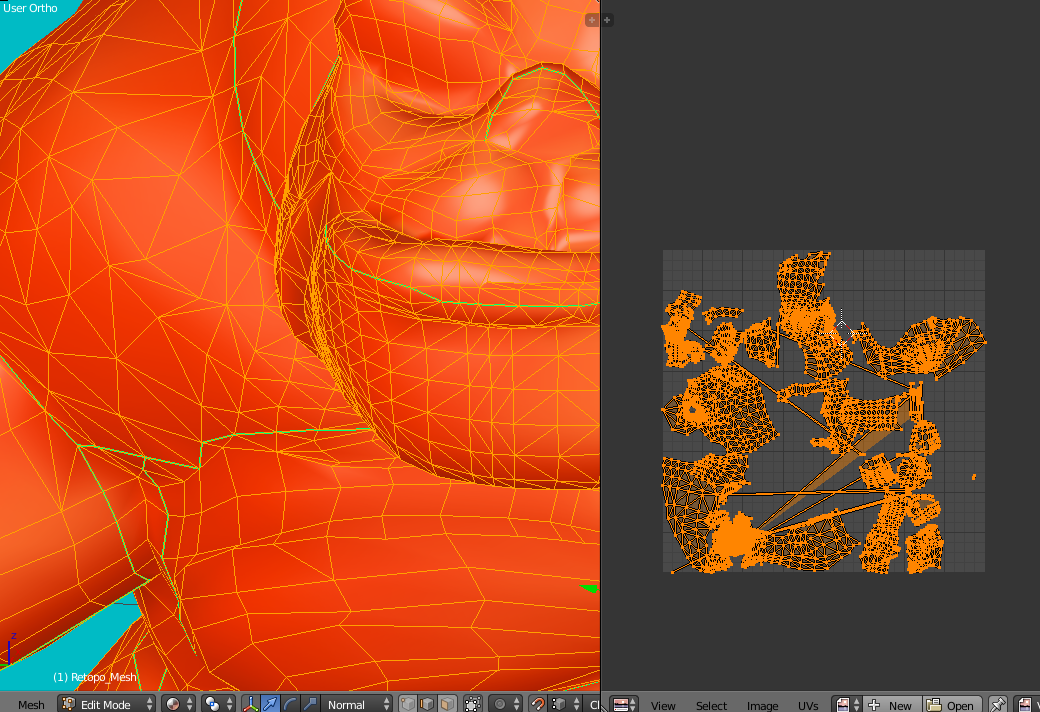
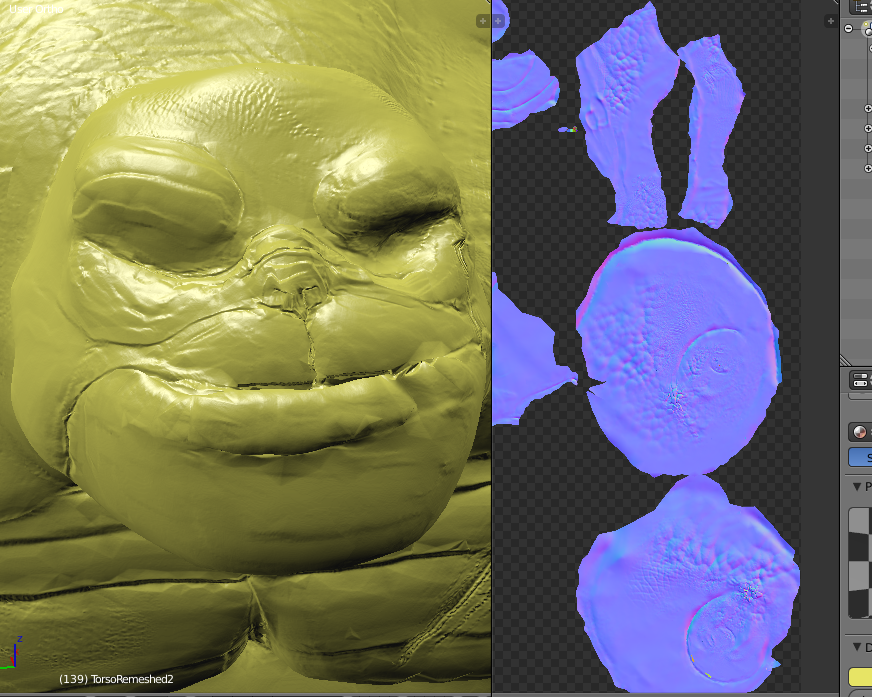
It looks slightly better but it’s still got some pretty big issues. I look at the islands though and I see there’s some place where polygons didn’t render for some reason, and on the geometry that renders as all jagging and stuff. So I think there’s actually something going wrong with the baking process that is messing stuff up. When I run the bake, it progresses until it gets to an error message that says “circular reference in texture stack” and then stops rendering.
Yeah so looking at the UV this is def what is causing the weird normals etc. What causes this improper render etc? I did my retopo with shrinkwrap and even offset it a little, so it can’t be that these are parts where the hi poly is too big right?
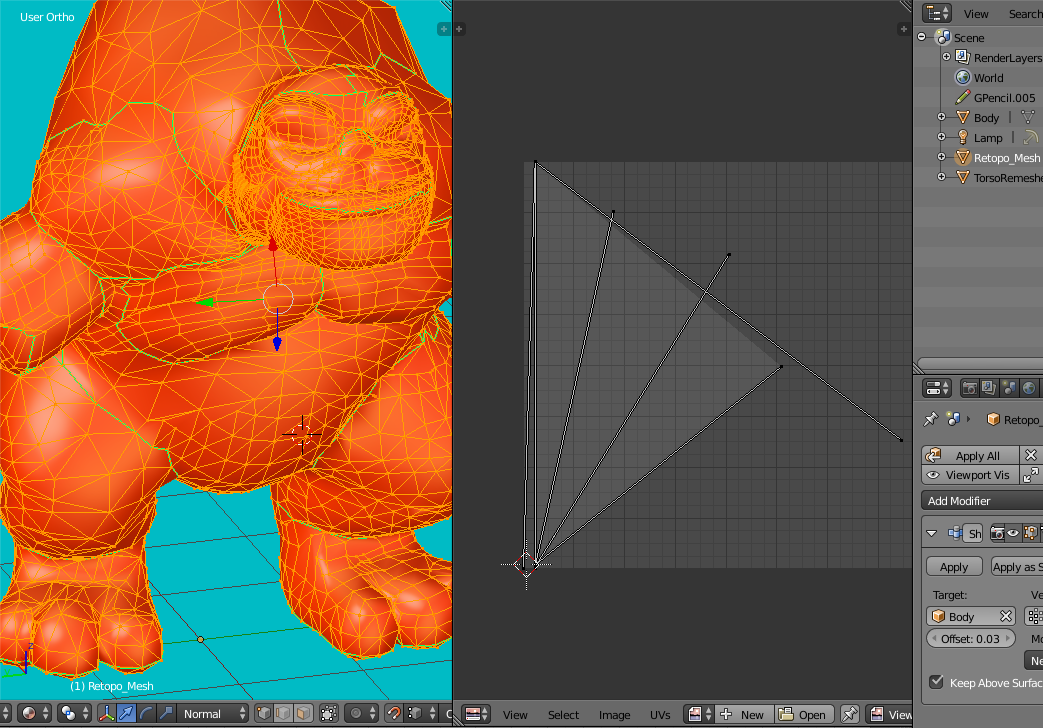
QUick/dirty: Some easy things to fix. ON noth objects, apply the rotation (ctrl a choose ‘Rotation’) on the low poly apply the scale (ctrl a ‘Scale’)
Next you need to apply the shrinkwrap modifer. You have every single edge marked as sharp. edit mode, select all, ctrl e ‘clear sharp’ next I would hit w 'smooth, two or three times, shrinkwrap it again, and apply it. now I would unwrap it. When you mark your own seems you just do a u ‘unwrap’ not a smart uv unwrap.
The real way: learn a bit about retopology and make an all quad mesh, if you are animating you want good edge flow, if it’s static you can do an ultra low “cubey” version, mark your seems, and then subsurf/shrinkwrap , ss/sw , a few times. apply it, unwrap it, done.
To add on Photox, you also have a lots of double geometry on the low poly one. Get in edit mode, select everything (a key), then open the special menu (w key) and select Remove double. (Removed 2989 vertices)
I haven’t uploaded a new version of the blend file. I’ll do that now. Since uploading that version I’ve created my own manual retopo and then shrinkwrapped, seamed, unwrapped, etc everything as suggested above. But the problem now is not the geometry itself, but rather the baking. It’s not baking a large part of the normal maps as my last comment showed, and I’m not sure why. Here’s the new blend file.
Well, the previous comments are still valid. On your new “retopo” you still have doubles, and you still have unapplied rotation.
Here’s the real problem, you say you have a manual retopo, but that’s not really true. You have a lower poly mesh made of triangle soup which seems to be made from a decimate/shrinkwrap or similar. It has uneven mesh density, triangles, and no flow. I really can’t stress enough how much time you’ll save in the long run if you retopo this thing correctly with all (or mostly) quads, and even density and bit of edge flow.
Okay yeah, I mean I know I didn’t do a very good job, it’s my first attempt. But Iv’e similar triangle soups work just fine online and I really just want to finish this project so that I can better design my next character sculpt from the ground up. Like check out this piece’s mesh:
It’s pretty janky. But he got it working on sketchfab and that’s all I’m really trying to do right now. I realize that retopo is an important skill to learn, but I also want to have a level of understanding of this process that I can effectively cut corners when needed. Honestly I’m just confused why the bake isn’t baking properly. As bad as the retopo is the bake works in 85% of the UV, so why all the big holes and stuff!
Also I’m kind of having trouble using the retopo tools. RetopoFlow keeps crashing for me, and SpeedRetopo and RetopoMT have some weird bugs that I’m having trouble getting to work properly. Maybe I’ll try Topogun, but I’m I kind of feel like I’m missing something. The controls on all these plugins seem so fidgety. Stuff snaps to the surface in a really irregular way.
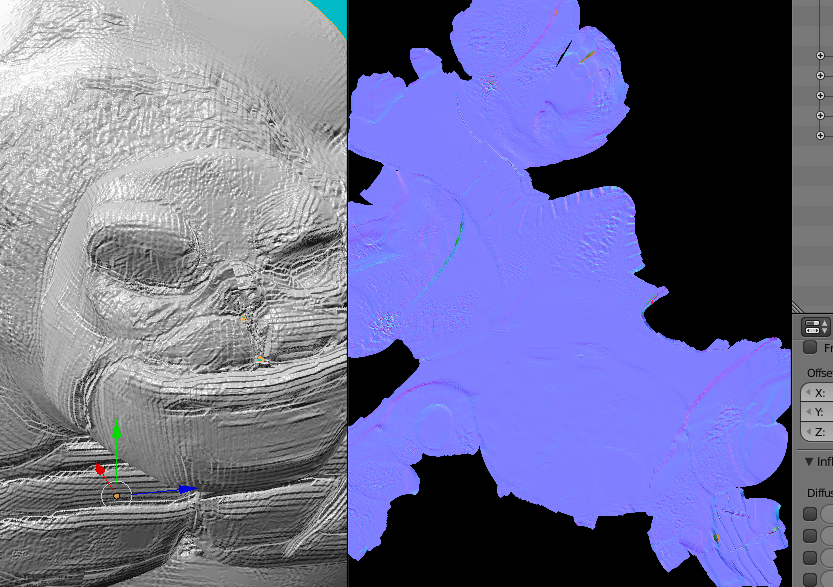
Okay so I took a clean remesh of the torso and then reseamed it and baked, and this time the baking goes fine. There’s some rough parts, not entirely sure why, but I’m going to try and fix those by painting directly on the normal maps and see if I can get stuff touched up in post by hand.
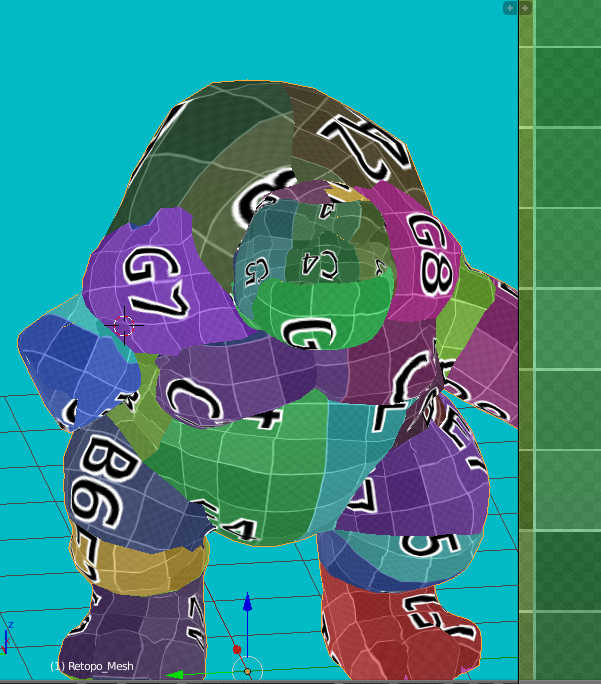
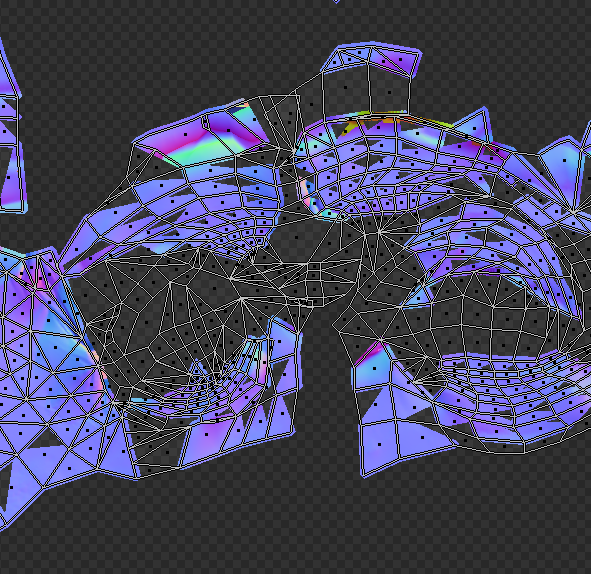
Okay just a quick update. I’m still going to edit the normal map directly using a normal map painting plug-in to fix some of the problems with my last bake, but I thought before I did that I might see what would happen if I used Zbrushes UV Master to automatically unwrap a single large UV. It seems to have worked pretty good with low distortion but when I do the bake, I get this bizarre blockiness. Soooooo… I have no clue why this is happening etc.
Trying to clean up the normal map using the Blender add on I planned on using didn’t work. BUT! I decided to try and use Zbrush zremesher and Zbrush UV Master to do a quick unwrap etc, and it worked! Woo!
Blender should really look into something like UV Master. The concept is pretty cool. It’s similar to the smart UV unwrap, it just allows for you to paint on information about where you want the seams and stuff.