Long story short: I have a blend setup that will mimic the engraved line cross-hatching style that one sees on old, old documents (see US paper currency for examples).
But to make it work at many resolutions, I have to feed it a set of huge 16000-px bitmaps. Each image is of some wavy, parallel lines. Some are thicker. All are perfectly aligned and look like sine waves.
To make it useful, I have to resize or remake those sets of lines, as bitmaps. Otherwise some illustrations will look pixellated.
I’d rather it be scalable… resolution-independent.
Seems to me that I could replace the bitmaps with procedurals, but here are the obstacles I ran into (can you help?):
I need to make a sine wave output from some node, somewhere in blender Cycles. I tried a lot of things on my own. I searched a lot of topics here without finding a simple sine wave texture output yet.
I need to adjust that sine wave node to make the lines thicker without affecting the line spacing.
I need to feed that procedural sine wave texture into Compositing nodes.
I’ve tried a Difference Key node attached to the output of each sinewave texture, but even that is still giving me white patchy areas (even though every sinewave texture is fed through a Diff Key).
something like this ?
replace the emissionshader with a diffuse.emission was only used ,cause its faster to build a preview without the need of light.
at the top image input you can put any picture into it and use the contrast to conrol the desired look.and the less than value for fac control.the image input below is for the wavetexure.you have to unwarp the plane first to make it work(i have projected the image on a plane).or use generated output.
if you use the composite instead,this build should work to,with little modification.
Thanks, pixelgrip, but no, I don’t think that won’t work. The composite nodes and their options are different. I spent a couple hours with your idea, trying to get rid of the white (with composite nodes, not material nodes).
My challenge is to get rid of the white, leaving only black lines and transparency… then layer on another set of black lines. In the Compositor.
ah understand now,the white as transparency.i think that should doable in the compositer.simply use the white as mask and combine the blacklines with an transparent alpha channel (use the white to mask then to make the transparency in the alpha channel)
edit, i think its just easyer.just use the black-white image and use this as alpha mask.(cause its allready black and white).maybe you just need to invert the black and white,i havent tryed(cant remember if black or white is used for transparency maximum)
what do you mean with…then layer another set of black lines?
edit ,i read your first post again.think i understand now.you want thicker lines .i dont know exactly what you means with thicker lines.i guess the sin waves.i dont know how to positioning a generated sin wave exactly over the old ones.its maybe possible with scaling,but i think its not so easy.
you want thicker lines without affecting the linespacing?how should that go?if you make thicker lines than the spacing gets smaller.or you just need more contrast from the lines?
When you want to fake this engraving style, you need to break up the final image into different darkness ranges.
Each one of those darkness ranges will be replaced with a set of lines.
The darker the range, the thicker the lines you’d want to use.
Sometimes, you even want to rotate the lines, for a nice cross-hatch effect.
To combine all these darkness ranges into one image… each one must have a transparent background.
I figured out how to do it with bitmaps, by using PNG files of the lines. Each PNG is 8000 px square, just so it’ll be big enough to fill most renders I might do.
I was thinking it’d be more efficient to use a blender-generated texture, because that would be seamless. At least, it’d be easier to adjust line weights (I think). That’s what I seek: a way to replace these PNG images.
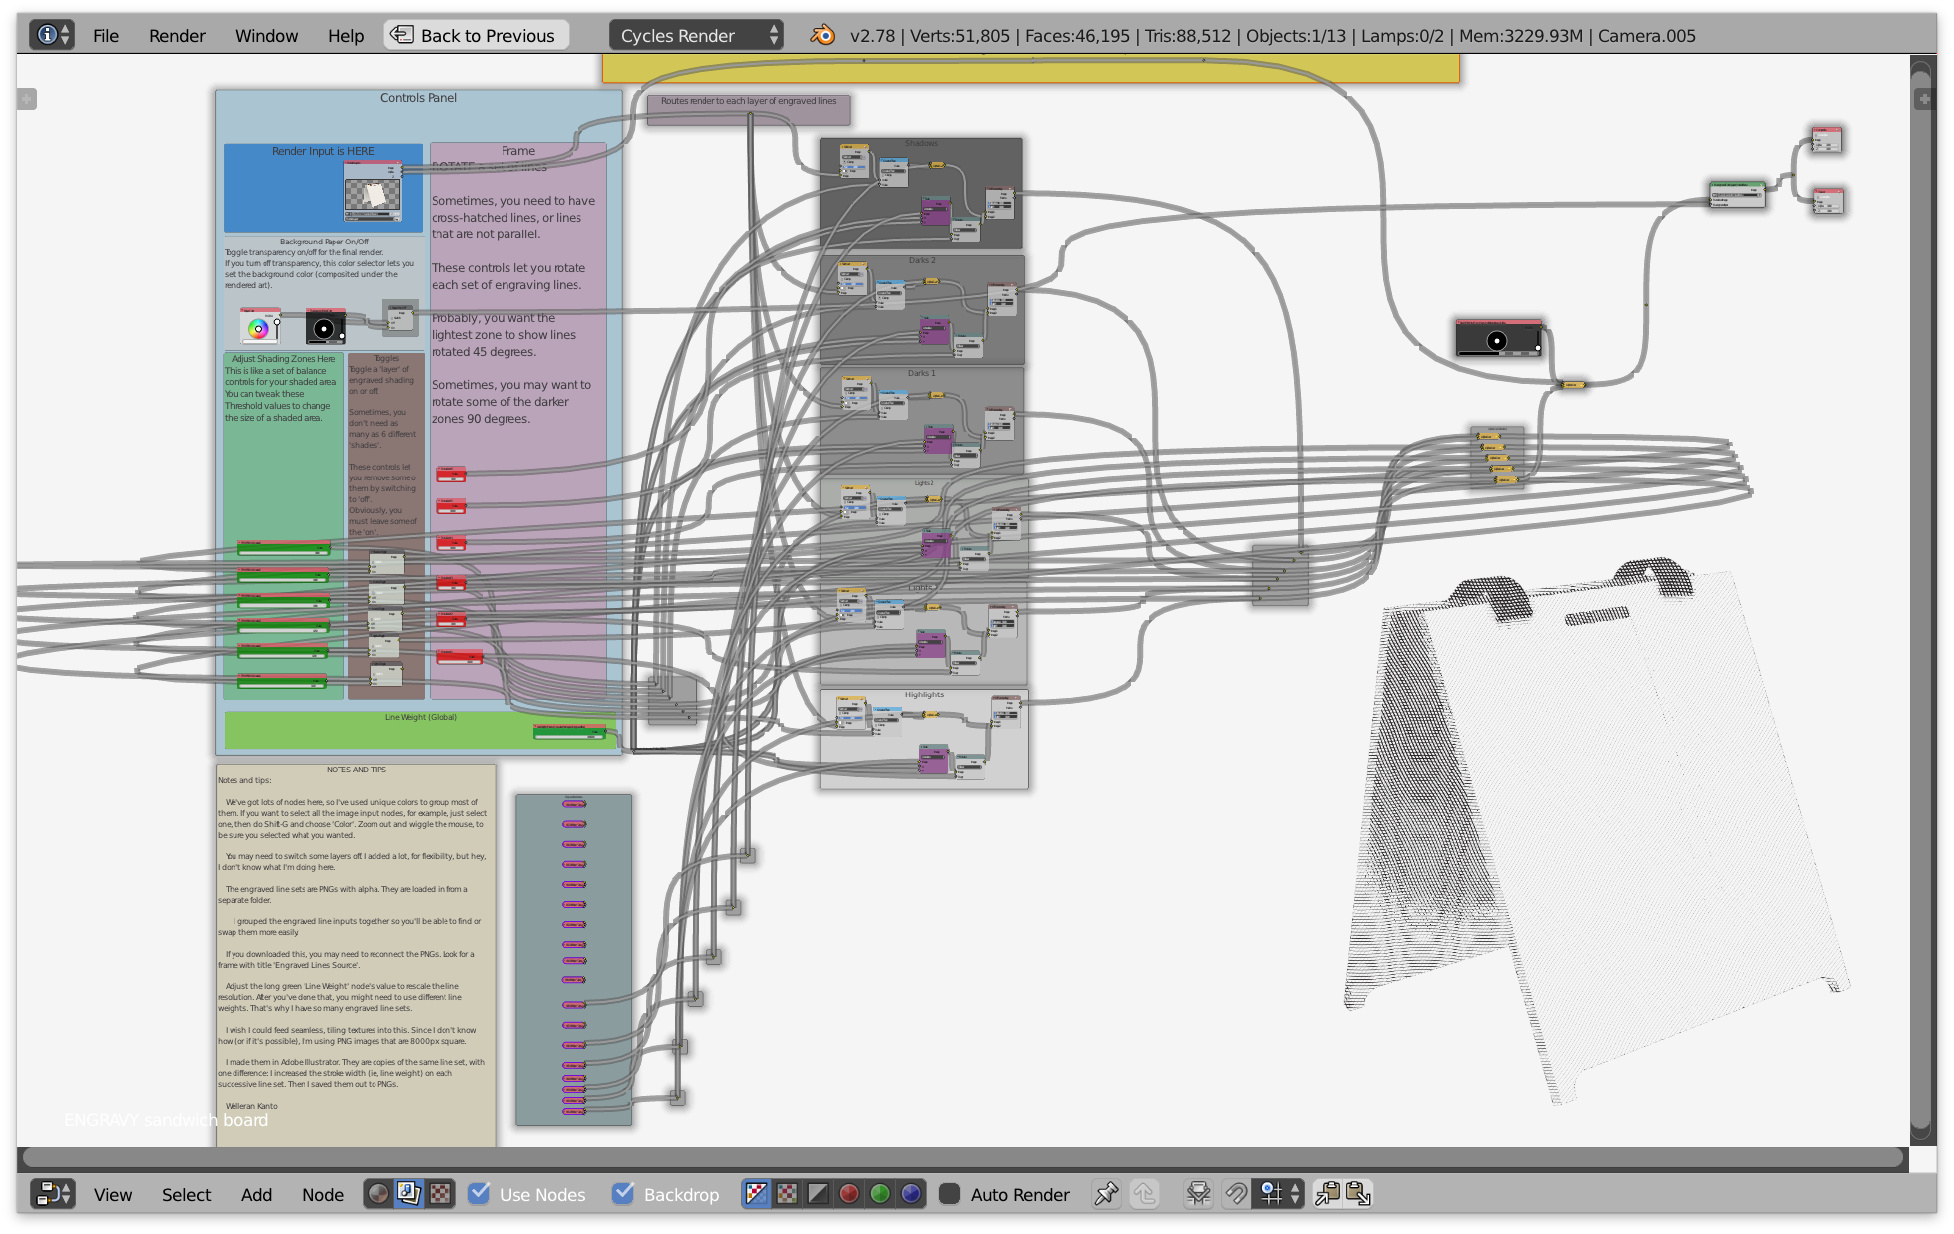
I packed a .blend file with all the line sets I’m using. It’s about 55 MB. Not sure how best to share such a large file on this forum. I cleaned it up today so that other artists might (hopefully) be able to see what I’m doing, because it’s a whacking huge pile of nodes in the composite nodes window… and about 24 PNG files.
I tried some screenshots, but the resolution is too low to see the names of the nodes!
ehm…im not sure what is your goal?i mean,do you want to give a picture (bmp jpg ect) this look.or do you want to give your 3d models this final look? thats 2 different methods (2d vs 3d based).since you posted your compositing nodes i guess the 2d image manipulation.
heres how i made transparency mask ,with less than as threshold control
My goal is to render 3D art, even animation, and see it converted to this style of ‘copperplate engraving’ (I think that’s what one calls this).
I accomplished it first by using bitmaps to provide the lines, and it looks good in this test, but for different sizes of render, or different scenes, I would need to change those images sometimes.
I believe it would be more efficient to have all the necessary adjustments gathered into one .blend file. Until I get a working example to test, I can’t say it would be more efficient yet. Maybe blender would take longer to render an all-procedural setup than it would to render a setup with bitmaps. Maybe it won’t save RAM to use procedurals… but I hope it will.
Here’s a few frames from a nice render test, orbiting a camera round a bicycle.
Pixelgrip, thank you for your kindness. Atartanian, thank you, too.
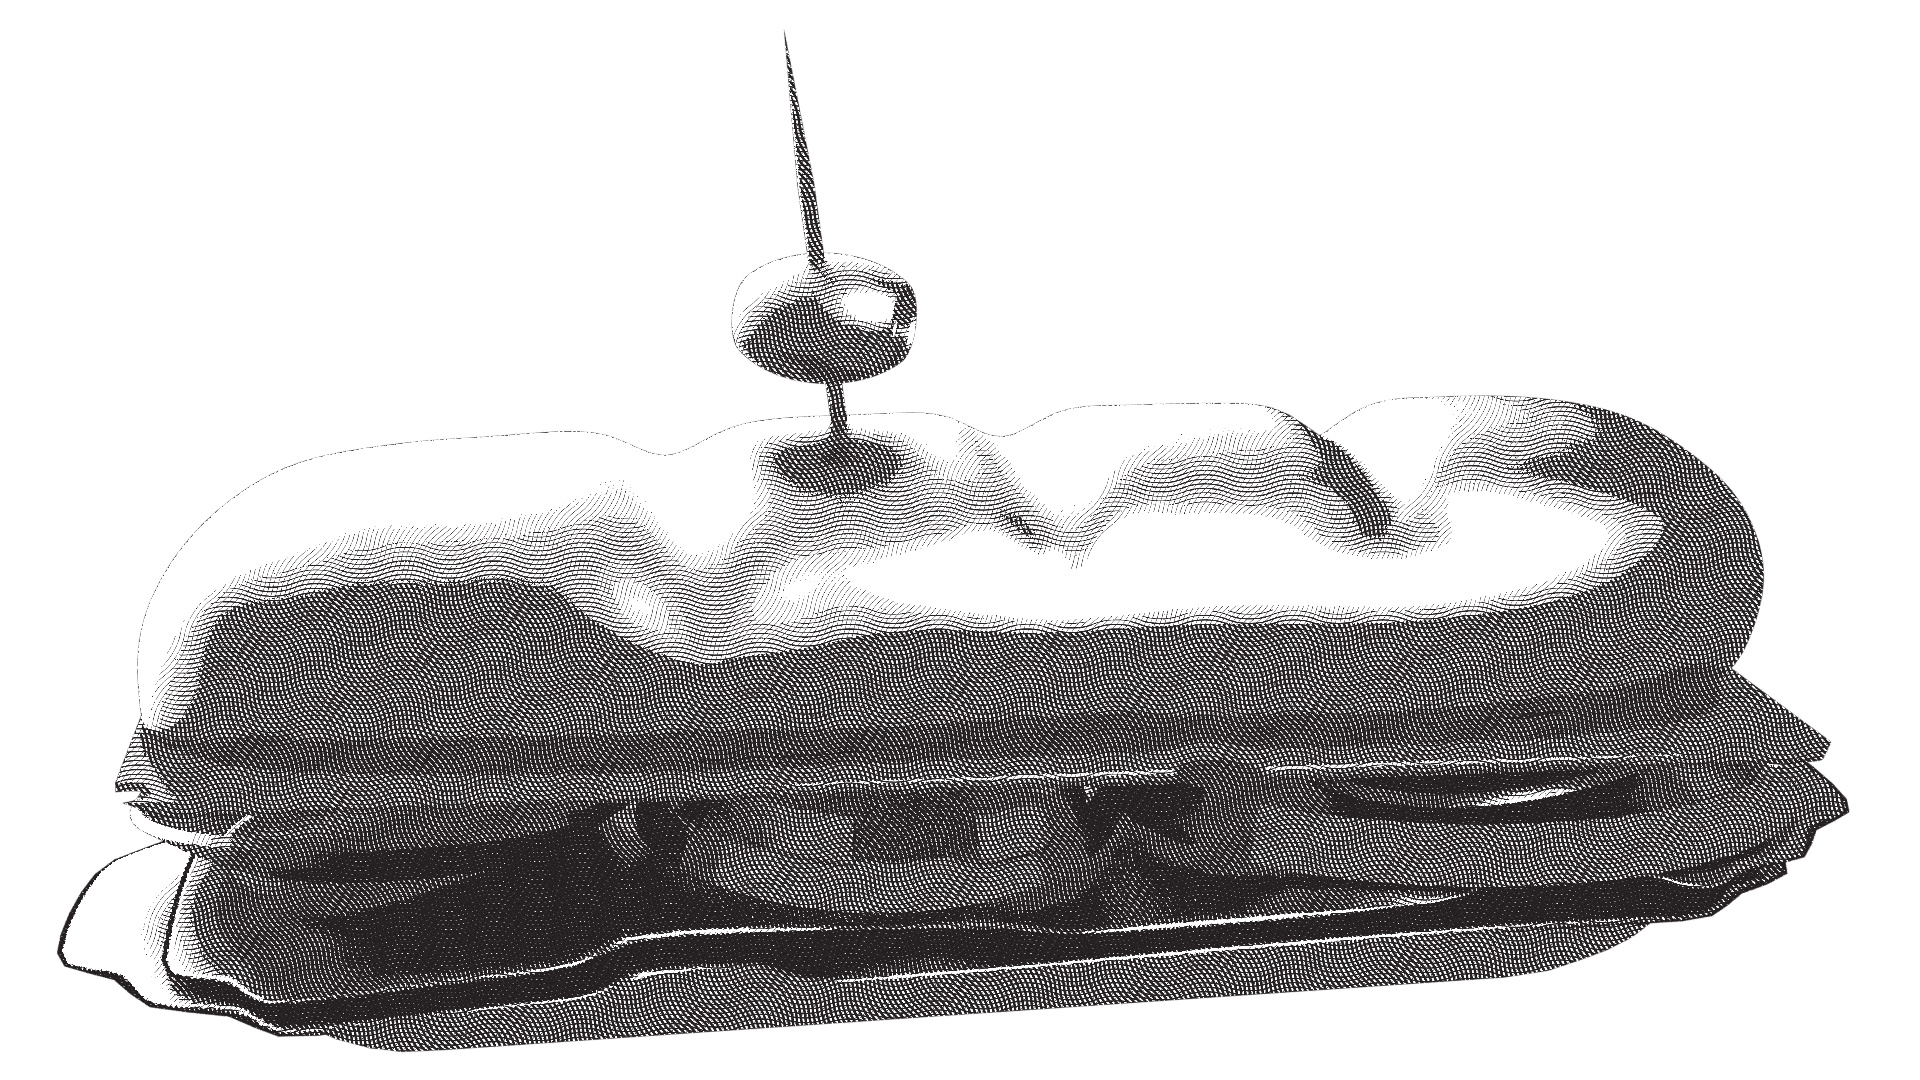
I finished the first project that I needed this look for, and I’m sharing an image of it. I’ve loved this look for so long, I had to try it.
I decided to use images for the engraved lines, because the generated-texture-based solution we’re working on here wasn’t coming together for me in time.
This blender project took a single render, filtered several versions of it to allow a certain range of lights/darks to remain, and then used those lights/darks to fill in the shadows with engraved lines from the images. It was all inspired by a Photoshop tutorial.
If you have this set of images, plus the blender file, you can model just about anything in blender, texture it with materials like the ones included, and get rendered copperplate engraving styles like the attached image, even rendered animations. No post-processing after the blender render needed.
Seems to me you can replace the referenced engraved line images with your own, and totally change the style, too.
I’d like to share the entire blender project, and a folder of images to go with it. I realize I can zip it, but I don’t think I can attach a zip of it here. What’s a useful, popular way to share blender files here these days?
In my image, the bike, watch, food, and signboard are all made in blender and rendered with this style. Some of the food comes from blendswap and is licensed for reuse, as are parts of the watch (I believe). I saved a transparent PNG from blender. I composited that, in Illustrator, with some layers of ‘ink’ colors beneath it to fill in or enhance what I got from blender. I just used the Blob Brush and painted behind the rendered, ‘engraved’ image. It looks a bit like old newspaper and comics from the early 20th century, I hope.
To put the words on the signboard, I used Illustrator to distort some text and shapes to match the perspective by eye.
I promised I would share this with the blender world. I have a packed .blend file that’s about 10 MB (because it includes a set of bitmaps: one for each line weight of engraved lines).
I’m thinking of uploading it to blendswap because I can’t attach it here… OK, I’ve done that, and it’s awaiting moderation. I’ll let you know when it’s available, if that happens.