I looked and looked online, it’s like no one ever solved this question before. So good luck everyone.
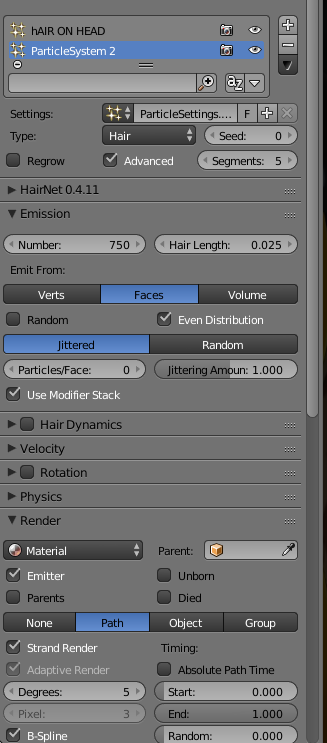
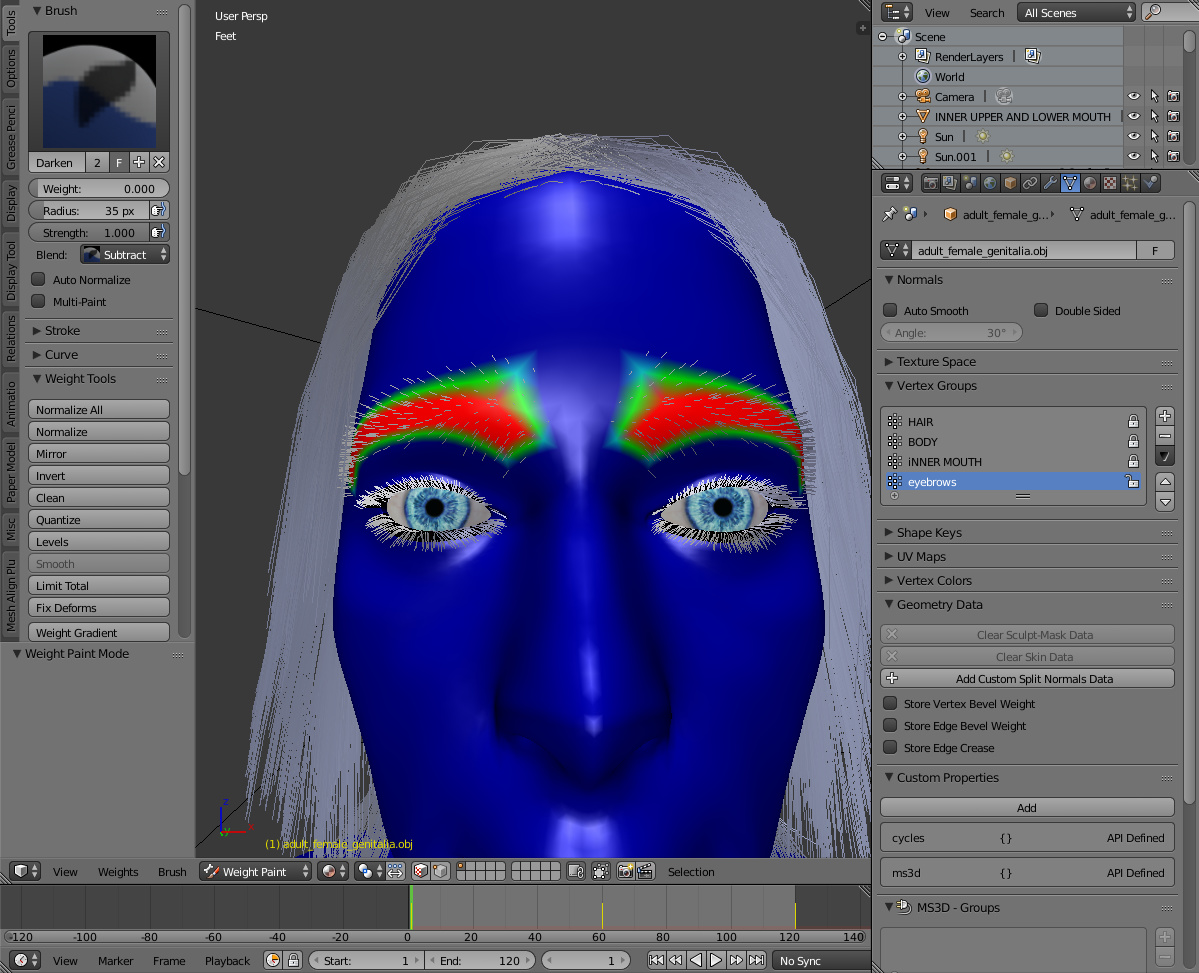
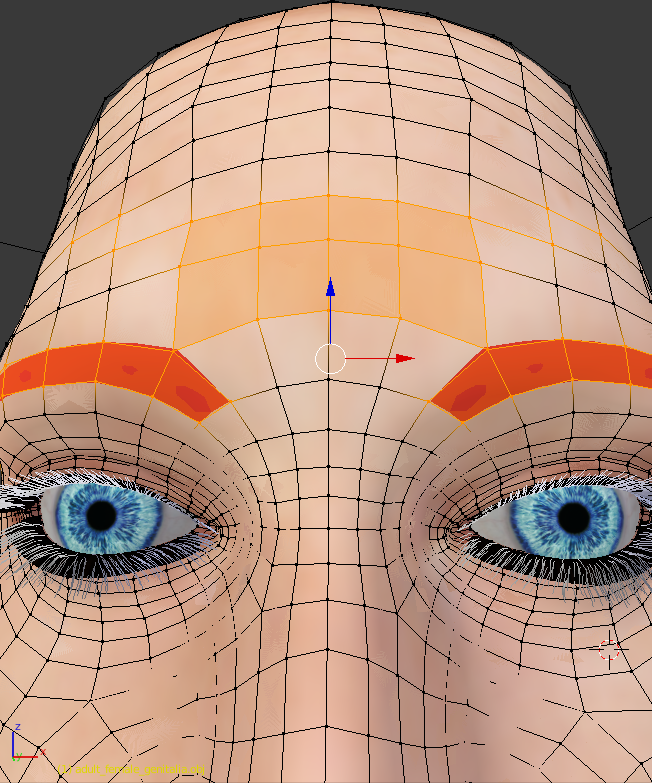
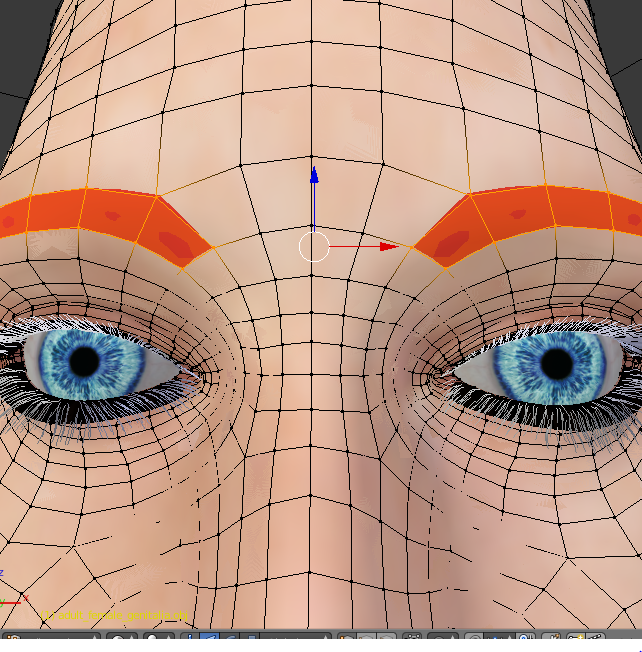
I want only the red area, none of that green stuff. So I can have multiple particle hair systems on a model in blender. It’s either that or finding some way to have particle hair inside the selected vertices. For some reason, they also like to pop up along the fading lines of the selected vertices. Is there any way to fix this without manually cutting hairs from the model? ( I don’t know how to delete hairs one by one, which also would be useful to know.)
Anyone got any helpful ideas? Thank you for your time.
Quick facts:
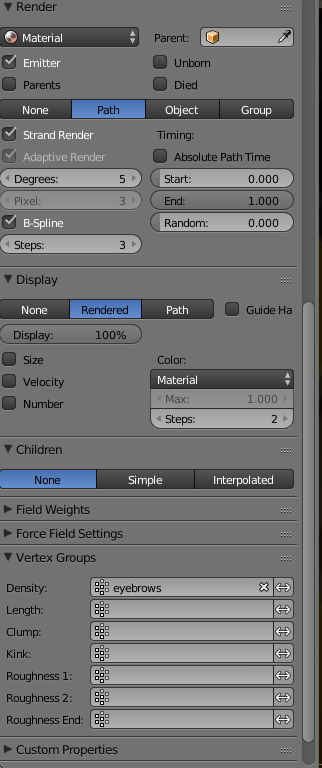
I want the eyebrow hair along the red on the models face. This is the main concern.
Some of the vertices cross over , for example. The Eye brow and the full body vertex groups. The full body vertex group also contains the eyebrow vertex group. It is there so I can apply the skin pic material to the whole body.
No matter what I do I get 3 outcomes.
Fat eyebrow that goes outside my vertex groups. ( maybe because of the fading lines leading outward from the selected vertices.)
Crazy hair all over the place.
Or nothing.
So manually deleting each strand is an option as well.
I just to have multiple particle hair system of different lengths on my model.
Any help would be greatly appreciated. Thank you for your time.
You have a few options, IMHO the easiest, and most flexible is to make a separate modeled object of the eyebrow area (shaped exactly where how you want it) and use that to emit the hair system from. You then parent the eyebrows to the head or to the head bone, so it moves along with it.
As you have it now, the hairs do spill over into adjacent faces, that’s just how it works. It would be nice if the system ha da chekcbox, ‘stay inside vertex group’ but ti doesn’t. You can create a b&w mask, you further define (or limit) where the hairs can emit from. You use both the vertex group and the mask in that case, it goes in the texture area below the vertex group in the hair system.
Save yourslef the headache and just create an eyebrow object, in the particle system there is a checkbox ‘emitter’ which if unchecked will not render the object itself, only the hairs emitter from it.
Not what I was expecting, but thank you. Do you have a video link where it shows what you are saying? And if all else fails, can you teach me how to select and delete certain strands of particle hair?
Update- I have no idea what you told me man, but thank you for your efforts. I solved the problem by deleting all my vertex and particle hair groups, subdividing the problem areas and making new hair groups from that.