Architectural glass : Unwanted cloudy texture, changing frame to frame

'Morning.

I’m making my first attempts to create architectural glass, and am encountering a problem that I’ve tried but failed so far to work out : unwanted cloudy texture in the glass, with the cloudy pattern changing from frame to frame. Please see the attached files (limited to 3 file uploads per post). I would have liked to upload my working blend file, but the file size is way beyond the maximum allowable (and file compression doesn’t bring file size down enough).

I’m encountering the problem with standard flat panes of glass, as well as the curved glass in this scene, and have been trying, over the course of a few days now, various modelling, texturing and rendering options. I’ll try to sum up.

Modelling :
The window panes and window frames are separate Objects. I’ve ensured that the panes do not intersect the frames, as I understand that otherwise that can cause problems with glass. With the panes, I’ve tried minimal geometry, and adding more geometry. I’ve tried Flat and Smooth shading. I’ve tried having a subsurf modifier (at render level 3) applied and not applied. I’ve tried setting Autosmooth, and having Autosmooth deselected.

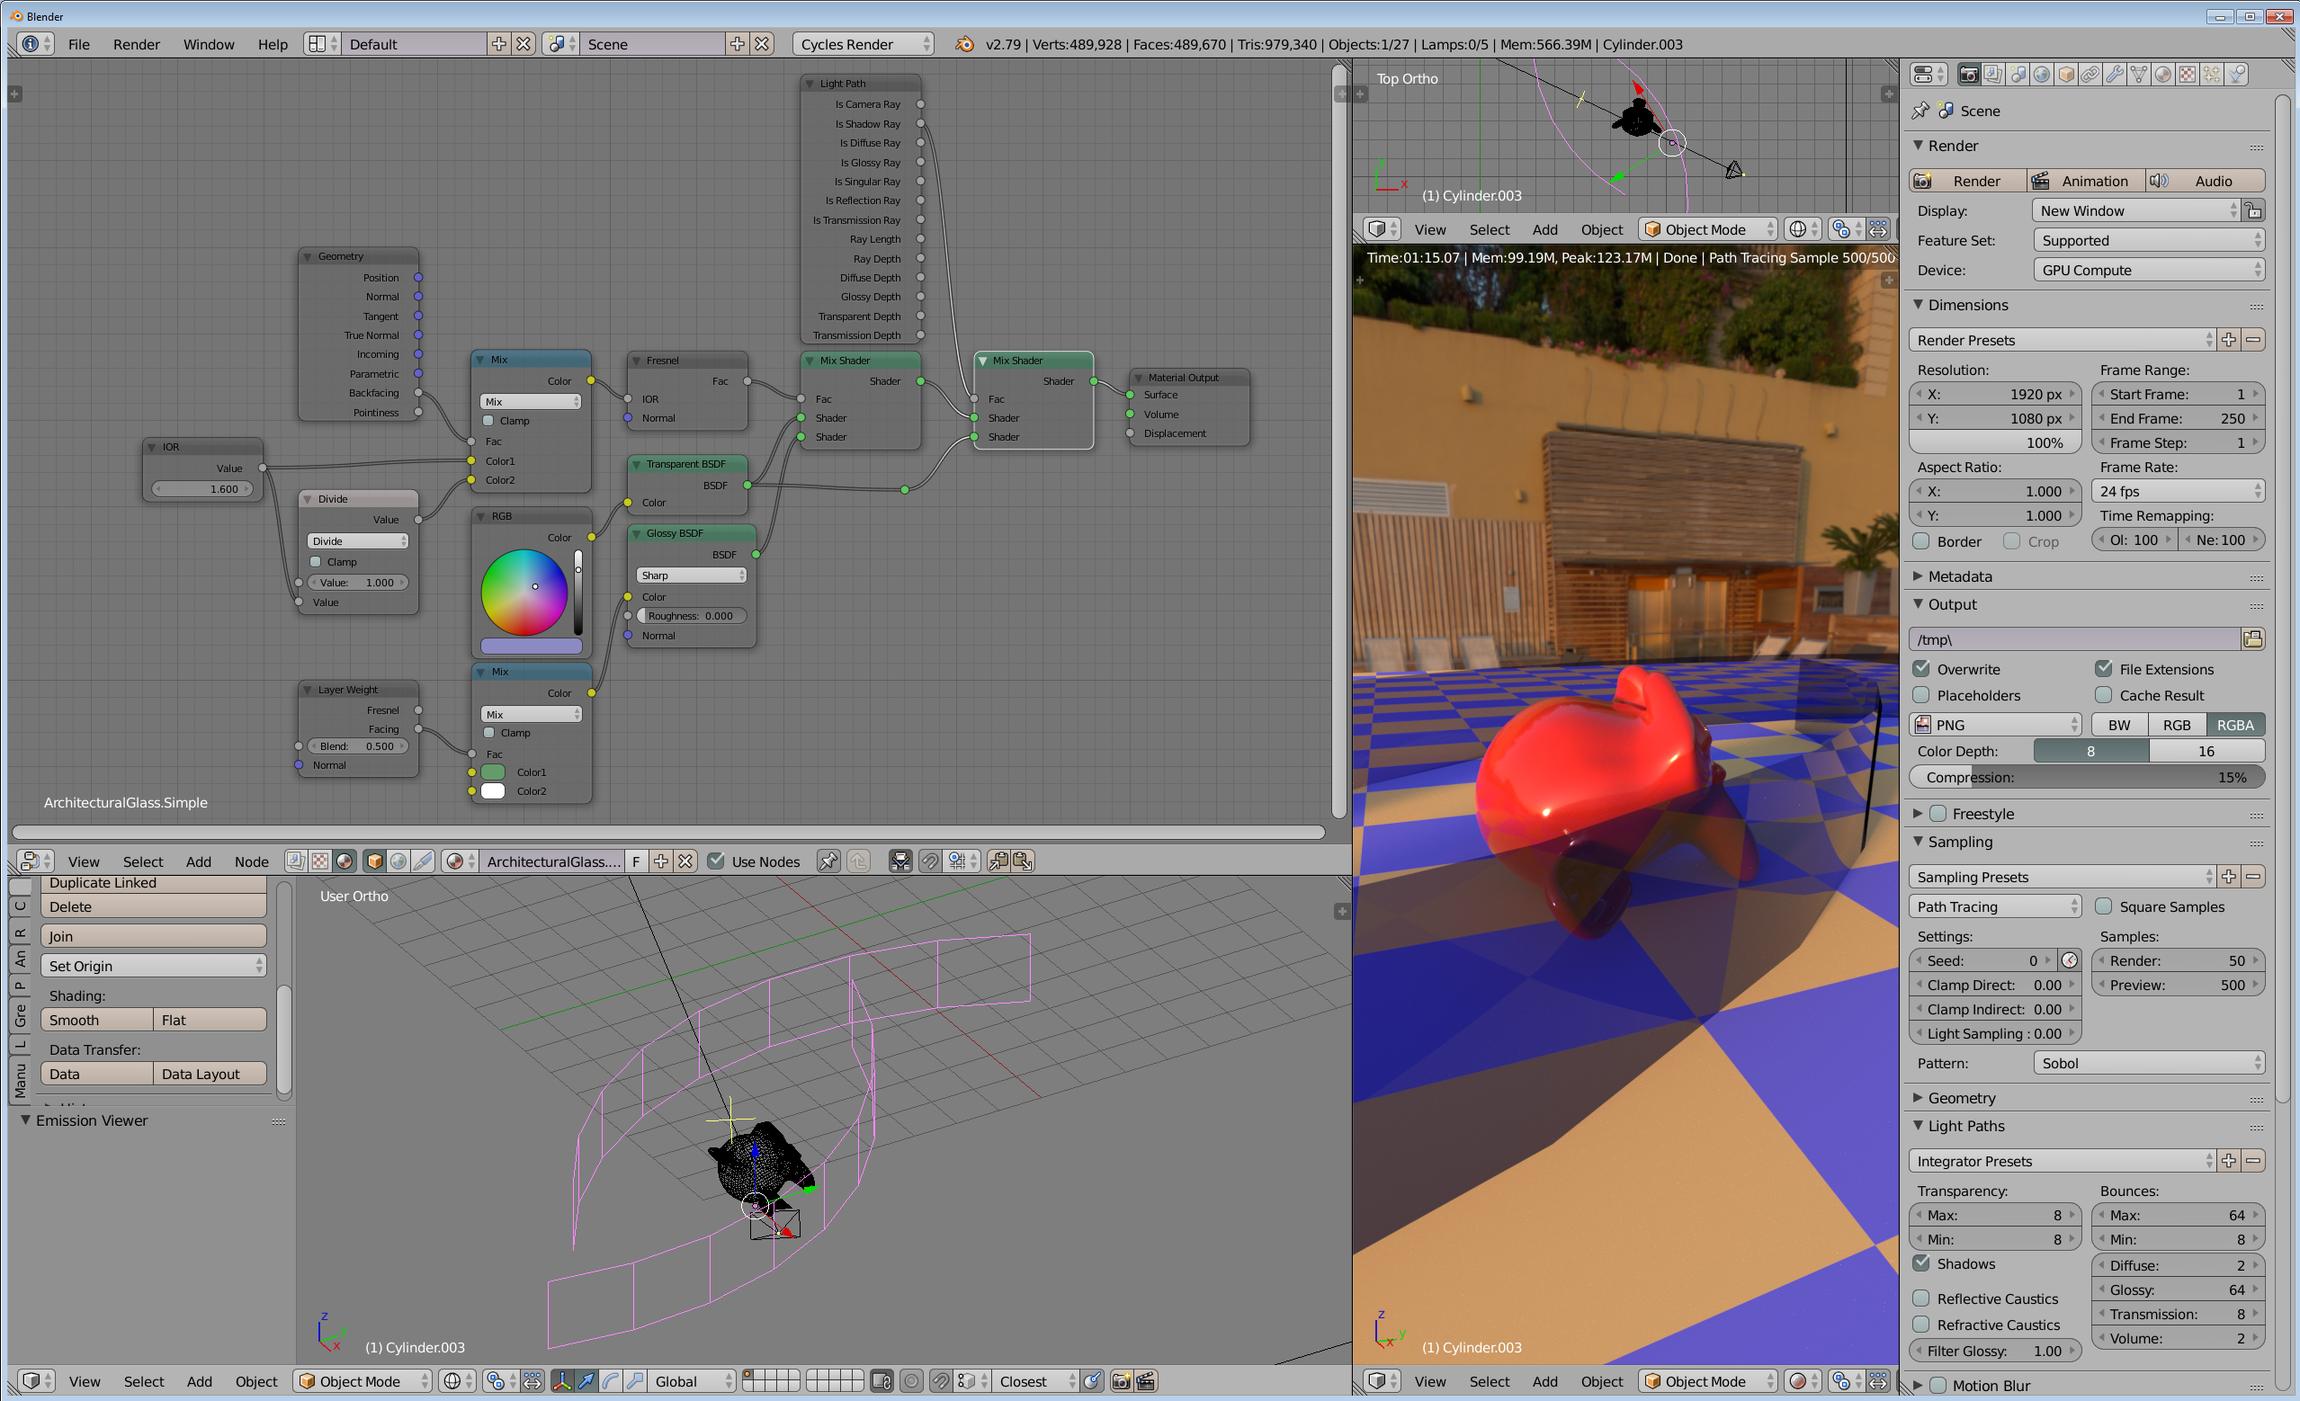
Material node set-up :
I’ve tried several node set-ups, and probably every one of them is fine to use. (I’ve done a great deal of research on web). If necessary, I can provide screenshots…But I suspect node setup isn’t the problem.

Rendering :
I’ve tried a great number of render settings combinations (Light Paths; Sampling). Regarding Samples : the screenshots were created with 300 samples, which ought to be enough for the scene, right ? I’ve tried higher Samples (making render times too long for such a simple scene), but the problems persists (though not quite so bad). I’ve appied Denoise, and disabled animated seed. (Before the Denoise option became available, I standardly had animated seed applied, to help minimise the effect of any noise).

Is this a problem that you’ve encountered ? If so, some guidance on how to dial it out will be greatly appreciated.
Thanks for any help offered.

Attachments


I’d guess this is a side effect of using the denoiser on a render with too few samples.

To quote from the manual:
“For animation denoising can be used, however it still requires high sample counts for good results. With low sample counts low frequency (blurry) noise can be visible in animation, even if it is not immediately apparent in still images.”

Please show the node setup for the architectural glass. There might still be room for optimization.

Prepare a simple test scene to test the material in animation. Better to solve detailed problem with specialized scene set instead of using the whole scene… you’ll better see what you’re doing :wink:

For sharing you can also use hosting services, then link here.
files: pasteall, g-drive, one drive, zippyshare, wetransfer, mega, sendspace, dropbox…
images: imgur, flicker, postimg, tinypic, imgbox, imageshack, photobucket…

@alan2012, I would try 400 samples or even 500 first. Although to be frank I can’t make out this milky appearance you are referring to. Also we have so many ways to make glass now. With the ability to download PBR _ Glass Node Groups and now the Principled BSDF Shader. It’s not just Glass & a Transparent anymore. Maybe lowering the ISO might help. Regardless, I’m liking the building and composition

Although I never use curved glass panes, here is a typical way I would setup architectural glass for use with thin glass panes:


It uses real IOR for whatever glass you choose, but it’s only used for the mixing factor. Since it’s thin you can replace refraction with transparency shader. Proper IOR needs fresnel, which needs to be corrected if used this way. The IOR=1/IOR for backfacing faces takes care of that. The transparency color takes care of transmittance, both what you can see through and what shadow it generates. Modern high rise building glass are often coated for energy reasons, and coating tends to change the reflective color (not driven by glass IOR, here I just use facing). In this example it’s basically how my anti reflective coated eye glasses work (green tinted reflections head on, white at glancing). You may want to drop this step.

If you happen to use real glass with thickness, combined with real glass shaders utilizing refraction (completely overkill imho), make 100% sure that the normals of the glass sides point in the right direction. Preview with a simple fresnel output - no matter the orientation the white should only occur at glancing angles. I’ve seen that now builtin arch addon mess this up for me frequently for windows (or doors?).

For foggy smartglass and such (sometimes used within office spaces), other tricks are needed. I don’t see a reason to use anything else than sharp glossy distribution.

For curved windows, you can see the shading error that occurs if having too little geometry with smooth shading enabled (that black line). Ensure enough geometry in the curving dimension.

I don’t do exteriors, but I would provide the actual sunlight with an actual sun lamp matched to the HDR rather than rely on HDR. Maybe even match the rest of the HDR as well, using a few light planes. Although for indoors, I tend to turn off MIS for anything that I expect doesn’t significantly impact GI.

Maybe upload to youtube a looping section over a few frames and point out what I’m looking for - I can’t spot any frame differences here (I didn’t difference check).

1 Like

Hi again, and thank to everyone for their contribiutions.

My most recent attempts (since first posting re this glass problem) are : to abandon (for the current version of Blender, anyway) the use of Denoise for animations (at least animations of scenes including glass), and to try to dial out the fireflies and noise using some good combination of setting for Filter Glossy, Indirect Clamping, possibly Direct Clamping, Max / Min Bounces, Samples, Reflective & Refractive Caustics on/off, etc. All with animated seed disabled. I’ve yet to hit on that good combination. I’ve gotten rid of the fireflies, but the glass remains noisy. I tried a few things with Bilateral Blur node (new to me), but didn’t come up with a solution that way. I’m back to trying to come up with a good combination of Filter Glossy, Indirect Clamping, possibly Direct Clamping, Max / Min Bounces, Samples, Reflective & Refractive Caustics on/off, etc.

Currently, I just want to be able to render out 14 seconds of animation (camera moving towards building). But I’m currently hindered by this ‘standard’ noise problem (whereas previously, using Denoise, I was hampered by the low-frequency, cloudy noise problem), in the glass.

Regarding the node setup : the one below is what I’ve been trying in recent days. I started the project a couple of weeks ago, and having yet tried the Principled BSDF Shader. In actual fact, I’ve only just installed version 2.79 this morning).

[ATTACH=CONFIG]498489[/ATTACH]

Thanks again for your contributions. Much appreciated. And if I haven’t yet tried them all, I soon will do.

EDIT : The noise I have now is throughout the scene, not just in the glass. It just seems more horrible to look at in the glass.

Also consider the use of compositing, whether you use the same renderer in both cases or not.

I find that many “inside vs. outside” problems, or “star-of-the-show vs. background,” are predictably solved through the use of compositing. In this case, you would construct a separate render which only​ produces the detail that you want to appear “on the surface of the window.” (That is to say, the general appearance that “glass is there.”) Once rendered, the effect can be fine-tuned using a few compositing nodes.

(Important characteristics are also added: for instance, things viewed through glass have less hue and/or saturation. Render them as they normally would appear, then superimpose the glass and desaturate the things that are supposed to be being viewed “through” the glass. At no point are you actually asking any renderer to consider the true effects of glass! “Ingrid, fake it!”)

Yes, you no longer see … after however-many hours … a single image that perfectly matches the final-image that you want. But, now you are in control of the situation without being totally at the mercy of “re-render Hell.”

For instance: say you want the viewer to be able to see some objects that are “inside that front window.” You could construct one render that only produces those objects; a second render that considers only the outside (without interior objects or glass); and a third that expresses only the glass itself. The fourth step is then to composite the three outputs to form the completed picture. The technique can also be applied to situations where different materials in the scene need very different treatment – such as the parking lot or those clumps of foliage. If you’re having trouble getting the parking-lot and the shrubbery and the subject-building and the buildings behind it or next-door all looking right “at the same time,” consider that you don’t have to.

A very common approach – but, an immensely time-wasting one – is to endeavor to model “physical reality,” then to ask a rendering algorithm to consider actual optics. Instead, consider what the final image should look like, then devise the most “shamelessly ‘cheating’” way to get there.