Hi folks. Ever since I started using Blender I’ve noticed that, when smooth shading is on, there’s a strange difference between the the way a shape looks depending on whether or not it’s made from one or more meshes. I made an example file to show what I’m taking about: unseamly.blend (579 KB)
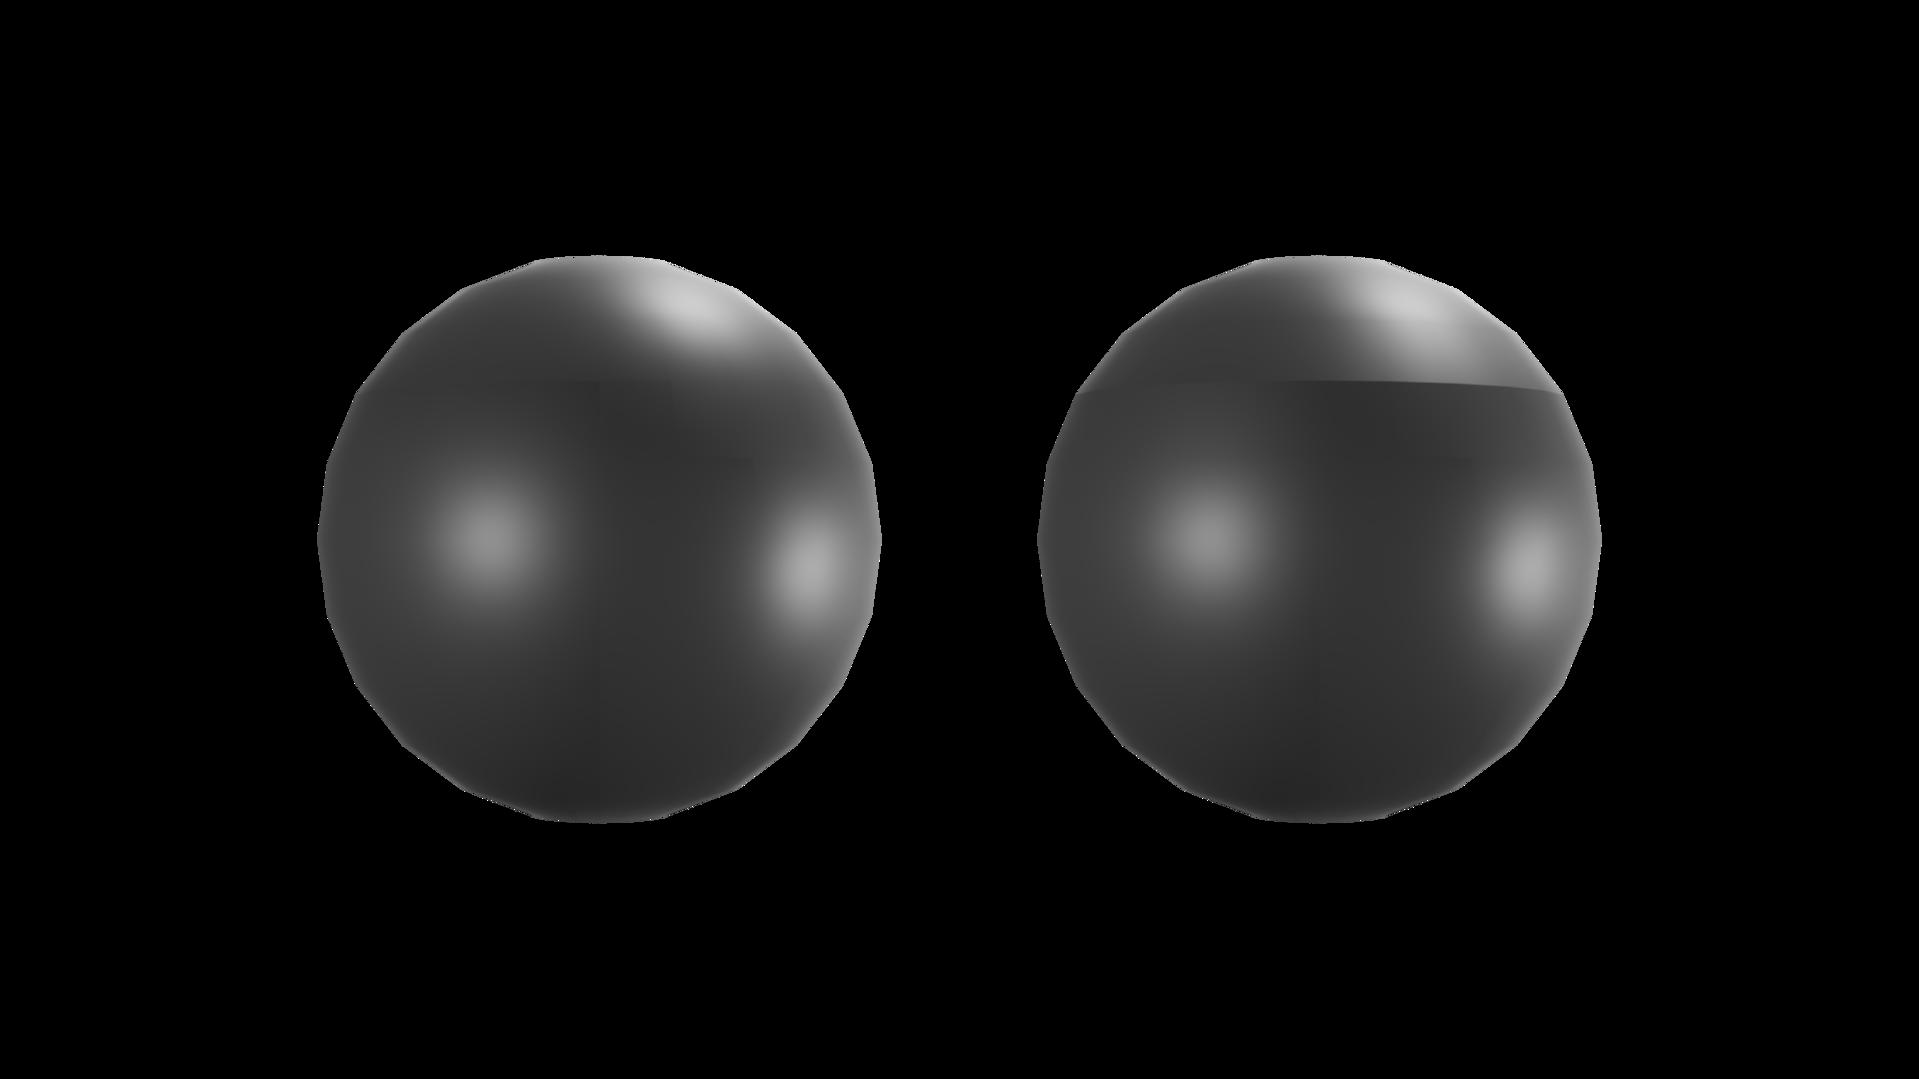
The following imge shows two versions of one basic shape (a UV Sphere (24,12). The first is the plain, unaltered shere with a simple material applied, the second version is the same shape with the same material, but the only difference is that it has had the upper verts/faces separated into another mesh (but it has not been moved or altered in any other way. As you can see, the line where the edges of the two mashes meet can be seen very easily. I’ve been trying to get the two-mesh version to look how I’d expect it to look (identical to the single mesh version) but I’ve been unsuccessful so far. I assume it’s because the smooth-shading function would require the missing geometry to provide the information required, but I couldn’t figure out a way around that. I tried marking the edges as sharp, but that didn’t seem to help, and I also tried applying a transparrent shader to the extraneous faces, instead of deleting them, but that just mage it look like a ghost sprite on an old NES or Mega Drive game.
I’ve been faffing about with this copy data modifier and I can’t get it to make any visible difference at all. I checked the manual page http://blender-manual-i18n.readthedocs.io/ja/latest/modifiers/modify/data_transfer.html which says to make sure that you press the “Generate Data Layers” button before I try to render, but the render always seems to come out the same with the very obvious line between the two meshes.
Like you said, it needs the extra data - with smooth shading the normals for the surface are interpolated values using adjacent faces. When you separate them it no longer can access the normal from the next face.
You can clearly see this if you set the original untouched sphere to flat shading
You are seeing one of those horizontal lines where you have made the split.
In order to hide this line you need to create two faces that have identical normals and place the split in the middle, which can be done like so:
1: select line
2. control+b bevel line
3. control+r to ring cut and use right click to keep it centered
4. separate at this ring cut - the faces above and below the cut have the same normal vector and so the seam is now hidden.
Absplutely awesome IZAC, thanks. I’ve no idea why, but it took me a couple of tries to get it right (probably just somehow making stupid mistakes despite the process having so few steps), but it’s working beautifully now.
I think I still have a similar problem with cylinders when they’re laid end-to-end but, given that I somehow managed to mess up a process consisting of only 4 simple steps, I think I’d better make sure that it’s actually a problem with my mesh rather than a problem with me.