I have tried to add an environment texture to my scene, but in the render the clouds and the sun are quite dark grey and not white. I have set it on “emission”, but still…
The exposure is on 1.00, but how can I understand what is the perfect value to match the real texture? Isn’t there an option to detect it automatically, maybe based on the 100% white areas?
And… Is it the correct approach, to increase the exposure?
I want that the texture emits its light as it is, like I see in some tutorials or renders where the photo is not altered and the object really fits into it… How?
What kind of texture are you using, is it HDR?
You say that you’ve set your environment texture to “emission”, but instead you should use a Background shader. If you can upload a screenshot of your nodes for your world shader I could help you better
Thanks, now…
This is the result but I had already set it as background.
If I increase the exposure it becomes brighter, but is it the right way to proceed? Or are there some other automatic options that do the job with the really correct value of the exposure?

You can’t expect to get much lighting information out of a small JPG. Increase the strength, or get a good HDR, there’s plenty of free ones out there(HDRHaven is your friend). Or is there a specific reason your using that image?
Honestly, .jpg is not HDRI, no matter what the filename claims.
It’s true, you can get light from a jpg, but you will never be satisfied with it. As has already been suggested, take a look at hdrihaven.
Thanks for the suggestion but I have still some problems. I have used now a “.hdr” texture from HDRI Haven https://hdrihaven.com/hdri/?c=nature&h=sunny_vondelpark
I see how in the videos of the others on YouTube it works without problems, it’s perfect. But in my case it doesn’t do the job.
I have also tried the suggestions from a video of Blender Guru enabling Multiply Importance (that was already enabled), and trying adding a Multiply and an Add math node to define the strenght. No results (it’s even worst).
Here some attempts variating the strenght and the exposure between 1 and 2. But as you can see I obtain those yellowish sky, or, a too high light to achieve the white light. There is something strange. None of them is equal to the original hdr image… 
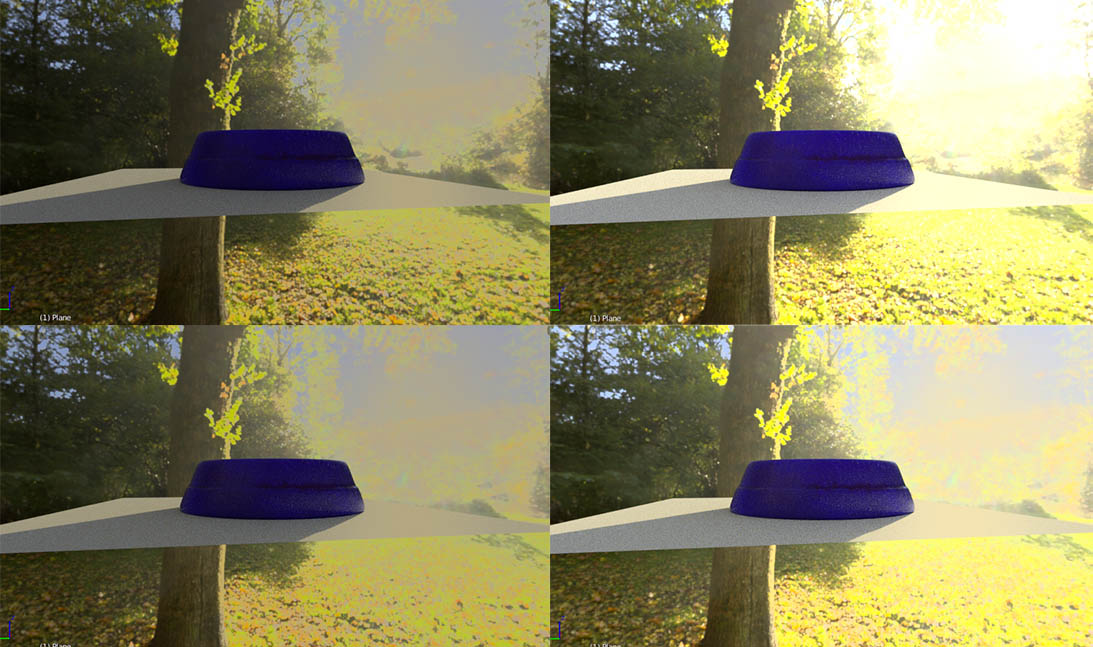
Well, the HDRI is very autumn’ish. Of course it would be very yellow, brown, red’ish. Most of the “sky” and ground is covered by an autumn tree canopy and fallen off leaves. You could try to desaturate it maybe? Or use another HDRI.
However, what is your colour management set to do? Even if the top image is a jpg without any extended dynamic range, it should still probably look white at strength 1, while yours look dulled down.
If you share the blend file, it’s easier to spot any mistakes.
There’s nothing to stop you creating two background nodes, mixed with a seen by camera factor. Set the visible one to a strength of 1, and the other to what you need for light.
You may want to add seen by camera and seen by reflection together.
Can’t post a sample setup. Don’t have blender here.
Hey thanks I didn’t knew that I can add 2 background nodes.
In the meanwhile I have found the problem!
I had accidentally increased the values of “Clamp direct” and “Clamp indirect” on the Sampling panel…
I have never used seriously the Render panel so I wasn’t able to understand the meaning of all the bars and buttons and I took a while to find out the fault of all of this. 
Sorry for the time that I have stolen to you but thanks anyway for the additive suggestions!