Hi everyone,
I´d like to simulate an image been projected in a screen. I´m using Blender 2.79. I can use a spot light, but the projection limits will be always circular… How to make it quadrangular?
Thanks in advance.
Hi everyone,
I´d like to simulate an image been projected in a screen. I´m using Blender 2.79. I can use a spot light, but the projection limits will be always circular… How to make it quadrangular?
Thanks in advance.
Do you need the lightbeam? Maybe you could just add the projected image/video material to the screen object?
Hi, northern87. I don´t need the lightbeam. And I already use this way to apply an image as a projection result, but I´d like to simulate it using a light. But ok. I think I won´t find a way to solve this.
But thank for your reply.
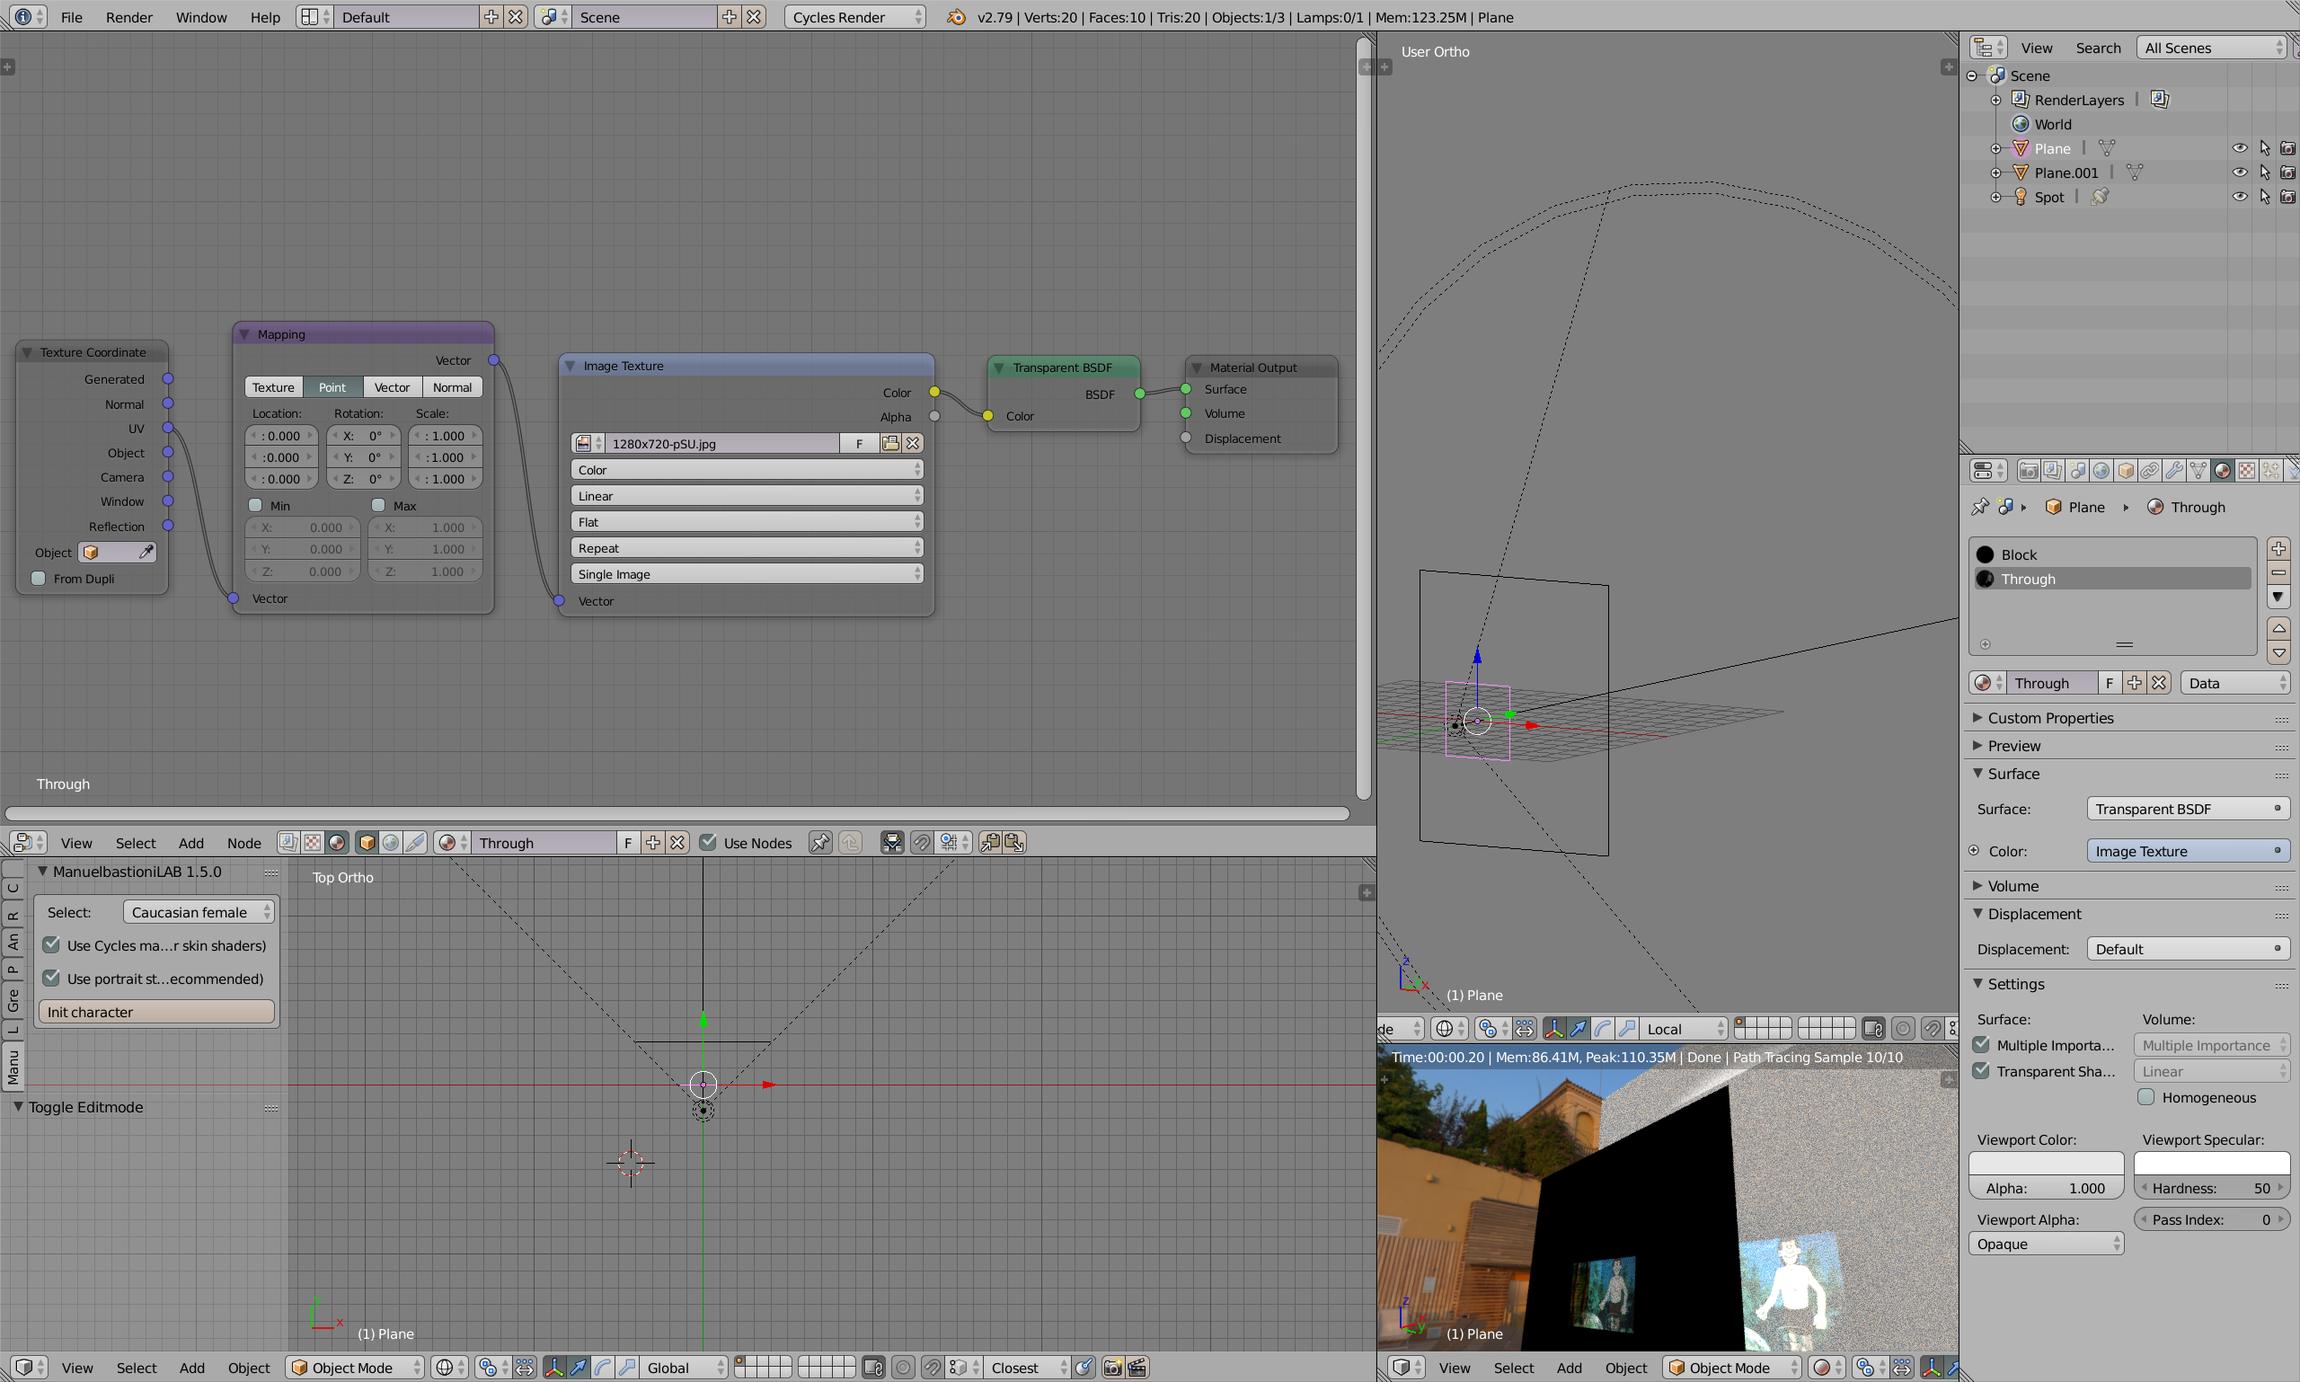
Use a white spot light with a transparent plane in front of it to cover the whole cone. Then apply a texture to the transparent shader. Make sure the block is big enough to actually block, the cone is wide enough to pass cover the image, lamp brightness is high enough and size set to 0:
The downside is you have to use a transparency node, and can be frustrating to control if you want to fake a screen response. We see shadow problems during the CAD setup phase, so if rendered I know shadows won’t be an issue. When doing projector screens I don’t care for shadows so I just map the image to the screen but will have to calculate for inverse square manually (bigger image - from a reference size - gets darker, fast).
If you need a visible rectangular lightbeam (I always use white, untextured), use a cube shaped to a pyramid with top at hole and bottom covering the image. Set the object origin to pyramid top (hole) and use object coords to drive some emissive volume setup. You can only to a limited effect simulate many levels of glass on a single “glass’ish” surface due to negated normals going black.
If you want to simulate how a TV screen illuminates a room, you could just use an area light using Geometry/Parametric to drive its texture coordinates. Not suitable for a focused projector light though as it emits in all directions and only close objects would appear “sharply lit”.
CarlG, man, I will test your workflow. It seems very interesting. Thanks a lot! I´ll return to tell what I found.
CarlG, it works perfectly! Tank you, very much, man!
I forgot to mention, but another drawback is using a infinitely tiny point source on the spotlamp, something Cycles tend to not like very much. If you can afford to set it up and doesn’t cause any issue, such as when “projecting” onto a main wall, you’d probably be best so set the spotlight to 0 or 1 bounces, with an area light on the wall causing the indirect bounces.
How can I set the bounces for an individual lamp?
Object data for lamp (where you set the lamp type). Size, max bounces, cast shadow and multiple importance.
If it were me, I would simply put the “movie” as a suitably animated texture on some convenient plane, maybe show a brief image of a movie-projector so that the viewer understands that it is there, but completely forget about a “cone of light.” Movie houses are not “smoke-filled rooms” anymore, so you never actually see the light-beam in the air. I think that it adds nothing of value to imitate it, although you certainly can.
A simple, brief, establishing-shot that shows the presence of “what is clearly a movie projector” will be enough – and maybe even that will prove to be unnecessary. If the viewer groks that “it’s a movie,” they probably don’t need to see the projection room at all – unless there’s a bad-guy lurking there, or somesuch.
I have become a strong advocate of the notion that you should “cut your movie together first,” as a way of determining what actually does and does not need to be modeled and rendered. The timing and pacing of the show is most-important, and very often “less is more.” You can crank-out “OpenGL Preview” renders very quickly, with nothing more than a properly-sized box to stand-in for the projector, until you have determined that you actually need it and, if so, how much of it you actually need.
And if you do it like that (that’s how I fake it myself, I never bother “simulating” it because I know from CAD data that shadows won’t be an issue), just make sure to “Add Shader” onto existing wall material using a custom UV containing (project from view, bounds) image location and masking out the brightness. In dark scenes you’ll want the wall material to show and you want to let it respond properly to ambient light. The only thing I’m “simulating” (inverse square law using math nodes) is increased image size causing a darker image. Only reason for doing it the way I’ve showed above is to satisfy your own curiosity - can it be done?