I keep thinking I’ve got the hang of it but then as usual another issue comes up. My problem on this project and like others is, making hard edges without defects on corners. Besides running an edgeloop around the entire object i see no way of achieving this. I would accept a few tris over the deformations the edgeloops cause, but i cant even figure that out.
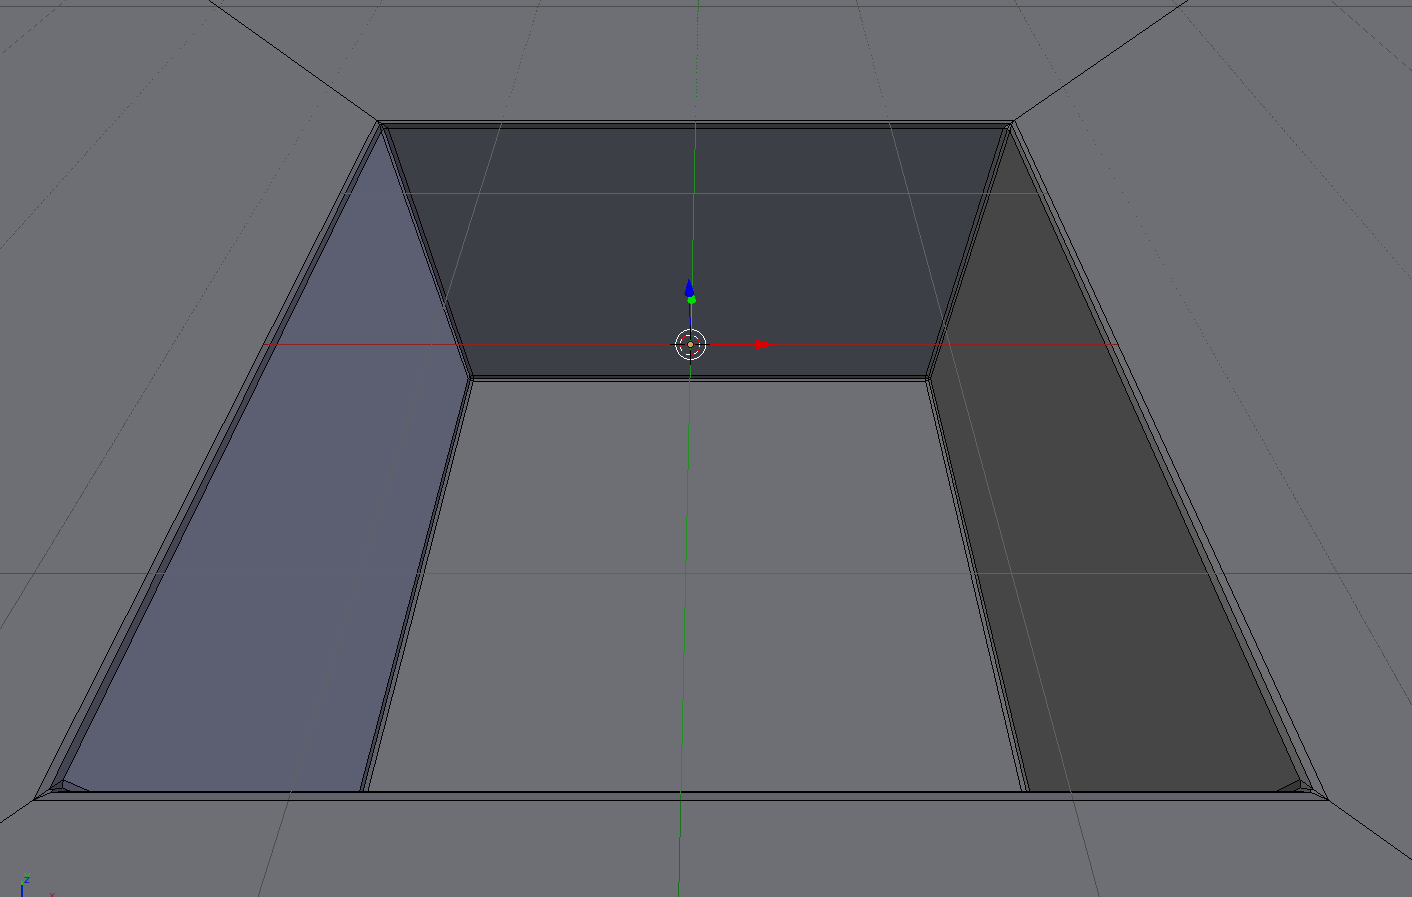
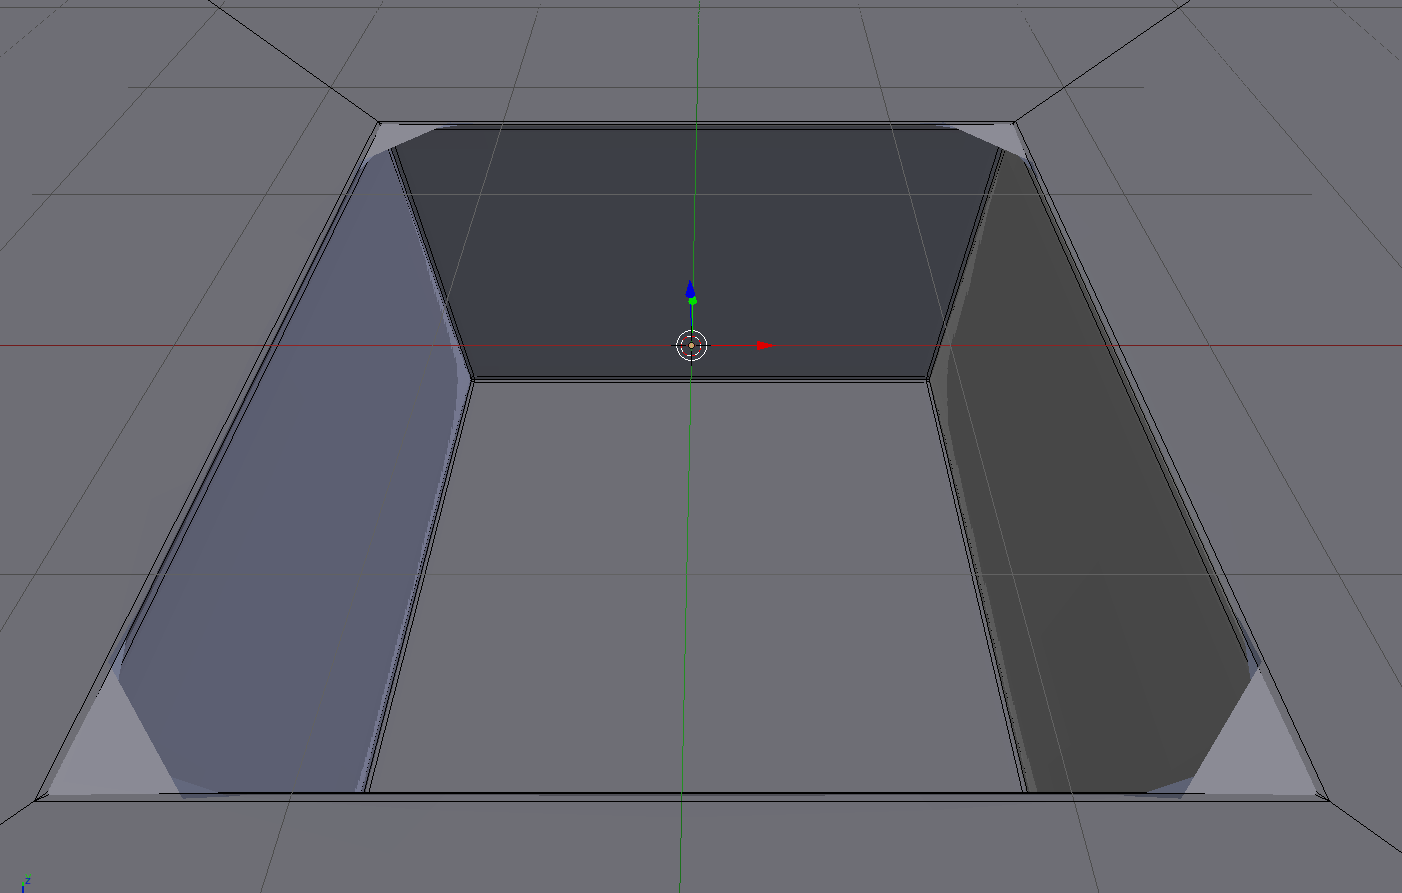
I’ll attach a .blend of the problem, and here are a couple photos of the issue.
So it looks like your current edge hardening for subdiv process is selecting all the edges relevant to the current shape and using a bevel, which is fast and thus incredibly seductive, but in cases like that inset box’s corners where you have the 3 edges selected to bevel but there’s 2 more edges continuing off from the inset box over the rest of the surface you’ll end up with some funny triangles, and subdivision causes those to balloon outward into the inset box. If you bevel all the edges connected to it with 2 segments you’ll get quads and the edge loops will continue out out of the inset box cleanly and it’ll subdiv just fine.
If it’s a small detail there’s always creasing, might not need shiny smooth edges on things you won’t see up close.
Maybe we’ll get a bevel shader in Blender next year and this whole thing will be moot.
Yes, exactly. The inset would be perfect if i had those extra verts, but i don’t unfortunately. If I’m understanding you correctly, wouldn’t that leave me with ngons where those connecting edges end? Which could be solved by continuing it like an edgeloop, but like i said that almost causes more problems lol.
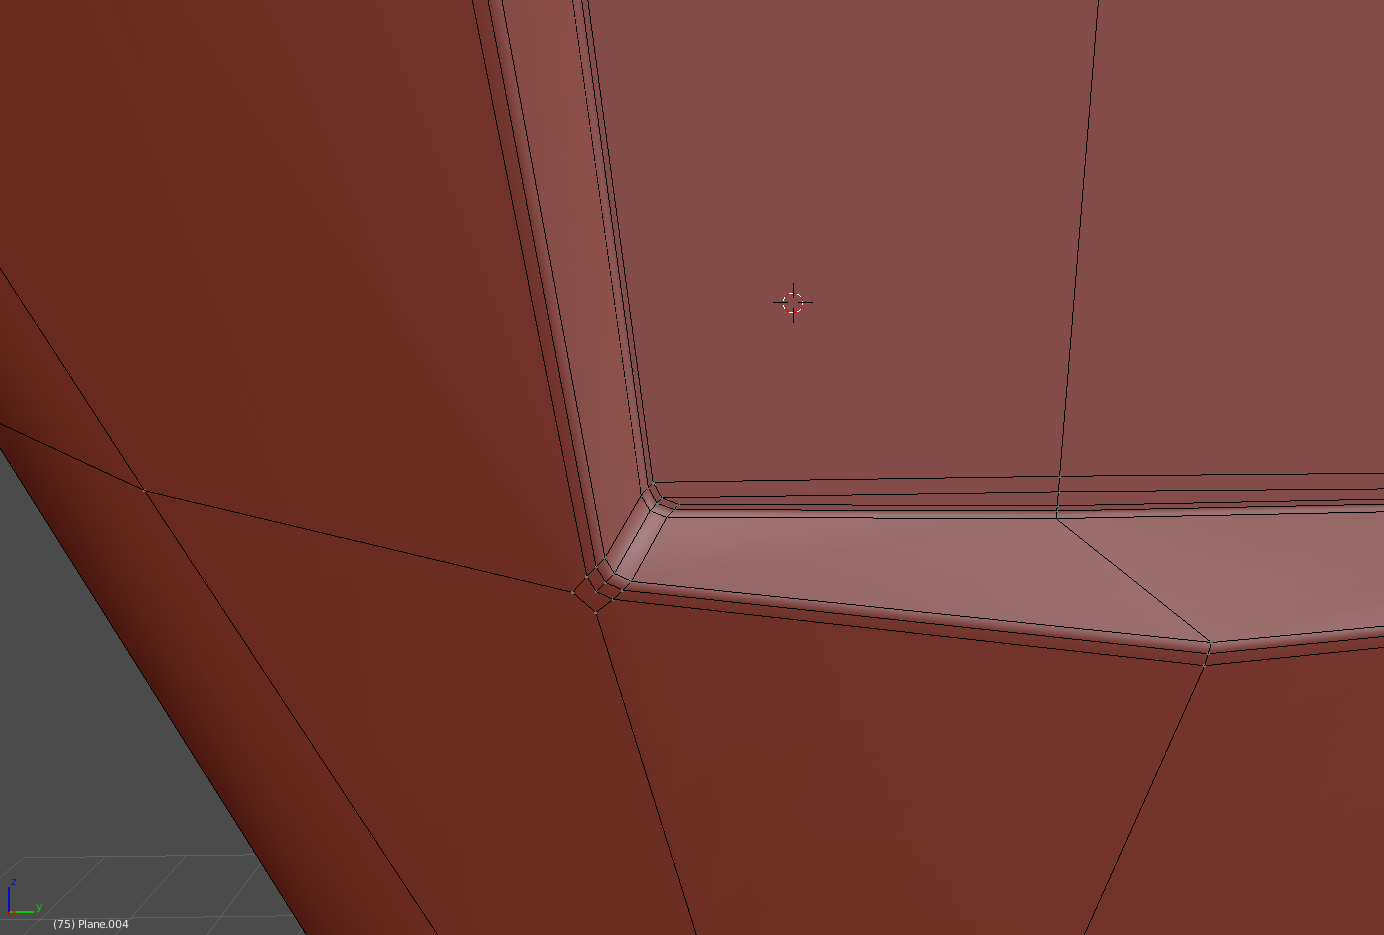
This is as close as I’ve got with no defects however I’m left with ngons. And in general its just not that great. This was done using the inset method from above.
Theres is different way of simplify this type of topology for curved surfaces, similar of what is using for car shells
you can use a shrinkwarp… on the initial surface, this permit to keep the curved surface intact.
For pure modelisation, i suggest to apply the subvdision of the surface before, basically here, create the shape then add the open… for get enough loops and edges for reduction work http://topologyguides.com/post/163679954765/loop-reduction
If the only loops on your model are controling the curvatures, the subdivision modifiers and too control the “corners” of this open", it will be really complicate to keep a good curvature then whatever the technic used, and specifically, it will complicate the job if you want to have right squares corners in the middle.
Yeah I’ve found edgeloops are the obvious choice but then your left with extra geometry surrounding the entire object. Which in turn creates harder edges where you don’t want them or strange topology. For the specific object in the file i uploaded the mesh that those edgeloops would continue on isn’t a hard surface but smooth and rounded. Think that made sense? Thanks for the info.
Sooner or later you will still need to add enough mesh density to hold your final shape. Unless there is a requirement for very low mesh density on your project your going to go nuts trying to contain a shape like that cleanly without enough mesh density…
Wow… Can honestly say I’ve never seen anything like that before, or maybe i have but very interesting. Exactly the shape I’m trying to achieve. And the 5 sided faces on the corners wont be an issue? For texturing or UV’s I mean? At this point I’m beginning to think its impossible to do this with no edge loops around the entire object just for those corners, OR no bevel weights, tris, or ngons lol. tall order I suppose.
Well lowpoly(?) isn’t necessarily the goal, a plus but not needed. My main and pretty much only issue with the edge loops is once i put them on I have to go around every side of the mesh and spread them out so the hard edge doesn’t follow through the entire way around. And in doing so I tend to end up with wonky spots that just don’t look right. (forgive me I’m still pretty new) But by density what do you mean exactly?
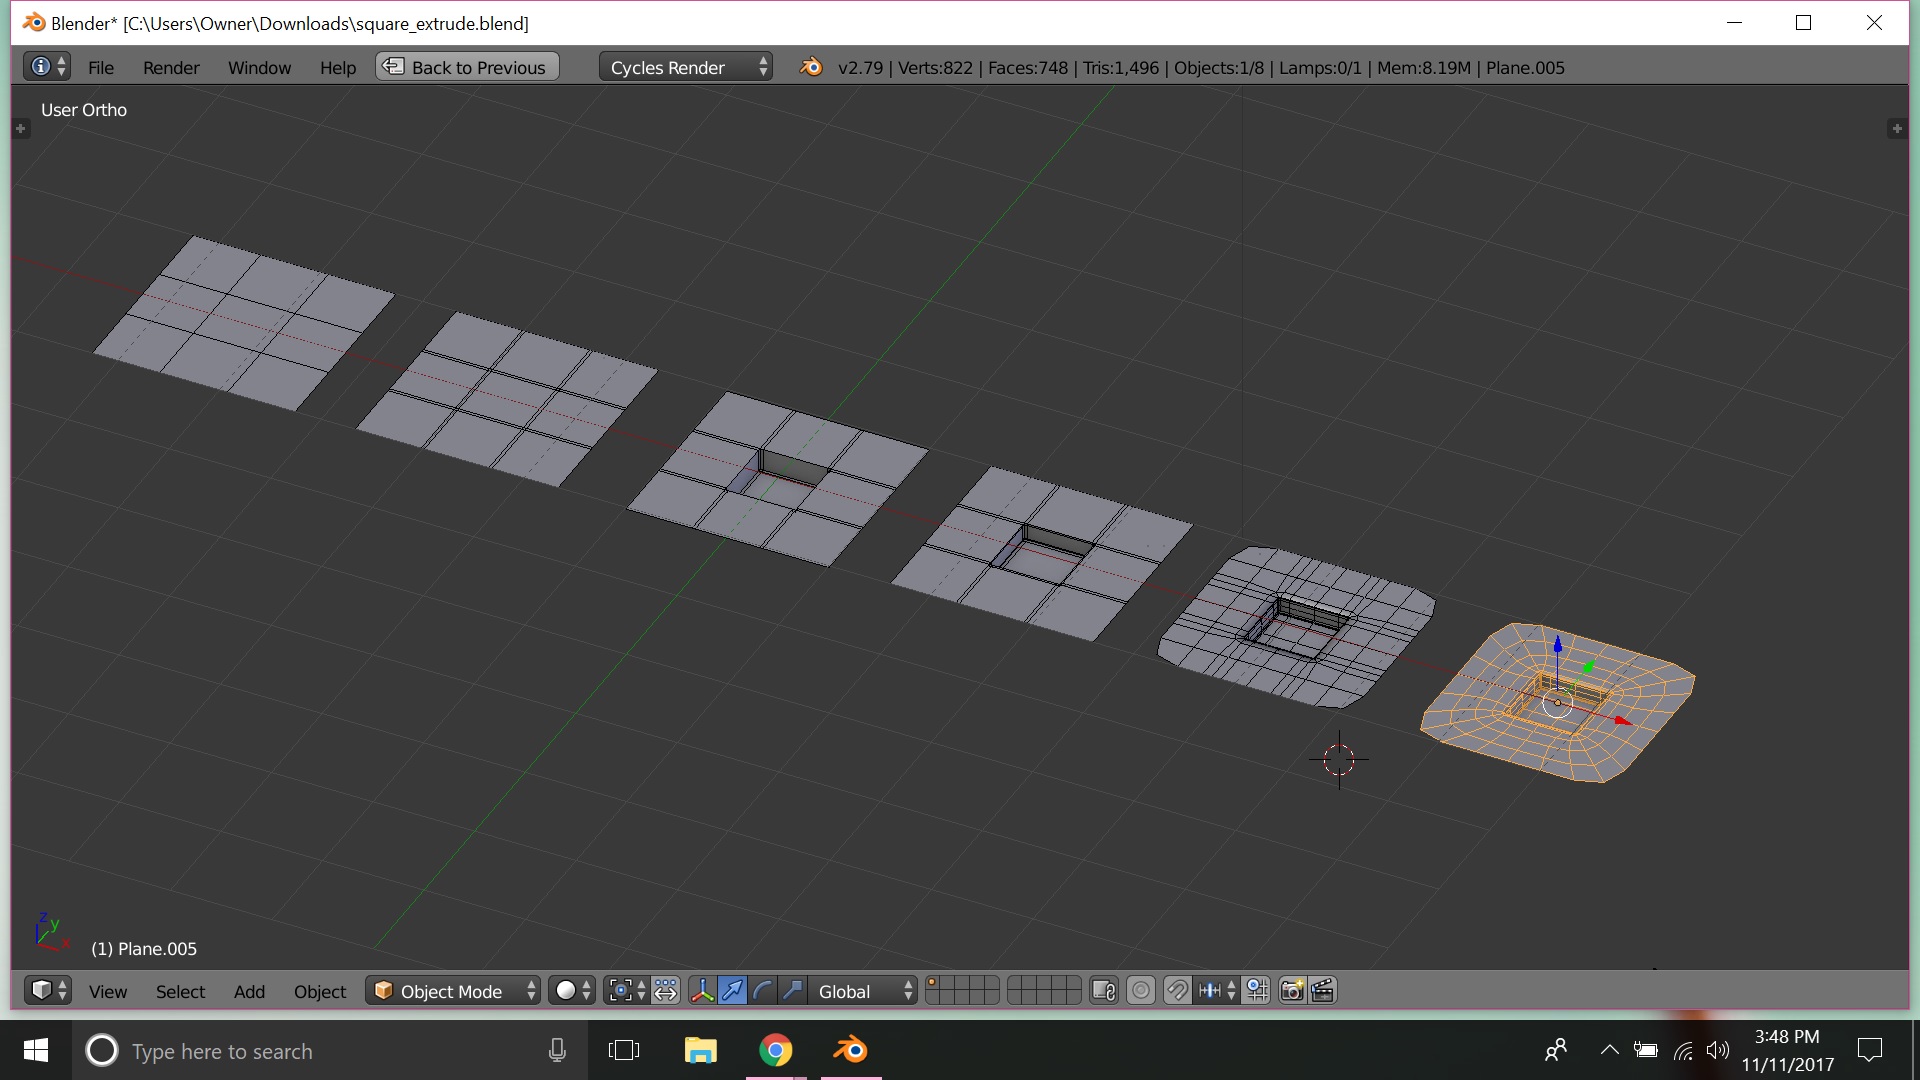
On mesh density, go back to my original post with the simple plane. The polys that make up the detail added to that simple example are of the minimum density that they can be and still control the intended form. Remove any one edge loop and the form is lost. This would be the minimum mesh density needed. Once you have this detailed form the hard part is (as you have discovered) in smoothly blending these higher detail areas into the overall form, which is usually of a lower mesh density. In my example Blend this part was easy as the faces are all on the same plane. If you think about it, that is really the question you are asking. How do you connect high mesh density areas to lower mesh density areas without messing up the existing form? The video above shows a very good way to do it.
If you really want you can always apply the first level of SubD to get an all-quads result.
Assuming this is the high poly model and not the final game export/normal map baking target(not source) mesh, it shouldn’t be an issue, no. If you are modeling a low poly game asset that you will bake a normal map to - you might want to control tessellation/edge orientation directly, both for quality of the normal bake as well as for the silhouette.
SubD modeling is all about the edge-flow control. And on this very note crease and bevel weights are a tool in the box to use to make your life easier. Also neither tris or ngons are a bad thing. You just have got to know where and how to use them. Where the poles that result from the tris or ngons as a result of Catmull-Clark end up at and how they define the edge/poly flow. This knowledge comes with experience so just got to keep practicing the art.
Also note that my example was intentionally minimalist and I tried to keep it simple but a few more loops can be added if a sharper edge/corner is the target.
Agreed, thank you for the explanation Pappy. For what its worth all this info has let me get that object to relatively where i want. But as the title says “repetitive”, I’m on to the next instance of this hardedge stuff.
Well I’ve done one successful bake on it so far, probably needs some work (silhouette), but that inset was the biggest issue. But an art it is indeed.
And practicing I am! I’ve watched a fair amount of videos and took some courses on topology but its one of those things that just can’t seem to click. But practice makes perfect. Definitely my worst area in blender. If it wasn’t for BlenderArtists this definitely would have ended up in the recycle bin lol. So thanks for all the tips and help everyone! Gonna have to bookmark this thread.