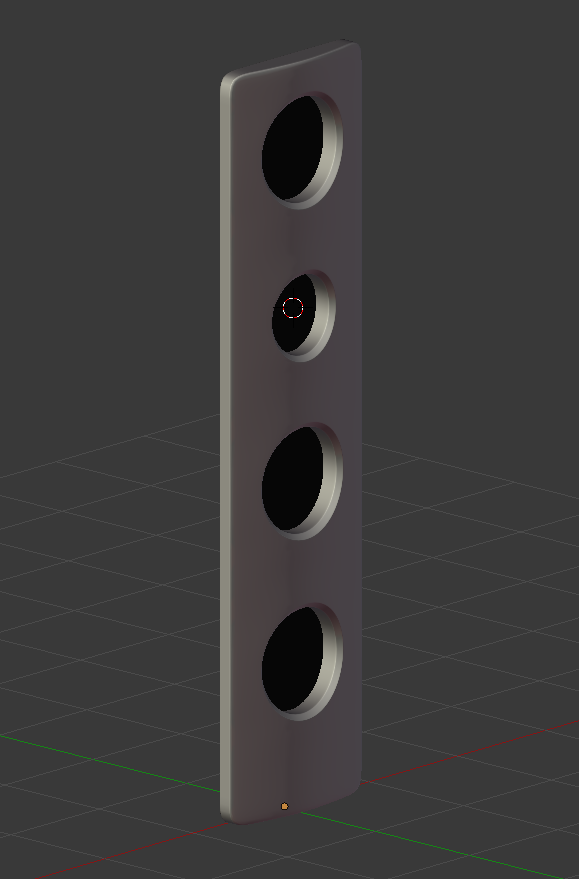
Hi guys, im moddeling a high end speaker, and im looking for the best way to add some circular shapes to the front of my speaker. Shapes that I need to intrude inwards.In those ‘holes’, i will put the actuals speakers…
I have tried boolean, knife project and 'intersect in edit mode… but for some reason… the all mess up the faces of the mesh…so subsurf looks horrible…
I just need to add a circular shape to a face, so i can intrude it (the opposite of extrude…not sure how you call it)…
And i want to be able to use subsurf aftwards to make it smooth.
So what would be the best way for me for doing this?
If the speaker front is flat, subdivide, select polys, run “to circle” on them and away you go, or even boolean a circle into it.
If you are aiming for a curved front you might need to create the circle as a separate object, shrinkwrap it to set the curve then join together.
Im trying to use the technique that you guys suggested with the shrinkwrap…but I cant get it to cut a hole…Its only extruding… This is what Im doing
I create a cirkel (ngon filled)
I shrinkwrap it to the object (normal settings, not choosing ‘project’ as mode)
I keep the circel selected…and add the object with shift
I press ctrl J to join them
Then in edit mode, i select the circle and press E to extrude
But then it doesnt cut a hole when I go inward…it just lengthens the shape until it comes out on the backside…but no hole…
So am I doing something wrong…or is this technique just for extruding?
And thank you for that video…that definately helped me with understanding the subsurf better
Create a circle ( no need to have it filled with ngon or whatever., then shrinkwarp, apply the shrinkwarp and and then join them as the same object.
Then you will need to retopo your initial mesh for correspond to the circles vertices. ( use snap for it ). Then you will been able to inset the circular hole created in the mesh.
Thank you for you reply. However, im running into a problem. If I create a circle and shrinkwrap it to the object, it sticks to the surface of the object. However, as soon as I want to join the two objects… the circle jumps back to its old position…
Im probably doing something wrong here. Maybe something with the origin point/ cursor?
Pfff I feel dumb. That works now… Im still having issues fixing the topogra[hy when I delete te faces around the circle.
Im having the same problem when Im using a boolean. I can get the hole just fine. But when i apply subsurf its all jacked up cause the topography is all wrong around the edge of the circle.
I think i need to a tutorial on fixing topography so subsurf works properly. Basically… you always want a face to have 4 edges/vertices right? thats what your going for?
Google Translate translation is very readable but the images should be enough. He covers flat and curved geometry and all of this is easily done in Blender. You can even do it a bit faster if you use LoopTools -> Circle and then translate it into the surface. Subdivide and merge the corner edges and you’re done.
Ok so for me, I feel that the boolean method works best for me to cut holes into shapes.
However, im not sure how to fix the holes after I make them, in order to make the subsurf work.
Can somebody point me in the right direction? I know I have to create faces with 4 edges/vertices… but does that mean I have to do that for all the loose vertices, front and back of the shape?
So that would mean id be easer to use a cilinder for cutting, with less verices right? SO i dont have to fix as many faces…
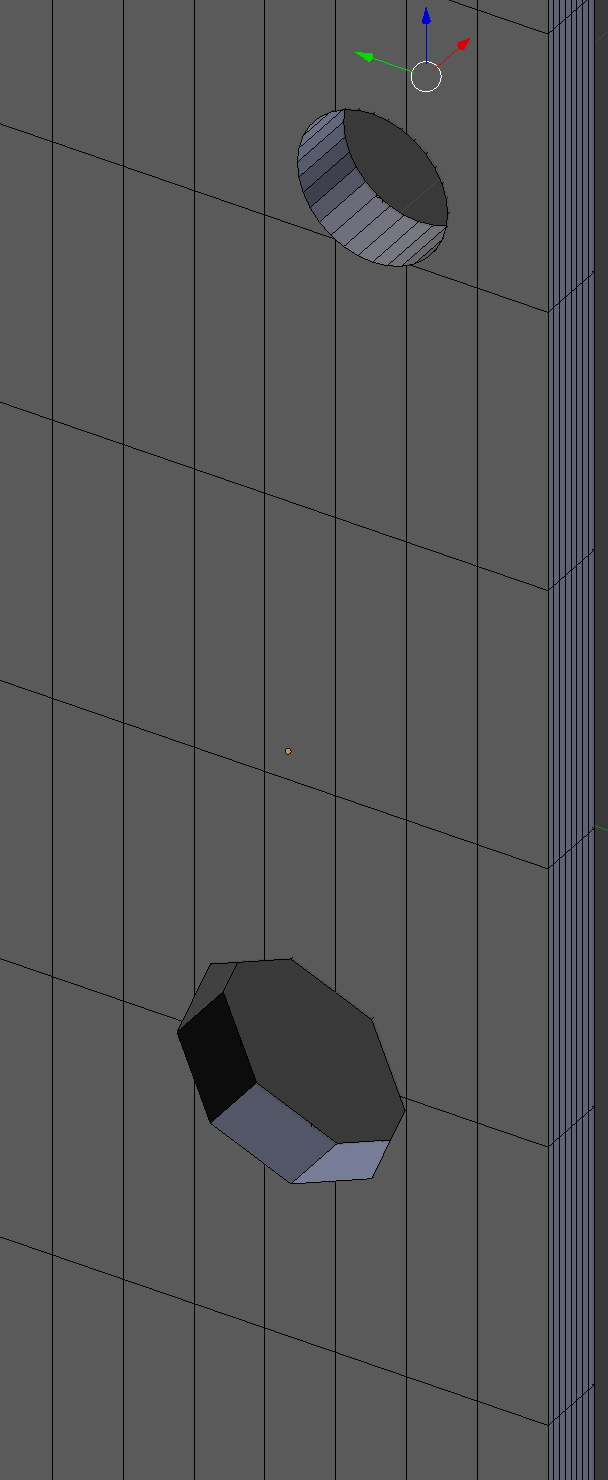
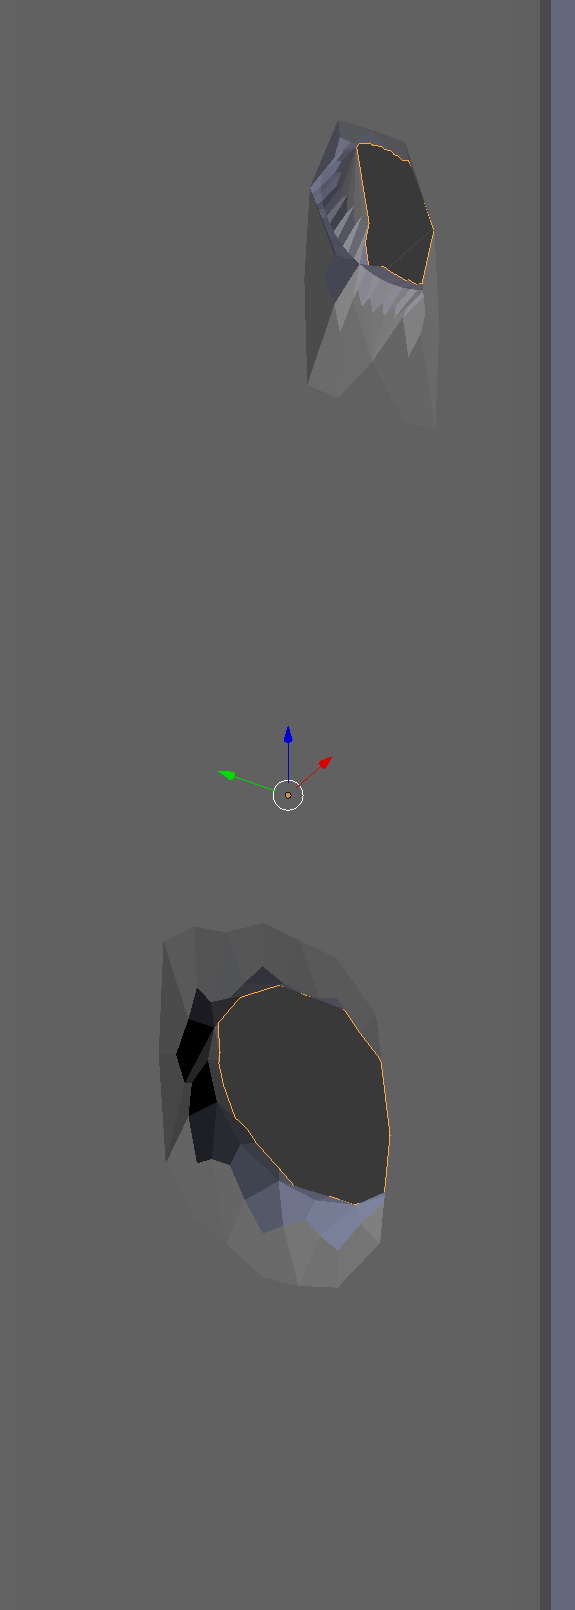
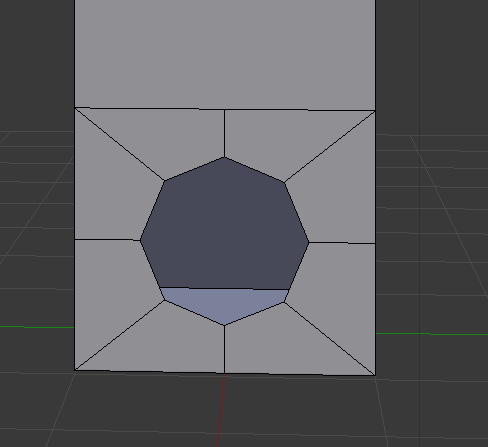
This is what i am getting at the moment… so i just want a way to fix the topography in order to maken the subsurf work again.
The bottom hole made with 8 vertices… would that be enought to create a smooth round circle with the subsurf? And if so… I would have to fix the faces on both sides of the square shape right?
Booleans won’t work with subsurf without more cleanup than it is usually worth, especially for holes. You need to create the topology to support and reinforce the hole.
Bear in mind, this sort of thing will only work on a flat surface. The trick shown in that video will work well on a curved surface if you use the ‘guide’ mesh as he indicates.
Responding to the main OP post for the front of the speaker.
Create a rectangle plane.
Add loop cuts so it is composed of mostly evenly sized quads.
Extrude it outward to add thickness
Add the circles to the front and add control loops to the circles.
Connect the circles to the rectangle plane using one of the methods used above.
Add a loop cut to the rectangle frame between the front and the back and then hide it.
Select the middle front loop of the rectangle frame (speaker), go to top view.
Turn on proportional editing and selected the “connected” option and curve it and then turn it off (O).
Select the circles and ctrl+inset them to extrude them inwards, inset it inwards a bit first to add the inner control loop and then add another inset to finish the hole.
Thanks for the reply guys, this is really helping me out
Im trying to try the previous method…so i can create clean holes on a curved surface. But im not sure what to do at step 4:
Add the circles to the front and add control loops to the circles.
I put the circle on the face of my rectangle (with snap), but I m not sure what you mean by adding a control loop to the circle. If I press ctrl L it just adds a vertex…
IAnd afterwards, I connect the circle to the coners with the knife tool then, right?