I bought a 360deg camera (Theta 360S) with the intent of staging my architectural models in their real photographed environments, in terms of background and lighting conditions.
After my first attempts I was immediately enthusiastic and frustrated: very exciting, takes staging your model to a new level! the light is not so easy and self explanatory. So I started reading and testing.
After two weeks I got to a level, where I can stage most anything in an environment I photograph rather easily and that I think is worth sharing.
Credits:
More than any other thing I read, I owe special gratitude to Miki and this Meshlogic blog of his. Not only was his guide very thorough but the Node Group of mine was based on his, which he graciously shares publicly. To some extent my node group is re-ordering and labeling inputs and control values according to my workflow idea, changing the function of some and adding two more, important inputs: the sun (light-pattern) mask image and the tone map proxy image.
I also got to test probes for the materials, two blend objects from Miki’s shared blend file.
Miki thank you and I hope you find my work complementary and possibly useful to you, as well.
Free test image HDRI Sky from VizPeople
The rest of my posting on this thread will be in the form of an illustrated guide, so here it is!***
Introduction:
to fully understand the workings of this you need to know a few basics about HDRI photography, though you can work things out along the way as well.
HDRI is not about 360 environments, though among 3D artists it is used often to describe environment domes that light up scenes. However in the literal meaning High Dynamic Range Images, can be in a small, larger of complete 360 field of view. High Dynamic Range for environments in 3D scenes, are more useful as 360degree worlds, so terms have been used interchangeably.
True HDRI is images that contain radiance information extra to the RGB, for a final 32-bit color/light format stored usually in .hdr or .exr formats.
“HDR” effects can be output to “false” hdr images, in the form jpg, png etc, where tones and colors are enhanced by editing giving the impression of relit and saturated colors in a wide range. Such images can be made of bracketed input, of several photos so that the ev information is indeed rich, but inevitably when saved in simpler RGB formats, result in tone mapped, images (not true HDR!).
These tone mapped images may even look, more impressive than true hdr, because of the tone mapping but are not good light sources! This node group can use both to full effect.
Download the blend file with the example, node group and guide
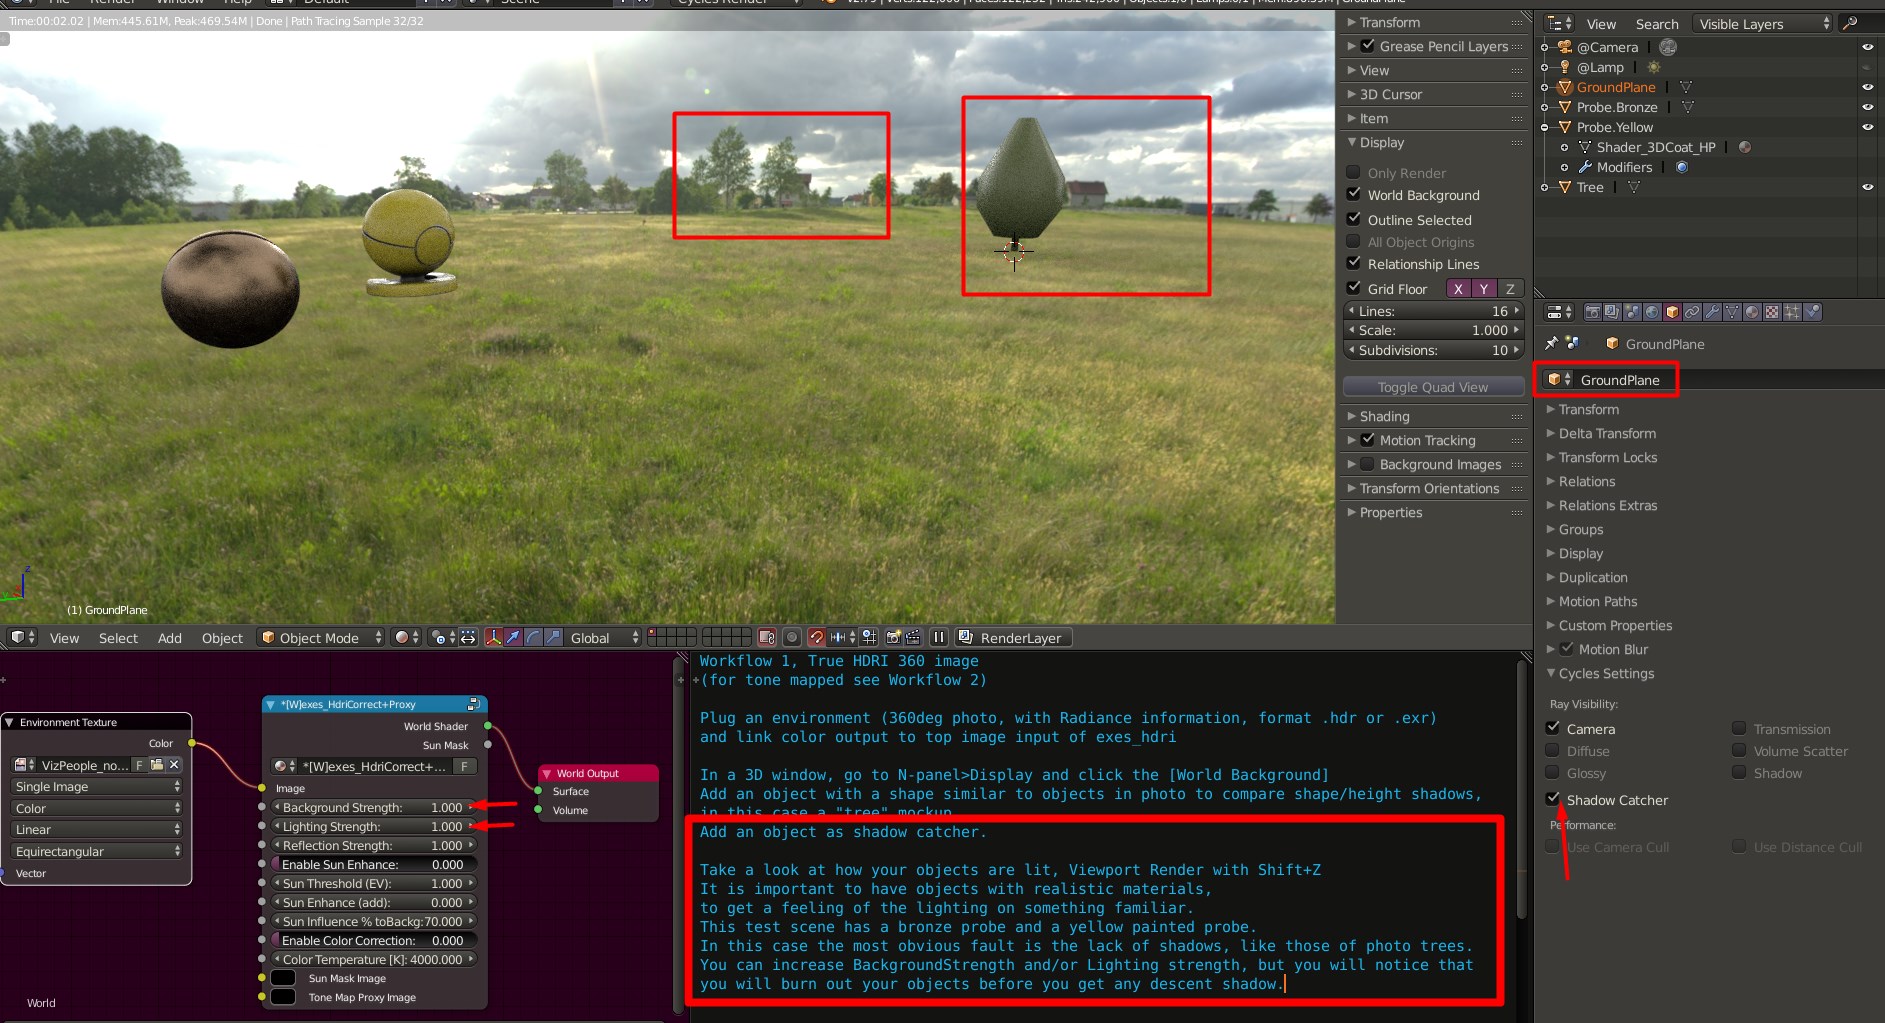
Workflow 1, True HDRI 360 image
(for tone mapped see Workflow 2)
Plug an environment (360deg photo, with Radiance information, format .hdr or .exr)
and link color output to top image input of exes_hdri
In a 3D window, go to N-panel>Display and click the [World Background]
Add an object with a shape similar to objects in photo to compare shape/height shadows,
in this case a “tree” mockup.
Add an object as shadow catcher. (related images below text)

Take a look at how your objects are lit, Viewport Render with Shift+Z
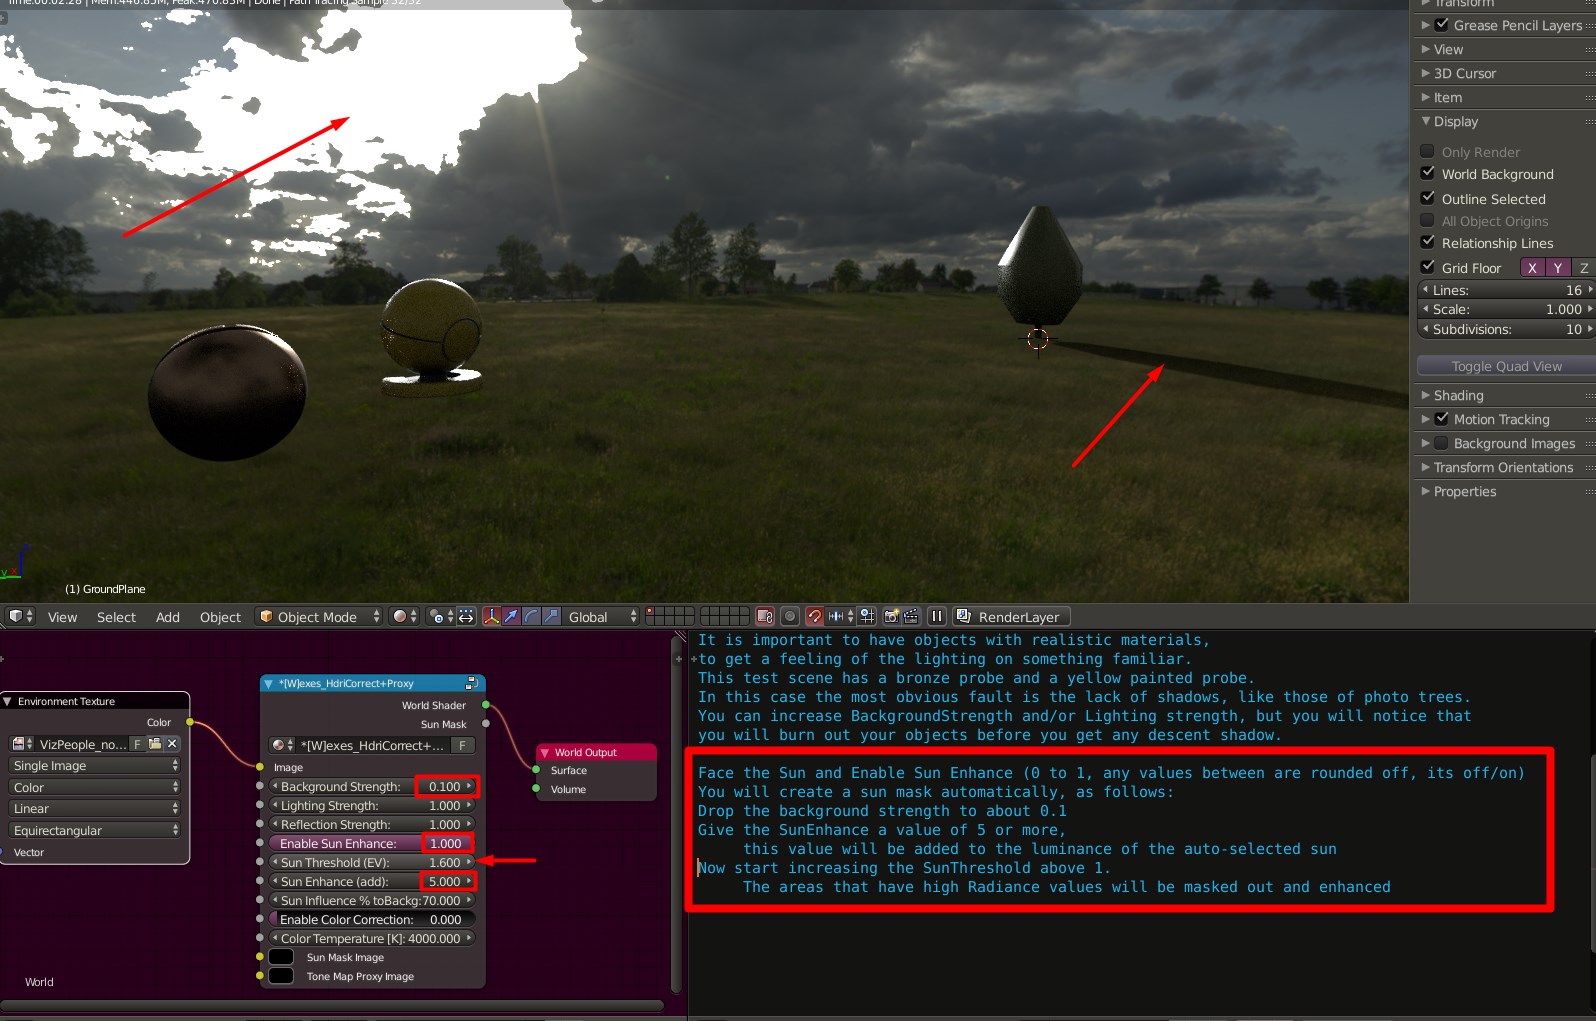
It is important to have objects with realistic materials,
to get a feeling of the lighting on something familiar.
This test scene has a bronze probe and a yellow painted probe.
In this case the most obvious fault is the lack of shadows, like those of photo trees.
You can increase BackgroundStrength and/or Lighting strength, but you will notice that
you will burn out your objects before you get any descent shadow.
Face the Sun and Enable Sun Enhance (0 to 1, any values between are rounded off, its off/on)
You will create a sun mask automatically, as follows:
Drop the background strength to about 0.1
Give the SunEnhance a value of 5 or more,
this value will be added to the luminance of the auto-selected sun
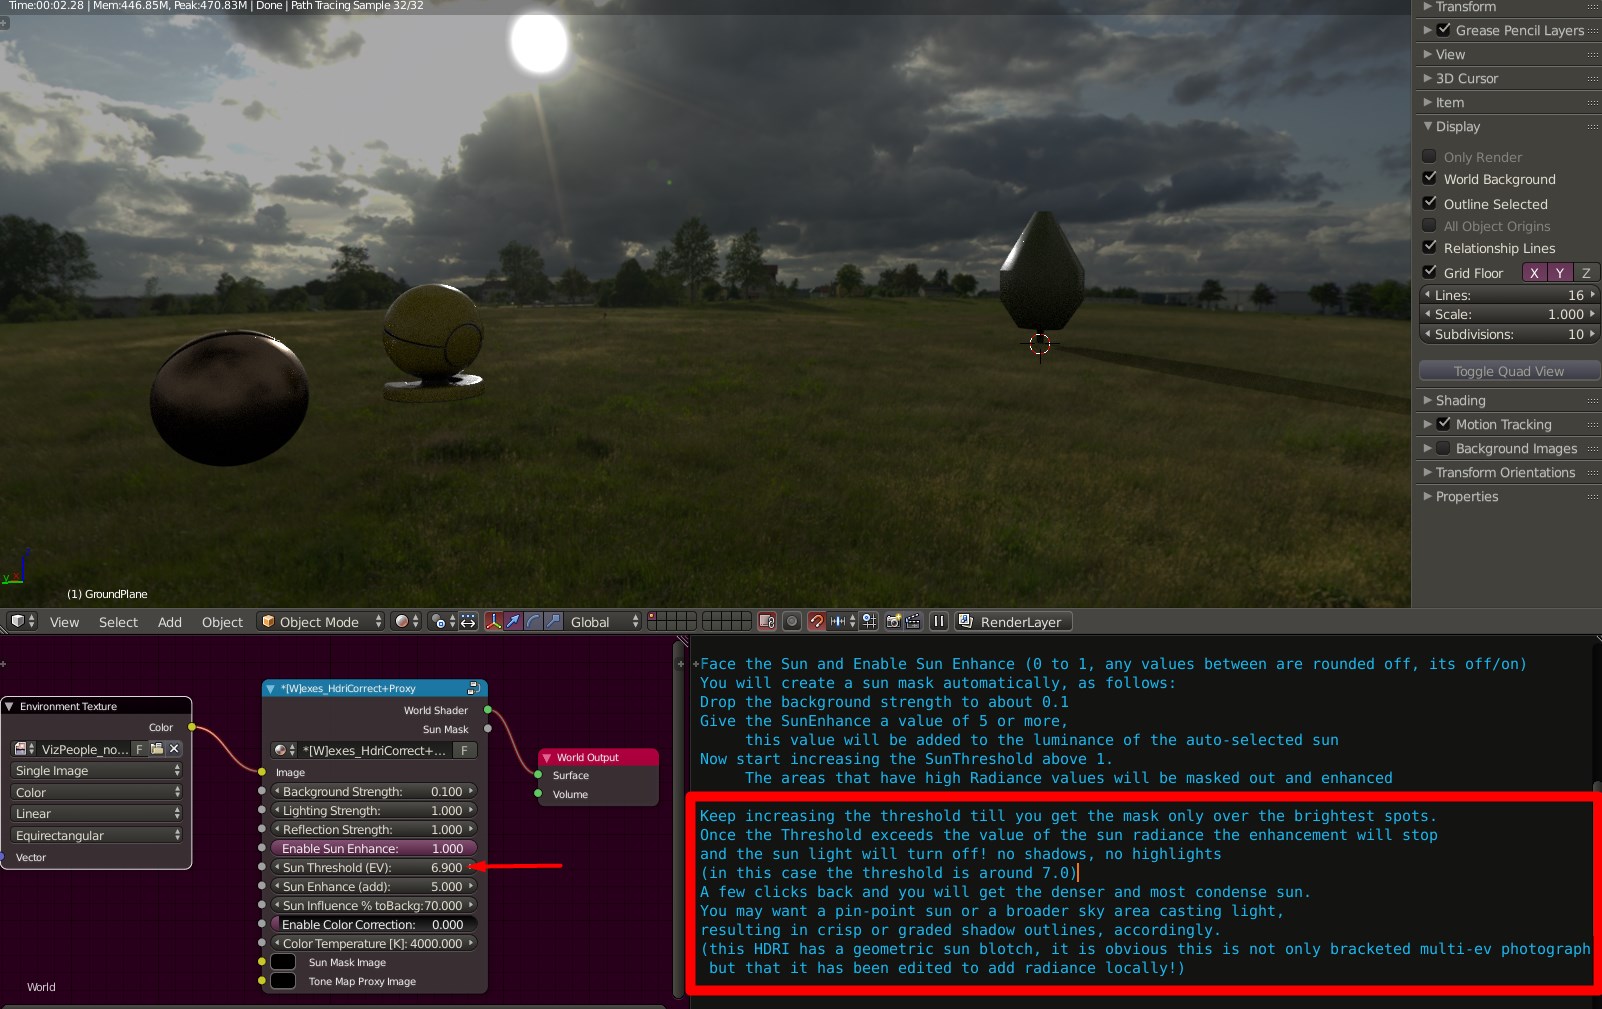
Now start increasing the SunThreshold above 1.
The areas that have high Radiance values will be masked out and enhanced