So I’ve gotten far enough in my construction of the Odysseus that I wanted to take a look at lighting, to get a sense of how different materials would look under environmental lighting.
To that end, I downloaded an HDRI set (“Milky Way”) from here:
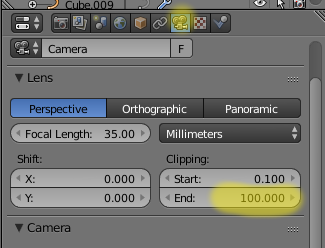
There was no camera in your blend. When I added one the default Lens clipping (100.0) was so low that I couldn’t find your model in the scene.
Change the Clipping End value from 100.0 to something that scales with your model (10000.0 or more). You might find it easier to scale your model down.
Also, your environment texture wasn’t packed in your blend file. I tested with one of my own and it looked fine.
b)
When doing a viewport render, make sure you’re not in orthographic view. Only perspective view shows the background correctly.
c)
Take a look at the images you use as background. That milkyway texture set comes with different flavours: You’re using “Milkyway_light.hdr”, which is a tiny and heavily blurred version of the file. You will see no stars in it, just colors. Either use “Milkyway_small.hdr” or use a two environment approach: “Milkyway_light.hdr” for lighting and “Milkyway_BG.jpg” only seen by the camera.
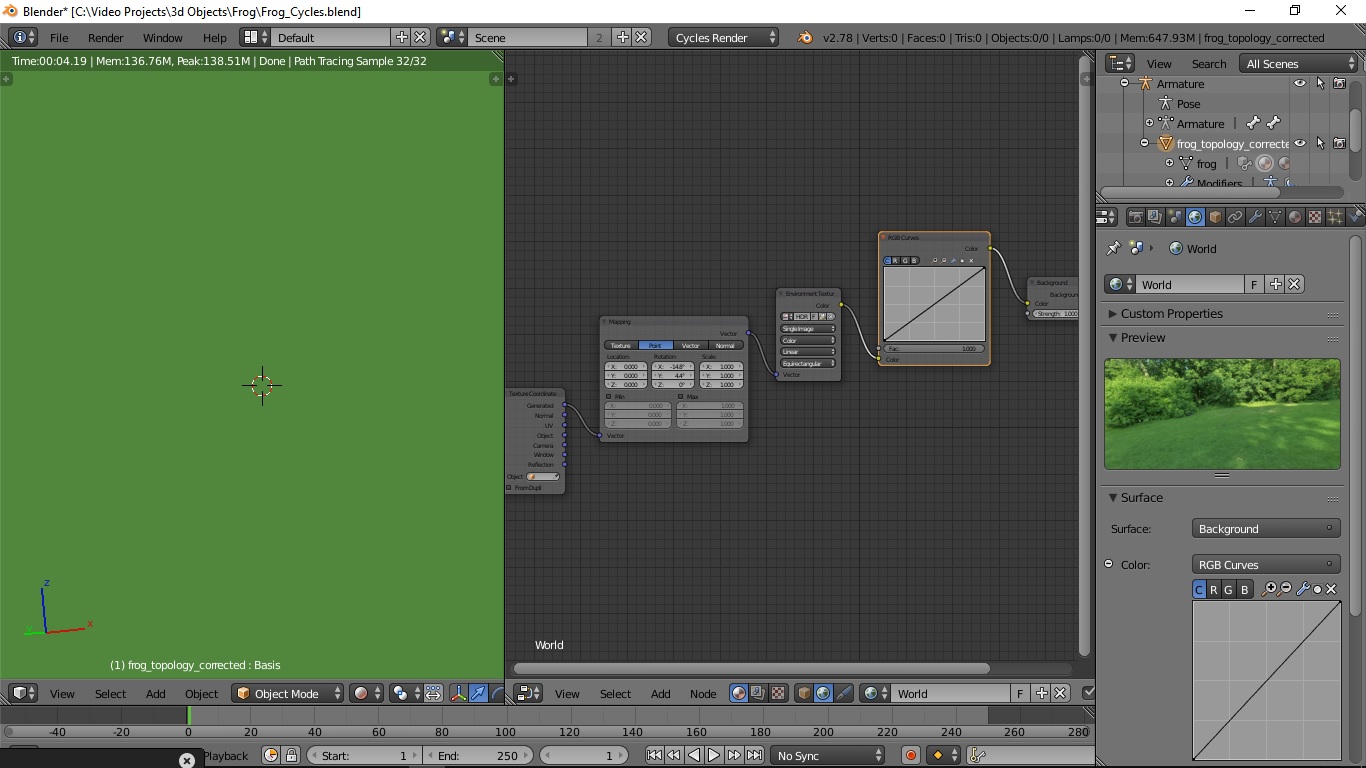
As G60 mentioned you do need a camera in the scene and be viewing through the camera to see the actual HDR, if you are viewing outside of the camera view rendered then it will show up as a various mix of shade from the HDR environment image. If you need to place the HDR to a specific section you can simply go into the node editor and (Input) Texture coordinate, then add a (Vector) Mapping, hook the texture coordinate generated into the vector of the mapping node, then plug the vector from the mapping node into the HDR texture image. From there you can split windows and have a rendered view (through the camera) and the other window you can adjust with the mapping node the rotation of the HDR.
As lkariShinji beat me to it this is a shot of just selecting perspective view (pay no attention to the nodes as they are not needed to view through perspective and see the HDR)
I imagine this is what you were seeing when you tried using the HDR (in my case just a green blend of color) That is what happens when you are viewing in orthographic and outside of the camera.
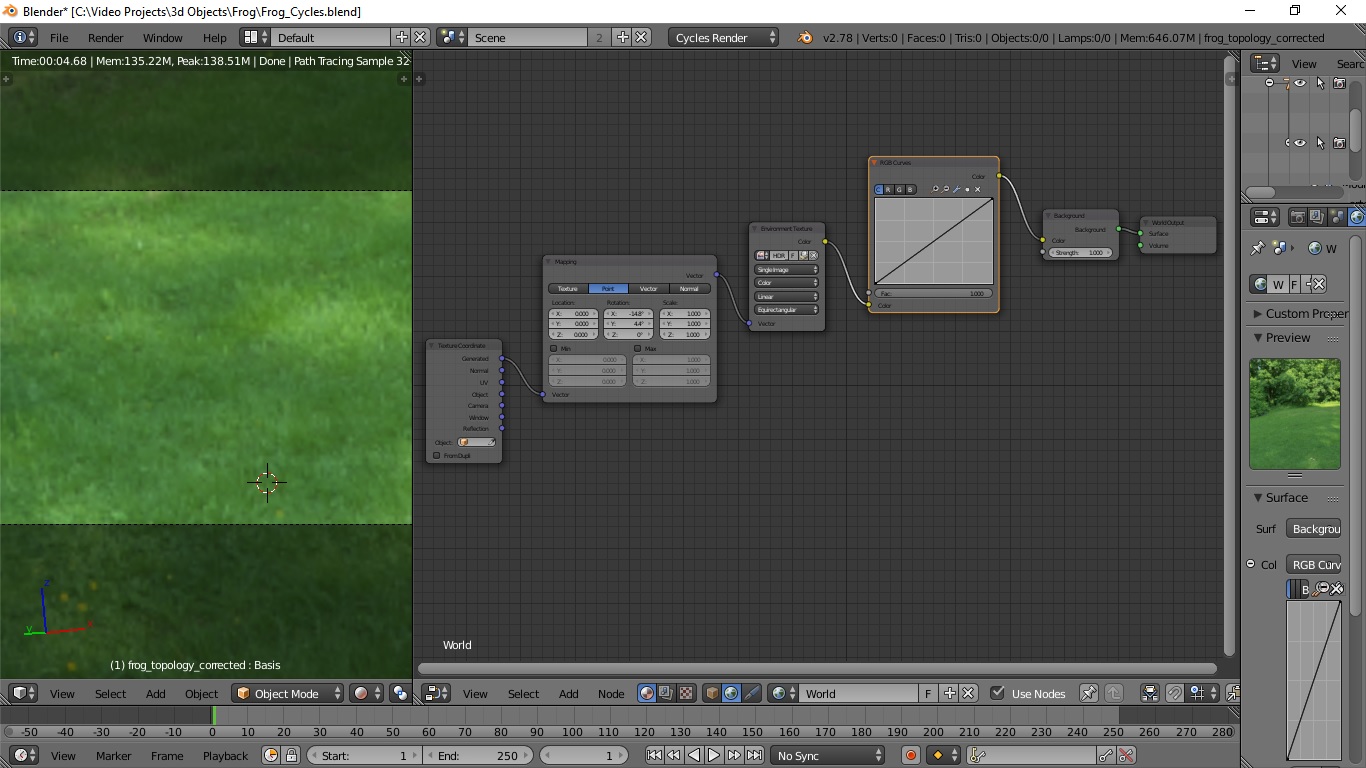
This one is what it looks like inside camera view orthographic. And in this view you can set the nodes up and adjust the x,y,z location of the HDR to where you are wanting it positioned for the camera view.
I was aware there was no camera; I was trying to see the HDR in a viewport render. Switching from orthographic to perspective fixed the problem. Sorry for bothering you guys with something so simple.
This one is what it looks like inside camera view orthographic. And in this view you can set the nodes up and adjust the x,y,z location of the HDR to where you are wanting it positioned for the camera view.
So I went to do that (perspective mode looks weird to me anyway, so I figured I’d go for camera view orthographic), but I’m still having that same problem.
You will always get a solid background with orthographic. Orthographic cameras by nature only show a single point (pixel) of the background. If you like the look and still want the backplate, render with an alpha channel and add the backplate in post.
As J_the_Ninja said if you have your physical camera set to orthographic view it will render a solid background. You can set your render settings to transparent and that will render the scene with all the reflections of the HDR and from there you can bring your image into the compositor and add in the backplate that you used for your scene. Which is why some HDR’s come with so many images to be used. If you don’t want to mess with that you can leave the physical camera set to perspective.
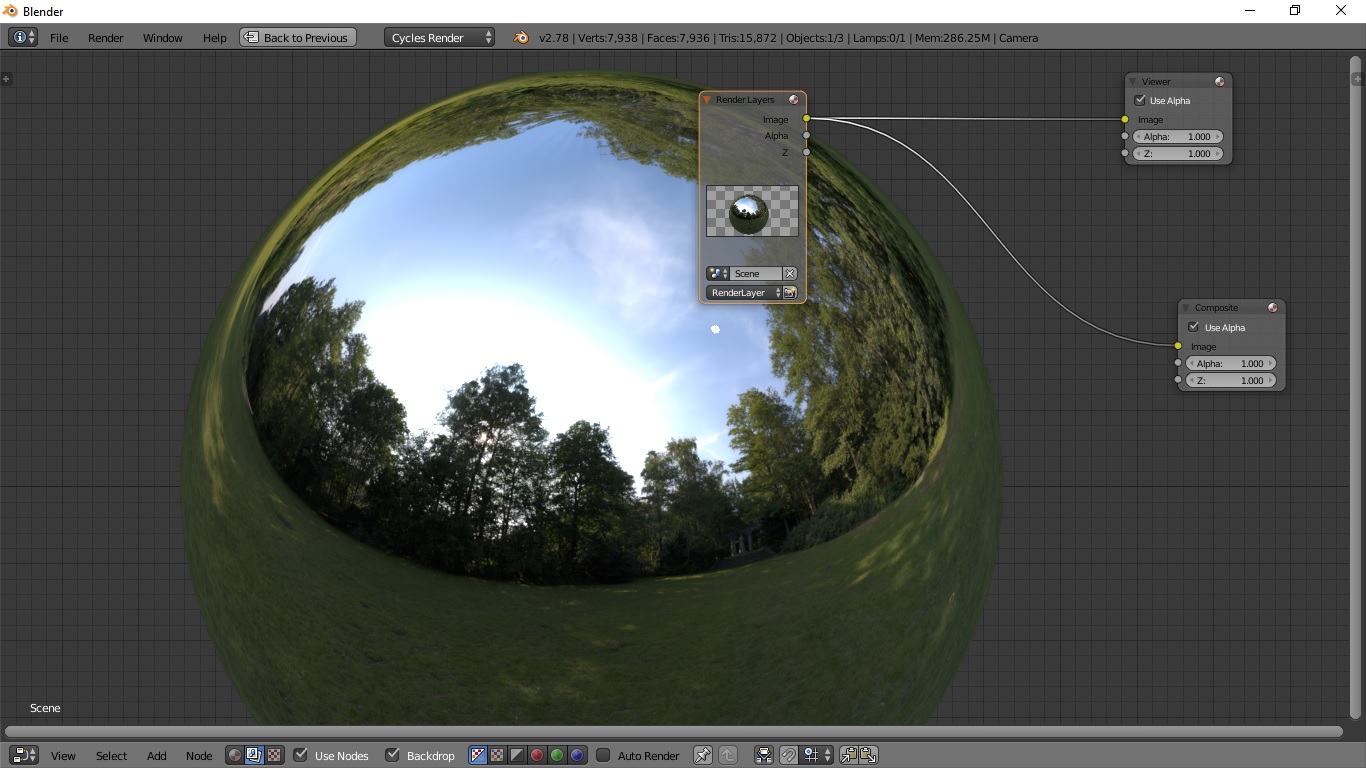
This is what the result is if the scene camera is set to orthographic and you set the render to transparent. Open up the compositor and plug in a viewer node and make sure it is set to the render result.