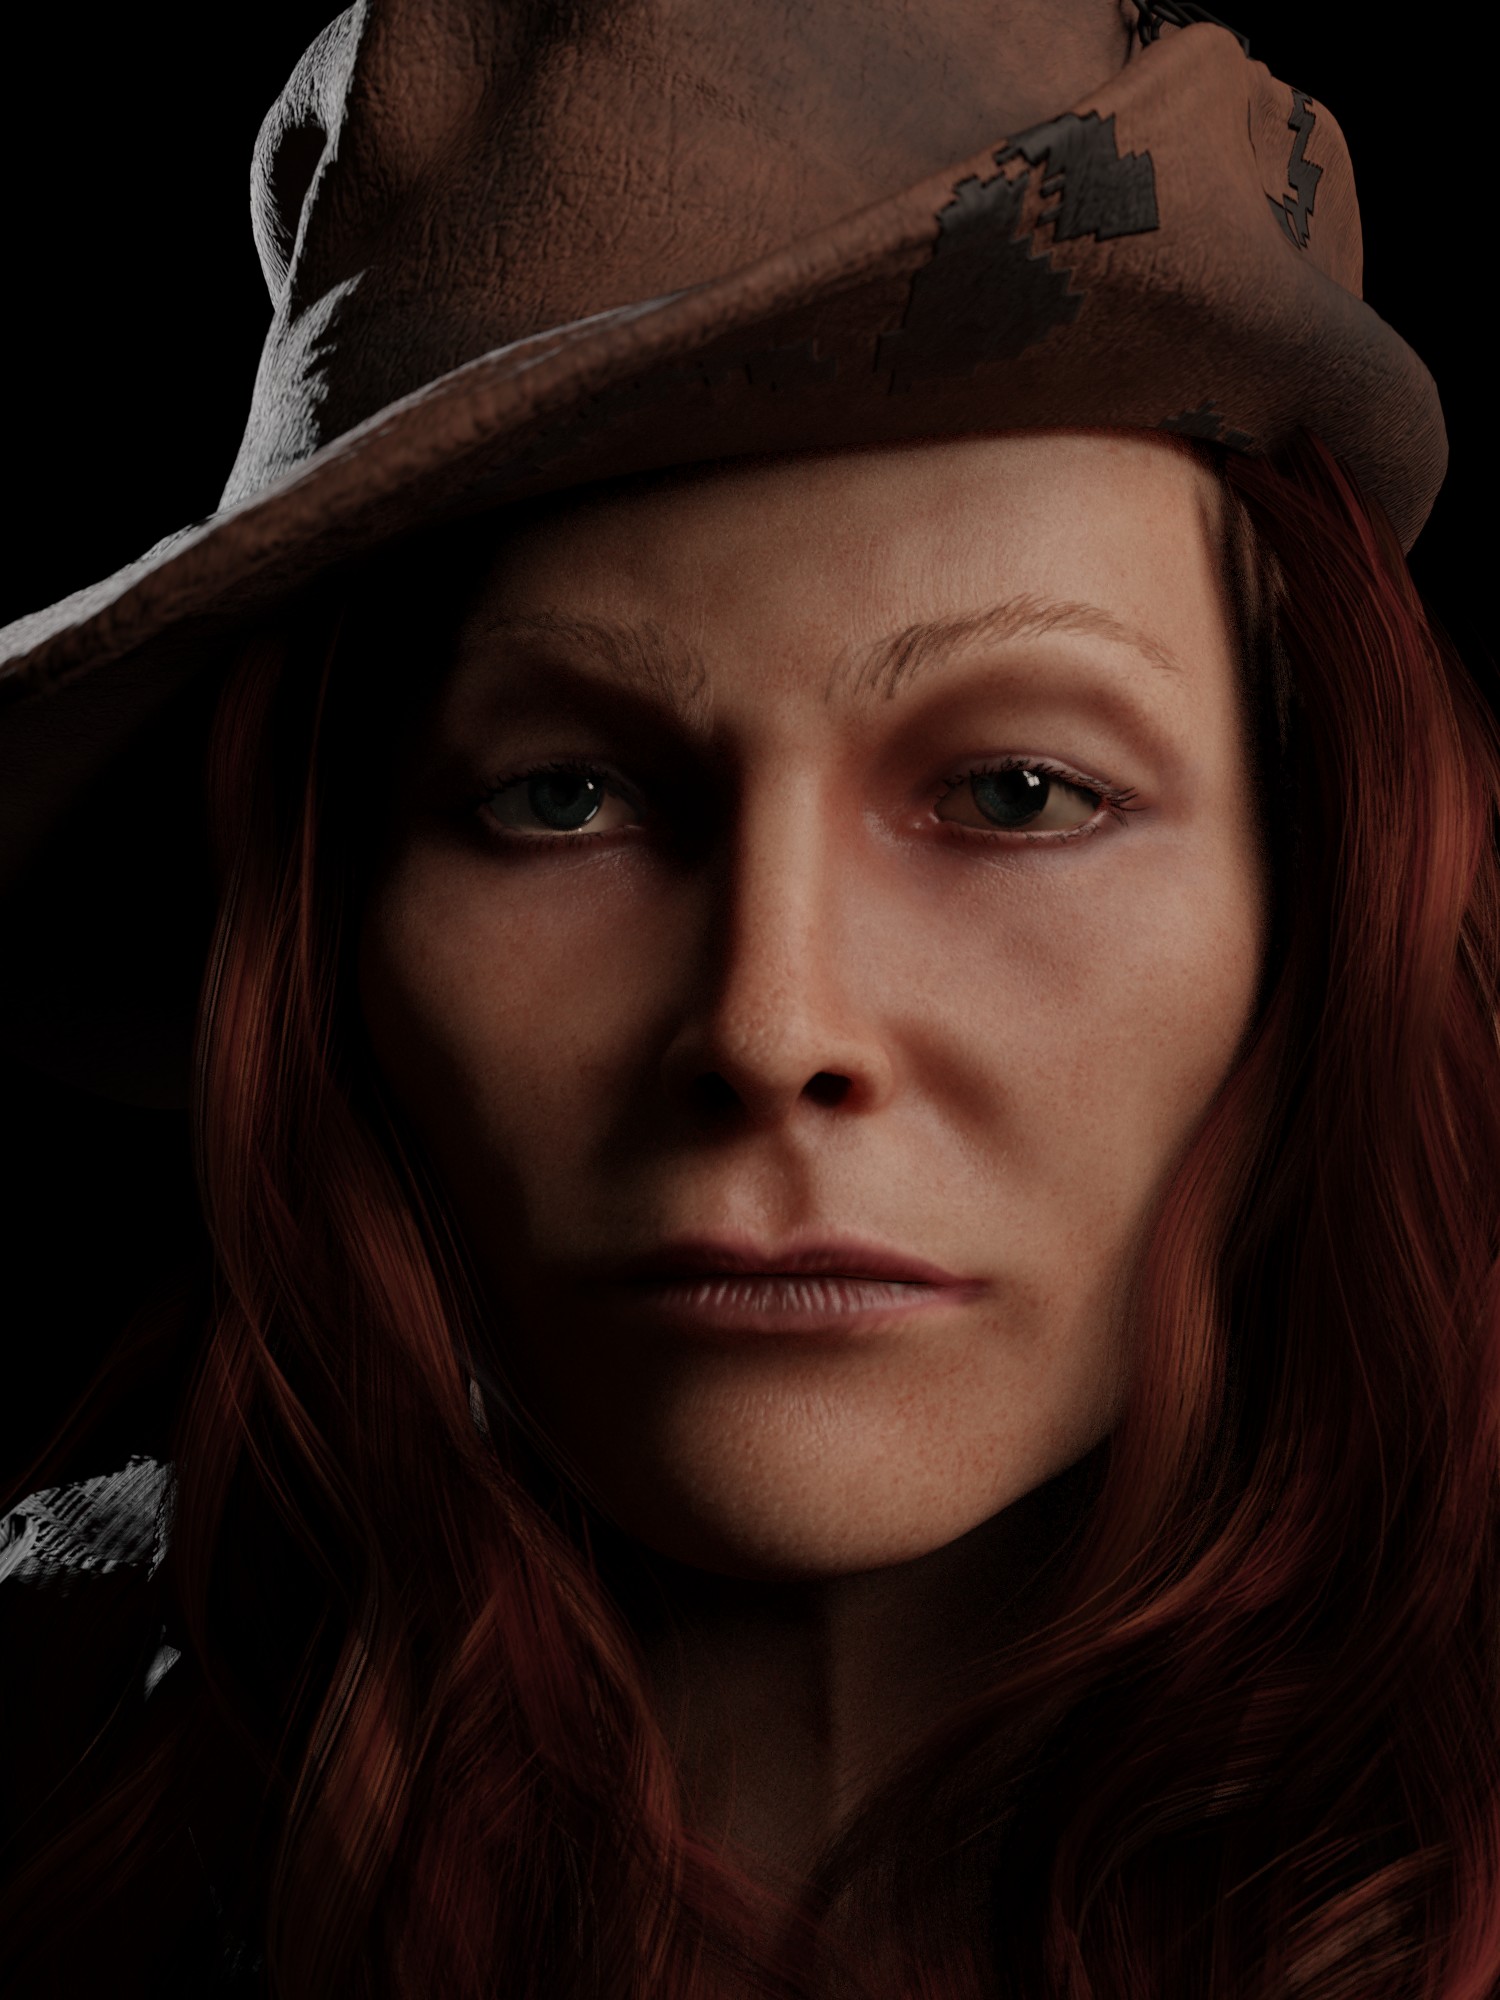
I think I might be able to go all the way with this one. Retop is done, Paintjob I’m pretty much done with the face but the eyes still need a lot of work. The hair and eyelashes were a preliminary stab and are growing out of vertex groups pulled from the mesh. Turns out this doesn’t give me enough control over the placement so I’ll do a separate mesh for those. The hat is a placeholder for now, I’ll remodel that. Also the jacket but that’s hardly seen so I might just leave as is.
Next step is rigging, and trying to drive a bit of expression in there (any input on how the hell I do that would be appreciated) I’ve already done the eyes, just on a simple swivel.
I also have an issue where SSS and AO seem to be fighting with each other to blow out my fine detail. I think I need to tone down SSS a bit? So much to do. Is daunting but reckon I can get a pretty good result from here.
[ATTACH=CONFIG]512524[/ATTACH] [ATTACH=CONFIG]512525[/ATTACH]
So on the plus side, I’ve found out what was wrong with my normal map. R&G needed to flip in blender and I hadn’t hooked up my heighmap cos I thought they were doing the same job. Turns out they’re not doing the same job. If I’m reading this right the heightmap is doing bigger volume displacement than the normal map and then the normal map is kind of applied over that?
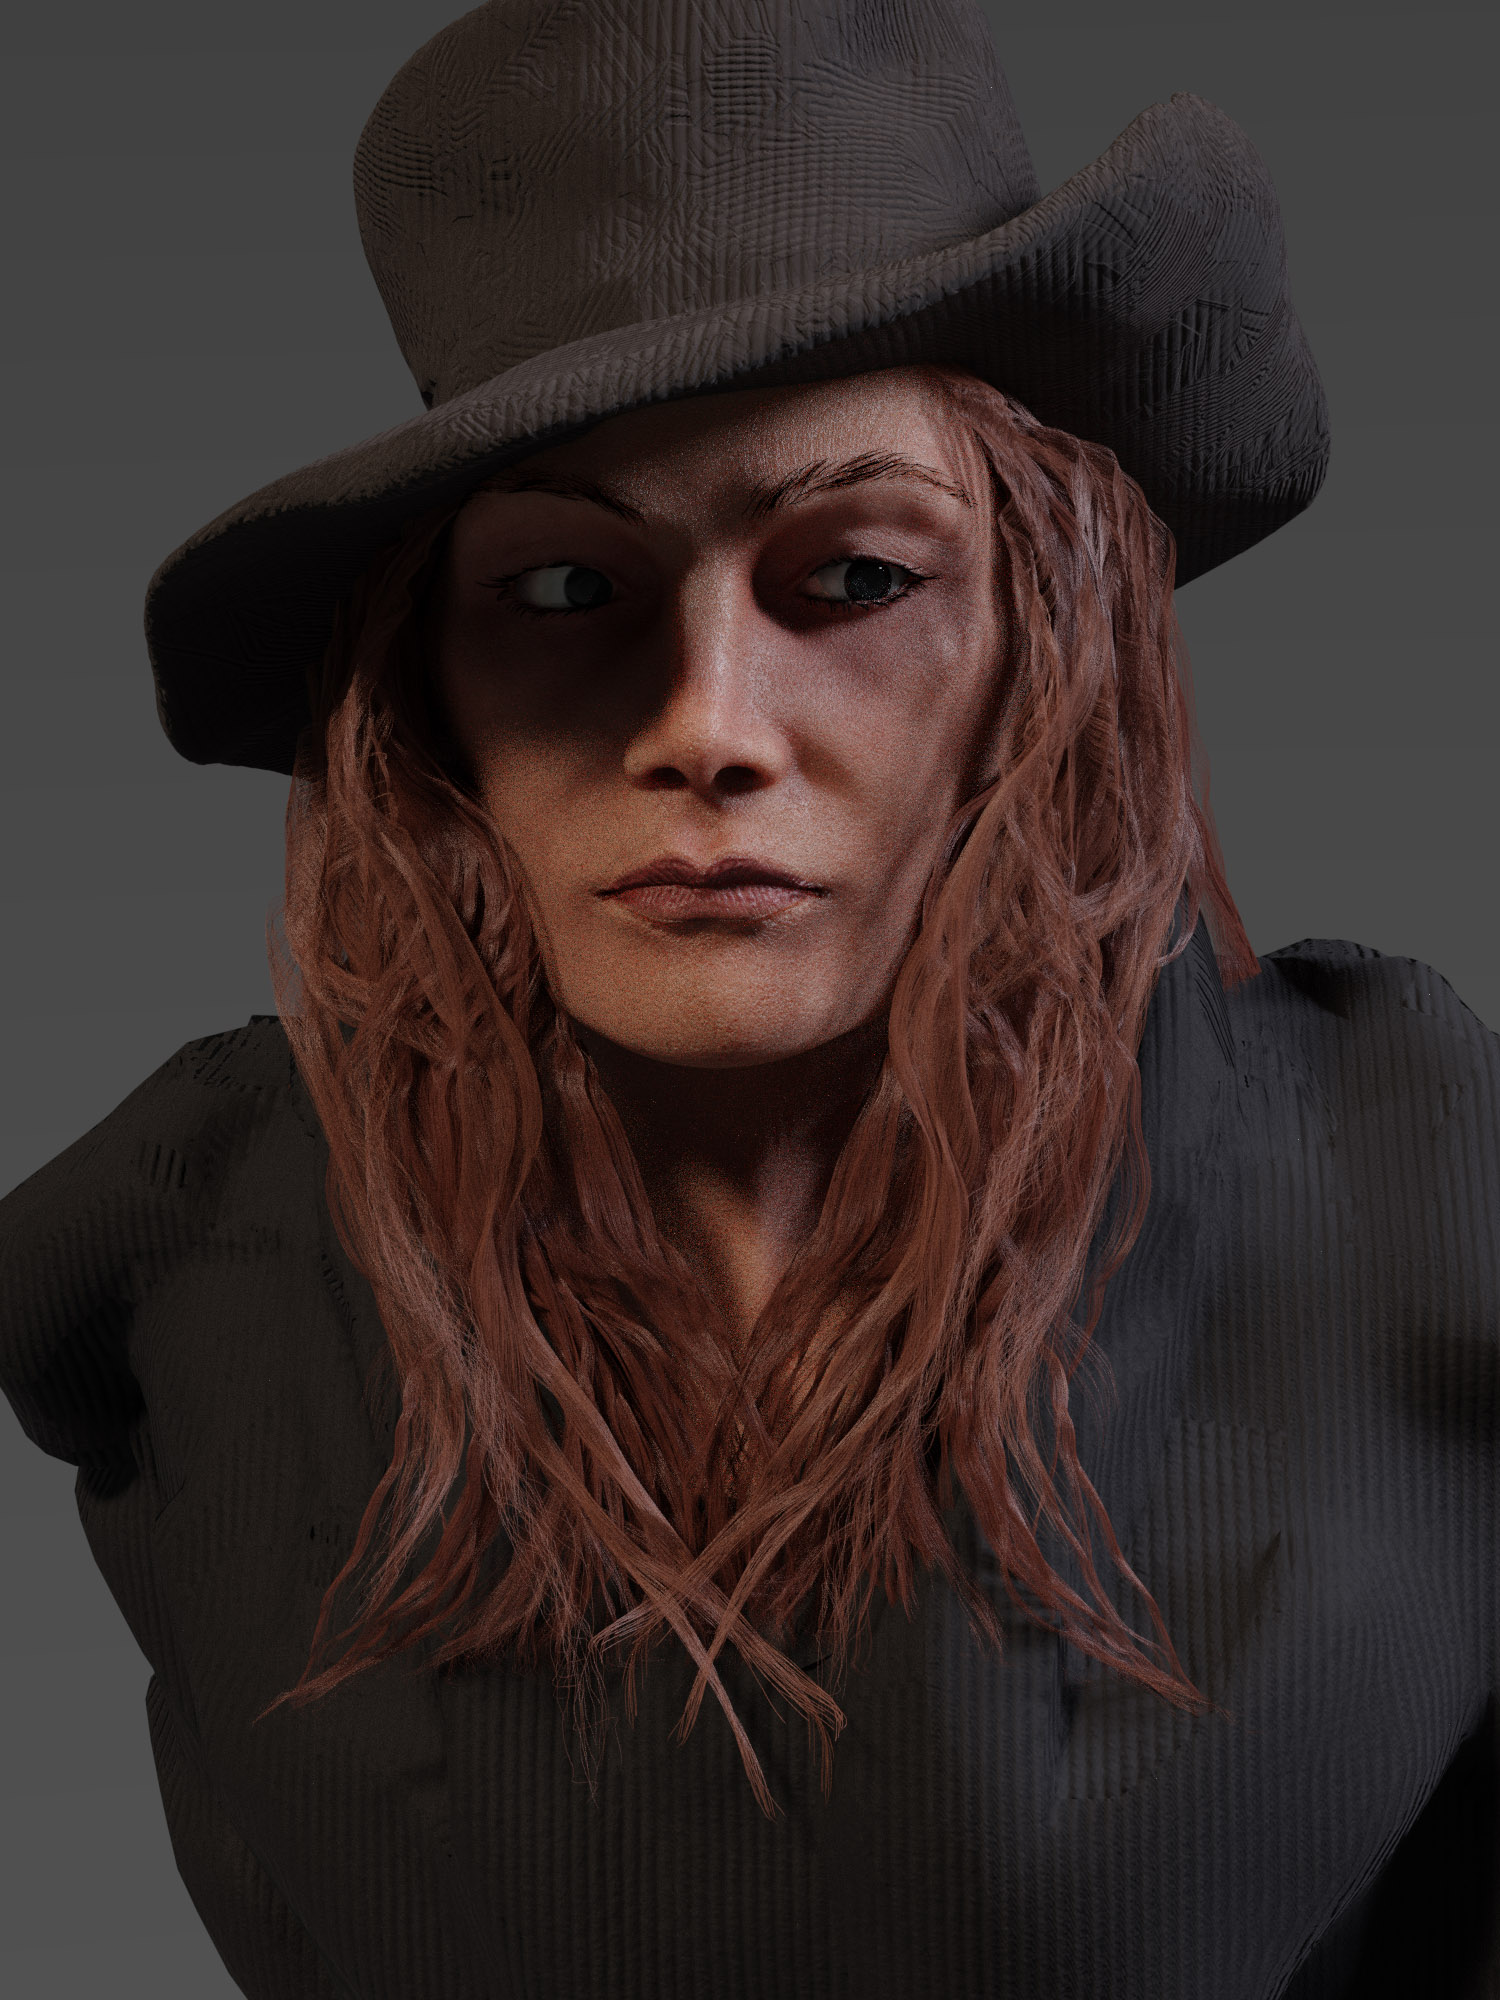
So yay! - I have all the texturing coming across from Substance Painter now and it looks… hellish! The story was I lost a lot of the sculpt detail from the original Medium sculpt when I retopo’d and made it symmetrical again. I tried to paintsculpt this back in in substance painter but I think that’s only going to get me up to a point.
The worst bits are the bottom of the nose lobes, where they’re supposed to curl into the nostril. I’m not sure if I might even have to remodel them or if I’ll be able to just sculpt the missing part in and carve out the folds?
Hair wise, I spent most of last night fighting with settings to try and not make it look all crinkled. Turned out my render steps were too low but I pretty much tried every option on the board until I got there. It didn’t help that I had plenty in the preview so everything always looked fine until I hit the render button and waited half an hour!
At least now I have a pretty good feel for how the hair works and I just need to knuckle down with some reference pics and figure out what goes where. What would be insanely useful is if I had some way of making different hair emitters show as a different colour in edit mode? Everything is just showing up as flat grey and it’s kinda hard to follow when different strands are intersecting with each other. Ideally I could assign each strand a primary colour until I was done editing. Is this possible? Where does the shiny grey look come from?
I’ve reduced the eyelashes. A bit too far, I’ll have to split the difference but I just found out I can control the origin points with a checkbox on the toolbar which is a game changer. Come to think of it, this would probably have saved me creating a separate mesh for the main hair and then all that aggro last night but hey, aggro is how I learn so no point crying over spilt milk.
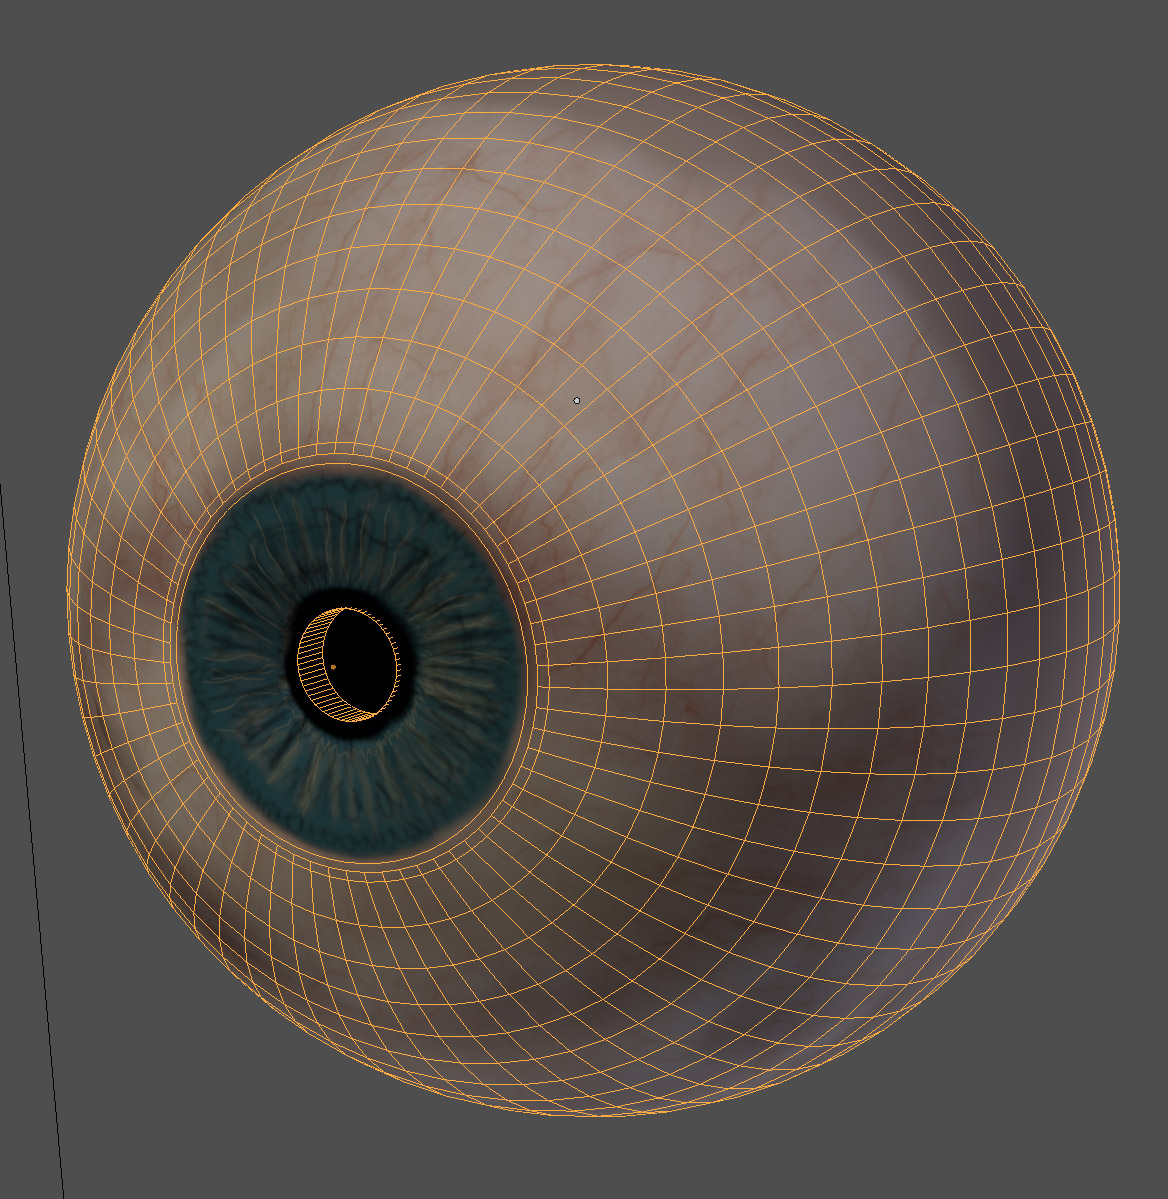
Oh and eyebrows! So I painted out the diffuse and one of the bump layers in Substance, leaving the base pass there cos I reckon it’ll come in handy for volume but christ does it look creepy now! I’ll get on that tomorrow. And the eyeballs as well - need a total remodel. At least I know that if I get to the end of this journey and she still looks the suck, all I have to do is flip the normal maps round the wrong way and fudge the lighting!
And to think, all I thought I had to do was rig up the face and push a bit of expression in there. Haven’t even started down that rabbit hole yet. This may take quite a while!
So I tried a bit of sculpting, just on the basemesh as a way of nudging some polys in the right direction and I seem to have gotten away with it. I didn’t redo the uv’s tho or rebake the normals which I think has led to bit of artifacting where the substance normal maps aren’t quite hanging propery.
It’s quite possible it’s something else causing it but I’ll try rebaking in substance first and hopefully that fixes it.
The good news is I found out how to change the hair colours in edit mode so I can see what’s going on now. Also I turned off x-ray (which I didn’t realise I’d left on when building the emitter patches) That made things a lot easier. I can see where the hair is going through the mesh now and everything.
Yeah I mirrored the hair. It took two days to get the first half done - sue me!
I’ve switched out the lights for the time being for the same hdri map I’m using in substance, which should mean I have more consistency with colours and stuff when I’m going back and forth, whereas before it was largely guesswork.
I’m still at the - herding cats - stage with the hair but it’s steady progress. All the sections interact with each other in unexpected ways, some cancelling out other effects and whatnot but even so, I can see an end in sight.
Next step is either going to be some multires sculpting in blender or some heightmap painting in Substance. Currently looking for a coin to flip…
So I plumped for a multires modifier and I’m glad I did! Done a bit of proportion ajustment to the nose and cheekbones but mainly focussed on the eyelids which were beginning to really bug me. I (very quickly) busted symmetry on the hair. It’s still looking like a bag of wasps but it’ll do til I get the face done. The fear has set in. I’ve applied the multires sculpt down to the basemesh so I’m pretty sure I’m going to have problems holding onto my paintjob in Substance but I guess that’s what I get for taking the paintjob to that stage before I had the mesh finalised. I’m like a kid in a sweetshop here, playing with all this new stuff but at some point I’ma have to settle down into something resembling a workflow.
In other news my normal map green and red channel seem to have flipped the right way around between updating the mesh in substance and re-exporting the maps. It’s only a minor quibble but it’d be handy if I could figure out why this was happening. This weekend is going to be finishing the sculpting and then (probably) starting from scratch in Substance.
Another bonus is I figured out how to make the hair render faster using strand render. It makes the specular go batshit but I can live with that for 5 minutes a preview as opposed to half an hour!
Bit more sculpt work today. Getting close to done (if I can figure out how to rig this thing before I lose the rag and just sculpt the expression in) Currently holding onto symmetry like a drowning rat but I don’t know how much patience I have to get this rigging job done. The impression I get is there’s no quick and dirty approach, the only way to do it would seem to involve chucking six months to a year of my life into it and I’m not sure if I really want it that bad. Time will tell…
On the plus side, I split the mouth today and redid the UV map and, other than some slight artifacting which took 2 mins to clean up, Substance Painter totally saved my paintjob!
Still plugging away on the hair. Eyebrows are closer to done and I split the lashes into top and bottom and redid those. Not much of a difference there but it’s a lot more manageable now. No idea what’ll happen to them if and when I get the rig done but if I don’t die of old age first I might just live long enough to find out.
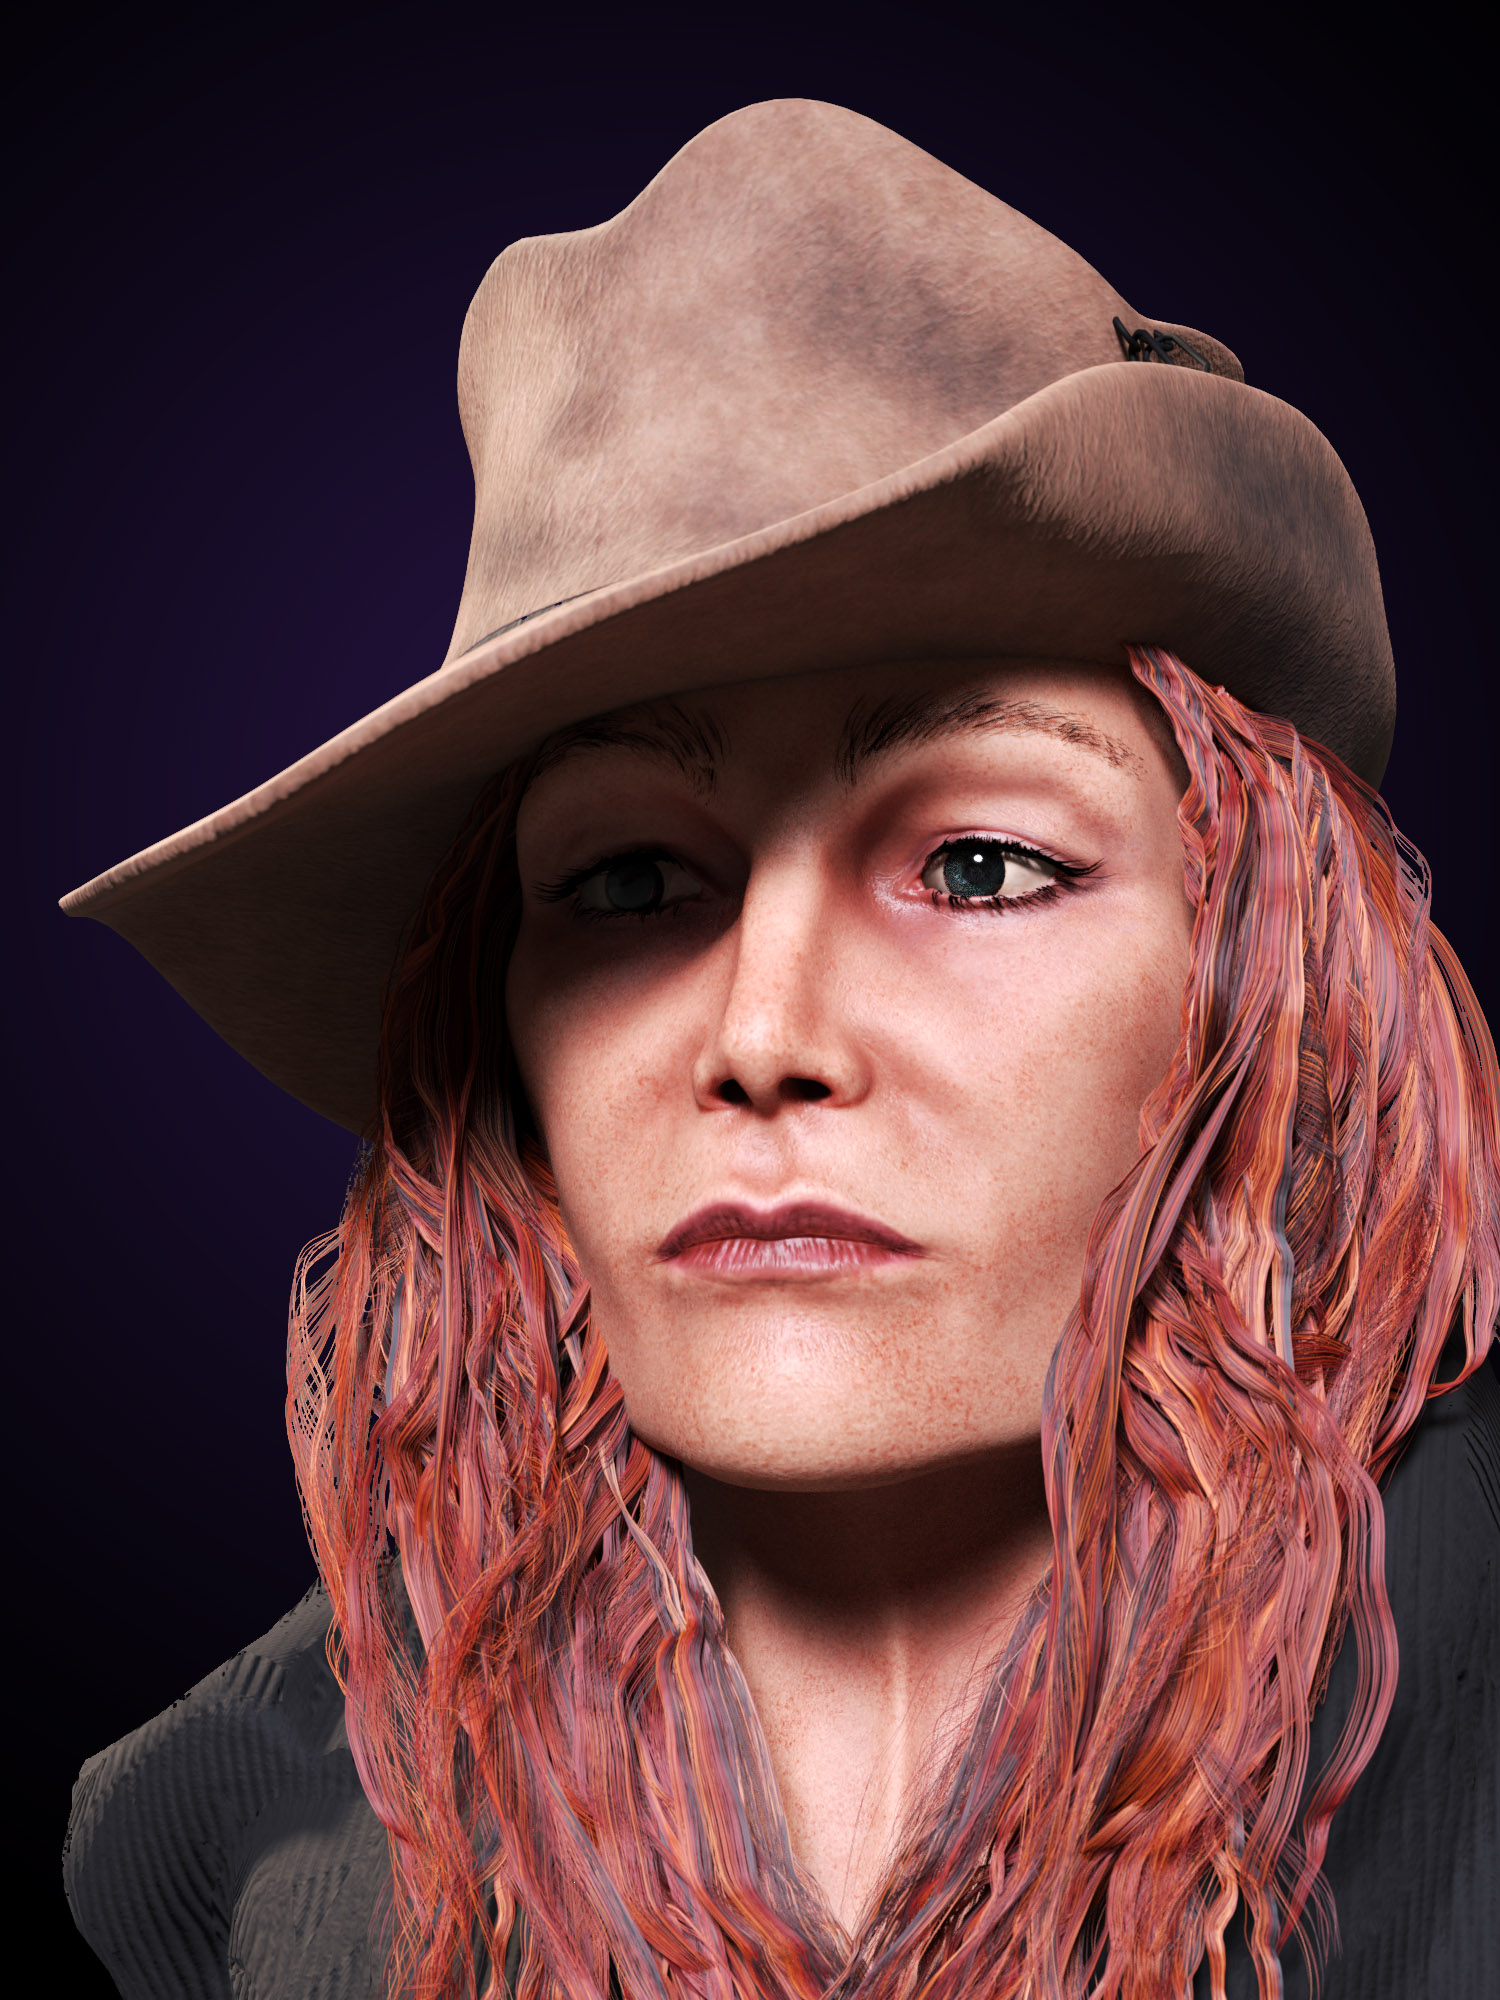
The main hair is getting close to the - quit twiddling about about with settings and start again - stage. I know I’ve made a whole bunch of bad decisions with parent/child ratios but I’m plodding on for now in the hope that I can get a clear picture of what a good decision might entail. The rainbow look was a result of experiments scaling my texture map and upping the contrast.
I was missing VR this avo (it’s been over a week) So I jumped in and knocked out a hat. I retopped it in blender then banged on a basecoat in Substance. It feels good to be getting a bit of familiarity with the pipeline now and knowing I can bounce back and forward between Blender and Cycles with something approaching reckless abandon is confidence inspiring!
So I never got to bed last night but the sleep deprivation was worth the effort. Rigify to the rescue. I was kinda daunted because there’s like a million-odd bones and finding a decent tutorial for doing the last bit felt like uncovering a conspiracy theory or something. For the record I used this one https://www.youtube.com/watch?v=GbcjlEHc9aQ
I think it’s going to be a while before I get any more work done on this, right enough. Messing about with face poses is too much fun! Once I’ve got it out my system, tho, I’ll be reskinning it. The bone placement was pretty slapdash and some of them could be a lot better placed now I know how they work.
Finally feel like I’m starting to get somewhere with the hair. Discovered there’s actually a hair shader. That made an instant difference. Go figure. Mucking about some more with the expression but I it’s reading more Liam Gallagher than Clara Paget. Definitely need to reskin this thing and a bit more mesh work on the mouth. Then it’ll be time to explore shape keys. Still no end in sight
Ditched the HDRI. Haven’t been near substance in days and it was making the sculpt look hideous so I spent last night adding some proper lighting. Other than that, still plodding away on hair. Trial and error. Still mostly error but inching a little closer every time.
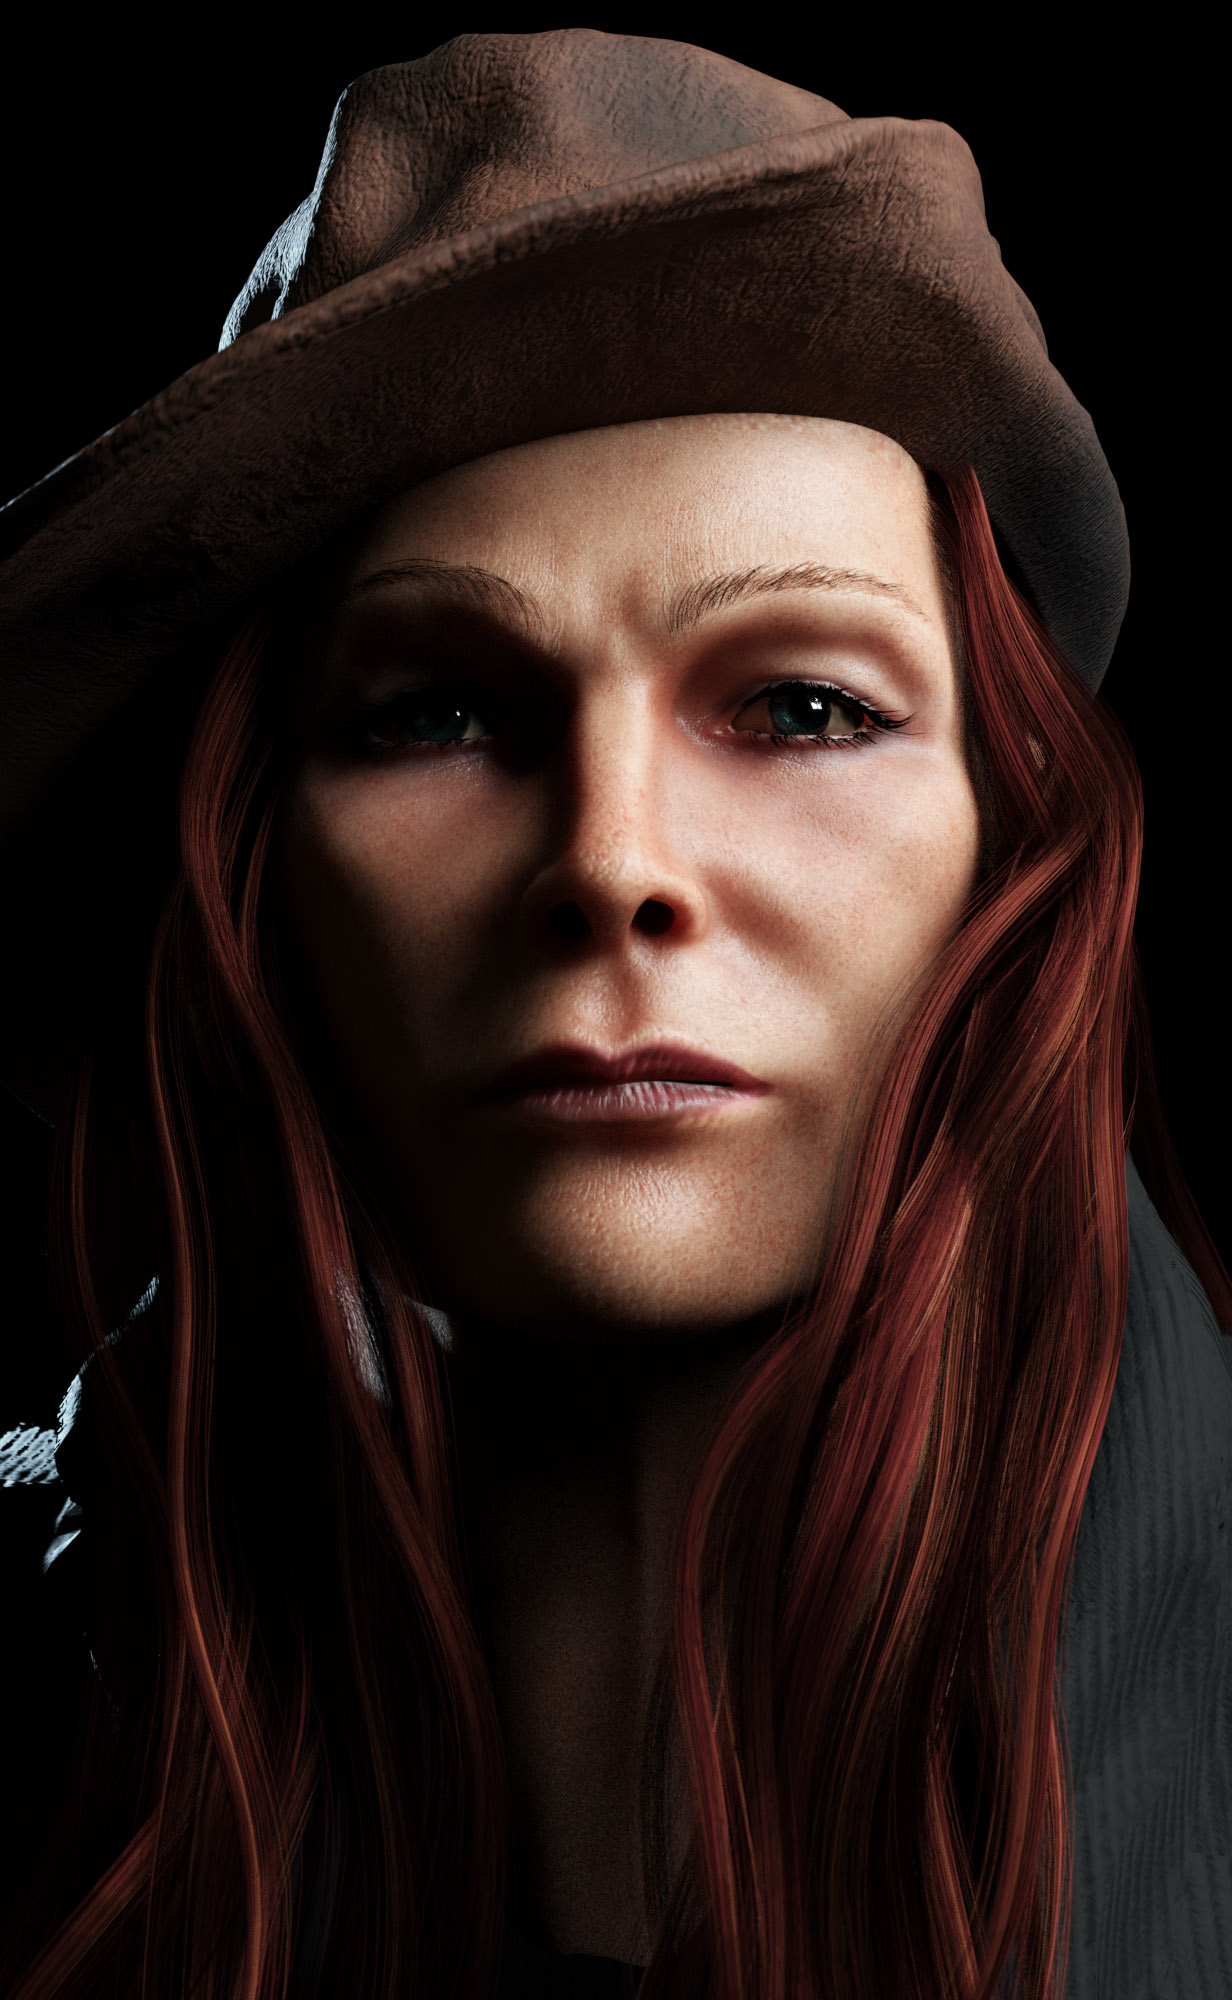
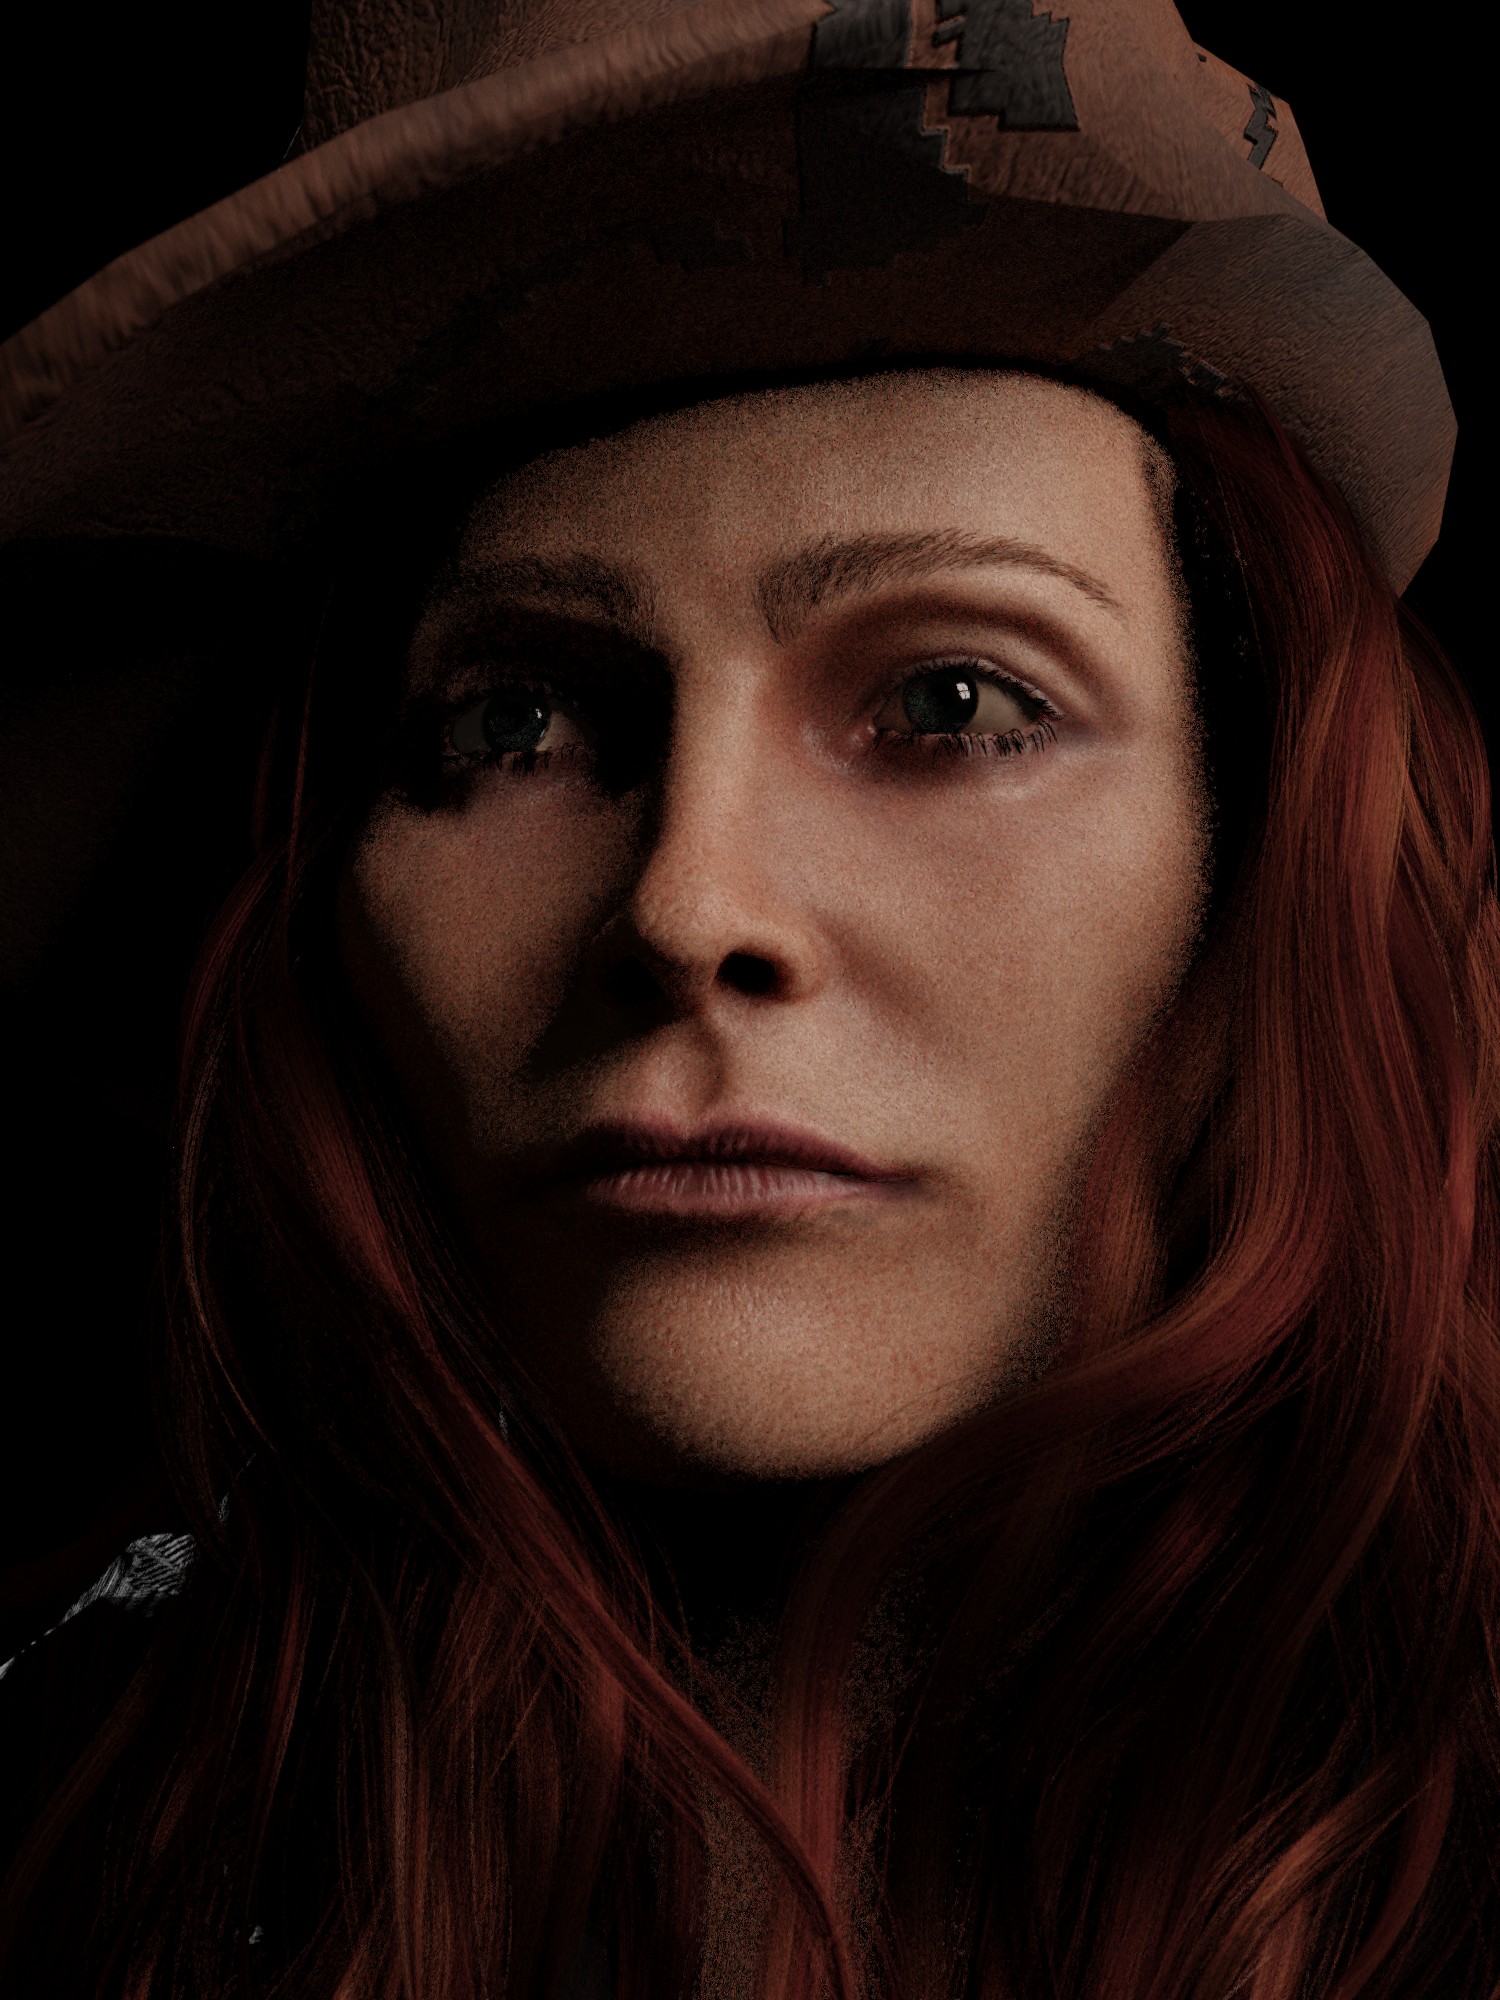
Moving closer to a likeness I can live with. Did a bit of modelling work on the mouth, tidying up the corners. Haven’t re-unwrapped yet. Hence the herpes thing. Cheekbones bigger + more fat. Eyebrows dialled back. For some reason sculpting summoned satan all over the hair on the left side so that needed redone. Still needs some tidy up. Eyes still aint right. Mouth still aint right. Not sure which is causing the biggest problem but I’ll keep at it. Hopefully figure it out.
If this was just a random head sculpt I’d probably be quite pleased with it by now. It certainly looks better than anything I’ve done before but it’s not a random head sculpt. It’s supposed to look like someone. And it doesn’t. And it’s doing my head in a bit. Oh, and something weird has happened to the UV’s on the hat but that’s the least of my worries.
Can’t believe no comments yet. Im not a pro at this but I can offer up what I’m seeing. Everything looks very nice, not sure what character you’re trying to model but everything looks fine to me. The eyebrows are a bit off for me, and maybe the hair as well though that has gotten a lot better over the course of the project. The nose also seems a but too straight, maybe some more definition and curves. Perhaps longer eyelashes as well?
Thanks for the kind words! Yeah, if you’re not familiar with the character I can see how this would look okay. If I can’t get the likeness sorted out, she’s going on artstation as “fictitious redhead - not based on any real person living or dead”
Eyebrows are hopefully looking better now (I had the root thickness way too high) although I need to up the children now (a lot) subject is quite bushy and I’ll also need to bring the origins down the brow to the kind of place real eyebrows would start. Lashes are going from one extreme to the next. They were too long, now they’re too short. Hopefully hit the sweet spot next time. You’re absolutely right about the nose - I’ll have a look at that. The mouth is looking a bit closer now due to some pose work but it’s still not quite there. Hair I’ve redone for the zillionth time. I think it’s better but probably won’t be right for another zillion or so attempts yet. I also added a tiny smudge of emission to the eyes just to try and pop them a bit. Could maybe go higher with that but it’s hard to judge cos any emissive at all looks ridiculous in the preview.
Note to self: 25 year old actresses have enough subcutaneous fat in the pouches under their eyelids to fuel a whole season of Biggest Loser.
Other note to self: Pay attention to the bloody references next time!
On the plus side, I think I’m on the home strait. Bit more sculpting required on those chubby little eye pouches, tidy up the hair and add some lose frizz and I think I’ll be calling it done.