Welcome to the new update of the Glass Caustics and Dispersion Shader! It’s been a bit past a year since I shared the original nodes, and I have been wanting to fix them for a while.
The shader is not at the speed I would like it to render, but I am very happy with the look of the fake caustics. I will certainly be looking to optimize the nodes, and I already have a few ideas of how to tackle the problem. The caustics may, once again, change visually, but I want to prioritize speed.
Only the “Glass Caustics and Dispersion” node group is under a CC BY 3.0 license, but its output can be used for any purpose.
Hi JettG_G,
your Shader looks very promising. Would you mind to give some more informations about how the shader in general works, and how the settings work?
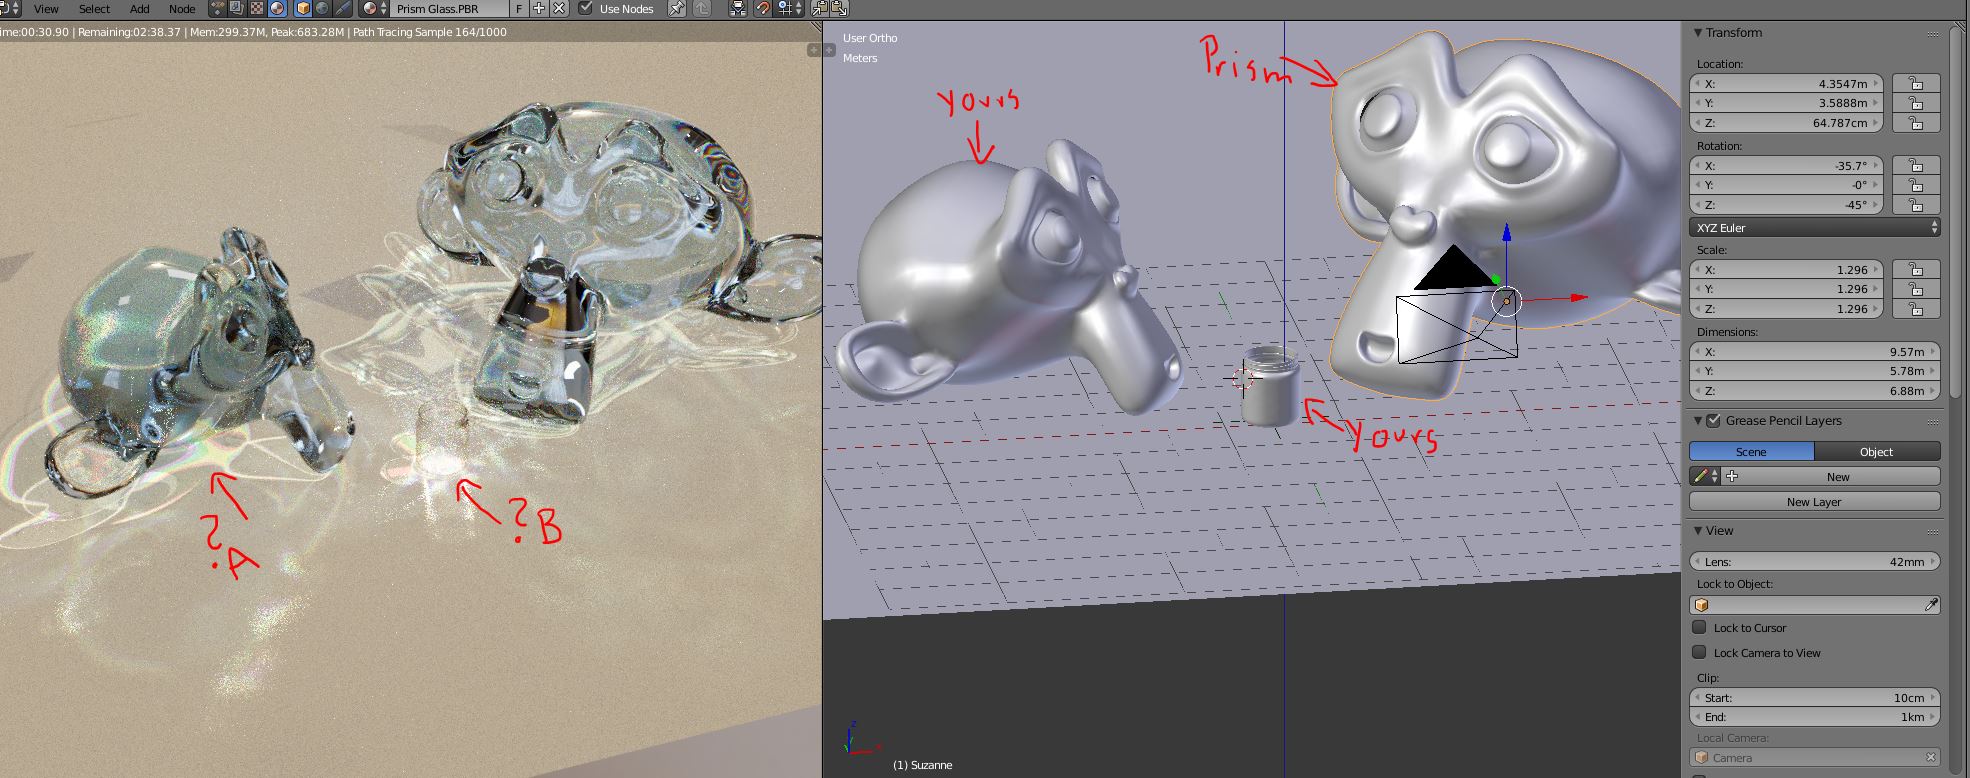
I compared your shader to the prism shader from blendermarket, and the results differ,as you can see below:
as there are no HDRs in your file, i used a HDR from Greg Zaals. hdrhaven.com (hotel_room_4K), which causes chagings in the way the caustics look (See Point A).
Besides of that, it seems that your shader settings are relative to the size of the object. I added a smaller object (B), used the shader given in your file, and the caustics look way brigther than in the lager suzanne objects. To improve things, i kindly would like to ask
is it correct that your shader settings are size dependent?
is there are relation between the light source color and caustic color?
And, last but not least, what are your plans of licensing you shader (GPL, CC-X …)
Anyway, thank you a lot for your work. The node setup looks very hard to achieve. Well Done.
When I have a little more time later today, I can do some renders to help show what each setting does and hopefully make each more clear. I will say that the way I’m calculating the caustics in the blend file is arbitrary.
For some reason, the “automatically pack into .blend” setting was unchecked, but the file should have the original HDRI that I used in the render.
Those are some very good questions. As for your first one, I would say that the shader being size dependent is not correct. I’m not very well acquainted how light works, but logically, it simply does not make sense for it to be so. Thank you for pointing it out, I’ll see what I can do to fix it.
To address your second question, after some quick tests, it looks like the caustics are related to the light source color. Although, it seems the caustics with the absorption color are not affected as much as the caustics resulting from the base color.
As for your last question, the license for the node group itself is CC BY 3.0, but the outputs (meaning anything rendered with the node group) can be used for anything. I’m sort of unfamiliar with licenses, so if you have any suggestions, I’m definitely open to considering them.
Seeing my shader right next to the prism shader makes me want to rework my caustics, and the Prism shader as a whole really does look like it converges pretty quickly, haha!
After seeing how so many people found this recently (I was horrified people were downloading and liking the shader after I thought it was buried and lost, hah), I finally got motivated to rework this glass shader, and I’ll be posting it when I finish the documentation for it. The renders for the documentation have already been made, so I should be posting it soon.
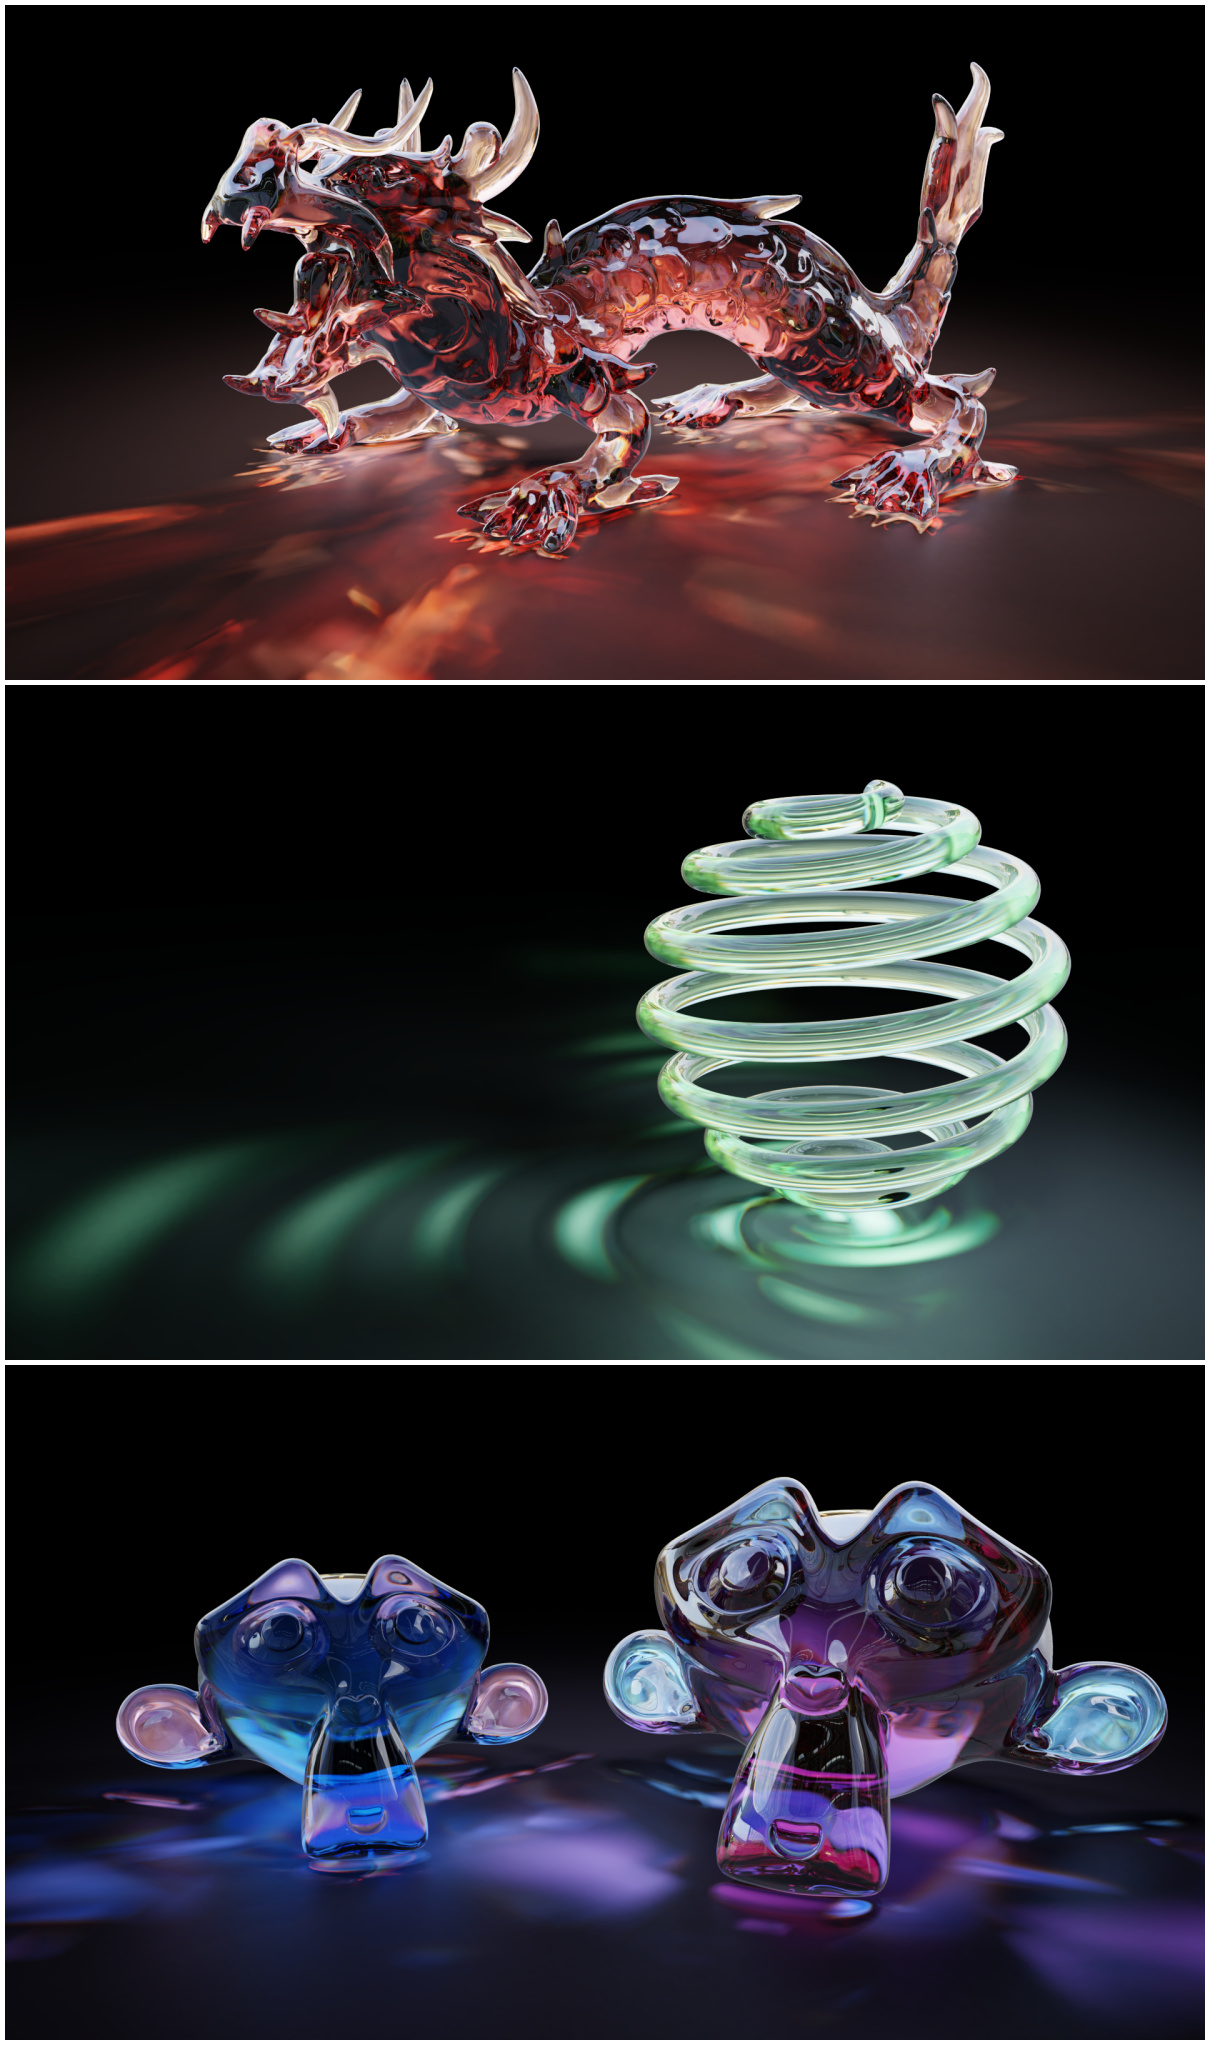
I think I’m actually quite happy with how the caustics turned out, but I won’t lie and say it’s fast… I’ll definitely be testing and searching for faster ways to fake them. For now, enjoy these preview renders:
Hello everyone! I have finally finished the documentation after putting it off for so long. The first post should be updated with everything, but here are all the relevant links anyway:
It looks pretty awesome, but I have one concern regarding flexibility of useage.
This node group completely ignores the curvature of the mesh. The curvature estimation doesn’t have to be particularly accurate to look good, just enough to handle some edge cases. For example, in Blender 2.7, there’s only the pointiness attribute, but adding ‘flatness detection’ to the node group as a toggleable option could be a powerful addition.
For 2.8, there are several ways of doing flatness detection: using the Bevel shader and dot product (this is probably the most efficient geometry-independent way), using AO and comparing internal vs external…
I’m specifically thinking of models that have enough curved sections to look bad with ‘architectural’ glass, but enough spots that are roughly flat to make most fake caustic methods to seem completely opaque in terms of shadows…
I think I understand what you mean, but I’m not exactly sure what it’s supposed to look like. Do you have any images that show the effect you describe?
Here’s a quick thing I put together with what I thought you might be looking for:
I don’t know what I’m doing wrong, but I’m getting no caustics at all after opening. (Glass Caustics and Dispersion (v2.0)) The glass looks cool though!