Greetings,
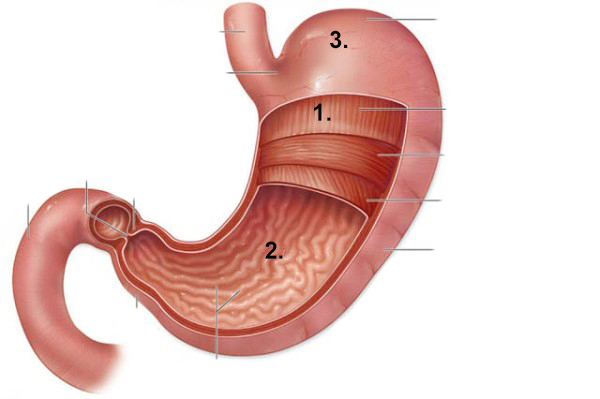
How to create this kind of textures shown with numbers on the picture?
Thank’s in advance.
Greetings,
How to create this kind of textures shown with numbers on the picture?
Thank’s in advance.
If you only need a texture, the best way would be to create the different textures in Photoshop.
Maybe by taking the original image, copy and past a part that fits to a new square image an use the stamp tool
and the brushes to fill in the rest.
If you need a material that also shows all the structure the different Layers have, i would suggest sculpting
them in Blender, bake the normal maps and then also in Blender, paint the colors via Texturepainting onto the Model.
Maybe at last some refining in Photoshop too.
1 and 2, I would probably make tiling bump maps from meshes. A plane shrinkwrap/projected onto a series of curve objects would probably do fine. I could use those bump maps directly along with a diffuse color, or I could bake the texture for use in a simpler rendering engine. As long as I was making meshes for a bump, I’d probably render them to AO as well and use that AO to drive some color variation. All of the textures for 1 could use the same bump map, rotated in various ways.
For 3, considering that this looks anatomical and the details look like blood vessels, I would probably hand draw that. Using Blender’s texture paint would be fine. I would draw in black and white and use that black and white texture to mix between diffuse colors.
My skill in making materials generally is very bad. Do I can find some tutorial about it? For all three steps.
Sorry for bothering you.
How much of the model is going to be seen? Is it just going to be a similar shot as your image or are you going to animate it and have it move in 3d space?
bandages I’m on it. I was found one more tutorial with more details.
FlyingBanana, I was planning to take just a picture. For now animation is too complex for my level of knowledge. Maybe later, when my skill become better.
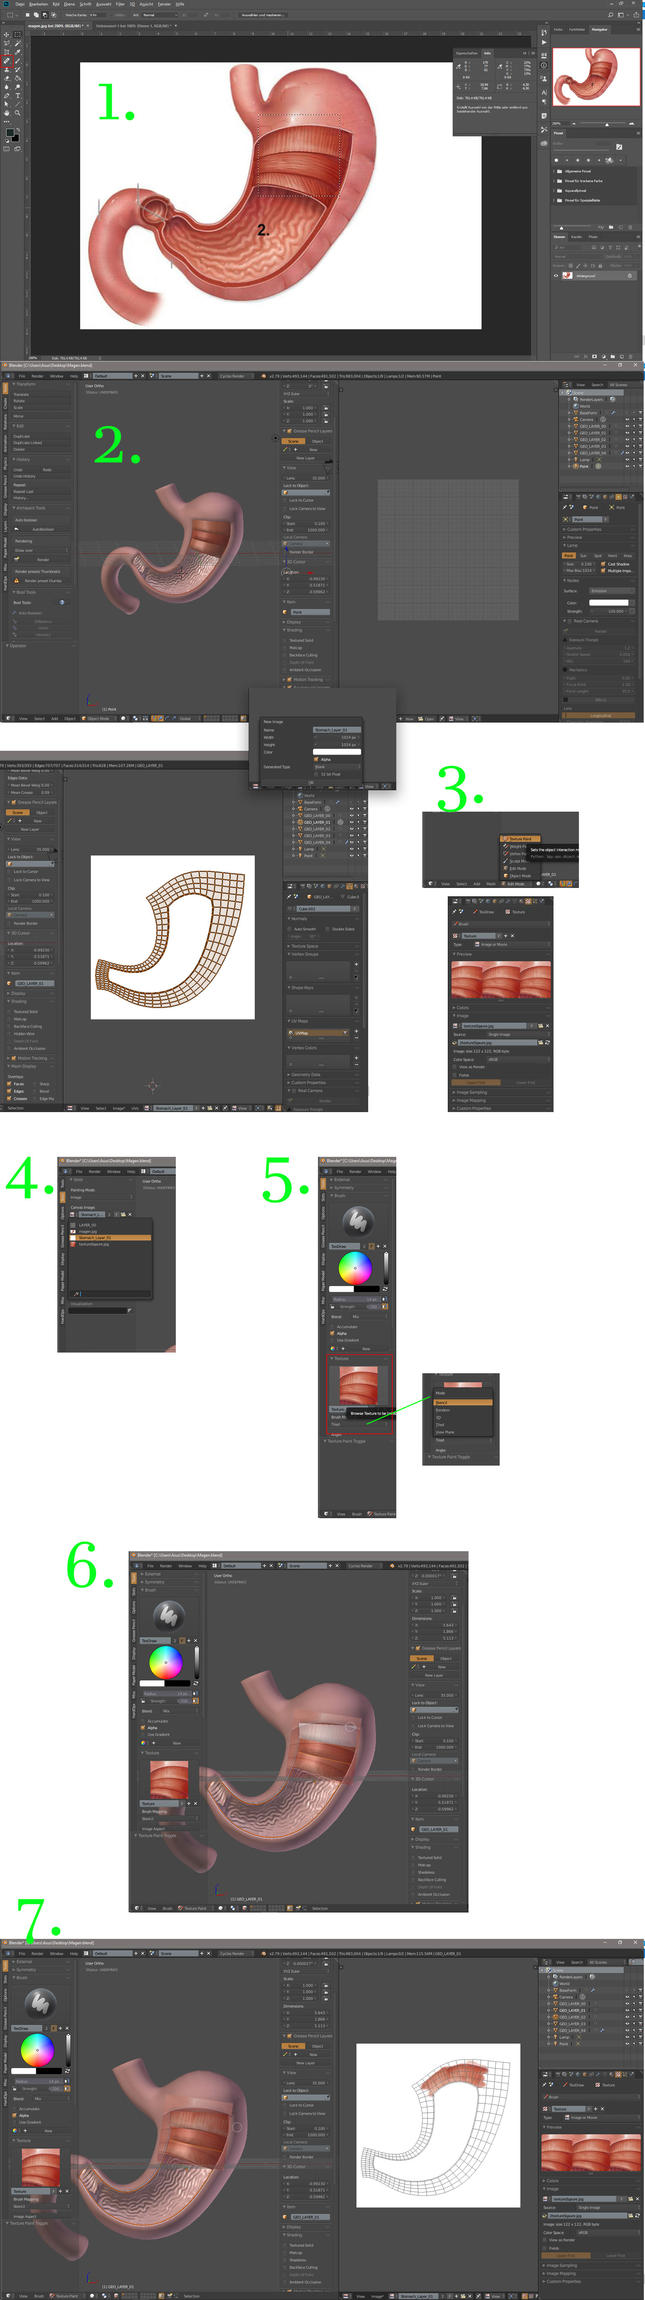
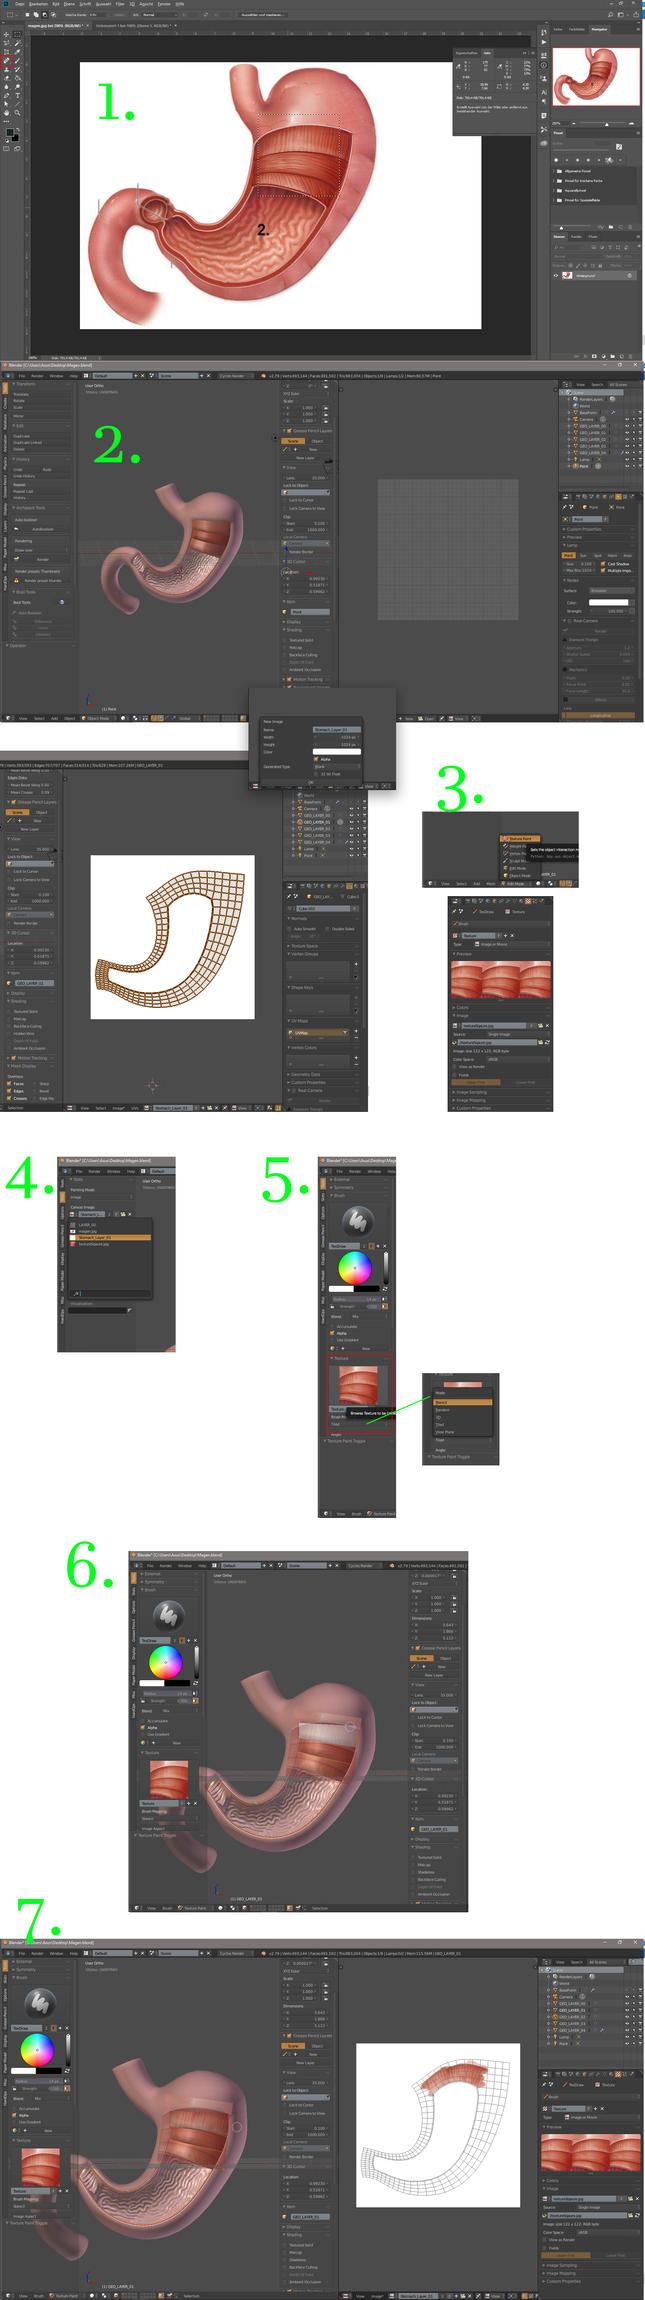
Hi nikola93n
i just created a quick step by step guide.
hope that helps.
1.) open the Texture in Photoshop and crop it to a square with all the textures you need in it.
(I also removed the lines and numbers with the repair tool.)
2.) open the UV/Image editor in Blender, create a new texture and place the UV island of the part you want to be painted
3.) Switch into TexturePaint mode and in the texture panel add the texture you made in Photoshop to your Brush.
4.) In the Slots Tab choose Painting Mode -> Image and under Canvas Image choose the new texture you created in step 2.
5.) In the Tools Tab choose the standard painting Brush and under Texture choose the Brush texture you loaded.
Choose “Stencil” under Brush Mapping
6.) with RMB, Shift+RMB, Ctrl+RMB place the Stencil in the 3D viewport.
7.) Paint.
Since your image doesn’t seem to have such a high resolution, this will result in an rather blurry Texture.
But it is a good starting point.
When your done with this, you can delete the brush Texture and now refine this image with a small standard Brush by sampling the colors and repaint until it fits your needs.
derSpunk, thank you very much. I’ve been doing this for the first time. Pictures are little blurry, but I can handle that. At least I thinking so. Thank you again.