Hi guys, I’m getting a bit bogged down with an asset and was hoping you could give me some pointers as to how to proceed retopologizing the high res mesh pictured below. Any pointers would be great but just a sanity check that I’m not way off would be appreciated too.
I created this high res mesh by creating individual bricks and extruded a plane to make the mortar. I used sculpting tools to do the finer details. As it stands the asset is two separate objects, one being the mortar the other the bricks.
My plan was to boolean the two objects together then decimate the result to get close to a low poly mesh then manually finish it off. However the boolean tool is not working like I wanted it to. I think the main problem is that the mortar isn’t a watertight mesh, it started as a plane that I extruded so it has no back face.
I also tried to create a ‘cage’ around the mesh and shrinkwrap it to the high res mesh which got the closest but not really satisfactory.
Finally I tried making the low res mesh by hand but this takes a lot of time as the mesh will be seen quite close up in UE4, I don’t mind doing this but I want to exhaust other options first as time is a problem for me.
My next step is to remake the mortar as a cube so it is a watertight mesh which I understand will play better with the boolean modifier. I will then try merging it all together then will decimate it and see where I end up.
After that I will try making it by hand again and just deal with it.
What do you guys think? Am I missing anything or is this pretty standard workflow? How would you go about this if you were working on it?
Looks like you might have to rebuild it from scratch if the original mesh is too messy. I often run into issues like this where I spend more time trying to find a fast solution, and in the end, I wasted so much time messing around I could have easily rebuilt it twice.
That said, if I were to retopologize, I’d use shrinkwrap and represent every visible brick face with a polygon face. Then at the end just extrude faces that need to stick out.
This chimney is almost symmetric so use a mirror modifier when retopologizing and then apply the modifier when you’re ready to do the unique details of one side. Hope this helps.
I’ve had a think over what you said and I think tonight I am going to try the shrinkwrap again but split the mesh up into parts and model the cage more accurately than I did the first time. This should allow me to give the shrinkwrap cage more polygons to work with and the result should be better if I model the cage closely to the original mesh.
I will post my results here tonight or tomorrow depending on how fast I can get it going.
Howdy,
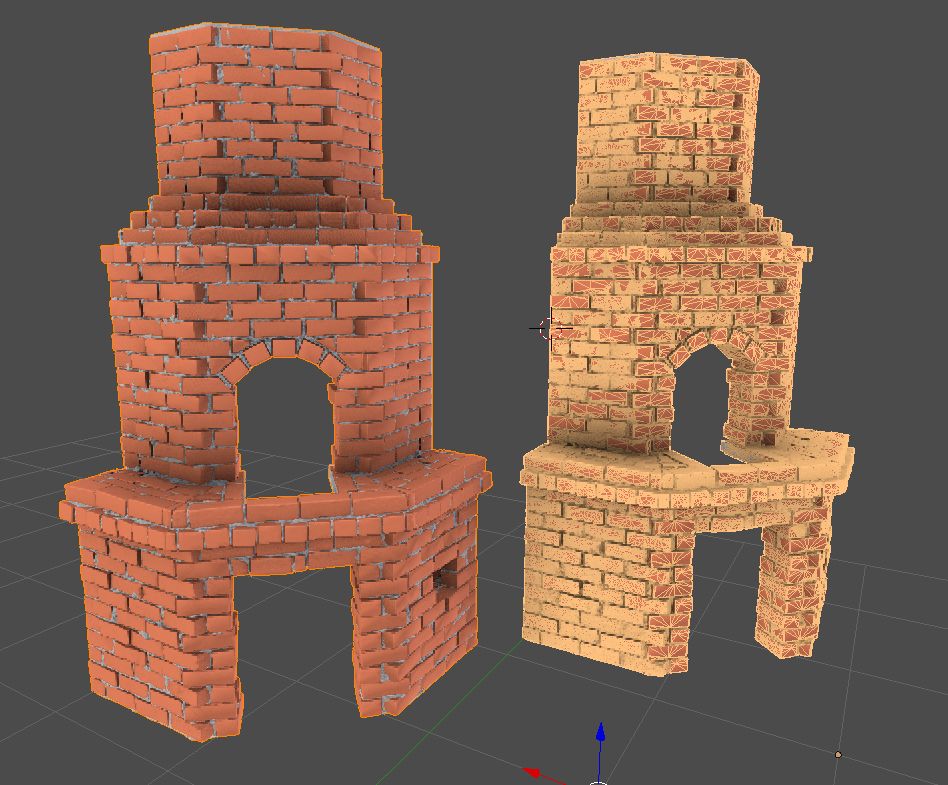
So I shrink wrapped part of my mesh as a test and cleaned it up manually. It worked more or less as expected. I smoothed the model with no splits and baked the normal map.
I applied the normal map with a principled BSDF shader and in the Blender viewport it looked horrible. It didn’t look too bad when I rendered it but still not great. I was surprised to find that when I tested it out in UE4 (after inverting the green channel) it looks more or less fine.
I am new to Blender but is this a common issue? I know the new 2.8 release has a viewport shader that people are raving about but is there no way to view normal maps except for rendering?
I’ve been away from 3D for 3 years or more and was really struggling with this retopology but after seeing my result in UE4 I have to say normal maps are a bit more forgiving than I remember them being. This doesn’t look amazing by any means but it looks a damn sight better than I expected it to.
If I needed to produce a low poly from that, I would first backup, then join all of the mesh into one solid mesh, then I would enable snap and set it to face or vertex and shrinkwrap, and then I would extrude and trace out all of my detail area’s. This will be a good exercise for retopology practice.