I’m totaly knew to blender and I am kind of lost right now.
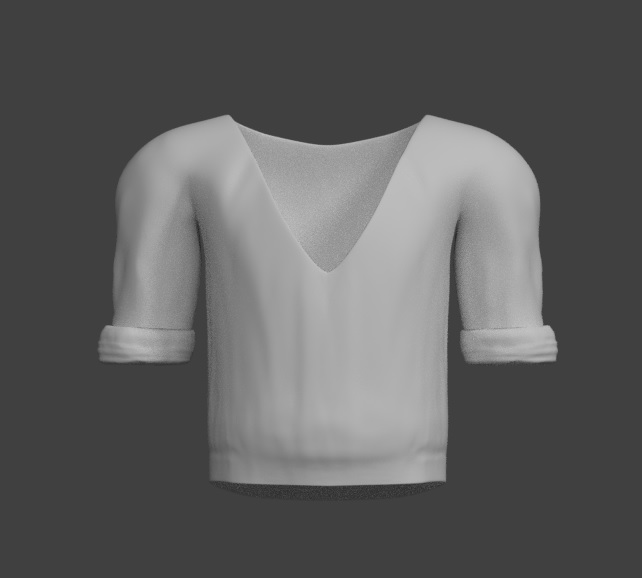
I am trying to create some Clothes as a Game Asset for Unity. I already modeled a shirt for my character (with applied Subdivision Surface and Solidify modifier, don’t know if this matters) but now i don’t know how to continue in order to give it a realistic look. I know that i need to add a material with some kind of texture for it, so it get’s the look of fabric/linen/cloth, but i get totally confused if I have to bake a normal map, a bump map or something before or do I just start with the material?
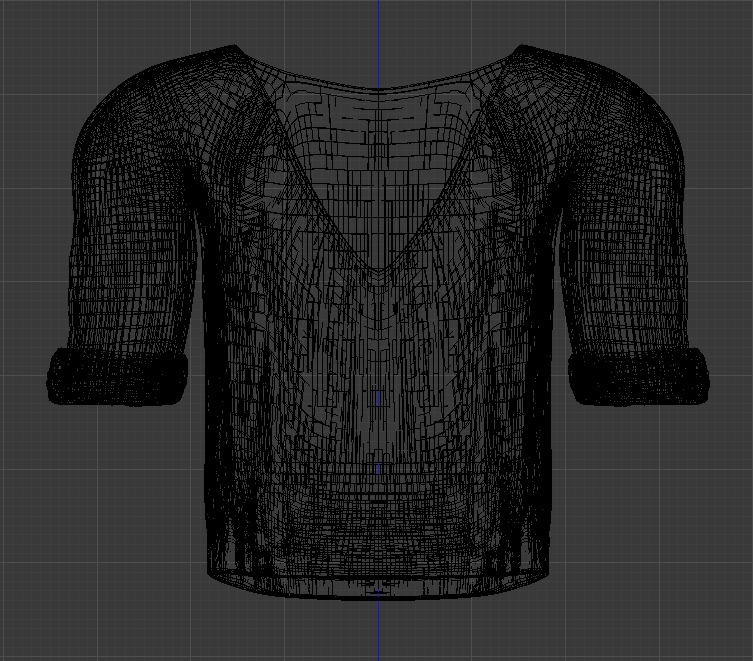
I don’t know if this helps but that is the mesh (Screenshot) in Cycles Render.
well, now it’s goin’ to be tricky in order to give You the right answers. You say, that you’re new to blender. Well, from the sight of modelling, you seem to do a quiet good job. So it would be nice to know, whether you are, or how much you are expierienced in texturering outside of blender. If you know nothing about texturing… well… then it’s a long story, because the possibilities are many and are depending on what you want to use the mesh for afterwards. You are talking about exporting to Unity?! Well, then you have to take in consideration, that you have to retopo the shirt, prior to use it in Unity on a rigged character… and so many things more …
So just give us a glance about your knowledge in general, not only on blender and I think, there will be many advices to proceed, then.
Thanks for that quick answer. About my knowledge and experience I can only say that I have NONE at all, inside and outside of blender. I just started beeing artistic a few weeks ago
Ohooohhh… well. In that case, well I would suggest to start up learning. Well, there are many, many sources out in the web. More or less of quality. When I started seriously (after a long time of trial and error - with no significant progress - other than nearby giving up ) I went to CG Cookie. The learning flows are covering mostly everything, that you have to know, from scratch. Including cross-learning flows into Unity. Well the access is not free of charge, but not as high as normal other proffesional training-sites. Go in look some free stuff up and then decide to get into the citizen state and start learning. It’s the best advice I could suggest.
I’m no “artist”, but if you just started “being artistic” a few weeks ago, I’d suggest dividing your time into four:
Learn to work with combo workflow, like Blender / Unity.
Learn to use main software, like Blender and Unity.
Copy/block out existing great pieces of art, and only spend a certain amount of time on it before going onto the next one (not detailed). Doesn’t have to be CG but it helps to know it has been done with CG before.
Learn the basic concepts of art (preferably not CG based). Color theory for painters, painting and sketching, sculpting, interior design, lighting, composition, spaces, concept art for movies, movie CG breakdowns even. That sort of thing. Look at youtube stuff with commentary, speed stuff doesn’t help much at this stage. The point is getting into the artists head and learn to think like one.
Focus at the bottom (learning art), then work yourself upwards. Later on, when you think you know everything (you don’t ;)), you’ll find yourself going back to these and refresh your memory. On a multimonitor setup, leave one running these while working on your own stuff, you’ll probably pick up stuff even if not focusing on it - but that’s for later stages.
thanks for your answers.
I spend some time now searching on the cgcookie-site now (and on the rest of the internet) and I came to a point now where I think I got the procedure I have to go through now, please correct me if I am wrong:
bake a normalmap (optional)
From what I got so far, you can bake the normals of a high Poly object into a map which you can than use to project some of the
details from the high Poly mesh to the low Poly mesh
UV-Unwrapping
Here you put seams on your mesh to kind of cut it in peaces if needed or to just flatten it, so you can put it on a texture in the Imageview in Blender.
Create a texture
In this step you need to create a texture from a photo or something, that you want to project on your mesh.
Create a material
(I only did this in Node-Editor) you use different Shaders to get different effects for you object, e.g. the glossy-shader if you’d like your mesh to reflect in the light. Also here is the coloring part from what I know.
Here is the wire-view. It’s a not so good screenshot but I hope you can recognise what you are looking for.
no need to uvunwrap your current model. It is Way, way too high a polycount for a game object, unless you want to vertex paint it, but even then why vertex paint your high poly when you can just paint your unwrapped low poly?
then you need to make a new shirt model, with way, way less polys/tris.
then you cut/unwrap the low poly shirt.
then you bake the details of your high poly shirt to the low poly shirt.
different texture types add realism… …a normal map will make the bumps/creases react to light as if they were the hi-poly shirt, the diffuse map will add the color, the gloss map will determine specularity, etc, etc. these are combined by unity’s standad shader to make it all work together.
thanks for your answer. This looks like a realy helpful information.
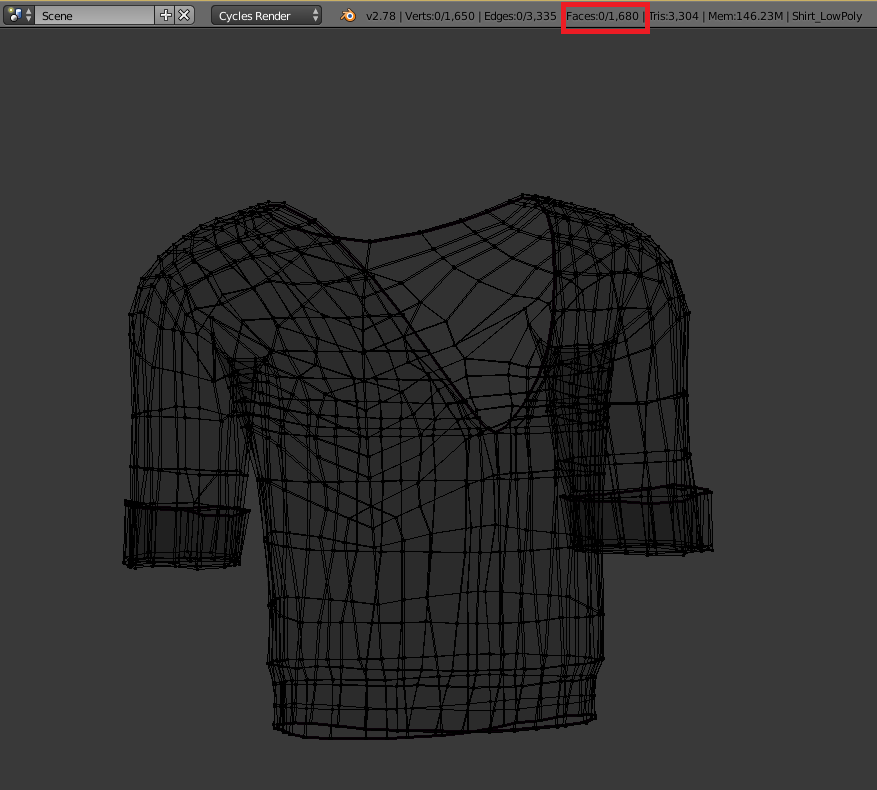
I have now worked on a low-poly shirt for the last days and I got something, I think is pretty decent for a low poly model but I’m still not too sure about the amount of faces, if they are few enough or do they need to be lowered even more?
Right now there are 1680 faces. When I looked for an approximate value poeple have been talking about values between 5k - 10k.
Can somebody of you give me some further information about these low-poly-values or guide me to an online-article about this?
thnxs for the wire-view… And… yes! It’s like I guessed. It’s quiet the same, as I did my ever first attempts on moddeling something. And it’s the real wrong way in terms of useful moddelings. As a game asset (has been mentioned by others yet) You will need as less density as even possible. Your High-Ploy mesh, will never ever work well in a Unity enviroment. Keep in mind that this shirt is only one part of the whole dress.
The real point is, that you have to learn first of all other things, to build a clean, low-poly mesh. clean means not only the shape, the form and so on, but also an animatable topology. Otherwise you will have a nice asset, which looks great as far as your character does not move. But messes up as soon as you add the first movement/animation.
Your guessed “workflow” is quiet right, but you will not be able to follow this path, as far as the basic - in this case the shirt-mesh meets the basic-rules in sense of poly-count, topology and the rest of the staff. I know the personell “pressure” of getting fast ut of the box something, you have in mind. But as in all things, as far as you are not used to use your instruments, it will badly fail at any point.
Take a piece of wood and a knife. Your imagination is to carve a bambi - yes? well, if you never learned the rules for this. How to start, in what steps to get closer and closer to your imagination, you will have a lot of splinters and no real piece of wood left. So again, my advice: Slow down your path to the final goal. Learn the basics. Which means: Modelling - starting with simple meshes like primitives. Adapt your flow to those. learn the issues, that are comming up and to solve them. Alter some primitives into a more complex mesh. Do the workflow again. You will face more issues - and you have to learn to solve them. Then start with simple non primitives. Use the tools inside Blender, ike modifiers. adapt your workflow again. Face the new issues - and so on and so on.
depending on what the shirt is for, you want from 100 to 1000 vertices max. 1000 would mean for a game with large characters/enemies, (but less of them, like a shooter or dark souls), 100 would be for like an RTS.
5,000 to 10,000 would be for a whole character, not just the shirt, and then it would be for a game on which maybe 20 enemies at most are on the screen at once.
It must be noticed, in game engines, vertex count increase for vertices marked as UV seams, and every texture adds 100% to teh vertext count. So a model with 1000 vertices, and 5 different textures for a PBR shader, is actually 5000 vertices in game. (so a 10,000 vedrtice base mesh would actually calculate like 55,000 or so in engine). 20 x 50,000 = 1,000,000 vertices. Which most cpus and gpus can handle now easily, but that is also not counting environment, AI calcs, etc.
i have been fiddeling around with this shirt for some time now and i think the workflow is now pretty clear to me.
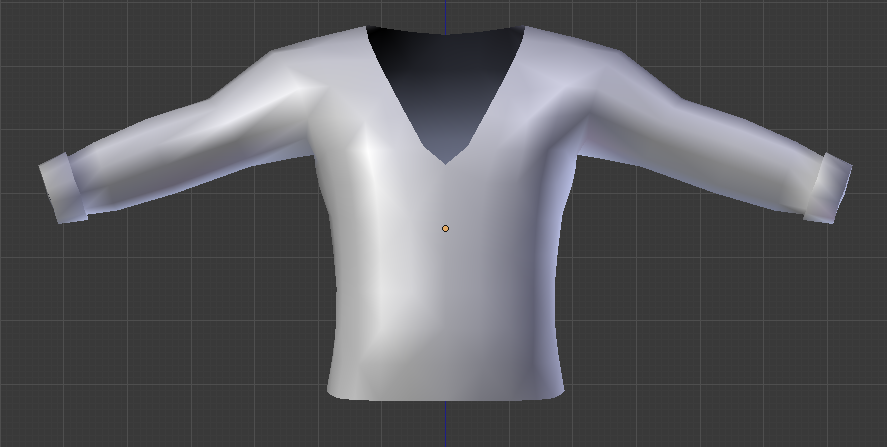
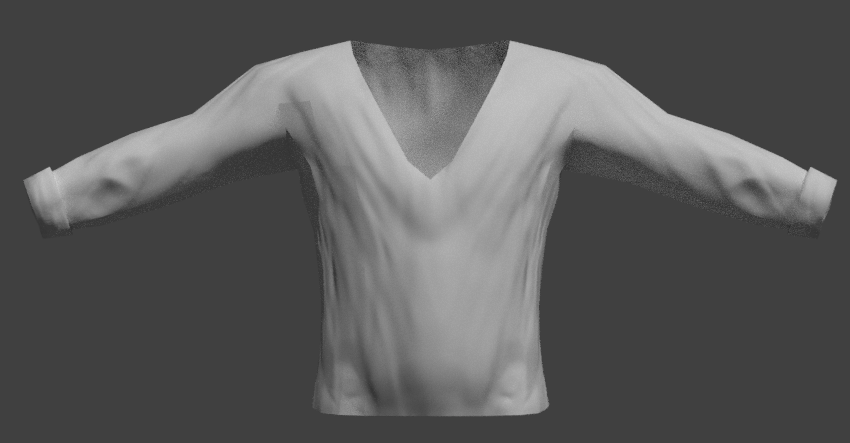
I created a low poly shirt with around 438 vertices and baked a normal map on it so it looks charming now
Here is a screenshot of the low poly shirt(smooth shading)
I know here and there are some issues left with some of the edges but i think i can solve these problems by investing a bit more time.
As before I say thanks to you guys, your help really brought me forwards.

 ) I went to CG Cookie. The learning flows are covering mostly everything, that you have to know, from scratch. Including cross-learning flows into Unity. Well the access is not free of charge, but not as high as normal other proffesional training-sites. Go in look some free stuff up and then decide to get into the citizen state and start learning. It’s the best advice I could suggest.