Hi! I have only just started with Blender and for my first “official” project, I’m hoping to bring a childhood character to life. He is a Corn-Squid–a hybrid creature made from an ear of corn and a squid.
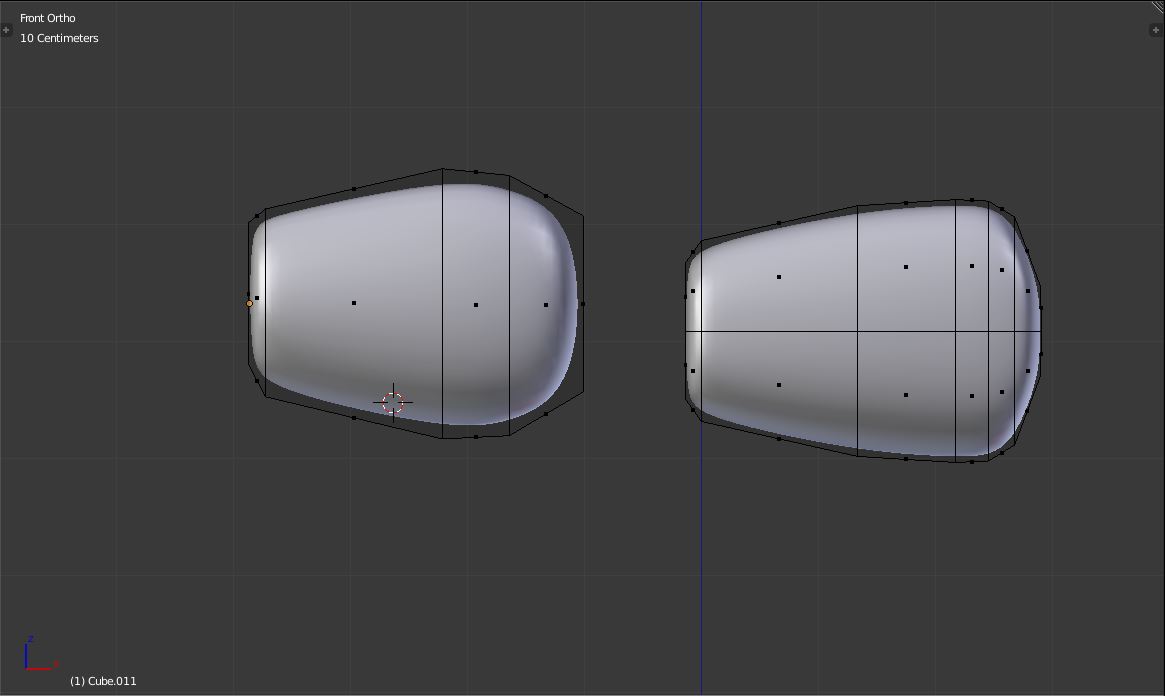
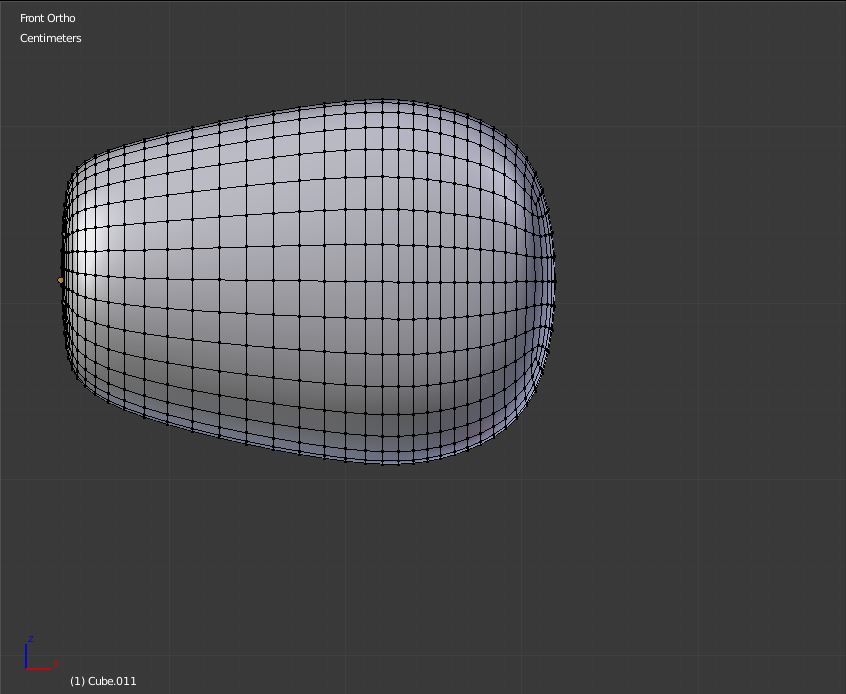
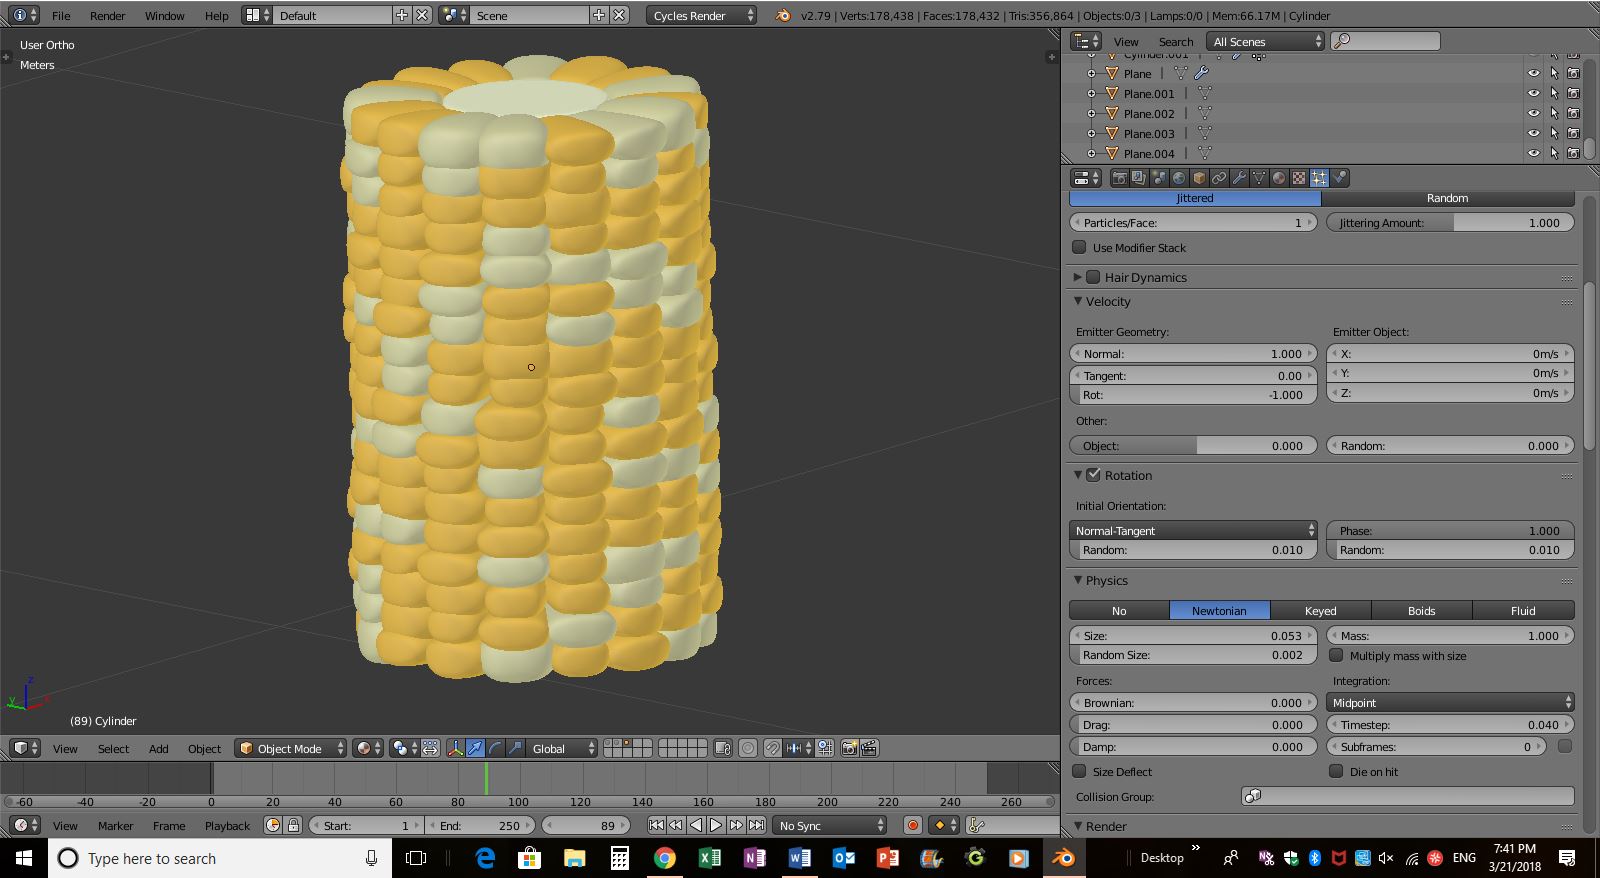
Recently, I have been browsing the internet for tutorials on modelling corn; unfortunately, I haven’t managed to find any as of yet. So, the image above is my sloppy DIY attempt in modeling a chunk of corn. In short, my approach was to use a low-poly cylinder (16 vertices) as the model’s base, and to make the kernels from a particle group.
I would love to hear other ideas or methods of modelling corn, and I would greatly appreciate advice on how to improve upon my current model for better realism Thanks in advance!
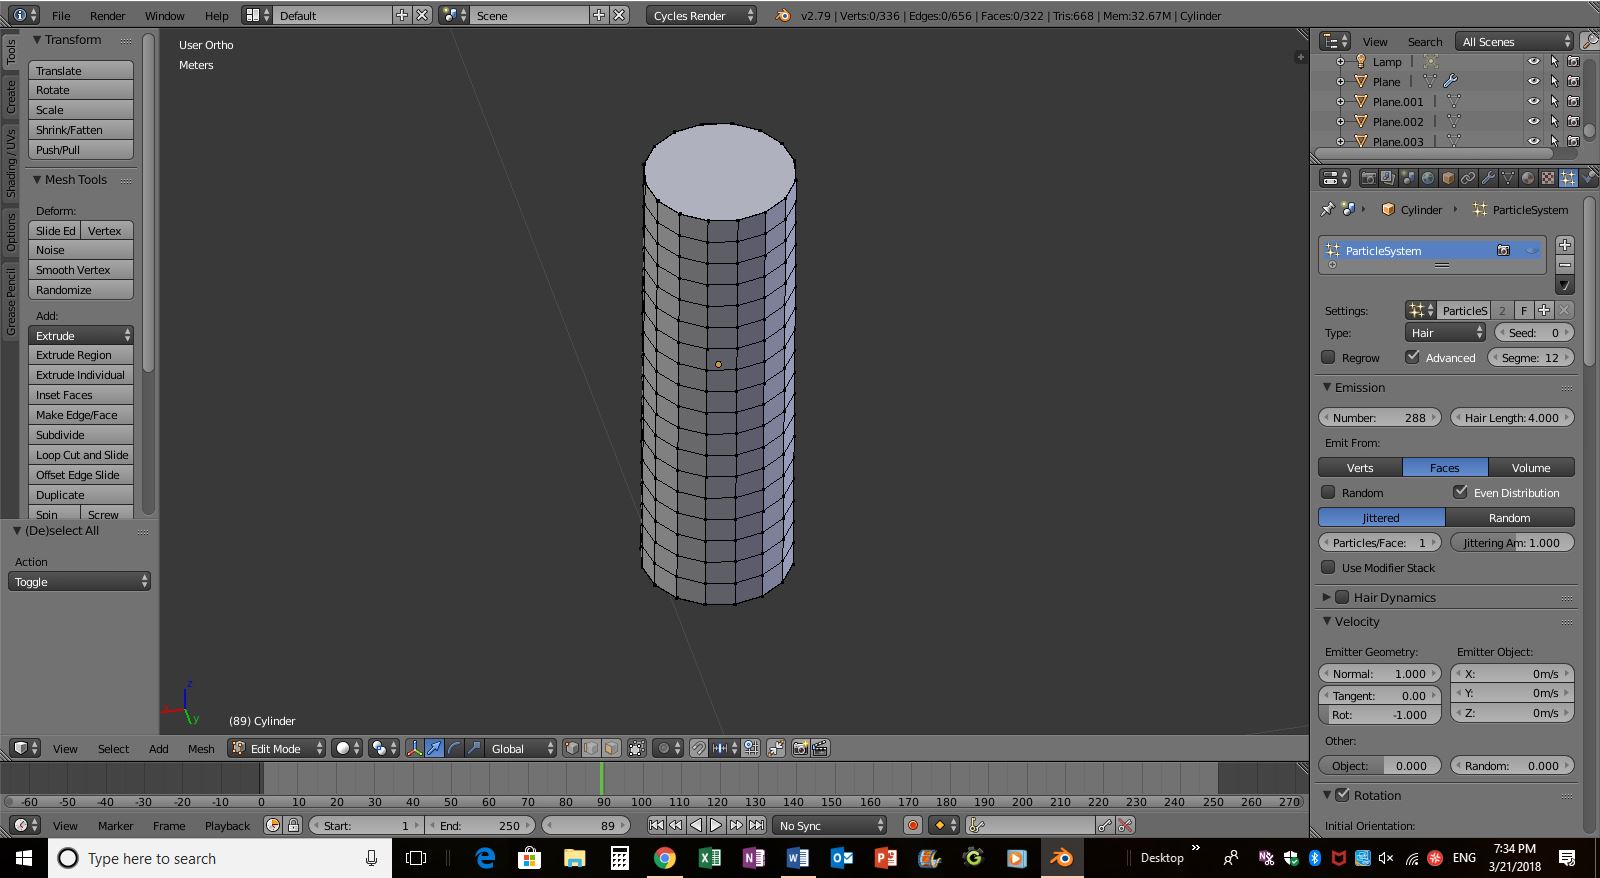
-added a particle system to the cylinder (1 particle/face)
(In hindsight, this actually seems quite simple, but it took me countless hours to do).
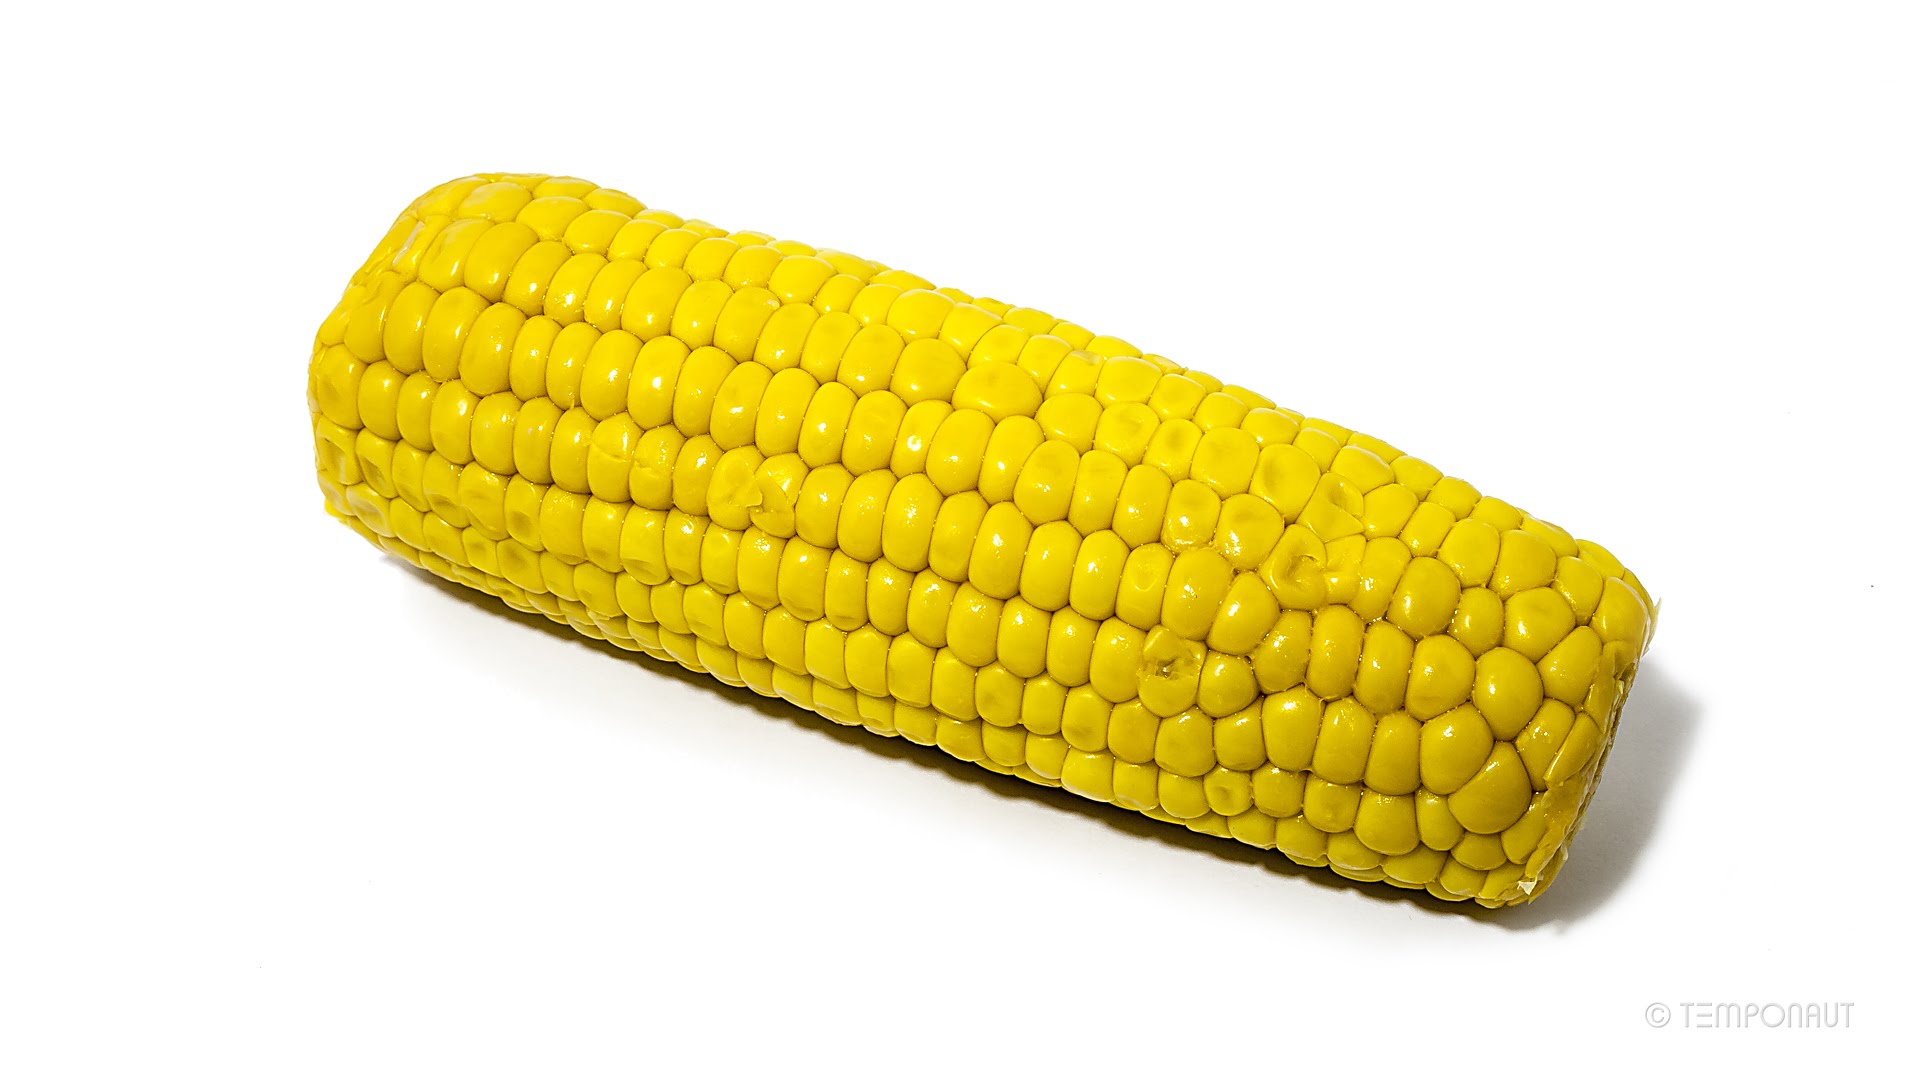
The issue with my method is the fact that I cannot offset the kernels in a way that is often seen in actual corn. Generally, the kernels follow a “brickwork” styled pattern:
And I guess I wanted a high degree of realism partly because I wanted to achieve a photo-realistic render, but also because I was quite curious as to how it could be done
but you could now apply the particles system
make a copy before just in case !
and then start using the sculpt tool to make some changes at different locations
and get something unique
or edit some part of it like rotate some lines of kernels manually and sculpt these a little
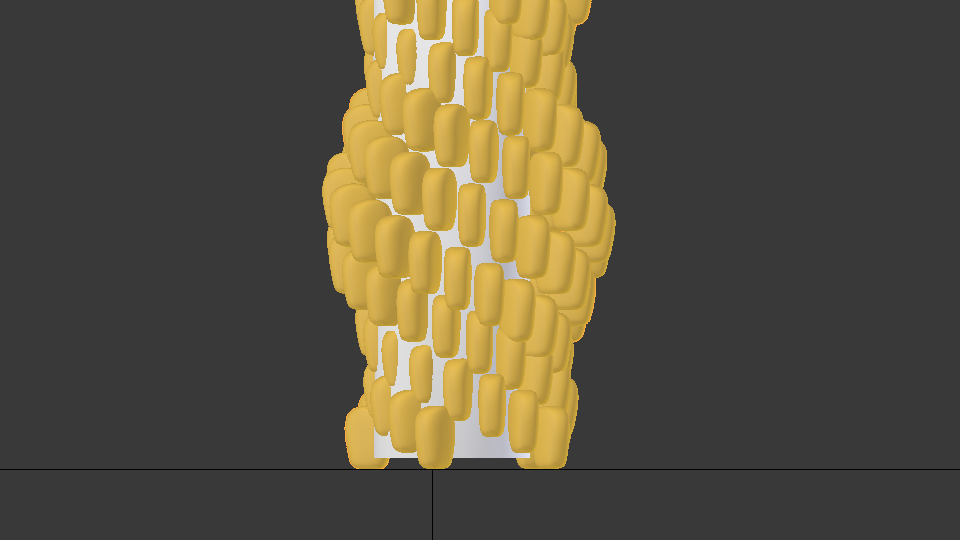
here is example of a spiral kernels around a tube
done with array spiral
sorry cannot upload file it is 36 MB in size
let me try to reduce array size to 1
not working
your kernels are like 2.6 Kbits when applied
that is a lot of verts for such a small kernels
you could reduce that a lot and still get something smooth and nice
for the array you need to add an array with an empty and make a spiral with it then apply and copy it and rotate around a tube.
I have reduced the number of vertices on the kernels and I have tried using the array modifier as well as the sculpt tool. The array modifier has worked out incredibly well Unfortunately though, my laptop appears to be to old to handle the sculpt tool.
There are still a few minor things that I need to work on–although it may be a while before I can, but I will upload a picture or the file when I have finished to see what other things I can improve upon!
I would also like to apologize for the late response
The older one had 42 vertices and the newer version has 20 vertices (it’s a big difference, but I think it might still be to much–especially if there is going to be a few hundred kernels on a full ear of corn; I’ll see if I can reduce it more)
I’ve put sub-div at 2 with the smooth shader and auto smooth, but the file size is still too big…might be that I have too large a variety of kernels in the array?
Hey; Add a ‘Data Transfer’ modifier to the lower poly one, target the high poly one. Don’t forget to ‘Generate Data Layers’, its like having the best of both worlds…
mimicing kernels is no easy task, I would have at least 12 different ones.
 Thanks in advance!
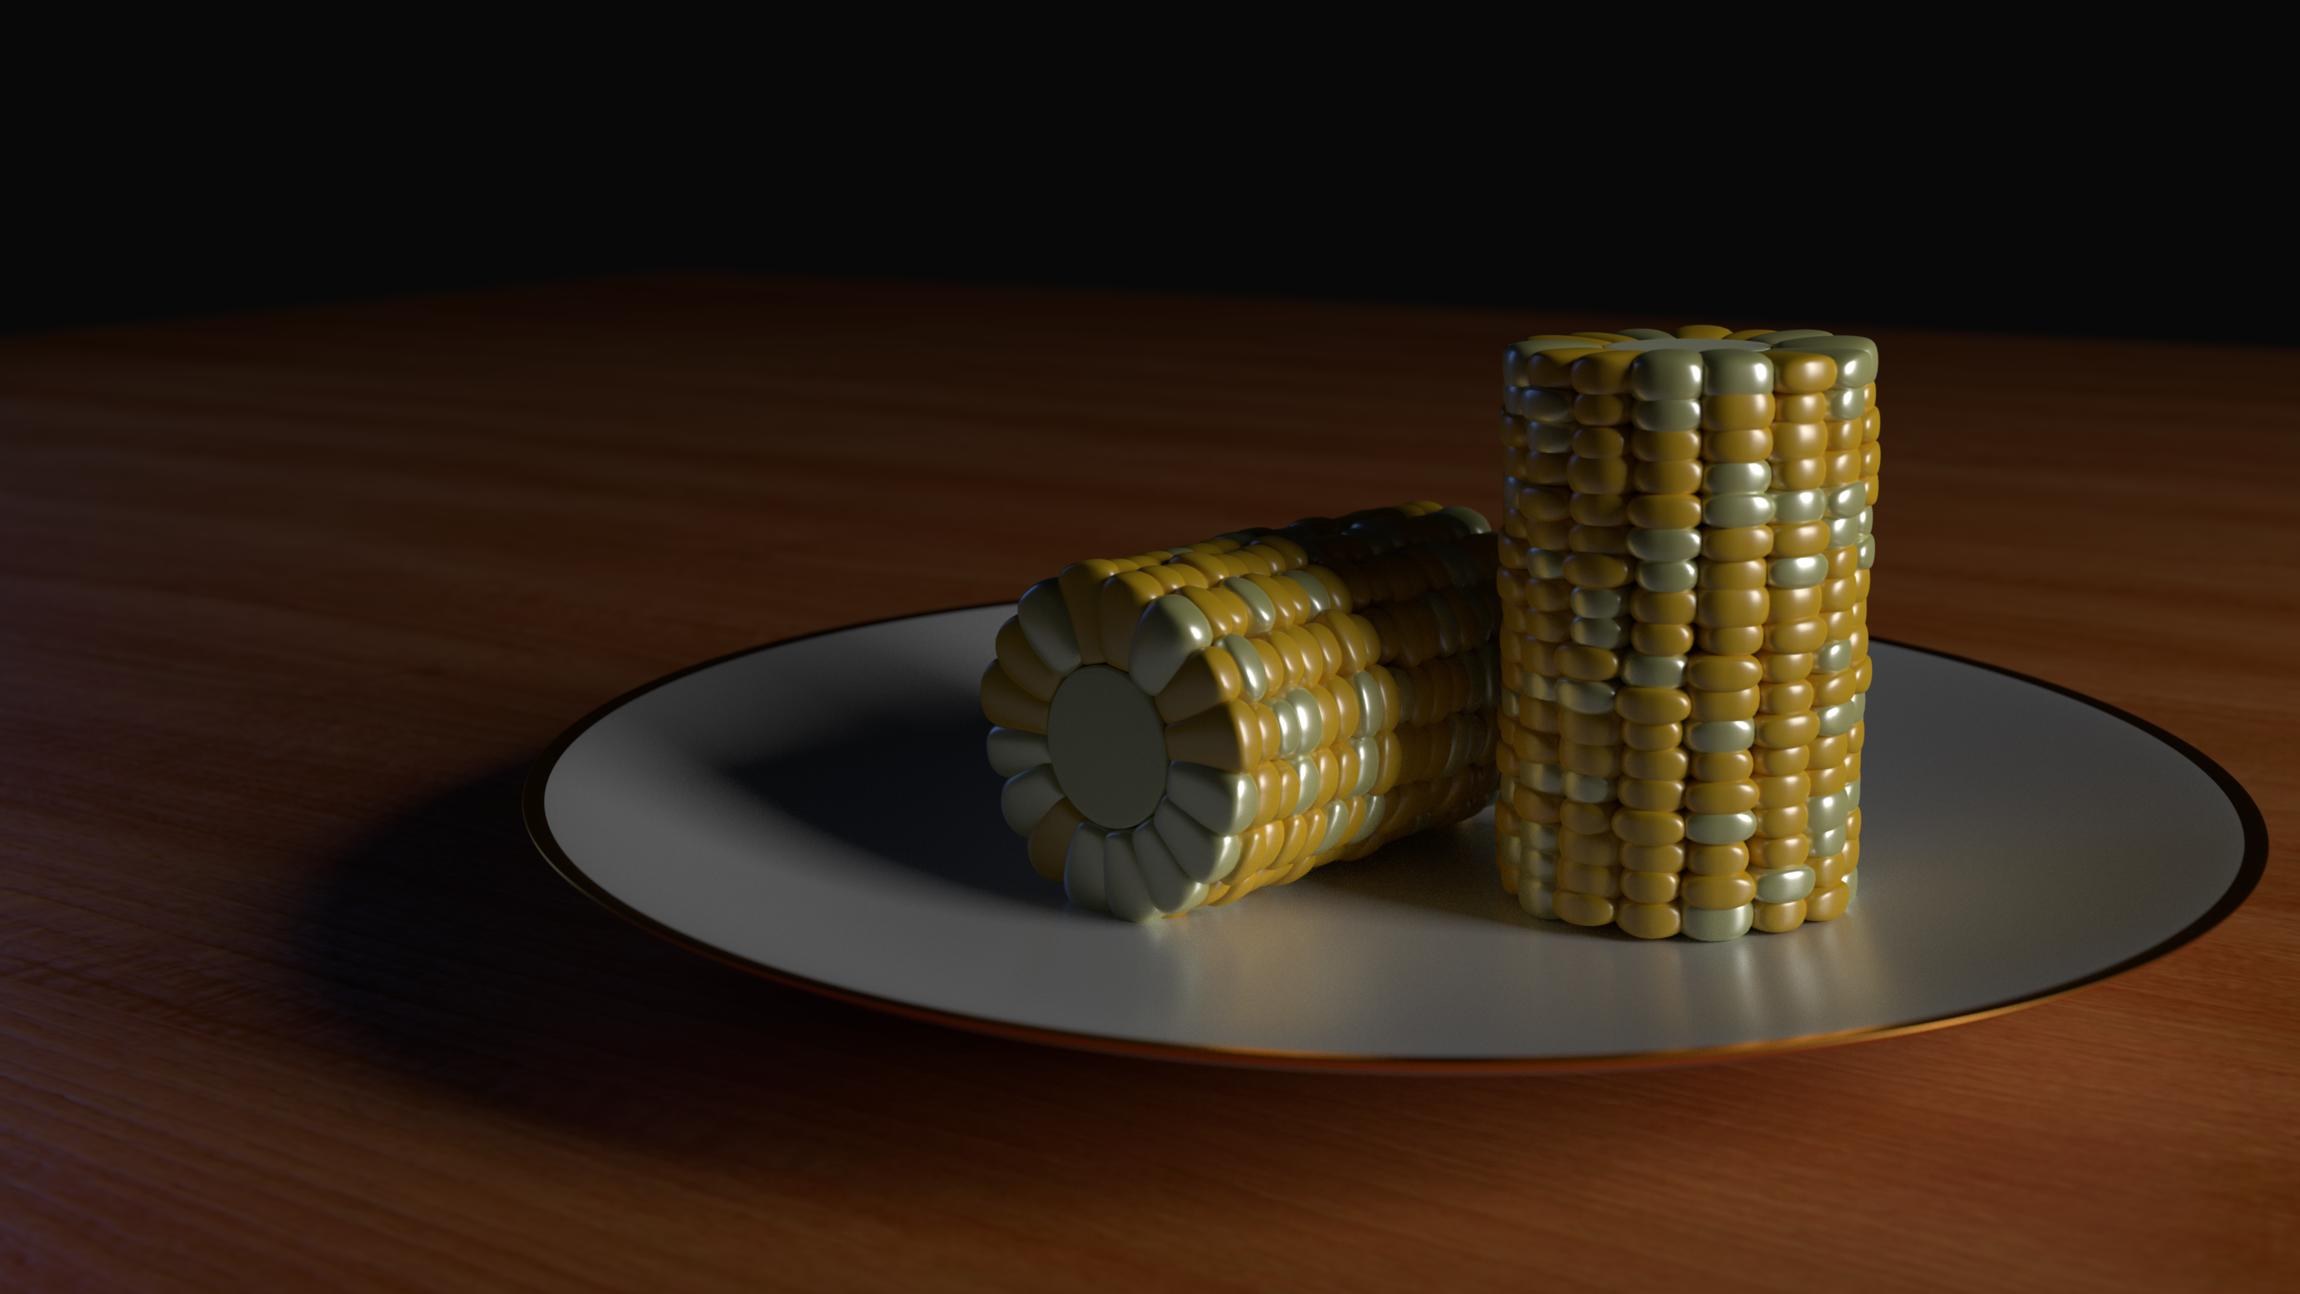

 Unfortunately though, my laptop appears to be to old to handle the sculpt tool.