Painting Imported Humanoid with Multiple UV Maps - Help Please

I’ve been trying to do this for hours (with Genesis 8 from DAZ) to no avail. Geez, 5 hours, and I can’t figure it out. :frowning: I’m using Blender 2.78.

I’m following a pretty clear tutorial here, but I swear Blender makes up what rules it wants to follow and what it doesn’t! Ha!

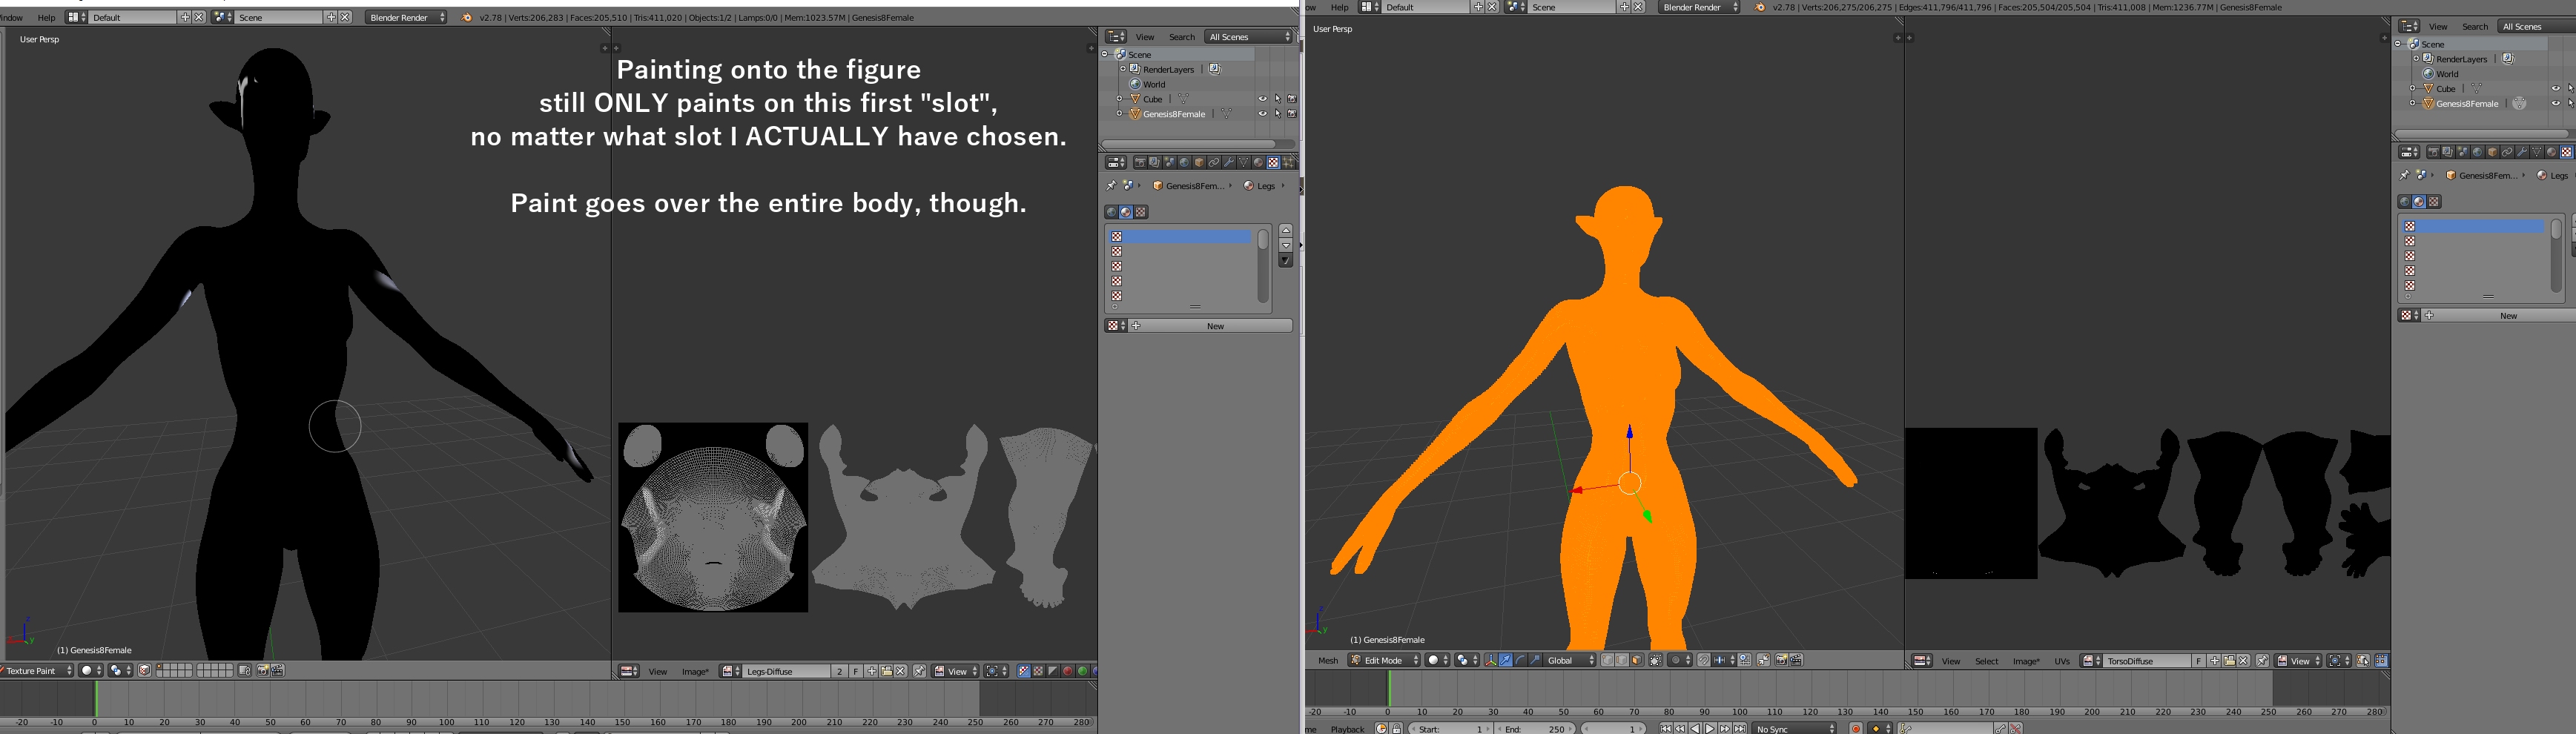
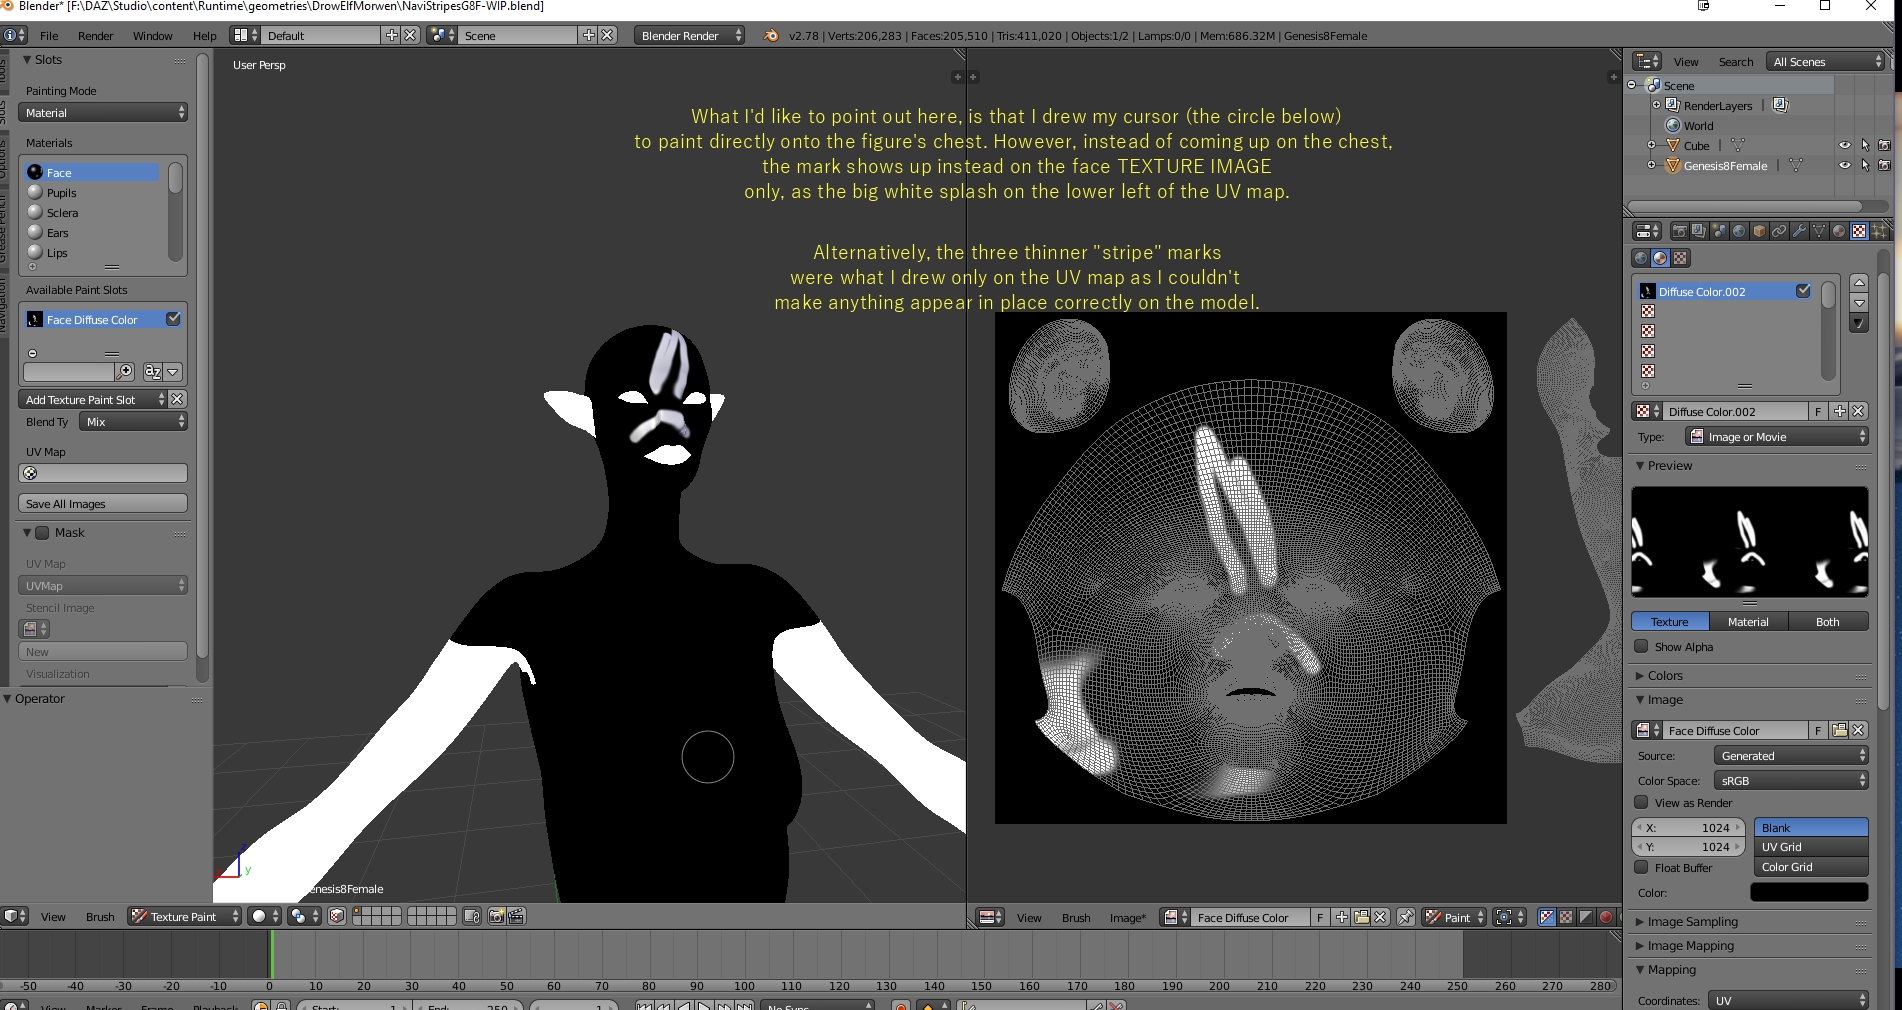
So here’s my problem, though I swear I’m following the tut exactly: In the UV/ Image Editor window, I see Gen 8’s Face UV, her torso one, legs, and arms. I’ve gone though and deleted all the extra stuff, like the eyes and mouth.

Yet blender won’t stop treating what’s left as if it’s all one big material. Plus, even if I “Add New” textures, they don’t show up in the Materials tab. In the past I’ve created images first, but I’ve ever had to fool around with assign vertices and such, because it was done for me. Of course, with Gen 8 I’d like to paint unto an existing skin…

So here’s the issue, I guess; the flat, Face UV map has black behind it. The rest of the areas refuse to comply. It seems as if no matter what, the Face texture (new image or not) acts as if it’s assigned to the ENTIRE figure, and nothingggg I do is fixing it :frowning:

Can I have some advice on this “little” issue?

I’m including some screencaps below that shows the curiousness of the problem.

and


Lastly, in an attempt to get around this, at one point I deleted ALL geometry EXCEPT the torso… and still, it was giving me this same problem. :expressionless:

And just to clarify, I know NOTHING about nodes. So… I need a solution that doesn’t involve those >_>

Daz characters have multiple textures and multiple UV maps. So you’d need to only work on the UV that pertains to that piece of the model. As for the face painting issue, without examining your setup, it appears that the model is inside out (but I could be wrong); in other words, the normals are flipped inside out. Again – can’t be sure without examining the model, which is probably not possible since you can’t share those models.

Sure it is.

Save your work, then strip down the model to handful of polygons and one image to paint on and pack that in the blend, and save the file.
How to prepare file https://blenderartists.org/forum/showthread.php?322623-How-to-ask-questions-effectively-on-blenderartists-org-support-forum&p=2547191&viewfull=1#post2547191

The file retains test geometry with UV’s, paint setup

I actually did have, at one point, the model down to the torso area–and only one UV map, I thought, since I swore I deleted the rest–but still the painting was acting as if the whole model was there. It was ALSO painting on the opposite side of where I actually wanted to paint (when I was trying to do it directly on the model).

Also, I can’t share the figure at all, even if it’s just an object file for painting?

I thought about sharing the scene file, but I’m not sure I should, I don’t want someone else taking the model ~_~ (I’m guessing that is why sharing even an object of it is probably bad?)

No one is asking for the whole model. When you only include an arbitrary selection of the surface, it’s no longer a usable model or enough information to get to the original model. It would only be usable for troubleshooting when you make sure there’s enough to reproduce the problem.

Anyway, my educated guess is that you haven’t assigned the materials to the geometry so the first one covers everything.

Faster for me to make a screen recording