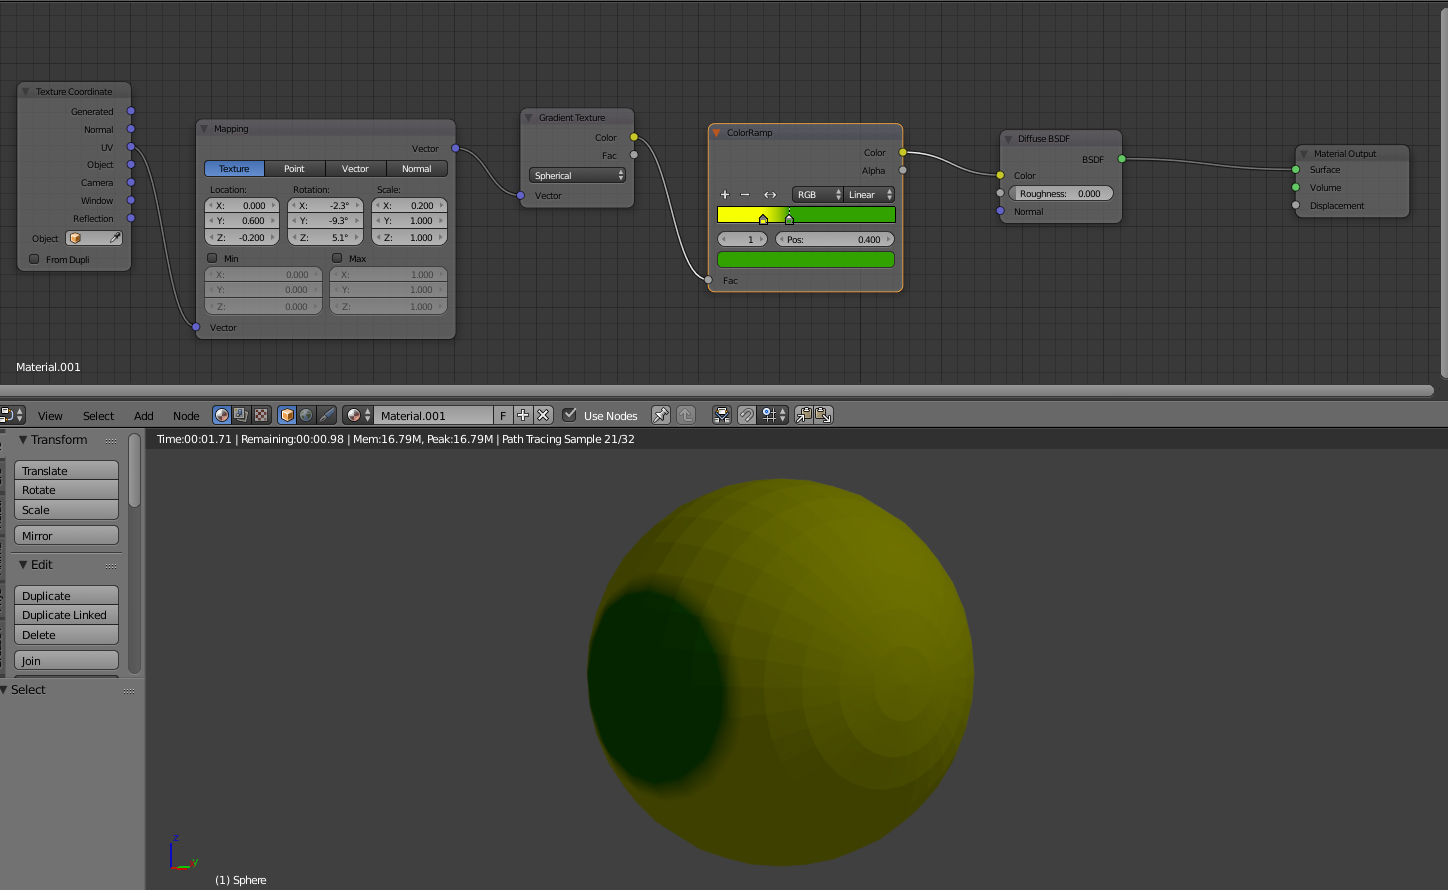
I feel like this should be very intuitive, but why can’t I see a radial gradient in this eyeball?
Blender scene file also attached. Thank you for your help in advance!

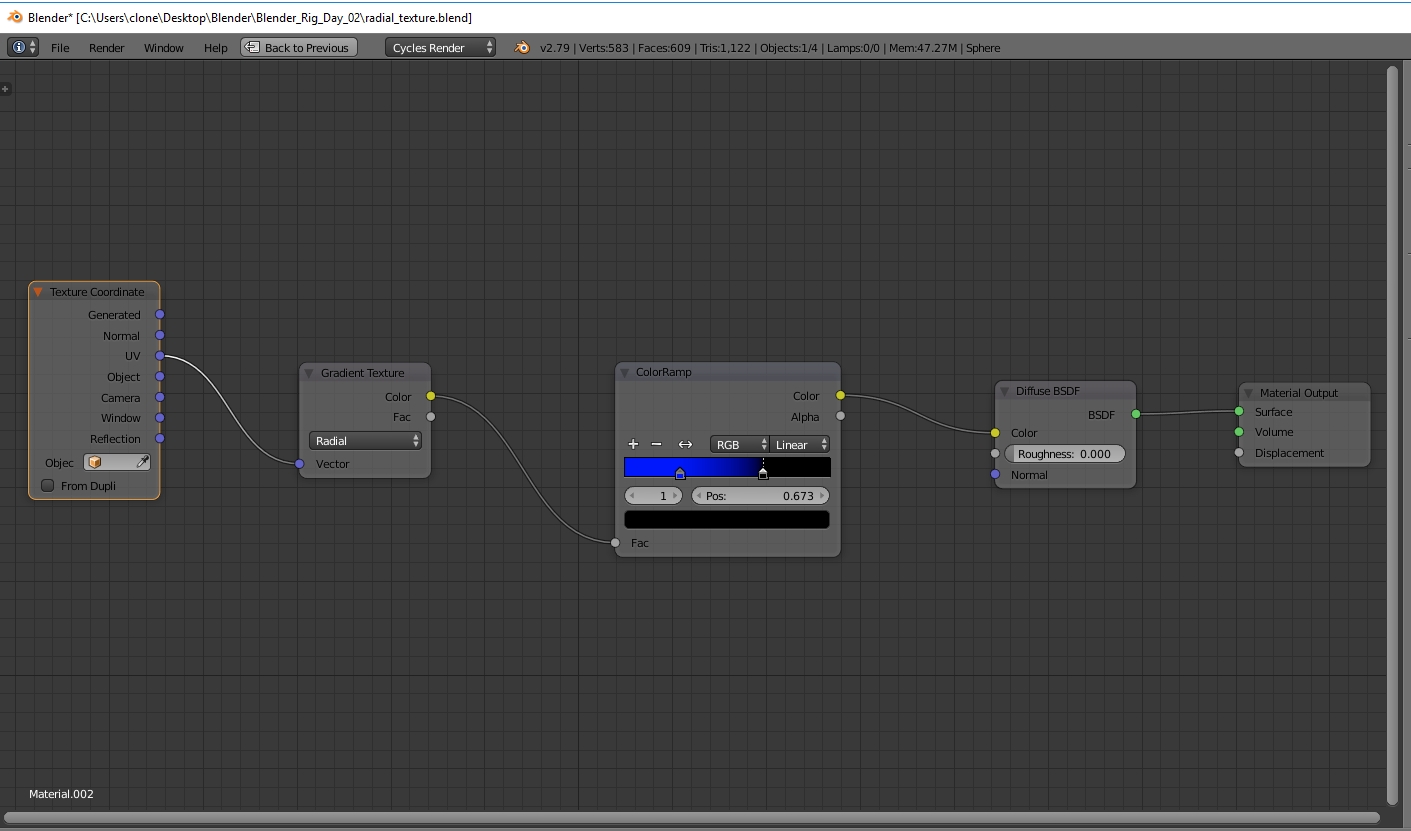
radial_texture.blend (606 KB)
I feel like this should be very intuitive, but why can’t I see a radial gradient in this eyeball?
Blender scene file also attached. Thank you for your help in advance!
don’t worry its not intuitive and theres many ways to skin this problem
Is this what you’re after? https://blender.stackexchange.com/questions/42304/radial-colorramp-gradient-texture
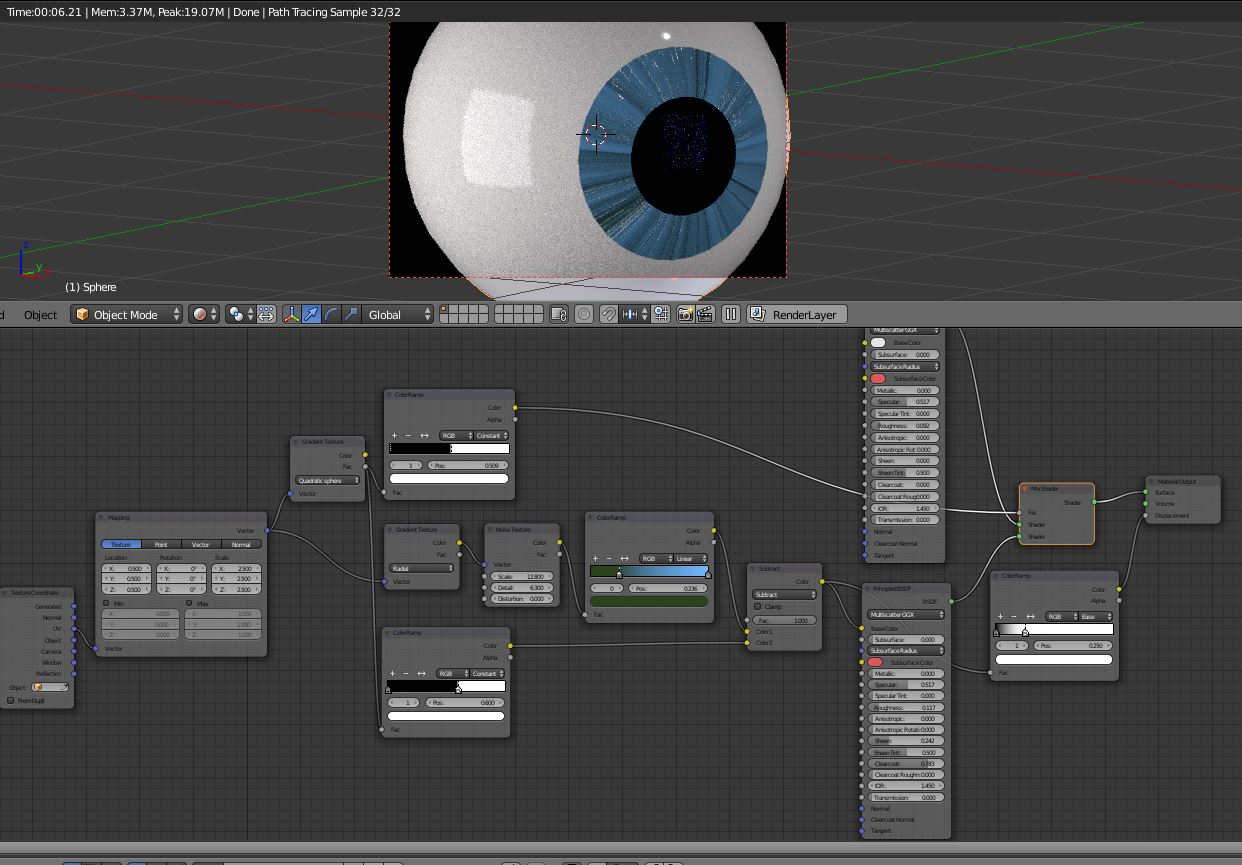
I made a quick demonstration eye, using radial texture and a spherical texture for the pupil. I use a UV map to separate he iris. Note the mapping node is set to 0.5 for x and y coordinates to center the texture in the UV map.
3point, thank you for the detailed graph!
Unfortunately I am having trouble seeing the exact values on your mapping node. You said you are using .5 on x and y scale, but it honestly looks like .25 on x y and z. It also looks like you adjusted your location on the mapping node.
I’ve tried to use your graph as a guide but to no avail. How did you UV map it? Spherical mapping? I used projecting mapping from the front.
Here’s another blend file and a screen shot. Thanks in advance for any insight!radial_texture.blend (557.6 KB)