Grass Tutorial (Now updated for 2.46)
I had some people ask me how to make grass so I thought I’d write a tutorial on it.
Remember that this grass may need to be tweaked for different applications. So don’t be afraid to play around with the settings.
OK let’s start.
- Add a plane
- Object button
- Particle button
- Click the new button

Now let’s make some grass.
- First change the type of partial system to ‘Hair’.
- Up the amount to 6000. But this might need to be changed depending on the size of your plane. Mine was about twice the size of the default plane.
- Click the rand and even buttons. This will make the grass random but evenly spaced.

- Change the normal velocity to .080, this pushes the particles up making them look like grass growing up out of the ground.
- Change the random velocity to .050, this adds some randomness to the length and direction since grass is obviously not perfect.
- Make the acceleration in the Z direction -.01, this will simulate some gravity pulling the grass down.
- If you want the plane underneath the grass to be rendered click the ‘Emitter’ button.


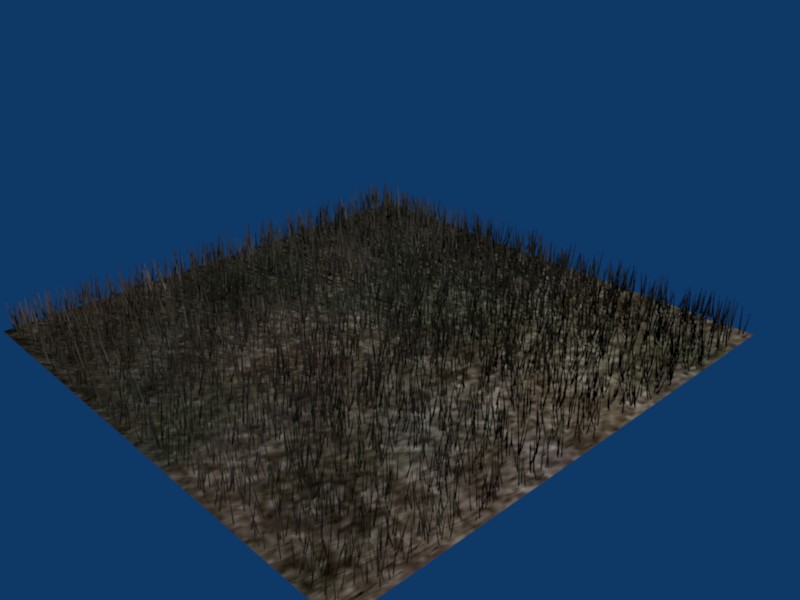
Now it’s starting to look like grass. Your render (F12) should look something like the picture below. If it doesn’t, go back and make sure every thing is set up right.

Now for some texture.
I’m assuming you can add a material and name it grass, so do it. This is the part that will make our grass look very real.
The important stuff is the color, the strand settings, and the spec and hardness. Make sure the get the strand settings correct, they will make the blades of grass thick at the bottom and thin at the top. To edit these settings hit the strand button and the options will pop up.


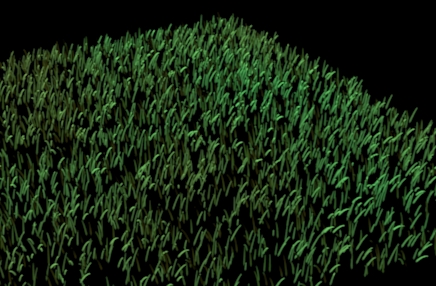
One other thing to think about is the ‘Use Tangent Shading’ button at the top of the strands menu. If you turn this off light hitting the back of each blade of grass will not transmit through it. You may want it on or off depending on your scene. I’ll leave it on. Here is an example with the light placed directly above the plane of grass:
With Tangent Shading
Without Tangent Shading
Now grass isn’t all the same color, so we need some texture. I would use one of these:
http://img171.imageshack.us/img171/9800/grass2kl3.jpg
http://img179.imageshack.us/img179/1304/grasszn1.jpg
Add it and leave all the setting the way they are except change the color to .75
Here’s an instructional picture to help you if you need it.
http://img162.imageshack.us/img162/5318/111hc3.jpg
And that’s it!

Common Problems & Tips:
-
PUT SOME BUMPS! Grass is rarely on a flat surface. It looks way better if you subdivide your plane and add some small bumps and dips.
-
If you place your light directly above the grass the strands appear very dark. Move your light to the side so that it hits the plane from an angle.
-
If your grass looks very bright or white in some spots try turning down the spec and turning up the hardness. If its too dark don’t turn up the spec, just make the color brighter.
-
For uneven grass turn off the ‘even’ button in the particles menu. When the ‘even’ button is turned off blender will divide up the particles and give each face of the mesh an equal amount. So if your mesh has a lot of faces in a small area the grass will be denser. For better and more controlled uneven grass I suggest weight painting.
Weight Paint:
To weight paint your grass do the following:
- While in edit mode select all the vertex’s on your mesh (the one with the particles) then go to the editing tab (F9). On the far left it should say ‘vertex groups’. Under that are a few buttons, click the 'new button and the ‘assign’ button. NOTE: There are TWO new and assign buttons, the smaller one on the left is the one we want. Also note that the name of the vertex group is ‘Group’. Feel free to change the name but make sure you type that name in all of the places I say to type ‘Group’.
- Now head back to the partical buttons and look at the very bottom of the ‘Extras’ tab. Here under the vertex group title you can select velocity, density, length, etc. and assign a vertex group to each one. velocity will control the length of your grass and density will control the density of your grass (duh).
Now you can go to weight paint mode and paint those strands onto the ground!
Curve Guides:
To make grass that always grows ‘up’ instead of following the normals of your mesh I suggest using curve guides. Here’s how:
- Set your particle ‘normal’ velocity to 0.
- Add a bezier curve. Go to edit mode and make the curve into a straight line, and align it with the z-axis.
- Now go to the fields menu in the physics buttons and change the field to ‘curve guide’. Your particles should now mimic the shape and size of the curve. If they don’t change go make to the partials menu and hit the ‘RecalcAll’ button.
- Lastly, you can change the size and direction of that bezier curve to point the grass in any direction and make it and length.
If you really want to you can make the curve any shape you wish and the strands will make that shape. This is a common technique for making hair but can be applied to grass.
If you have anymore questions or problems feel free to ask them on this thread or private message me.
And don’t be afraid to post your renders here. Half the fun of making a tutorial is seeing what people are able to create with what they have learned.
Here’s what I came up with: http://img172.imageshack.us/img172/359/soccerfinalhiresuj7.jpg


