Bump Maps for Beginners

To do this tutorial you’ll need some knowledge of modeling in Blender and how to add materials to a mesh. You’ll also need a simple model sitting
on a plane.

If you’re not a beginner (ie: you already know this stuff and your looking for more advanced techniques) try Hard Surface Texture Painting suggested
by Waternz.

If you haven’t got a model handy, add an icosphere with three subdivisions and add a plane. Position the Sphere on the plane and point the camera at it.
Scale the plane up so it fills most of the background in camera view.

I use a basic three point light system: spotlight, fill light and backlight. The spotlight is intensity 1.00, is on one side of and higher than the camera
and points down at the model. The fill light is lower and on the same side of the model as the spot light, but on the opposite side of the camera. The
backlight is behind the model. Both the backlight and fill light are intensity around 0.4 to 0.6. Move the lights closer or further from the model, or fiddle
with the intensity, until the model looks well lit.

NOTE: Bump maps don’t show up in the 3D View window. You’ll have to render to see what’s going on.

BUMP MAPS

Bump maps (abbreviated nor because they affect the mesh along the NORmal vector) are images used to add highlights and shadows to the surface
of a model to make it appear to have more detail.

Where do these images come from? Two sources:

  1. Blender Textures
  2. 2D image programs: the Gimp, Inkscape, Photoshop, etc.

To keep this short and simple, we will not discuss #2.

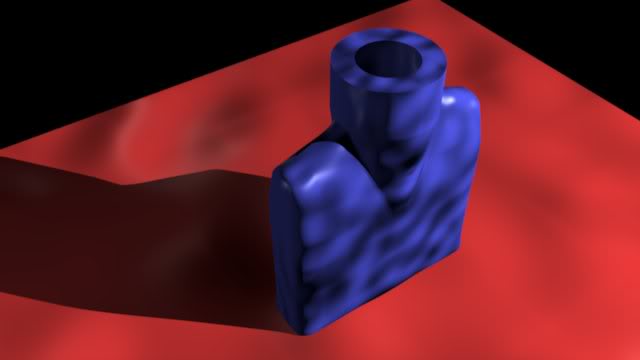
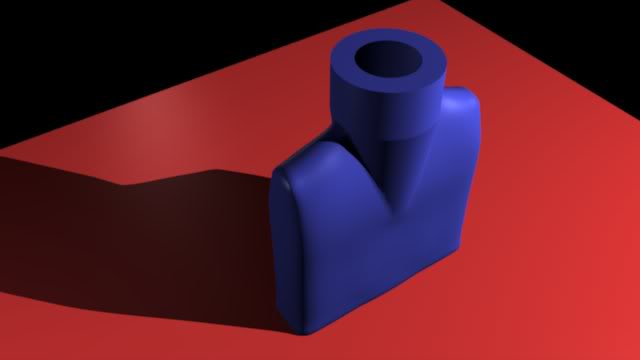
Here is a blue bottle on a red plane. The bottle has a material called Opaque Blue and the plane has a material called Opaque Red. All the detail here
is in the mesh.
http://i69.photobucket.com/albums/i64/Orinoco_guy/Bump%20Map%20Tutorial/BlueBottleBumped.jpg

Here are the Opaque Blue material settings. [Let’s talk navigation (green boxes) for a second: ]

The button window has three layers: mode, type and panel. This image shows the Material mode (first sphere icon in the header) and Material type (second sphere icon in the header) panels. I call these the Mat:Mat panels. The actual panels are the third layer. (The panels are also multi-layer: some buttons act directly, some bring up mini-menus with more options or selections.)

In the Links and Pipelines panel we navigate to the Opaque Blue material using Link to Object. If you have several materials you pick the one you want using the double triangle button (green arrow) which brings up a selection menu (including Add New, just in case you wondered where that button was hiding.) The Link to Object box can also be used to change the name of the material, in this case from “Material” (Blender’s default name for a material) to Opaque Blue.

A few words on the Material:

Opaque Blue is straightforward: the only change is to the Color. To set the color, press the Col
button (this is the default, you may not have to actually press it) and move the RGB (Red/Green/Blue) sliders. If you prefer to work with Hue/Saturation/Value sliders, press the HSV button at the bottom of this panel (next to the RGB button.) Or you can click on the rectangle next to the Col button to get a color selection dialog box. The rectangle is filled with the selected color. Spec and Mir work the same way, if you decide to use them.

Back to setting up a Bump Map:

Bump maps are textures. We add a texture to the Opaque Blue material by pressing the Add New button in the Texture panel.

Finding the Texture panel. The button window is usually 4 panels across and the Textures panel is usually the fifth panel. It’s not on the screen. Can’t use it if you can’t see it. You have several options. First, MMW (Middle mouse wheel) will move the panels left and right. Ctrl-MMW will shrink or zoom the panels, more panels are visible when they are smaller. MMB (Middle mouse button) drag will also move the panels left or right (or up and down, if there is room.) Pressing the White triangle next to a panel’s name will collapse the panel into a narrow vertical gray bar, leaving room for other panels which will slide into view.

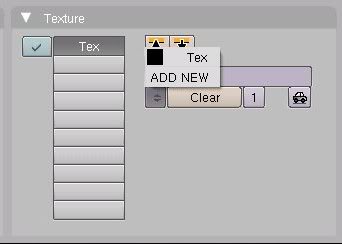
Adding a new texture will change the Texture panel as shown below

Blender added a new texture called “Tex” (See the name box TE: Tex), added two new panels (Map Input and Map To) as tabs to the Texture panel, added Tex to the texture stack on the left (nine empty slots left), put a check mark next to the slot showing that this texture applies to this material and added the texture Tex to the selection list that pops up if you press the double triangle under the “TE:” in the name box.
http://i69.photobucket.com/albums/i64/Orinoco_guy/Bump%20Map%20Tutorial/AddNewTexButton.jpg

This is also where you find the ADD NEW button now, in case you want to use any of those nine empty slots.

If you compare the two previews, before and after adding the new texture, you see nothing changed. New textures, by default, have no effect on a material. We have to tell Blender what we want this new texture to do.

We switch from the Material Type button panels to the Texture Type button panels by pressing the Texture icon in the header.

Rename the texture to Bumps in the texture name box. To choose the Texture Type press the double triangle selection icon to see the Texture Type menu. Notice one of the choices is “image”. If you have a 2D image to use as a bump map, select this to get a dialog to tell Blender where to find the image.

I chose Stucci. When I did so, the Stucci panel appeared, along with the stucci image in the Preview panel. The Stucci defaults are fine (remember, we are keeping this simple) no changes here.

Notice the image in the preview window. This is the image Blender will use to add highlights and shadows to our surface. Next we tell Blender what effect we want that image to have on our model.

Back to the Mat:Mat Buttons.

Press the second Material icon on the header to return to the Material Type panels. Notice in Links and Pipeline we are still linked to MA: Opaque Blue.

The Map Input and Map To panels are usually tabs on the Texture panel. I’ve detached them so we can see them all at once. In the Mat Input panel, I selected Cube since that more closely matches the shape of the bottle than the other choices.

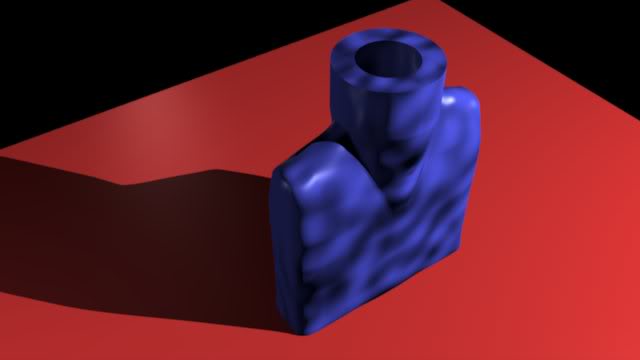
In the Map To panel we turn our image into a bump map by turning off the Col (color) button (the default), and turning on the Nor (normal) button. I also moved the Nor slider up to 5 or so, to exaggerate the effect. Here is what it does to the render:
http://i69.photobucket.com/albums/i64/Orinoco_guy/Bump%20Map%20Tutorial/BlueBottleBumped2.jpg

The bottle now has bumps.

We can add the same texture to the red plane.

In the 3D View window, Object Mode, select the plane instead of the bottle. Switch to Material Type panels with the Material icon. Notice, above, the Link to Object shows the Mesh (ME: ) is called Plane and the Material (MA: ) is Opaque Red. The Opaque Red Texture panel shows no textures in any of the slots.

To add the texture we’ve just created, press the double triangle selector button and choose Bumps, the name of the new texture. Notice that the square next to the name Bumps is a teeny tiny representation of the Bumps texture image. This is to help those folks who don’t name their textures when they make them, but as you can imagine, it’s not much of a help. Get into the habit of naming your materials and textures when you make them, it will save a lot of time later on.

Selecting Bumps attaches the texture Bumps to the Opaque Red material, but Blender still must be told how we want the texture to affect the material. We go back to the Mat:Mat panels, as we did before, this time for Opaque Red instead of Opaque Blue, and set up the Map Input and Map To panels. I changed Cube to Flat in the Map Input panel to reflect the shape of the plane, and set up the Map To panel exactly as shown in the Opaque Blue Map To settings.

Here is the effect on the rendered image:

http://i69.photobucket.com/albums/i64/Orinoco_guy/Bump%20Map%20Tutorial/BlueBottleBumped3.jpg

Now the red plane looks a bit like a tablecloth, with wavy folds. The bumps on the red plane are so much larger than the bumps on the bottle because the plane has more area than the bottle, and Blender spreads the image out to cover the whole area.

But what if that is not what we want? We can change the size of the bumps by scaling them. In the material’s Map Input panel, we can set the number of times Blender will use the same image to cover the area.

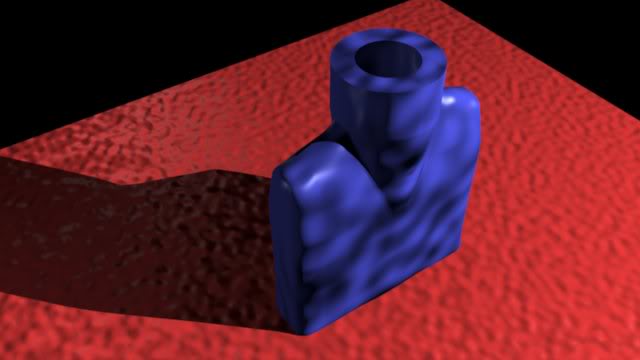
In Opaque Red’s Map Input panel set the Size X, Size Y and Size Z to 10 copies (although setting size z has no effect on a plane, only x and y.) Now, instead of spreading one copy of the image over the whole plane, Blender will squeeze 100 copies into the same space.

http://i69.photobucket.com/albums/i64/Orinoco_guy/Bump%20Map%20Tutorial/BlueBottleBumped4.jpg

As you can see, the larger the Size X,Y,Z number, the smaller the grain of the texture.

Now the plane has a nice pebbled surface, but it’s flat again. Can we get the waves back without loosing the pebbly texture? Of course we can. We simply add the Bumps texture to the plane one more time.

First: select an empty slot in the Texture Panel. Second: Press the texture selector button to bring up the list of available textures (Add New and Bumps are all we have at the moment, but in an extensive project this list could get pretty long) and select Bumps. In the Map To panel (probably a tab on the Texture panel) turn off Col and turn on Nor, and set the Nor slider to 5 or so. The texture loads with size x,y and z set to 1.00, so we don’t need to change these, since the copy of Bumps in the first slot is set to size 10.

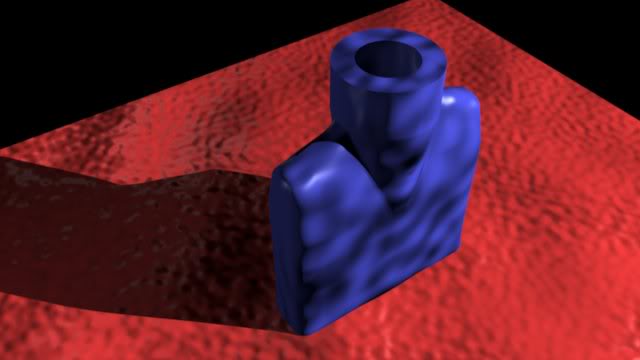
Here’s the result.

http://i69.photobucket.com/albums/i64/Orinoco_guy/Bump%20Map%20Tutorial/PlaneTenPlusOne.jpg

Notes on working with bump maps:

Bump maps are applied to the image when it’s rendered. Nothing shows up in the 3D view window, unless you use the new Preview option.

If you don’t use preview, set your render settings to get quick results (cut the render size to 50% or 25%, turn OSA sampling down to 8 or even 5, turn off Ray tracing unless you’re using transparency, mirror reflection or index of refraction) and render frequently.

Do your experimentation on small portions of your scene, or on a simple scene like this bottle and plane, again to shorten render or preview time.

This tutorial barely scratches the surface of what can be done with bump maps. Once you get comfortable working with them, check out the more advanced tutorials over at Colin Litster’s Cog Films

Advantages and Limitations of Bump Maps.

Bump maps speed things up. You get detail that you don’t have to spend your own personal time pushing verts around in your model to get and you can work with lower poly models, which speeds up Blender render time, since it requires less computation. Imagine modeling all those little tiny bumps on the plane…

Bump maps give materials a sense of reality. You can take a gray plane and with bump maps make it look like concrete, painted wood, plastic, clay, iron.

But… (you knew there was a but, didn’t you) bump maps only create the illusion of detail. They don’t actually move the mesh. (Well, they can, but that’s beyond the scope of this tutorial.) Take a close look at the bumps on the blue bottle. Over most of the surface, and especially near the closer edge, on the left, where the light turns round the corner into shadow, the illusion of bumps created by light and shadow is very good.

Now examine the right edge of the bottle, where the light first hits. There are three wavy ridges running diagonally toward that edge, creating the perception with light and shadow that the edge itself is wavy, but the geometrically smooth line between the bottle and the plane fights that perception and tells the viewer that the edge is smooth. In my view, the battle here is a draw: sometimes the edge looks wavy, sometimes the edge looks smooth. Unless the optical illusion of a sometimes straight, sometimes crooked line is what you want, generally speaking these toss ups between geometry and value are not a good thing for the viewer to confront.

Now look at the neck or cap of the bottle. The geometrically smooth ellipses and the vertical lines at the side overpower the illusion of bumpiness from the value changes and the neck ‘reads’ as a regular cylinder milled out of some light and dark blue material. This is actually a good thing here, because most bottle necks or bottle caps are not bumpy, whatever the bottle is like. The only problem this creates is in giving the viewer the impression of a multi-colored material and this perception can “bleed” down into the rest of the image, causing some confusion whether the light and dark areas on the bottle surface are bumps or simply color changes.

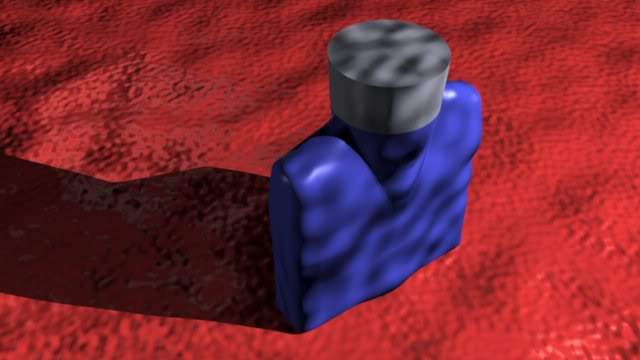
If I were going to work with this image some more, I would give the bottle cap a different color, so the viewer’s perception of a smooth cap would not affect the perception of a bumpy bottle.

Another thing to notice is that whether geometry informs our perception, or light informs our perception, doesn’t really matter, since both the neck of the bottle and the near side and shoulder look realistic. It’s only when these two processes balance each other that the image looks contrived or fake. Imagine if we tweaked the mesh at those few spots so the light and the geometry supported the same illusion…

http://i69.photobucket.com/albums/i64/Orinoco_guy/Bump%20Map%20Tutorial/BlueBottleBumped5.jpg

thx:D!! really needed to know how to use bumpmaps. the sound of that word just scares me…not as much as UV mapping tho:eek:.

Nce tutorial.

ziggly, UV Mapping’s not that scary. I felt the same way at first, though.

I would just like to addon:

If you UVMap an image, you can then turn it into a bump map, and apply it by adding an Image texture channel, and setting the map input to UV, and output to nor, so you can have more customed bumps.

zigglycosci:, you’re quite welcome. I’m glad you found this useful.
UVmappers:, you’re absolutely right, but this is a beginner’s tutorial. UV mapping is useful and much more customizable, but (IMHO) it’s an intermediate skill. :wink:

there’s a little mistake. A normal-map saves the normalvector coordinates in the colour channels, that results in an weird looking texture like this:
http://planetpixelemporium.com/tutorialpages/images/normalmap.jpg
a bumpmap just saves height values.
that’s how to use a normal map:
http://img419.imageshack.us/img419/1061/normalzf4.png
the “map-to” settings are like the bumpmap settings.

Thanks. I fixed the definition on the first page, if this shows up anywhere else, I’d appreciate hearing about it so I can fix it there, too.

It’s difficult for me to write a tutorial and not want to get sidetracked into other neat things that Blender can do. My working title for this was “Bump Maps: Short and Simple” but it turned out to be not so short.

The Blender Wiki has a pretty good explanation of Normal Maps, for those wanting some more explanation.

AHHHHH!!! UV MAPPING!!! RUNNNN!!! :evilgrin:

haha i remember when i had to do an emergency, self-taught crash course in uv mapping during my slight involvement with the mgp. i wasnt actually sure if i was doing the right thing, let alone if i was doing what i was doing right. :eek:

i havent used uv maps since, but at least i know how…

How to see the bump map, which is affected by light position in the game engine ?:smiley:

Well, I’m not really all that familiar with the ins and outs of the Game Engine, so you might want to ask this question over in the GE forum. Sorry :o

Thank You Orinoco - this is just what I needed!~

thanks for the tutorials, very well explained. it really helped a lot, especially us (the beginners). keep it up

ohh great tutorials… just got what i needed… you are just expert in ths i think…


Cheap Flights to Turkey Auto Insurance Rates

“They don’t actually move the mesh. (Well, they can, but that’s beyond the scope of this tutorial.)”

can you at least point me in the right direction to finding out how to do this?

If you want to create changes to the mesh, use the displace modifier.
http://wiki.blender.org/index.php/Doc:Manual/Modifiers/Mesh/Displace.
If you have specific question its probably best to start a new thread, this one is ancient and many things may have changed in blender since this was first written

Richard

thanks for the tutorial helped a lot good and could expect more tutorial from u

Excellent Tut…I would really help the newbies to master basic blender tool and techniques.

thanks for the tutorial. I’ve been looking into different tools for bump maps. Have recently tried ssbump

Thanks for sharing this great tutorial. I am very sure that this would be very helpful for all the people like me who are new in this field.