To do this tutorial you’ll need some knowledge of modeling in Blender and how to add materials to a mesh. You’ll also need a simple model sitting
on a plane.
If you’re not a beginner (ie: you already know this stuff and your looking for more advanced techniques) try Hard Surface Texture Painting suggested
by Waternz.
If you haven’t got a model handy, add an icosphere with three subdivisions and add a plane. Position the Sphere on the plane and point the camera at it.
Scale the plane up so it fills most of the background in camera view.
I use a basic three point light system: spotlight, fill light and backlight. The spotlight is intensity 1.00, is on one side of and higher than the camera
and points down at the model. The fill light is lower and on the same side of the model as the spot light, but on the opposite side of the camera. The
backlight is behind the model. Both the backlight and fill light are intensity around 0.4 to 0.6. Move the lights closer or further from the model, or fiddle
with the intensity, until the model looks well lit.
NOTE: Bump maps don’t show up in the 3D View window. You’ll have to render to see what’s going on.
BUMP MAPS
Bump maps (abbreviated nor because they affect the mesh along the NORmal vector) are images used to add highlights and shadows to the surface
of a model to make it appear to have more detail.
Where do these images come from? Two sources:
- Blender Textures
- 2D image programs: the Gimp, Inkscape, Photoshop, etc.
To keep this short and simple, we will not discuss #2.
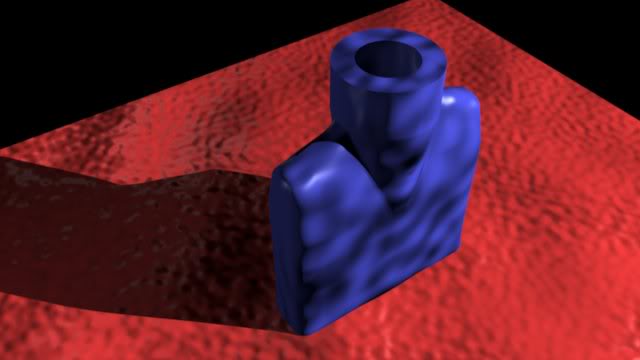
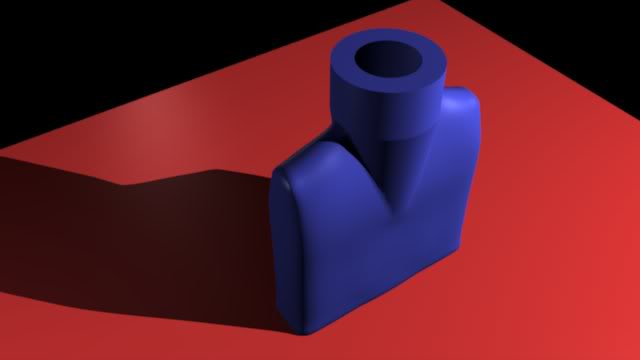
Here is a blue bottle on a red plane. The bottle has a material called Opaque Blue and the plane has a material called Opaque Red. All the detail here
is in the mesh.
Here are the Opaque Blue material settings. [Let’s talk navigation (green boxes) for a second: ]
The button window has three layers: mode, type and panel. This image shows the Material mode (first sphere icon in the header) and Material type (second sphere icon in the header) panels. I call these the Mat:Mat panels. The actual panels are the third layer. (The panels are also multi-layer: some buttons act directly, some bring up mini-menus with more options or selections.)
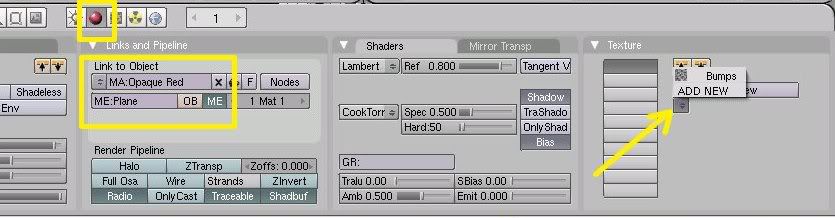
In the Links and Pipelines panel we navigate to the Opaque Blue material using Link to Object. If you have several materials you pick the one you want using the double triangle button (green arrow) which brings up a selection menu (including Add New, just in case you wondered where that button was hiding.) The Link to Object box can also be used to change the name of the material, in this case from “Material” (Blender’s default name for a material) to Opaque Blue.

A few words on the Material:
Opaque Blue is straightforward: the only change is to the Color. To set the color, press the Col
button (this is the default, you may not have to actually press it) and move the RGB (Red/Green/Blue) sliders. If you prefer to work with Hue/Saturation/Value sliders, press the HSV button at the bottom of this panel (next to the RGB button.) Or you can click on the rectangle next to the Col button to get a color selection dialog box. The rectangle is filled with the selected color. Spec and Mir work the same way, if you decide to use them.
Back to setting up a Bump Map:
Bump maps are textures. We add a texture to the Opaque Blue material by pressing the Add New button in the Texture panel.
Finding the Texture panel. The button window is usually 4 panels across and the Textures panel is usually the fifth panel. It’s not on the screen. Can’t use it if you can’t see it. You have several options. First, MMW (Middle mouse wheel) will move the panels left and right. Ctrl-MMW will shrink or zoom the panels, more panels are visible when they are smaller. MMB (Middle mouse button) drag will also move the panels left or right (or up and down, if there is room.) Pressing the White triangle next to a panel’s name will collapse the panel into a narrow vertical gray bar, leaving room for other panels which will slide into view.
Adding a new texture will change the Texture panel as shown below

Blender added a new texture called “Tex” (See the name box TE: Tex), added two new panels (Map Input and Map To) as tabs to the Texture panel, added Tex to the texture stack on the left (nine empty slots left), put a check mark next to the slot showing that this texture applies to this material and added the texture Tex to the selection list that pops up if you press the double triangle under the “TE:” in the name box.
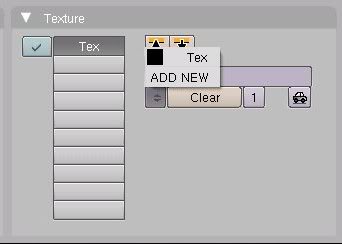
This is also where you find the ADD NEW button now, in case you want to use any of those nine empty slots.
If you compare the two previews, before and after adding the new texture, you see nothing changed. New textures, by default, have no effect on a material. We have to tell Blender what we want this new texture to do.
We switch from the Material Type button panels to the Texture Type button panels by pressing the Texture icon in the header.

Rename the texture to Bumps in the texture name box. To choose the Texture Type press the double triangle selection icon to see the Texture Type menu. Notice one of the choices is “image”. If you have a 2D image to use as a bump map, select this to get a dialog to tell Blender where to find the image.
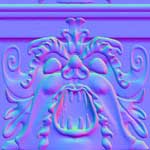
I chose Stucci. When I did so, the Stucci panel appeared, along with the stucci image in the Preview panel. The Stucci defaults are fine (remember, we are keeping this simple) no changes here.

Notice the image in the preview window. This is the image Blender will use to add highlights and shadows to our surface. Next we tell Blender what effect we want that image to have on our model.
Back to the Mat:Mat Buttons.
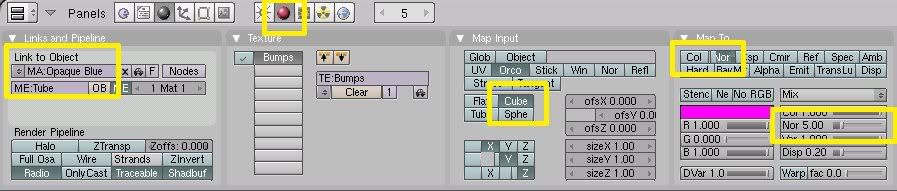
Press the second Material icon on the header to return to the Material Type panels. Notice in Links and Pipeline we are still linked to MA: Opaque Blue.
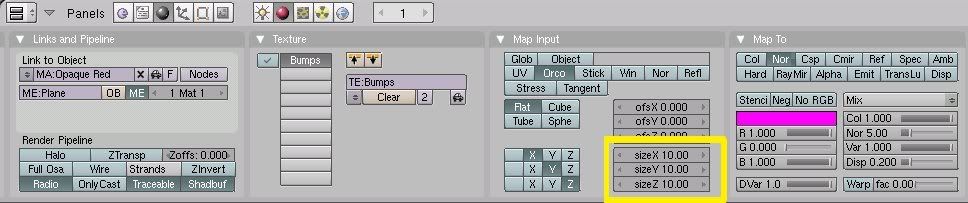
The Map Input and Map To panels are usually tabs on the Texture panel. I’ve detached them so we can see them all at once. In the Mat Input panel, I selected Cube since that more closely matches the shape of the bottle than the other choices.
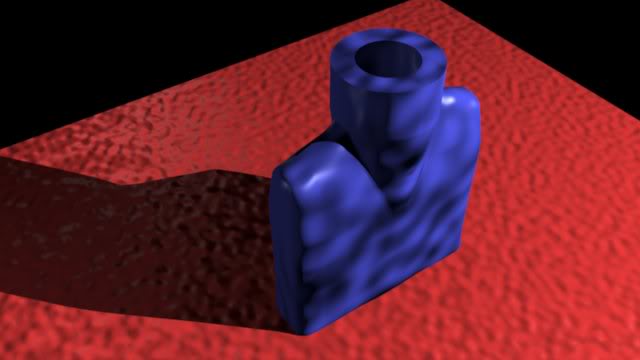
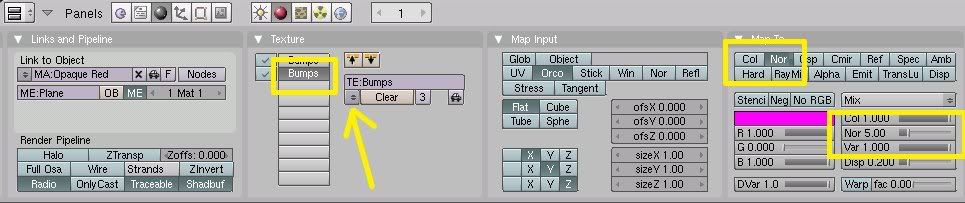
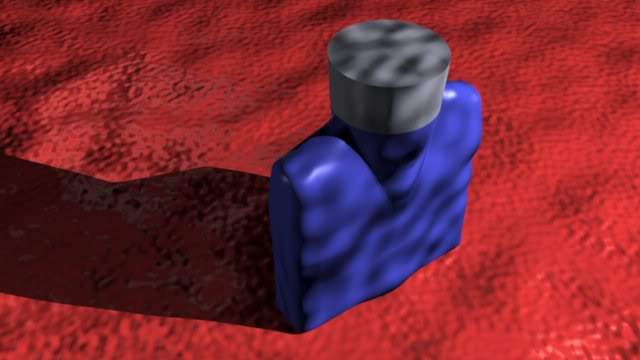
In the Map To panel we turn our image into a bump map by turning off the Col (color) button (the default), and turning on the Nor (normal) button. I also moved the Nor slider up to 5 or so, to exaggerate the effect. Here is what it does to the render:
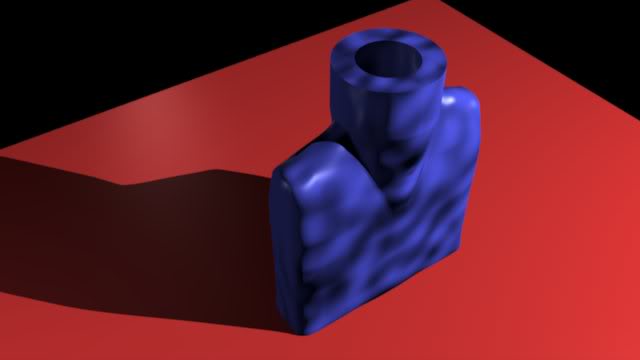
The bottle now has bumps.