Another improv. Just trying to get something out of nothing
Another improv. Just trying to get something out of nothing
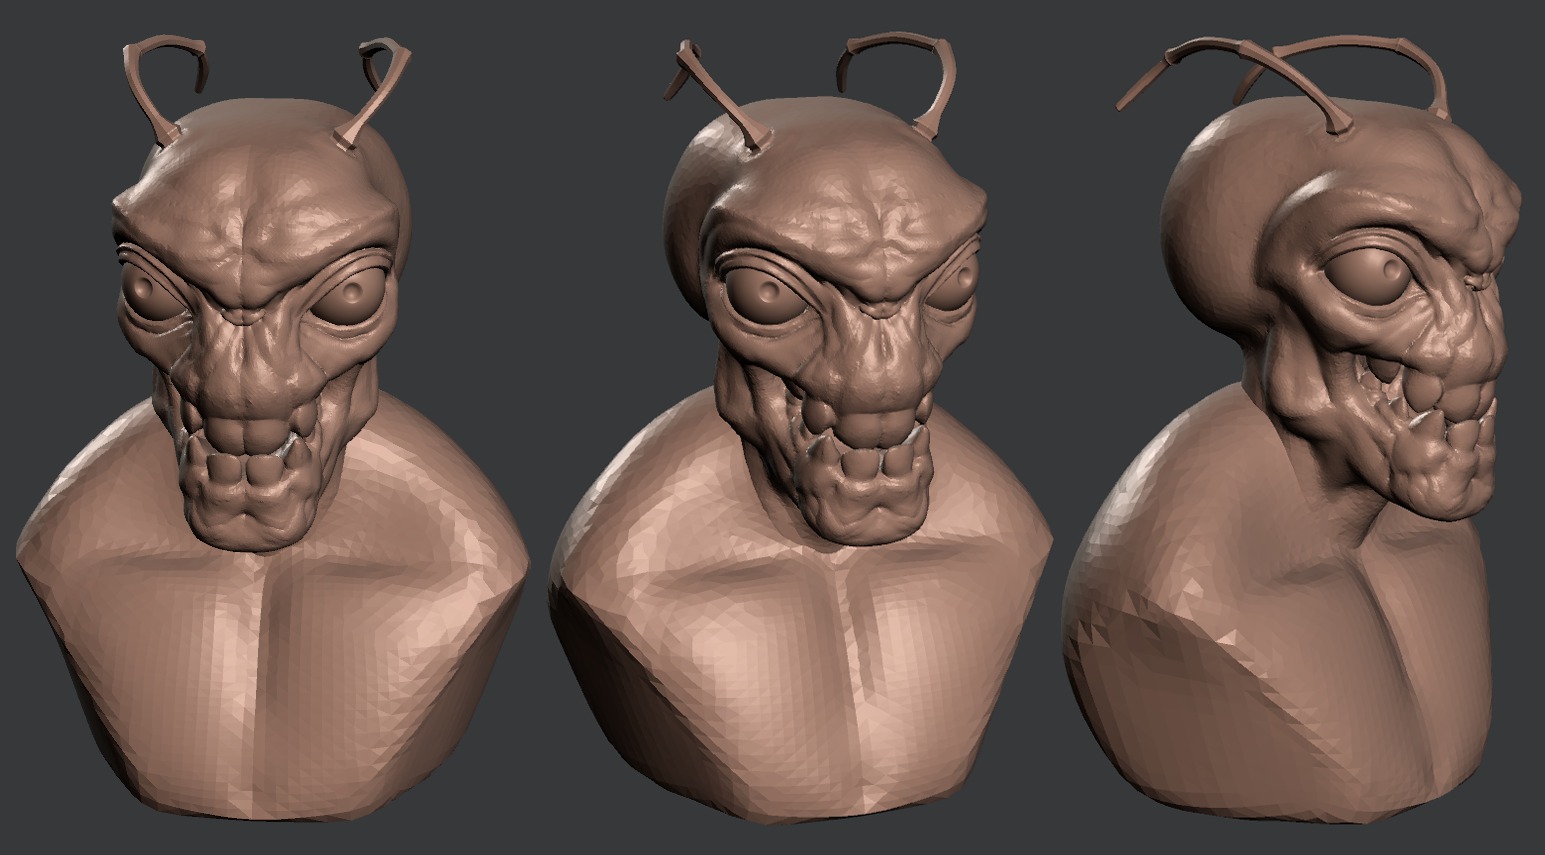
Made the eyes a bit smaller
You sculptors never cease to impress. Love the insectoid’s smile 
Hey, you know us, we the Dyntopo Crew!
Thanks khalibloo 
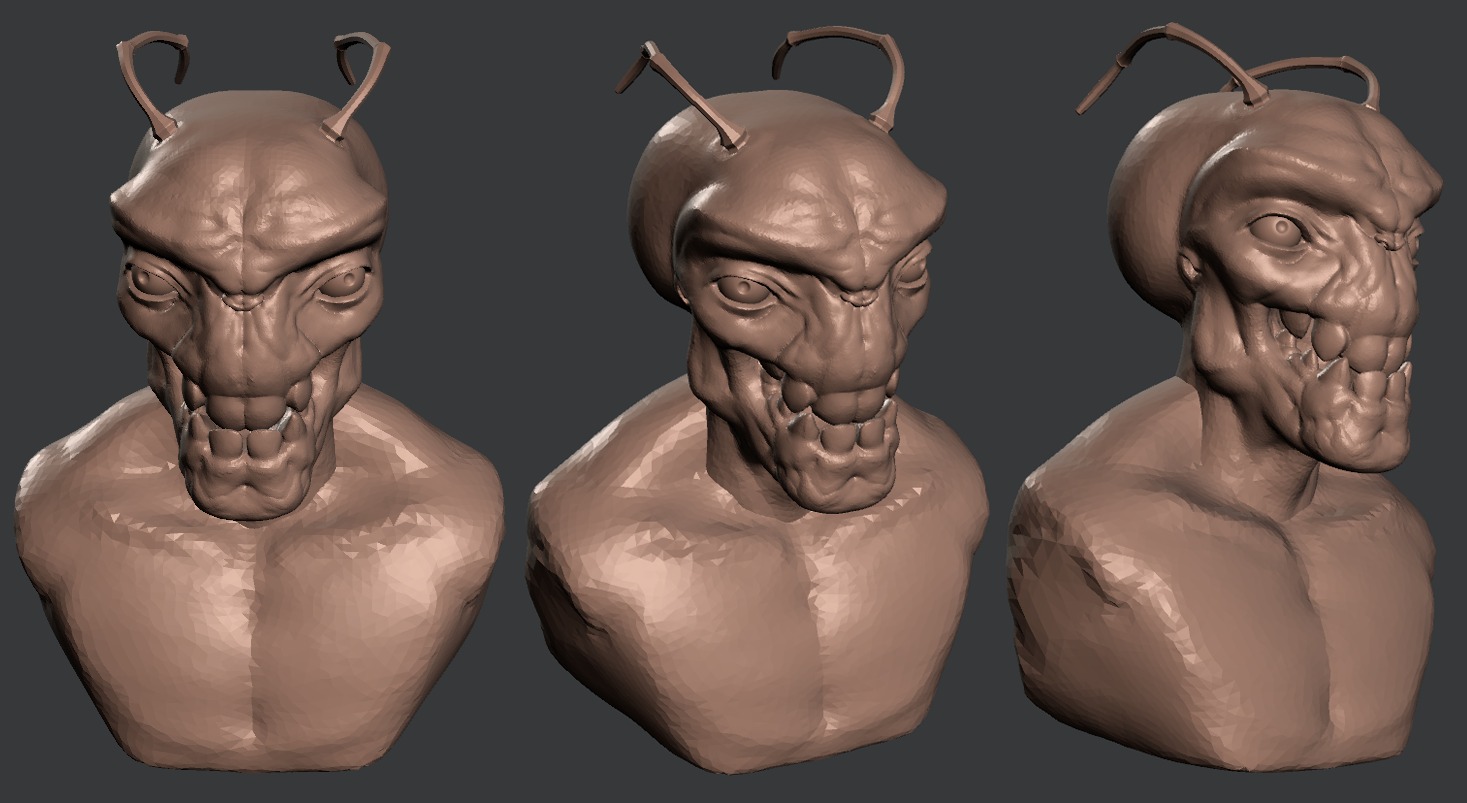
This one might be interesting in terms of shaping up of the concept design.

claps
that’s quite the insight.
i’ve always wondered… after completing a sculpt, around how many vertices do you end up having on average? does blender have a limit? or is it just limited by the hardware?
bows
I’d say both. Depends on your HW which of the 2 will hit you first.
Also Sculpting under Dyntopo or Multires in terms of how far you can take it in regards to polycount is not the same.
With Dyntopo generally you will hit a wall between 1Mil and 1.6Mil triangles on modern HW. That seems to be the limit on the amount of data the algorithm can crunch in real-time. HW has less of an impact on the threshold.
Multires, I don’t have much experience as I almost exclusively sculpt under Dyntopo, I had read the wall is a sliding margin between 4-8-10 Mil with a modern HW config. It apparently depends on the base mesh a lot. With Multires HW plays a lot larger role on the limit.
Maybe some of the other Sculptors can give you more accurate threshold numbers.
Even though on a first glance of the 2 sculpt environments Multires seems to be much more favorable because of the sheer polys it can take, in actuality it is a lot different. Especially for concept development sculpting, where you are exploring the concept on the fly, Dyntopo is king. It’s because of the localized detail that you can develop very good detail on surprisingly low tri-count, plus you don’t need a base mesh!
Both sculpt environments have their place in the pipeline.
-Having fun sculpting, doing sculpt improv jams, concept development, or getting something to retopo for base mesh - Dyntopo all the way.
As a reference here are the face triangle counts on my latest sculpts.
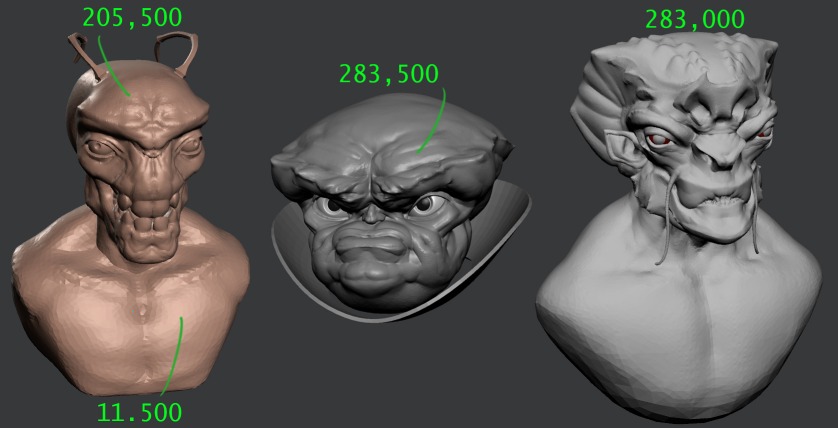
i gotta say, i expected to hear 6 million polys on those 3 sculpts
thanks for the heap of info. just wanted to know in case i ever give it a shot
khalibloo - Your estimate is not far off if you would think of it in terms of old school sculpting, anything that is either not dynamic topology or something like latest ZBrush dynamesh. Even with dynamesh, because it’s not truly dynamic I doubt you could get this detail under ~1Mil.
…
I’m a sucker when it comes to rendering. Last night was the first time I tried HDRI in Blender. Grabbed an old model as a test dummy. I realy like what I got just out of the HDRI, definitely something I’ll have to look into further. I thought it gave an old model a fresh look and wanted to share it here.
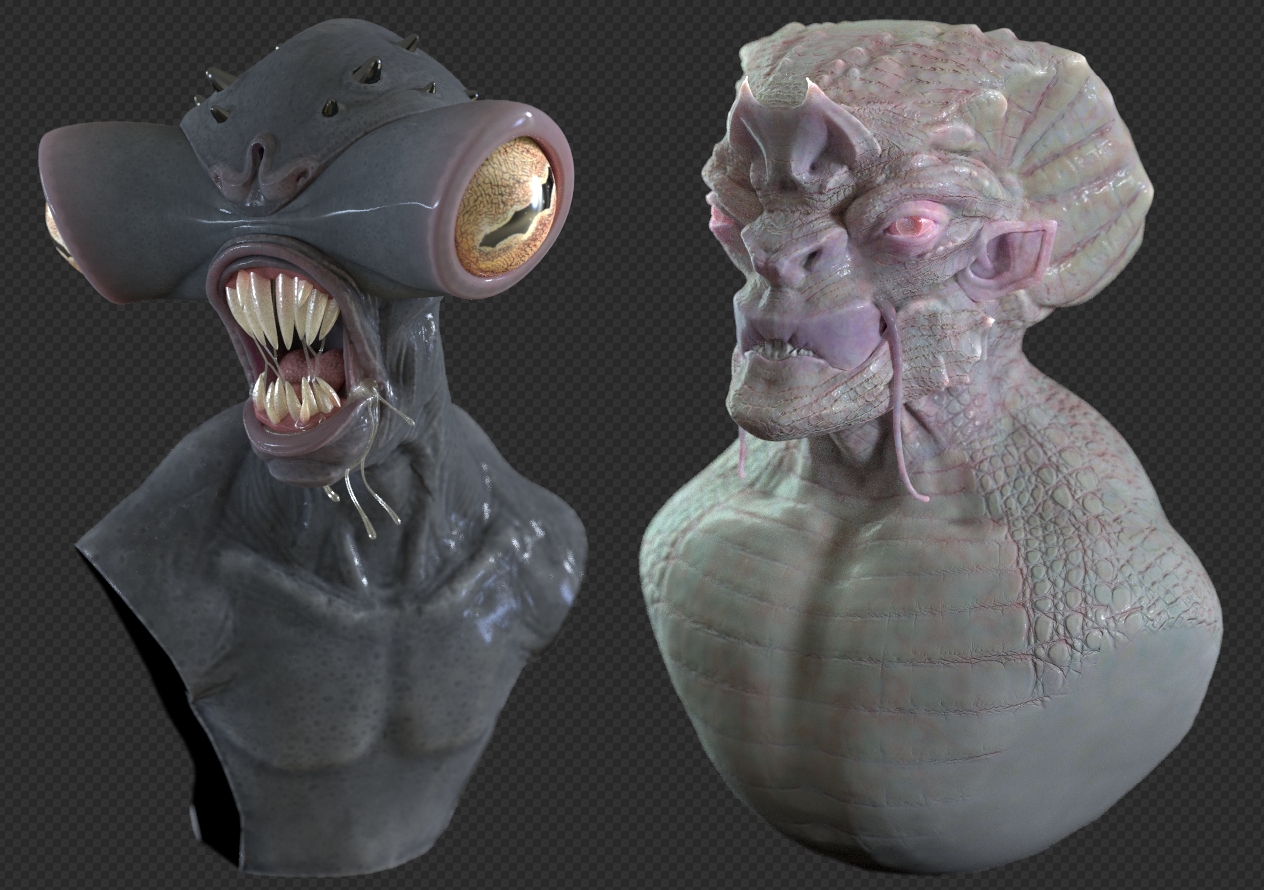
Edit: updated image with both creatures.
Nice! That new lighting really makes the screecher creature shine, I love the design and the subtle texturing.
And of course, the saliva, it just has to be there 
Personally, I find sculpting on a remeshed mesh like DynaMesh or the Remesh Mod in Blender more enjoyable than DynTopo, at least in later stages, its just a matter of how the brushes behave, it feels more natural to me. But sculpting on these meshes maxes out at about 1mio polys, too, so it is not really helpful to get something higher-res.
Really amazing work, please do some more!
suboptimal, thanks.
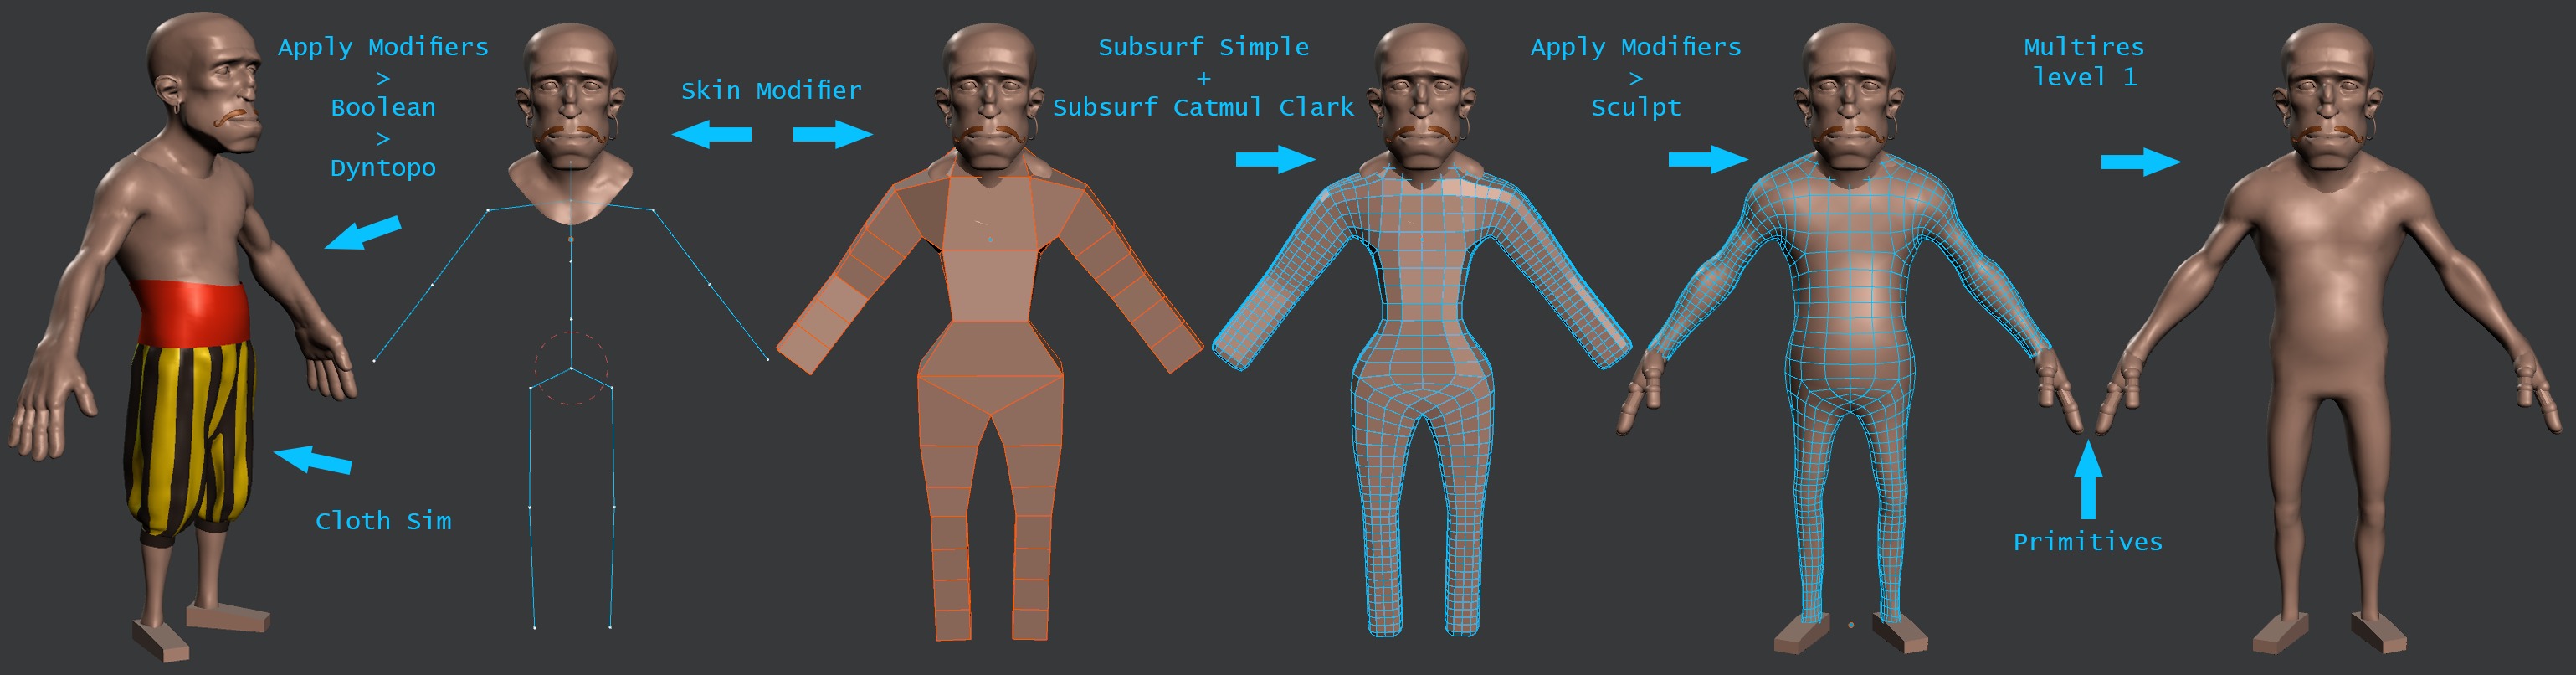
Started a new WiP. Grabbed a very old sculpt I had done in Silo, and used it as a starting point for a pirate concept I had in mind.
Exported the bust from Silo with baked subdivision, decimated, sculpted in Dyntopo. The body is SkinModifier then Multires.

I’m loving #110! Really nice SSS you got there, and the eyes on both are amazing also. Well done!
Your sketchbook is always inspiring OrAngE, awesome job!
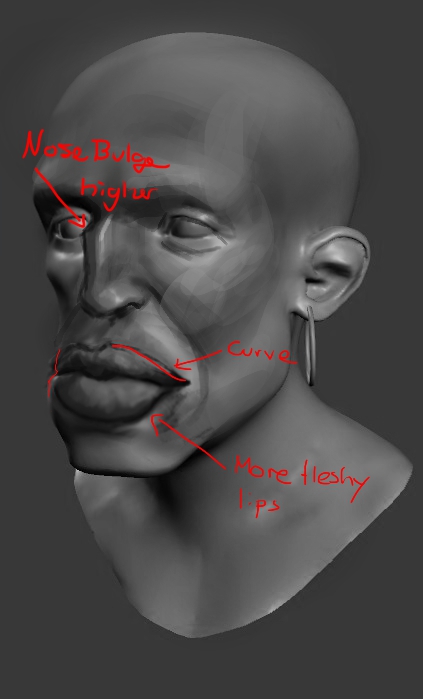
I love that latest sculpt, he really got that certain goofy pirate vibe, also the stylized anatomy (Stunning hands!) works very well in conjunction with the head. My only critique would be the jaw/lips and the crooked nose which is a little too broken for my taste  Did a paintover to show the points, but as said, I think that highly depends on personal preference:
Keep it up, too! 
Hi OrAngE, nice job man. I’m impressed.
VickyM72 . Thanks! Glad you like them. SSS courtesy of Microno!
julperado . Much appreciated, you’ve got some mighty impressive work on your end!
suboptimal . Thanks on the feedback. The nose was the central piece, I had already toned it down compared to the old model everything started off. I know it’s over the top 
I’ll try to balance it all out as I move along.
blendDoodler . Thanks. I caught a glimpse of your original post. In terms of sculpting, I think there’s good amount of timelapse GIFs and one full capture video in this thread to cover that topic. The turtleneck was modeled using ClothSim. The texture was based on the technique suboptimal covered here. The hair shader was created based on this great Hair Tutorial by Kent Tremmell. For skin, all my characters use Microno’s SSS Shader as a base, I’ll mix some other stuff with it, use a DirtyVertexColor as a MixFac etc. In terms of texturing, I did not post any screenshots because I don’t use Blender for texturing, my main app for that is 3D Coat. Here’s a screenshot of my layers in 3DC and how I stack them. That specific render had no bump and spec maps. I’ve used just one Brush Alpha that you can see on the last screenshot. I’m pretty sure you could replicate all that in Blender if you’re comfortable with Blender TexPaint. Hope it helps.

Love that insight, as well as the current state of the character - that nose is brilliant!
Thanks, OrAngE. I thought I’ve read somewhere that you don’t retopo your sculpted model. I use the decimate modifier as well, but just to reduce the hardware slow down, then re-sculpt the detail. In your case, you use the modifier in prep for rendering, yet they’re (renders) still looking like they’re retopoed. Man, I probably need to do some more reading and watch some more youtube videos.
Craig, Thanks, much appreciated! Just wondering, the character you were referring to, is it #112 or #116 ?
blendDoodler, it’s probably this post you’re referring to. Yeah, for stills, I don’t retopo. I use the Decimate Modifier only to decimate the mesh so I can UV it easier (then I transfer the UVz to teh hiRez sculpt). In the case of the pirate bust, because my starting point was a mesh that was sculpted using the old-school way of subdivisions, I used the Decimate Modifier to lower the face count and get something closer to what the mesh would have looked like if it was sculpted under dyntopo.
…
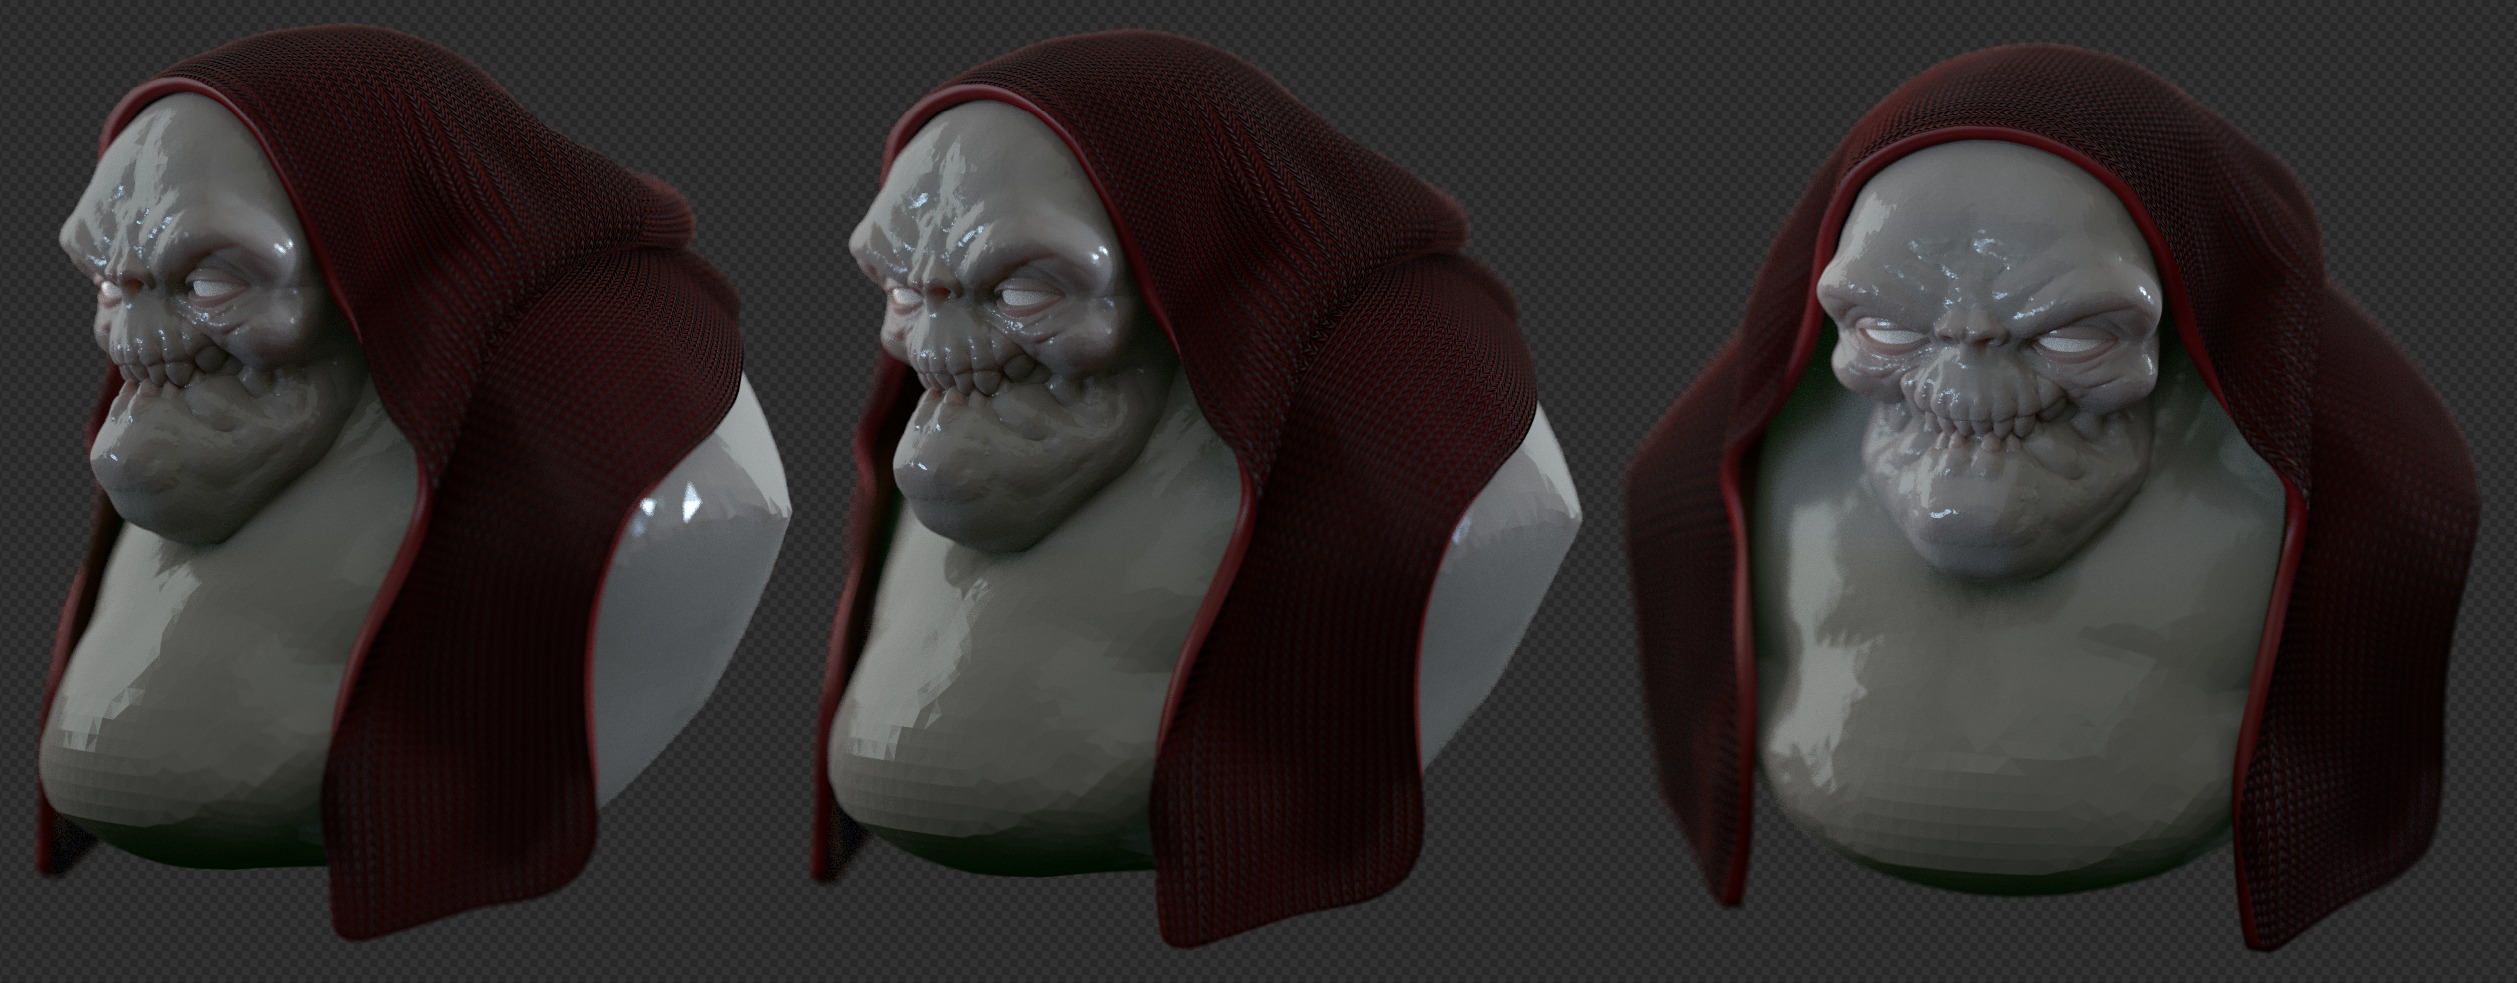
Here’s another sculpt jam, this one was super quick.

Edit:
Ran a quick clothSim for a hoodie concept.

Edit 2:
Cycles render
Wow Orange the last one is incredible!!!
Looking great! How did you do the DOF?