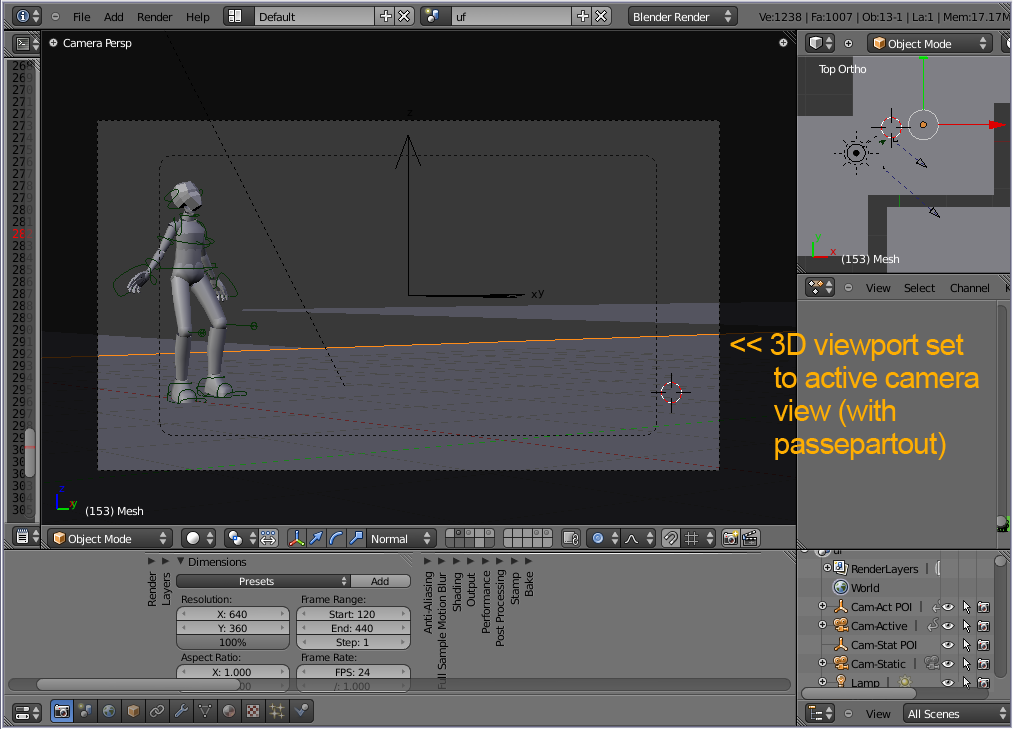
While working on some animations for the Durian project (my first real workout with 2.50a2), I found I couldn’t make usable “playblast” anims by using the “clapboard” button (Open GL render to animation) – the resulting rendered view was weirdly cropped, best shown in some screen grabs:
Is there some way to define the area rendered by the Open GL render buttons? It does not seem to be connected to the render dimensions or the window dimensions in any recognizable way. Is this something that should be put on the bugreports page?
EDIT: In a related issue, there doesn’t seem to be a way to specify or configure the “AVI codec” output option; when rendering it just seems (judging from file size) to output raw AVI. Additionally, when the “Xvid” option is selected, the FFMPEG configuration panel comes up, with no indication that Xvid is the codec, nor any Xvid configuration options (just those for FFMPEG). Is this just a matter of as-yet-incomplete implementation for the alpha? Or am I missing some controls?
Yes I have the same problem with the open GL render. I tried with different resolutions, lens sizes or aspect ratios, but it doesn’t work. Certainly a bug.
Thanks for the response, bupla. It’s definitely in need of work, but I have found out a few things that might help if you want to use it for rough previz & animation checking, although capturing an exact camera port is NOT possible by this method.
First, it seems that the OpenGL render will be distorted depending on the image proportions – usually stretched vertically somewhat to fit a standard 1:1.33 frame (like 640x480). By trial & error I’ve found that by using a 640 x300 image size, the OpenGL renders will not be distorted in this way. That’s a 1:2.133 ratio (image ratio, not pixel ratio!).
Next, it seems the image rendering area starts near the lower left corner of the 3D window or camera frame area, and extends approximately half-way across the frame. The resulting height of the rendered area is then determined by your image ratio.
Using these rather gonzo observations (they are not exact by any means) you can set your scene up in a camera view or the “User” 3D viewport so that the OpenGL render captures the part of the action you want. Use the OpenGL “still” render button (the little camera) to check a number of frames for what’s being captured before doing an animation, though.
Not what it should be but at least some very rough pre-viz can be done to check on animation details, since the UI playback can be off time by a significant factor depending on your scene load.
After a while you get used to figuring how to set things up – I’m working on a little short now that uses ONLY OpenGL renderings from 2.50a2 (it’s part of the subject & style of the piece to do this), and now I can set the camera/viewport up very quickly.
You’re right Chip. I was (am) having the same problems. Was following Andrew’s tut on smoke.
First pair of pics is what I was getting, then setting the object to the lower left (even outside of the camera range) would put the render more in the center.
Rather than moving the objects around in the 3D space (which can screw up some scene layouts), what I’ve been doing is setting up an Empty as a constraint Target for the camera to Track To – a Point of Interest – and then shifting that and the camera about as needed to frame things up in the OpenGL render area.
I also found that using the Camera Shift options can help get your image properly oriented – good for fine-tuning if needed.