How amazing is that! I assume you used an HDRI for this animation and left it also as the background?
It would be awesome to make a ‘Walkaround’ kind of video with motion tracking! That is what I’m planning to do with my Concept car 
It is overall an stunningly detailed model, it needed alot of patience for sure.
Wow realy good work.Just missing a little bit of scratch/dirt on the car paint.
I was watching this just before your work!
The dirt on the car will be the last thing I’ll do, because right now the mesh still changes quite frequently and laying out the UVs every time from scratch will be a pain. But I have thought about that. Most likely I won’t do any scratches though, the car is supposed to be new and shiny 
And to LW DEsign: Great idea! When the model is finished, I will do something like that, still have to figure out what exactly.
I’ve been working a bit again, and as you will see, there isn’t much more to do that’s really visible. I did a lot of improvements and modelled out the main parts of the hardtop (which you cant see from the exteriour), to at one point have a top that can be opened. I figured out the mechanics and already did a rig for it, but it’s not really finished yet. You’ll see it soon enough. I added a cooler behind the front grille, improved the blinkers and the door handles, added some number plates and windscreen wipers and pretty much finished the entry area, so that the doors can now finally be opened. Stil missing the hinges for the door and overall detail in this area. The interiour got a rear view mirror and a small light. You’ll only really see the changes if you look for it, but the car becomes more finished every hour. These details really need a lot of time and patience and I don’t think I can call this model entirely finished until feburary. Then I’ll work on a bit of dirt and overall detail texturing to give it a more natural look. Right now it still looks like a render rather then a real car. And then, finally, rigging the chassis 
So here are a few renders of the current state:
The rear, with open doors:
DNMN3000 stands for doenerman_3000, my Youtube channel. I hate that name (you’ll laugh if you find out what it means), but for number plates it works surprisingly well. You’ll find me pretty much everywhere under that nickname, but for Blender Artists I used somthing new.
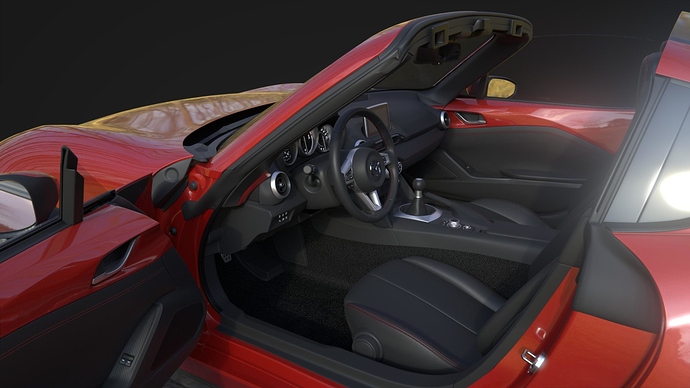
A closer shot of the interiour:
And finally a front render:
For the soft top version I decided to let loose off the rig, and just do one version closed and one version open. On one hand it doesn’ really matter if you can open it, because if there is no character to open it, it most likely won’t look good if it opens magically. With a motorized top though i think that can be tolerated. And on the other hand it is pretty difficult to get the deformation of the fabric right, while, with these mechanical, static parts on the RF, it is much easier to analyze the movements of the structure.
Still working hard and making progress… slowly :yes:
Love to see your progress, I’m really looking forward to what the final version will look like :yes:
wow that’s absolutely amazing
Wow. Very nice!
Loving the models with complete interiors. And maybe I’ll do a video with my Ferrari model too!
Hey there,
and finally, I can call the interiour sorta finished:
But there’s still a bit of improvement to do. While every detail now is modelled out, I’ll still have to tweak the materials a bit and maybe even sculpt a bit of creases and general detail on the seats and the handbrake/shift knob cover. I’m having a problem right in the center of the seats, where the central stitching is. Because I’m using a texture to represent the stitching colour and bump, there is a UV seam and it seems to affect the normal map with the leather texture, even though that is not controlled by UV, but is generated instead. Any idea how to fix this?
A little render from the rear 3/4 view you’ve already seen:
To finish the RF up, I still need to do a lot of modelling for the hard top, which is especially hard, because there is not much footage of that. So that will need a bit of time still, but I’m happy with how far I’ve gotten so far.
I’ve already started to do the rig for the car, and it’s working quite well. Looking forward to do some cool animations :D.
Comments and tips on the UV issue are appreciated. Thanks for all your good feedback, that’s really making me happy and giving me motivation to move on with what I’m doing.
This is really among the best car models I’ve ever seen, and one of my favorite cars, too 
Hey there,
as promised a little animation on the roof mechanism. It is still not 100% fin fished, but as always, you’ll get the point. The only real thing missing is some modelling. Many complicated shapes, and not really much to hide, so a lot of work still. But the end is near 
When the car is finished you’ll see a rendered version too.
That’s cool. Looks like the only piece missing is that one scissor-link mechanism. One curious question though: drivers, or action constraints?
Exactly, and I’m working on it. And besides I need to model a bit of trim pieces so you cannot look right through the car.
The rig is all based on IK constraints. That’s mostly possible because I did a lots of research on how exactly the mechanics are set up and how they work, and then reconstructed them. A lot of fiddling was still needed to make it all work though :D.
Please show workflow for making the tires.
I’ll do a quick video tutorial on that. Might make a good Youtube video and I think it is the easiest way to to it.
Interesting. Some IKs are so damn fiddly to get a good solve or not run into cyclics with more than one moving pivot. I’m surprised you’re managing it. That’s why I know actions can be handy for mechanical stuff. Yet I’ve still seen some manage to get their drivers dialed in too.
— Edit —
Seeing something on the tires… Those do look good too. I’ve done experiments with the new micro-displacement and that almost seems the way to go now. (Unless you’re doing some other 3D stuff outside of Blender.) Almost works too good to UV a simple-stupid tire mesh, have adaptive subs on it, and just texture the tread displacement. Of course you may be doing something different, but I thought it’s worth a mention.
Holy smokes!
Ok,sorry for having you wait for so long. I just can’t find a war to record properly, every solution has a querk that makes ist impossible for me to record something. Has anyone of you have an idea what I could use to record?
So, here shortly written for you:
I basically model out the profile of the tyre, on a flat surface, rather than rounded. All without any bevels or subsurf, just plain. I then use a curve to bend the mesh with a curve modifier, until it looks like one portion of the tyre tread. Then I use an array modifier to make a row of these portions, and another curve modifier with a circle to form the tyre. I select ‘first last’ in the array, so that I end up with one big mesh without seams and then scale the tread mesh along several edges to get the proportions right.
I hope that was a bit helpful for you.
Hey there,
it’s been a long time, I’ve been busy with exams. But to keep you running I’ve got a bit of eyecandy for you:
I made a quick studio lighting setup and increased the rim size a bit to be more realistic. I think it came out quite well, but it’s nothing fancy. You’ll hear from me soon, it’s only two more exams left ![]()
Hey there,
finally, it is the finishing touches. I’m moving my build over to the finished projects section for some feedback, but this thread will most likely live on with me trying to animate the car and/or finishing the softtop version.
So these are some (for now) final renders with a very similar render setup that you can see above.
Also, there will be a rendered version of the roof opening and closing. I’ll upload that one the following days.
It’s a great feeling finally being able to do some great renders with the car. I’ve never modelled on this kind of quality level and I’ve learned quite a bit. I hope you like the results as much as I do. But nothing is perfect and as always, feedback is wanted and appreciated :).
Hey there! ![]()
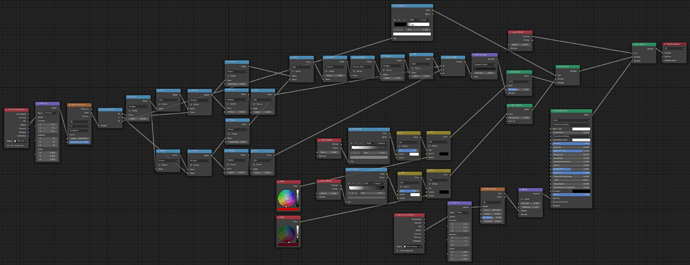
I’m back from the dead! Over the last years, unfortunately I didn’t habe enough time to use Blender on a regular basis, but with 2.8 I started to get into it again. So to try out the new OptiX Rendering as well as the denoiser and all those other cool features I tackled the paint on my MX-5. I tried to make the metallic flakes as realistically as possible and I found a way to make the individual flakes of a voronoi texture face randomly in different directions - there was some geometry, maths and studying of Normal Maps involved…
Let me know if you want me to go in depth about how all this works ![]() - this took a while to figure out.
- this took a while to figure out.
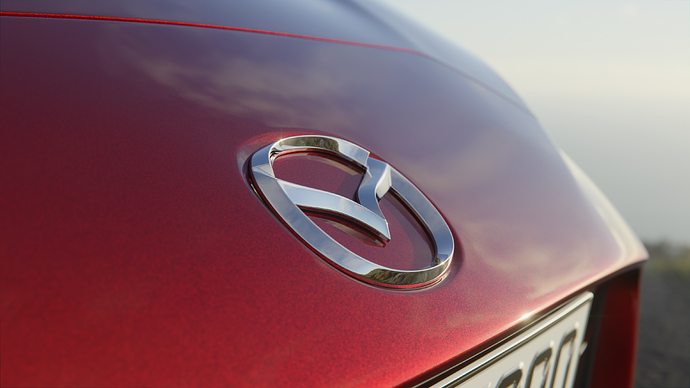
Here’s how the paint looks in a close-up:
Here you can see how the flakes work:
And finally, a turntable of the MX-5, wich somehow has changed its Wheels and git a little lip spoiler ![]()
In this video, I also tried to do some cinematic lens flares, which look quite good when not overblown like in a few frames on the bonnet - but I might just have overdone it a little bit for a simple turntable ![]()
What do you think? I really want to make some renders in a real environment, so that might be coming soon


