4x4-All terrains Autodrive system - version 4.0

Hi, I have just built the v4.0 of my 4x4 autodrive system.

This time, I have used an armature, and the rig is very simplified. You will find a blend file here :

http://3d-synthesis.com/Blender_Files/4x4-Autodrive-RigV4_08.blend

You will find previous versions as well as animations showing the system in action, in this thread :

http://blenderartists.org/forum/showthread.php?t=159680

Comments will be welcome.

Best regards,

Philippe.

Nice work!

I like the simplified rig a lot. It is much easier to understand and responds quickly.

Thank you Atom !

I have started to work on a rig with tank tracks (caterpillars). The tracks work fine on a flat ground, but it is very difficult to rig a suspension for a tank. Even with sensors on each low wheel, it is hard to get something correct without deforming the caterpillars in a weird way ! The problem of the tension of the caterpillars is hard to solve…

Not yet close to release, I fear !

ROUBAL:

I have some more feedback on your new rig. I generated a landscape using the ANT Landscape script and did a swap at the mesh level with the mesh Ground object in your scene. I had to keep the ANT landscape mesh scaled to 1.0, so I scaled it up at the edit object level. I disabled the modifiers on the ground at that point (they were no longer needed). I had to toggle the shrinkwrap modifier on the Curve-Guide on and off to make it snap to the new landscape. It worked great. The rig was tracking to the new ANT landscape with no problems.

I thought I’d try the same thing with the Curve-Guide and I ran into a problem. I tried both a bezier curve and a nurbs curve, but each time I swapped the new curve in, the rig no longer worked. Is there some trick to replacing the curve? By swapping it at the CU level I am keeping the object naming intact, except for the CU name. Do I have to rename the new curve to Curve-Guide in the CU field as well?

Do I have to rename the new curve to Curve-Guide in the CU field as well?

I’m not sure to understand, but if I’m not wrong, YES it is necessary to Type the same Curve Name in each field used by a Modifier or a Constraint.

Do not forget that the Empties “Empty-Front”, “Empty-Rear” and “Empty-Steering-Target” have Clamp To constraints also using the Curve-Guide name !

So, You must Check their fields to see if they are not empty or contain a wrong Curve Name.

I have been playing around with the latest release and I find that it breaks (meaning the wheels act unnatural when traversing certain terrains). Is there anything that can be done about this?

I was wondering if I could just use a single sensor for both rear wheels? Do you think this might help? Sometimes the wheels tilt/lean too much, is there a way to set a maximum rot/tilt?

Attachments


See my comments on the Other thread. I will try to improve the rigg, but this said : With a real car, even a 4 wheels drive, you wouldn’t go everywhere, so I think that there are also some limits for a virtual car. Some big errors can be corrected by correcting the terrain, in order to get safer driving conditions.

EDIT : Hmm, you are right : the problem is bigger than I thought. Thank you for the feedback !

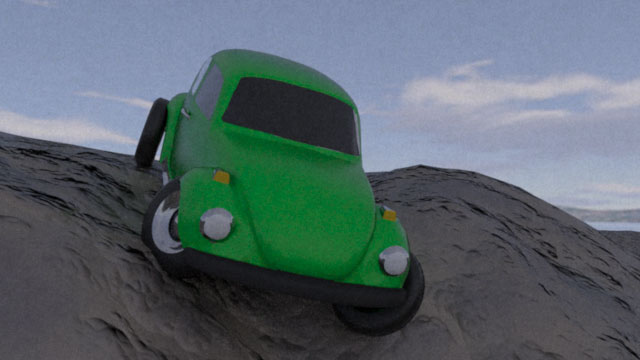
I have noticed something unexpected : The empties following the curve by Clamp To constraints are not affected by the ShrinkWrap modifier applied to the curve ! So, as the master bone tracks empties which are at a wrong altitude, the Sensors position are wrong and it leads to a bad positionning of the wheels and a broken rig !

I think that I will have to come back to the heavier solution with a “Ribbon” mesh following the curve and suporting the empties.

EDIT : Here is the 4.1 version. The armature is more robust.

Fixed bugs :

  • Replaced the Clamp To method by the Ribbon mesh method used in 1.0.
  • An unwanted frame offset on the sensors as also been fixed for better accuracy.
  • Arms angles locked.
  • Distance variations in high slopes between Left and Right wheels neutralized.
  • Bone shape added for the Suspension in order to make easier the parenting of the car body.

This shows that the feedback of Blender users is very important. When you spent a long time on a project, sometimes you don’t see your errors and forget important things.

It is very late in the night, and I have not yet defined a precise process to resize the setup to match the car dimensions. It is on my To Do list.

The best way for using the system is to import your terrain, car and wheels, and edit the existing curve.

If you want to import the setup in your own file, append the group named Car-Setup.

If you want to change the initial direction of the car : select the curve AND the Arrow mesh and rotate of 90° around the curve center point. After that, copy the dLocY ipo curve in the dLocX ipo curve and delete the dLocY.

Download the new 4.1 release here :

http://3d-synthesis.com/Blender_Files/4x4-Autodrive-RigV4-1_09p.blend

Please check this version, and tell me if you find other bugs.

I discovered one of the best ways to keep the rig from “stressing-out” was to simply control the curve and the terrain. After all, a real car could not take a dive down a steep slope like the one I have pictured above.

I thought I would give the rig a test using an animated displacement for the terrain. The rig tracked the animated surface without any problems. Good job!

You can view the result here:

Attachments


Nice animation ! A car on water : original idea, and good effect !

I’m currently working on version 5.2 of my system. This time, I came back to solid objects.

The rig looks a bit more complicated because of the separate objects, and because of the use of a “compound” setup with two reference bones and a “dual stage rig” made of solid objects, but indeed it is not so complicated.

This new setup has two advantages :

  • No more dependencies, and so a very responsive rig.
  • A better behaviour of the rear part of the rig (rear axle), without any geometric deformation.

In extrême situations, the contact with the ground could be slightly less accurate because of the use of a geometrical projection, but it should not be noticeable in ordinary situations. Added to that, on moderately bumpy terrains, it is possible to switch to a “single stage” mode, allowing the maximum accuracy on the wheels/ground contact.

I still have to built a clean file with instructions. I’m also including in the file SAM (Simples Armature Man), the automated driving character, as well as the Gear/Clutch command box.

I will release it as soon as possible. I also want to include the Tracks Creator, but it can take some more time before being simple enough to be used really easily.

Hi !

This is the 5.3 version of my 4x4 system.

Maybe you will not like it at first glance, because the setup uses many solid objects and empties, but it is accurate and responsive, and works well in extreme stress conditions.

It is easy to make not visible and not selectable objects that are not necessary in normal use, so the view would not be too much populated. It is also easy to hide the setup on a layer.

The Truck option is a first test, and is not suitable for very bumpy terrains, but it is the same for real trucks !

Here is a blend file compressed with Blender built in compression feature, so if you save it again , do not be surprised if the file is bigger after saving it !

http://3d-synthesis.com/Blender_Files/4x4-Autodrive-V5-3-TRUCK-Compressed.blend

I have not yet added the springs (absorbers) deformation.

The v1.0 was made of solid objects and empties. The 2.x used an armature. The 3.x used solid objects and empties. The 4.x used an armature, and 5.x uses solid objects and empties. Can you gess what is coming next ?

Yes, I’m already working on the 6.0 release, which is a translation in Armatures of the 5.3 version. So far, and as expected, I get at least one cycle of dependency in the system. It seems to be very difficult to build a system like that using armatures without getting dependencies.

Stay tuned, and don’t forget that your comments are not only welcome, but are important for debuging purpose !

So, please don’t be shy !

Best regards,

Philippe.

I have released the 6.1.1 version, using a simple and efficient armature.

There are no dependencies in this rig, and so it is very reactive.

No more geometrical deformations.

The Blend file of the setup and a 21 pages PDF manual are available on the two links at the top of this page :

http://3d-synthesis.com/tutorialsenglish.html

Comments are welcome.

Philippe.