Hello. I’m used to using Maya and have recently started learning blender and I have a few questions that I hope people can answer.
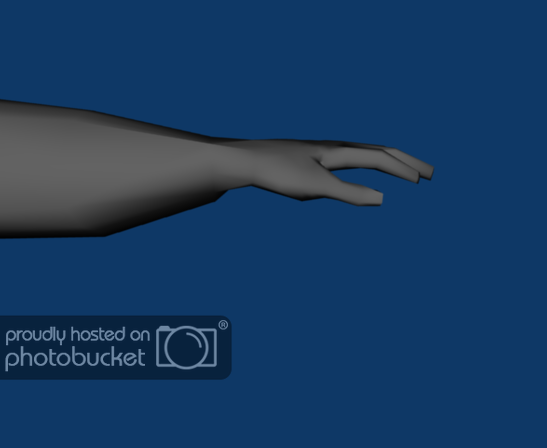
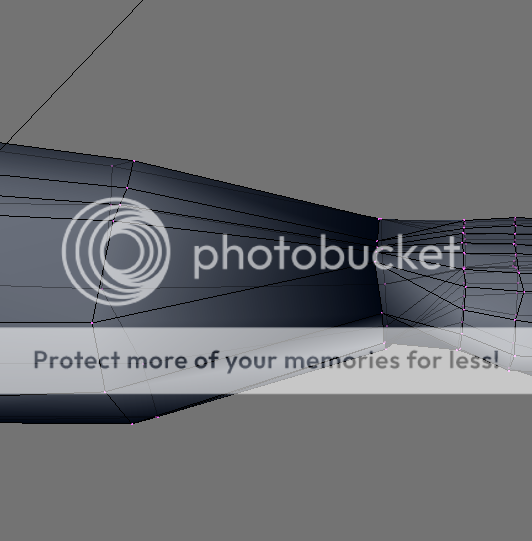
The first is a problem i’m having which is very strange. Basically, i have a character and I decided to create the other body parts like the feet and the hands seperate to the character (in order to solve another problem) and then just merge them to the character. I’ve merged the feet perfectly fine to the character, but when i try to merge the hands to the wrist a very dark area appears at the part that they’re merged at and I don’t understand why. The stranger thing is, is that when I do a render this dark area isn’t actually there. I’ve taken some screenshots for people to see…
I’ve merged a lot of the vertices in twos for every one vertice on the wrist becasue the hand has alot more edge ring loops, however that isn’t causing the problem becasue i’ve tried just merging 1 vertice for 1 vertice and it’s still there. I’ve also tried moving the vertices around but it didn’t fix it. The only thing that somewhat helps is to add a edge ring loop on the wrist and then move it really close to the dark area but it’s still noticable and looks weird. So yeah, any help would be appreciated.
My second question is, is there a tool that is similar to the split polygon tool in Maya? I know there’s the knife tool in Blender but that doesn’t seem to do the same thing as the split polygon tool, or perhaps i’m just using it wrong? It just seems very different.
The black areas do just appear , when your Normals are in the wrong direction.
Select all Vertices with a and then try pressing Ctrl + N
And press Enter. Now your normals get regulated outside and the black areas should disappear.
If not, try selecting the black faces and press W and then Flip Normals.
For your second question i haven´t got a answer for you cause i´ve never used Maya and i don´t know what the split Polygon tool does.
And split polygon splits a polygon face. So if you select an edge and then select another edge (for this example it could be the opposite edge on a plane) then it would split the polygon face and add vertices in those positions, similar to what adding a edge ring loop would do, except instead of going all the way around the model it would only add the vertices on the faces that you select.
There is no split polygon tool yet in blender.
Remember that blender does not yet support n-gons so faces can only be 3 or 4 sided. If you split an edge this will create additional triangles on the adjacent faces that you’ll have to clean up afterwards.
I have another question and instead of making a new thread I figured i’d just reply to my old one.
I’m quite new to UV mapping, but I think i’ve finally grasped the idea of it. So i’ve UV mapped my characters head and arms and soon it’s legs, but i’m running out of space when it comes to placing the UVs and although I could resize them all to fit fine I’d much rather give the head it’s own map and the arms/legs etc one becasue a lot more detail is on the face than the other body parts. Is it possible to do this in blender or do I have to fit everything on one?
Yes it´s possible.
In the “Editing Buttons”(F9) you can add some other Uv Layers with the Button “NEW”.
You can unwrap some parts in the first Layer and some other parts to a second or third layer.
here it´s much better explained http://wiki.blender.org/index.php/Doc:Manual/Textures/UV/Unwrapping_a_Mesh


