This is a very important feature. IMO
Sculpting, sketching, is deeply involved into measurements, we like it or not.
Any app related to camera capturing, see iPads, SLR cameras, or any cameras… all provide a grid to help compositing.
All renaissance masters use grids, sometimes in front of the subject.
However, zbrush, 3dcoat, sculptris, blender…. nothing there.
As a workaround, I tried to use:
Lock camera to View
Asked for a simple grid in camera properties (not quite what I like to see, not much options)
Trying a parallel camera didn’t help much, facing some issues.
A real grid, painted on my glass monitor, or a construction in front of my monitor, this sounds ridiculous, doesn’t it?
Any ideas?
Please, questions like “why do you need this feature” will be answered as “you really don’t understand what I’m talking about”, so better avoid them. Sorry.
Would be useful, i’m not a coder so i have no idea on how to create something like that (maybe using the same code as the stencil brush paint would be good), but if you didn’t already tried , as a workaround you could give a try to Background Image (set to “front” instead of back), and a grid png image like this one :
so you can control the dimension and size but tweaking the background image setting.
But only a workaround, as it while can only fit front/back/side/top/bottom/camera view, it does not fit every angle of view unfortunately
Thank you both.
The background image is a solution.
However, how? Why this background image panel is grey for me? It doesn’t work…
Edit:
it works now… I wonder why.
Anyway it is related to camera, I have to use lock to camera view.
The simple camera guides are more or less the same.
No, I don’t like it this way.
Thanks anyway.
We need a serious developer to start working into sculpting mode. @Sanctuary
Your sculpture looks very well aligned to this grid. Excellent.
Have you enabled the Background Image (it’s not enabled by default) :
I agree, but unfortunately with the “gooseberry” movie , i doubt there will be anyone working on sculpt mode for a long long time, as sculpt was not one of the targets of the movie at all if i remember well.
Perhaps you could create a plane, subdivide it to suit your needs and set its drawing mode to wire, show all edges; then you can parent it to the camera and put it at relative location (0, 0, x) and rotation (0, 0, 0).
It will always stay in front of the camera ( restrict its selections, render ability)
@sourvinos
good one, however all these workarounds are related to camera. (lock to view)
Have you tried a parallel camera when sculpting? Surprises.
It becomes more and more complicated. Better avoid any use of grid. Not this way.
I will paint my glass display. Much better.
LOL sanctuary, yes, check this box, right.
I agree, but unfortunately with the “gooseberry” movie , i doubt there will be anyone working on sculpt mode for a long long time, as sculpt was not one of the targets of the movie at all if i remember well.
I’m too old for gooseberries. Can’t wait for so long.
It is more complicated, we need a developer who understands art and sculpting, who will listen, someone to understand what we are asking. We also have to understand the limitations of blender and try to build on what we have already.
Well, sure it’s not a great solution, but you could draw on the viewport a grid with Grease Pencil in View draw mode.
(or someone could make a script to draw a grille with GP on the active viewport)
Ricky, can’t be done with python. I need something related to 3d view, not to camera.
Camera has guides, a simple grid, more than enough for me. I don’t like cameras though LOL.
(no luck) @sourvinos, thanks, already tried it. No luck
Hi Michalis! I’m not as deeply into sculpting as you, so I don’t know if this will work for you but can you open this .blend and see if you like this grid system. The sculpt is not one of my best : ) The grids were made in Inkscape and saved as transparent PNGs… they are packed, I hope.
Naturally the effect is completely dependent on what your background color is and how big you are working, so they have to be rather customized to the task. The great thing about this way is that your grid can include curves… I don’t need to tell a master like you how to manipulate in the 3D view, but for others reading this post, you can parent the empties to a central one and rotate the grid box so you’re not bound to axial view gridwork, if that makes any sense.
Thanks Druban
I need something a lot simpler, really. The guides of the camera are the best so far. (just using a square format) A script that will add a few more guides on camera could serve well. As I already mentioned, we can’t use lock parallel camera to view. Try and see why. Not compatible to sculpting.
A printed transparency on a laser printer in front of the display is better for me. LOL
All I’m asking is a grid in 3dviewport. The background image is relative to view angles and or camera.
Funny thing, I was asking the same in zbrush, sculptris, 3dcoat…
However, when I loaded your blend file, for some reason, certain shortcuts (like TAB-editmode) stopped working. (Load UI is always Off). Interesting. (using fresh daily builds always)
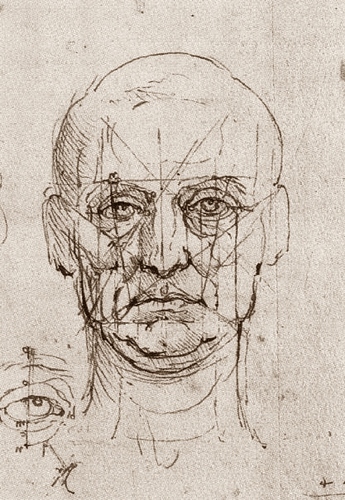
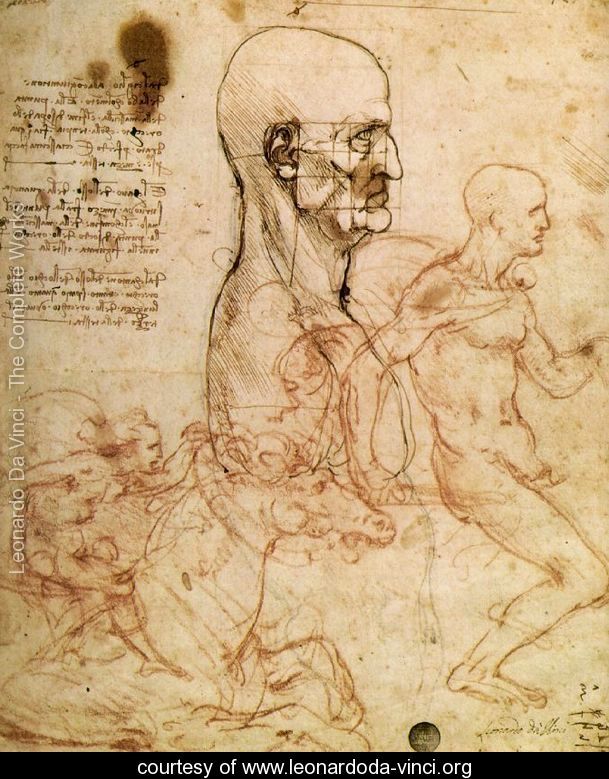
Just for inspiration, see what I have in mind. Studies. Leonardo.
sounds odd, is it possible that you selected an empty? Those were not mesh planes with a grid image, but image empties… No edit option for them…
Something odd with that file anyway… too large but BA allowed it the first time. I took it down, looked at it and then BA balked at uploading it … I think maybe a compression problem? Anyway I substituted a Suzanne and deleted any cruft and uploaded it again.
LOL, right, empty was selected by accident. shortcuts working fine.
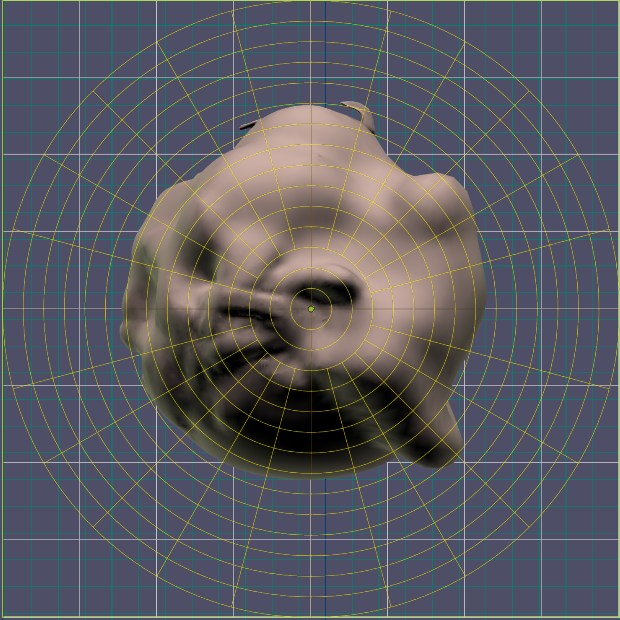
See Leonardo’s measurements? He uses harmonics and golden ratio based grid.
He just places his shapes on these guides, anatomy just happens.
Well, all these harmonics, golden ratio, thirds etc, you can find these giudes in camera properties.
The bad news are: When I asked for 4-5 guide sets, it hits performance of navigation.
Anyway, a WIP. Trying to place shapes accordingly. Many odd things still happening. But, I don’t trust anatomy this time. I’ll find a geometrical, abstract way to fix all these. Anatomy will just happen. (I hope so LOL)
(guides on the side view, the other is accidental. Anyway, I use these guides when zooming, sculpting detail, in many ways)
Hi Michalis, I thought those marvelous sculpts just naturally flowed from your fingers.
I hope you get it worked out… The image empties really work for me because I can rotate them and drag and scale them to cover the area I am working on, exactly as you have in your screenshot. I use them like French curves and other drafting aids from a long time ago, only I can turn off selectivity, locking them in place and they don’t move just at the most crucial moment as physical aids often do.
Inkscape is capable of exporting a guide object of any kind, including golden ratio and diagonal guides just as you show.
Being able to drag a guide from the window edge would be nice, but what to do with them when rotating the view? Maybe each axial ortho view should draw and store its own set of guides dragged by the user from the window edge as in 2D programs. that shouldn’t create a lot of overhead…