So recently I was completing a fundamental animation exercise (My first walk cycle) with CG Cookie, thought that’s not what this is about. What this is about is how I wanted to use the compositor to combine my front and side views instead of having to render them separately and then adding them to the sequencer. This process was found by tinkering with a ton of different nodes but below is the process I used to get the animated GiF you see.
PROCESS
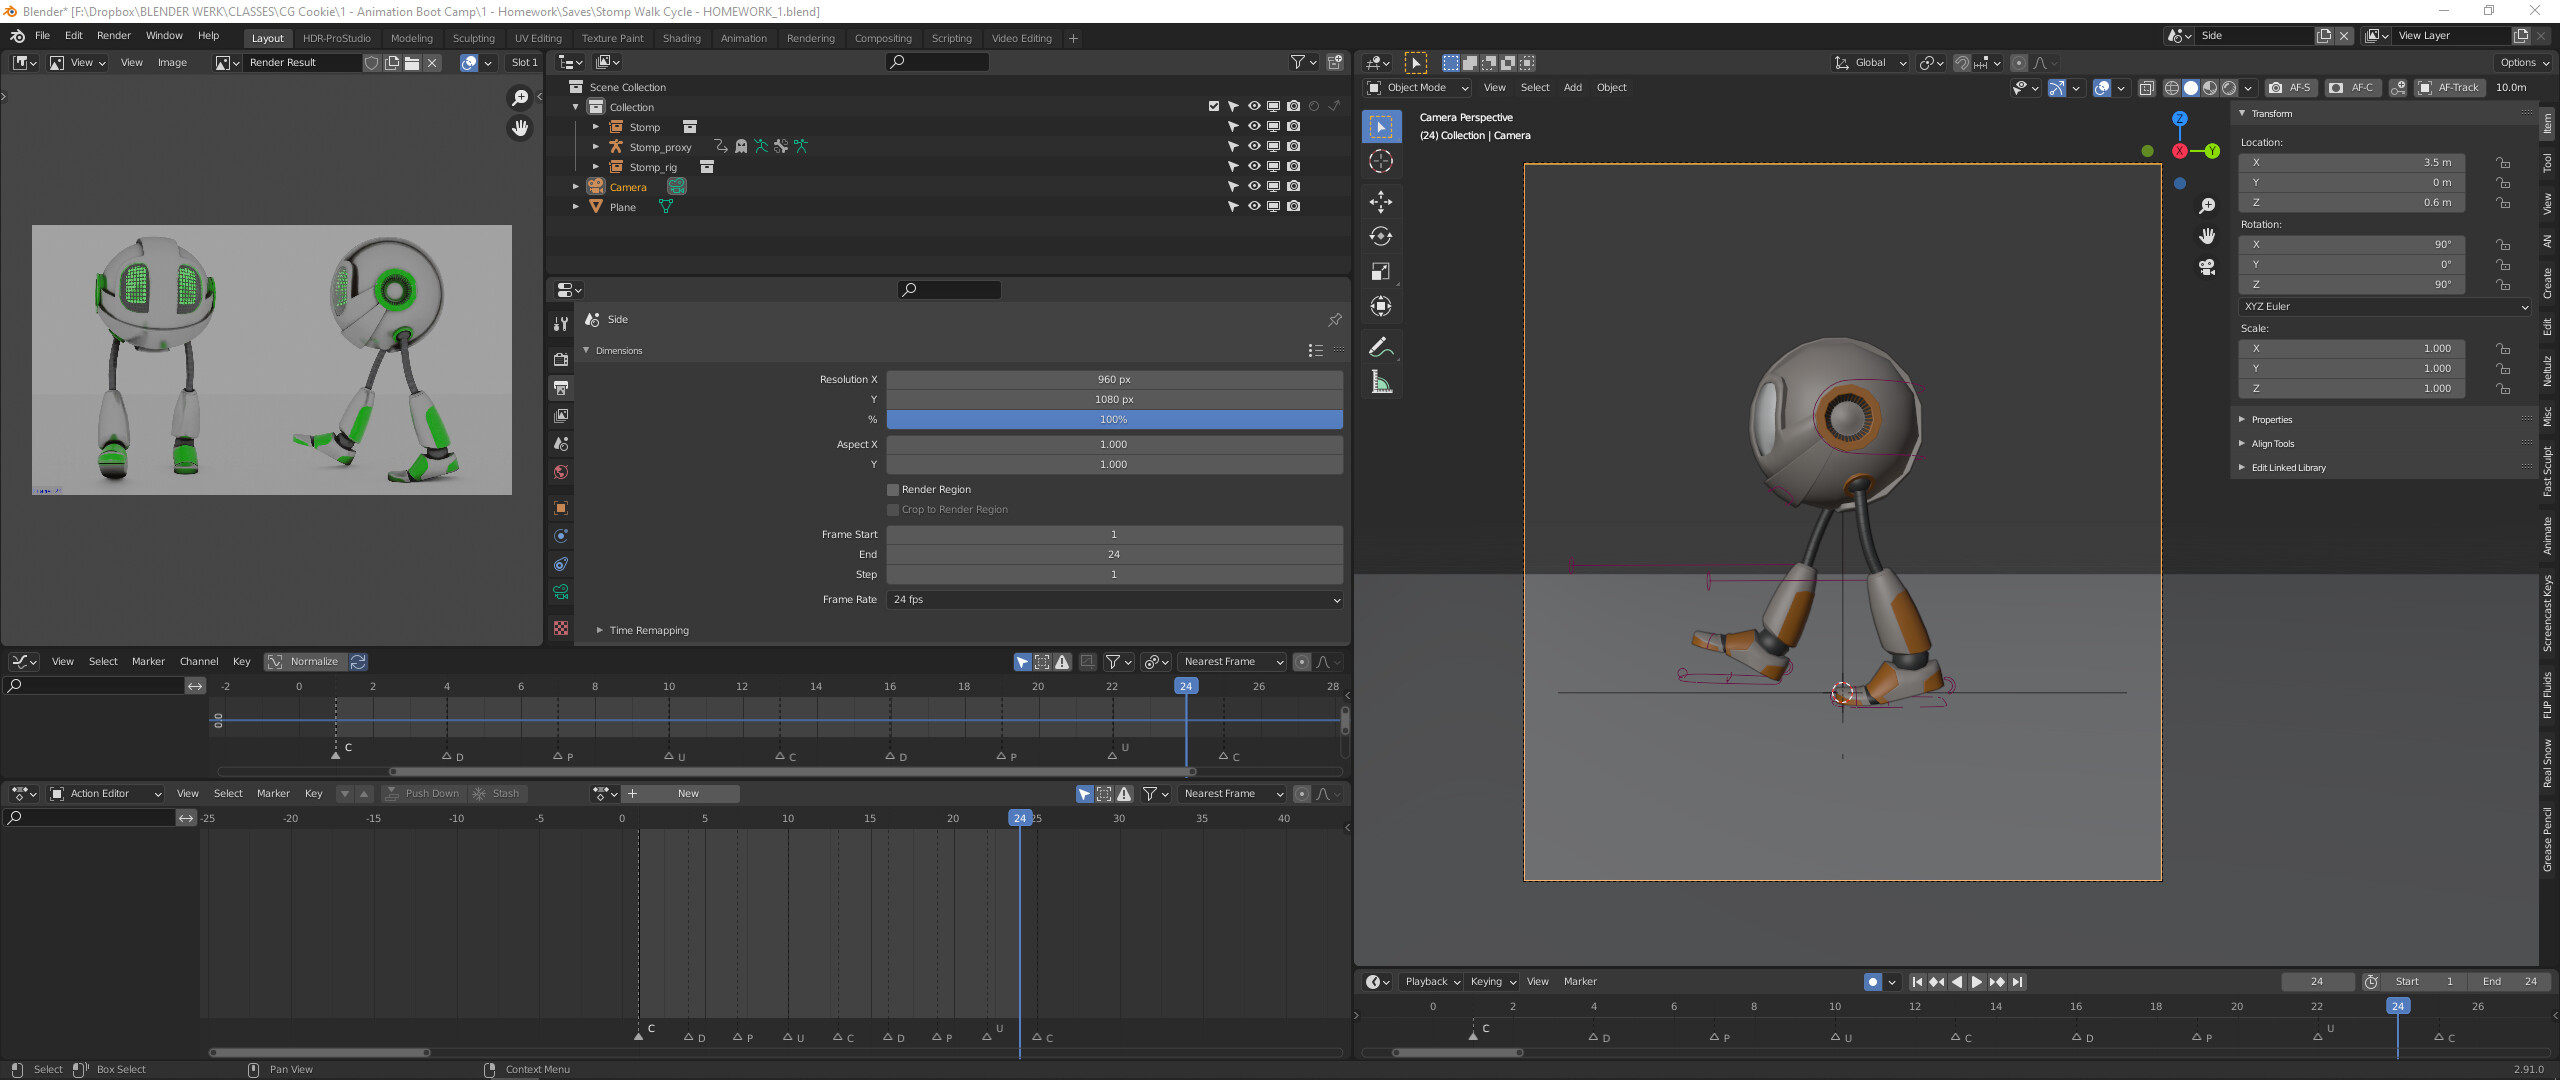
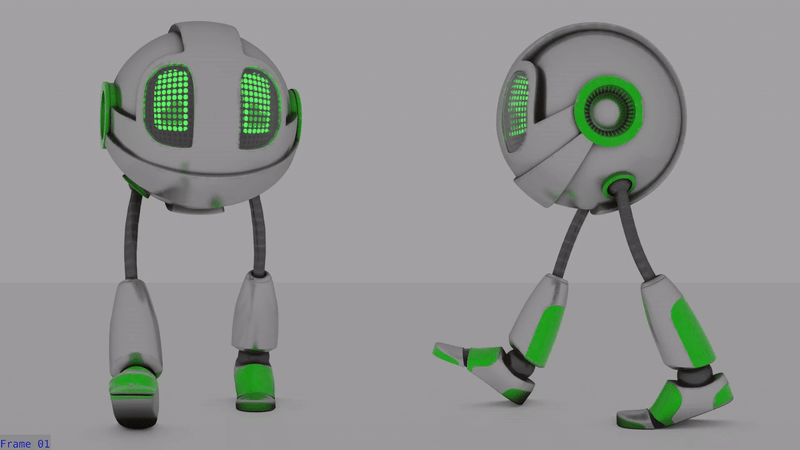
To achieve this, I first did the walk cycle (duh). Then added a camera with a resolution size of 960x1080. 960 being half of 1920, this would help later in combining it with another camera view and adjusting them both into half of a final 1920x1080 frame.

Once I was sure I had everything the way I liked it, I duplicated the entire scene as a Full Copy. Next I added a “Track to” object constraint to my camera. Then I added a circle on the ground and made sure it’s edge lined up with the origin point on the camera. Finally I parented the camera to the circle, then rotated the circle on the z axis by -90 degrees to line it up.
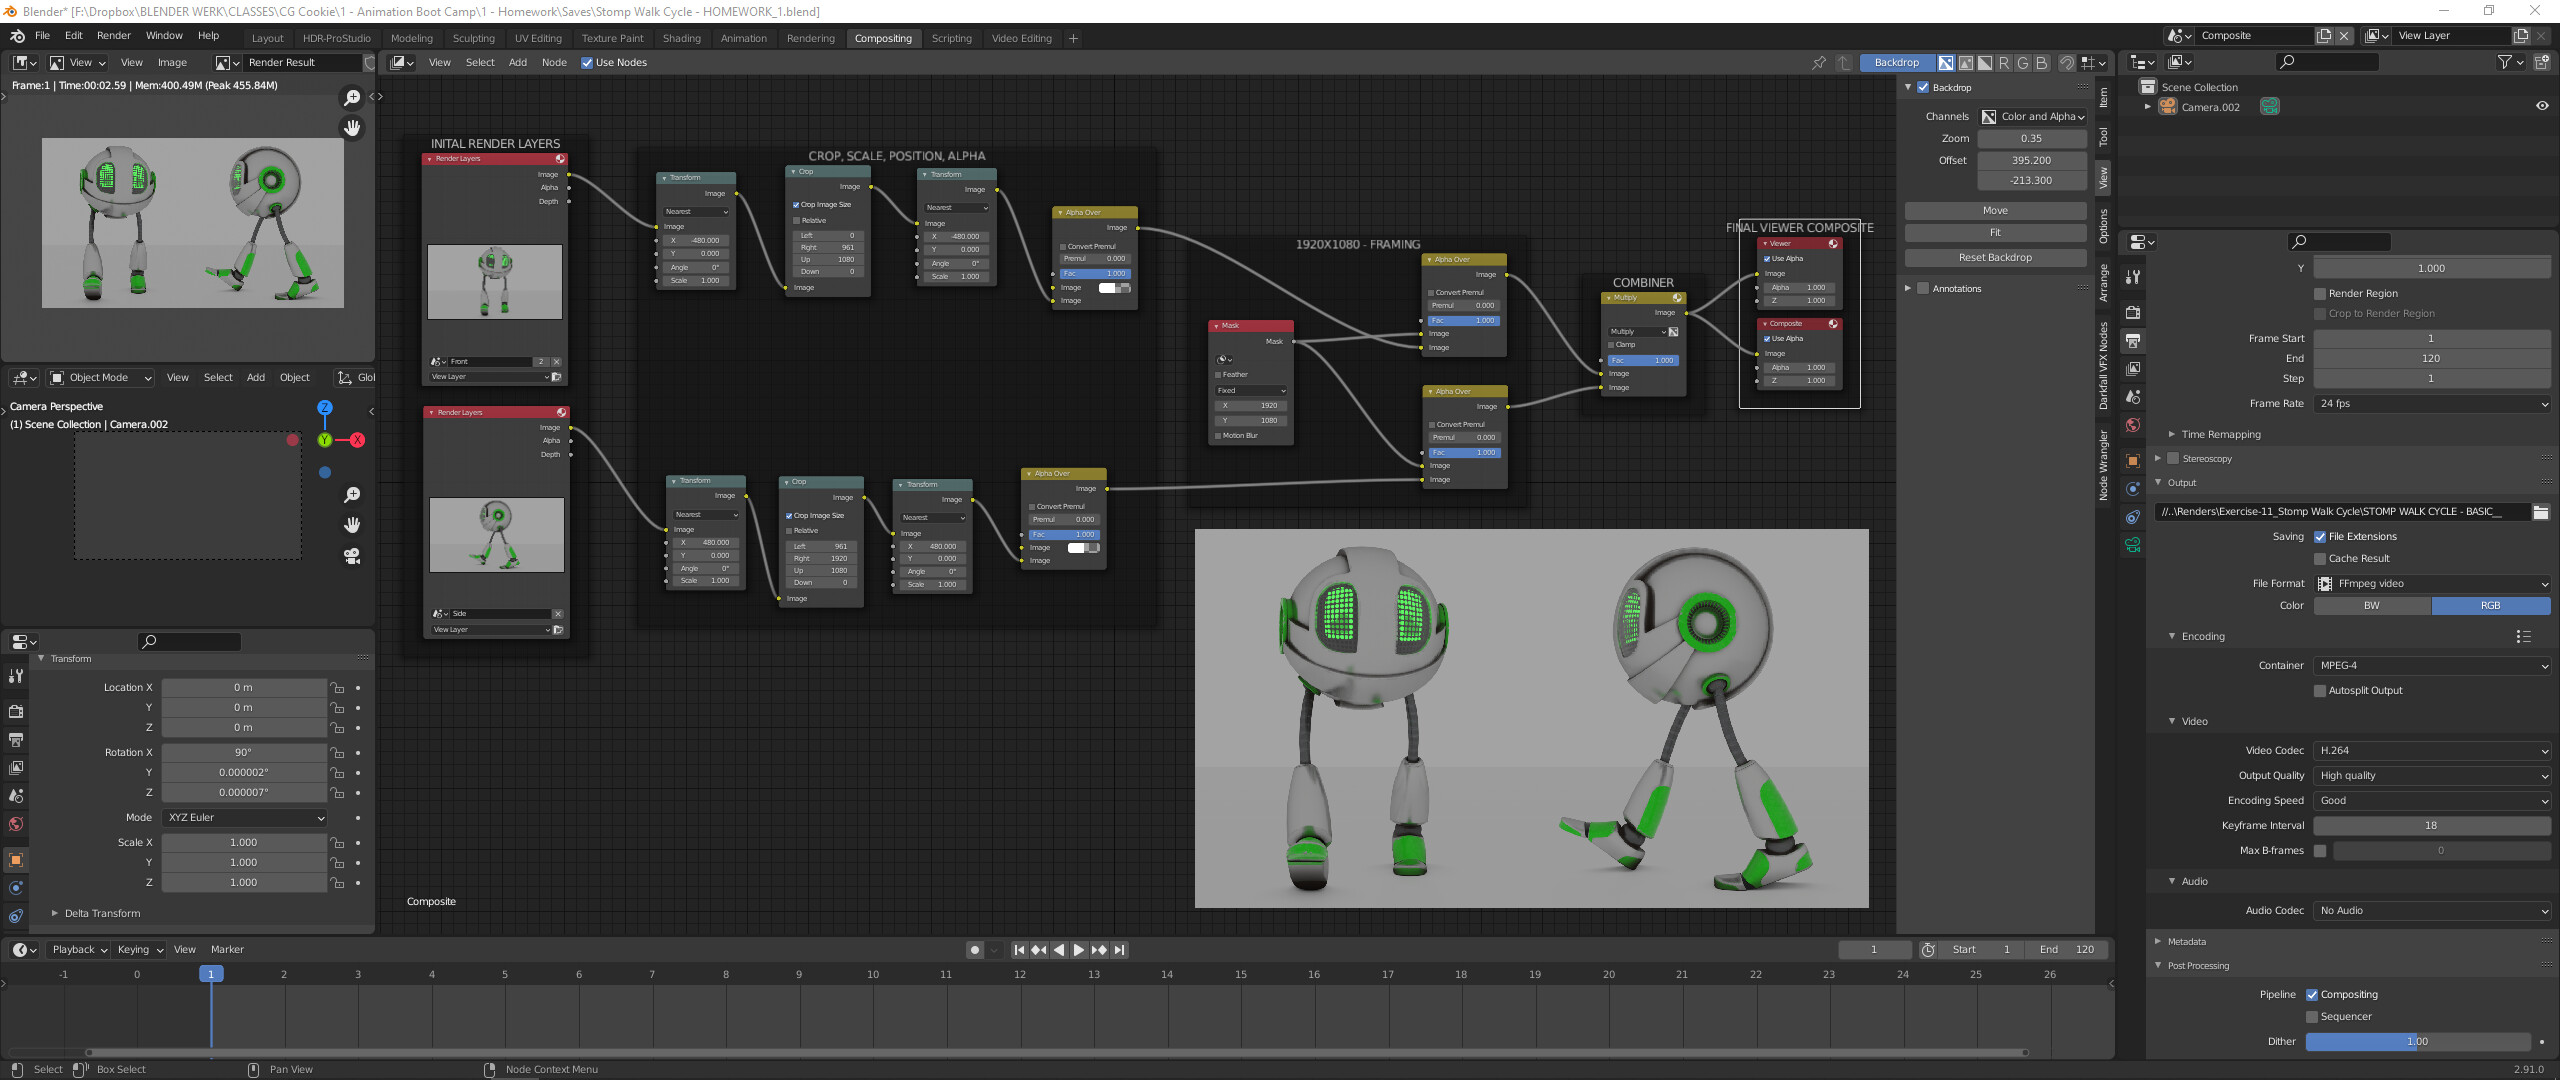
Next I created a new scene and placed a blank 1920x1080 camera in it. Then in the compositor I just started going nuts with alpha overs, masks, and mix nodes till I started getting close to something I liked. To be honest, I’m not even sure why this final composition of nodes worked. I’m not sure if all the steps I did were even necessary. All I do know is that if you remove one of the nodes I have set up in the compositor currently, the whole thing doesn’t seem to work right. I would give you all the blend file, but it contains the CG Cookie vonbots which you’d have to pay for to link the rig. Though with the information and images provided you should be able to recreate this experiment for yourself! And please be sure to share your results and findings here for others to use!
Happy Blending!