[AddOn]Tile Based Landscape/Cityscape Generator (Steering, Birds, UFOs and more!)

Right now the system is completely random, just relying on connection types to drive what a valid neighbor can be. Other generation systems take algorithmic approaches in passes using external data such as images, textures or curves as guides. Someone may modify the current code to take that approach but I think I am just going to let it be for now. It is actually fun to play with!

Cycles:


Freestyle:


Top View:


I think with proper tiles (and maybe added height) your addon can create houses also.
Mockup: need rotate to up, high tower.
Edit: by height I ment this, green lines, so tiles can be also top of each other, but was only an idea :slight_smile:
First when I looked your .blend file, I thought it would be nice if that building generation area shape is user customizable, so it could be round or cross or what ever, ofcourse tile precise resolution. But then I thought its easy afterwards delete extra tiles.

Attachments


To make assets that work with the current code you should make all tiles 8x8 blender units in size. Height can be whatever you like. A 2x size asset can be 16x16. If you make your assets another size you will have to alter the grid generation code.

Your larger building would probably fall under the is_2x_asset category. Presently only a single 2x asset is generated. Kind of like the hero of the shot. You can have multiple 2x assets in the list but only one of those will be randomly chosen per generation.

What are your thoughts on height affecting generation?

I joined all the objects from the resulting generation together so they form one mesh. This improves viewport performance greatly. Then you can apply modifiers as normal. Here is the tile proc deformed to a curve.


Deformed along a helix:


Deformed along a circle:


Yeah, thats what I thought also, join all together and Knife project trough and you have our own shaped area.
Tested with 2 houses from Blendswap.

Attachments


Nice work, I like the palm trees.:slight_smile:

Thank you, I’m using it wrong way anyway :slight_smile: I dont have a clue about tile connections, all are “house_connect”.
When adding new tile(s) to list, it would be a quick way to select those new tiles and last select empty and then click add button, code would generate correct names from the objects.
I hope this addon has very good future, pretty easy to create cities even my dummy way.

As an add-on has been released, this thread has been moved to Released Scripts and Themes; also at the OP’s request.

Atom, I like your Inception movie curve deform there!

Thanks Richard!

@3pointEdit: I had not thought about that but now that you mention it I see what you mean.

@JuhaW: Here is an easy way to swap your tiles with existing tiles in the BLEND file that you pulled down from Blendswap.

Compatible tiles should be modeled in the size of 8 units X by 8 units Y and any size in the Z direction.

Open the Blendswap BLEND file and select layer 10 (far right top).
Select the tile_Manager object in the Outliner.
Activate the Object Context and pin the panel. (This will keeps your TileProc tools always open)
Select the grass tile, or any tile from the master tile set.
Click the Magnifying Glass Icon in the TileProc panel.
This will find the selected tile in the list and populate the panel with those properties.
Type the name of your tile object, such as palm_tree, into the Object field.

That’s it. Click Generate to see your new tile in action.

Your palm tree now acts as what grass used to be. This way you don’t have to think about re-programming the settings of each and every tile. Just find an existing tile in the working set that visually has characteristics similar to your tile and type your tile’s name over what is in the Object field.


Thank you Atom, now I understand that concept better. Some problems when tile is set not enabled it generates it.
Selecting tile from the list and texture space gfx is shown its hard to see whats that tile, one idea is to use bounding box sphere, cylinder or cone to visualize that. And if ideas are wellcome, I prefer random tile rotate option, four positions. :slight_smile:

Some problems when tile is set not enabled it generates it.

Hmm…that’s odd, I just pulled down the current release and tested the Enabled functionality. I disabled all the sand tiles and when I regenerated they were removed from the final Generation. Enabled does seem to be working for me. Maybe you have two entries pointing to the same object and only one entry was disabled? Also if you accidentally click the Notepad icon this will read back in the list from the exported CSV file replacing any current settings you have in the list. This would effectively erase any Enabled settings you may have had in place.

I like the sphere bounding box idea. There are times when I have to look real hard to find the currently selected tile.

You mentioned rotation of tiles before. I’m not sure code can solve that problem because it is a visual problem. How would the code know which way the tile is initially rotated? The entire concept behind the AddOn is that it empowers a human to add connections to arbitrary assets. It can be a lot of work to do that to many tiles. It took me about 3 days to manually setup the initial BLEND file with 260 pre-rotated tiles. If there was some kind of short-cut for that I would have coded it.

You were right, I had one tile twice on that list, now it works like a charm.
Code knows default rotation from original tile rotation and your tblr rotates hand in hand with random rotation value.

Attachments


Not sure I understand the rules of how elements are added now, so excuse me for just thinking out loud, but if element families was added one by one ex. first roads, then water, then houses and then nature, maybe the elements could be placed in more “real life” ways - ex. where every road-piece is connected to the rest and so on.

Not sure I understand the rules of how elements are added now

Elements are picked randomly from the list, in a loop, starting at grid point 0,0 (lower left) and increasing in X to width and Y in height (upper right).

There are no “famliy” or types of elements. All element connections are made based upon the connection types to neighbors. An empty space in the grid is considered a “wild card” and any element type can connect to that. The grid starts off empty so the very first element that is randomly picked will always connect to it’s wild card neighbors.

maybe the elements could be placed in more “real life” ways - ex. where every road-piece is connected to the rest and so on.

There is always room for improvement, that is why I made the code public. Feel free to write your own grid population routine.

Consider the main code…


                # Properties from the interface.
                random.seed(int(ob["rnd_seed"]))
                w = int(ob["width"])
                h = int(ob["height"])
                
                # Create a blank grid that will be populated with tile entries.
                grid = [[0 for y in range(h)] for x in range(w)]
                for x in range(len(grid)):
                    for y in range(len(grid[x])):
                        grid[x][y] = -1
                
                self.populateGridHoles (grid, collection)                # Fill initial holes.
                self.removeOrphans (grid, collection)                    # Throw away any bad connected tiles.
                self.populateGridHoles (grid, collection)                # Try to fill the holes again.
                self.patchWithForgivingConnections(grid, collection)    # Just fill the holes as best we can, no solution = grass.
                lst = self.return2xAssetList(collection)
                if len(lst):
                    n = random.randint(0,(len(lst)-1))
                    self.add2xAssets(lst[n], grid, collection)            # The index for the 2x size asset.
                self.gridToObjects (context.scene, ob, grid, collection)

To alter this just populate the grid array with the appropriate values which are just indicies into the collection list.

For instance, here is the original code that was used for the image in post #1, purely random with no consideration to any connections at all.


                # Properties from the interface.
                random.seed(int(ob["rnd_seed"]))
                w = int(ob["width"])
                h = int(ob["height"])
                
                # Create a blank grid that will be populated with tile entries.
                grid = [[0 for y in range(h)] for x in range(w)]
                for x in range(len(grid)):
                    for y in range(len(grid[x])):
                        grid[x][y] = -1


                #Purely random generation.
                for x in range(len(grid)):
                    for y in range(len(grid[x])):
                        grid[x][y] = random.random() * len(collection)


                self.gridToObjects (context.scene, ob, grid, collection)

Now you see how easy it is. Just assign an index to grid[y]. However, you also see how hard it is. Many large companies have spent millions of dollars on R&D to randomly generate convincing game levels and still face the same question of what value do I place in grid[y]?

Hello Atom again, I tried(with Freebasic) easy way to allow tiles rotations.
Tiles in gridmatrix has 2 properties, tile index and rotation value (4 different possibilities = top, right, bottom,left)
When rotate 90 degrees to clockwise its just reading TopRightBottomLeft values one shifted left, so I made 4 arrays for those, RotMat {0,1,2,3}, {3,0,1,2},{2,3,0,1},{1,2,3,0}. 0=top 1=right 2=bottom 3=left.
Random number 0-3 defines rotation, 0=0, 1=90,2=180,3=270 degrees.


Declare Function DirectionType (y As Integer, x As Integer, direction As Integer) As Integer

Dim Grid(10,10) As Integer

Type gridtiles
    tile As Integer                'index to tiles
    rotvalue As Integer             '0-3
End Type

Type alltiles 
    rotation As Integer            'is tile rotatable
    Dir_TRBL(3) As Integer        '0=Top 1=Right 2=Bottom 3=Left
End Type

Dim Shared gridtile(10,10) As gridtiles
Dim Shared Tiles(10) As alltiles
Dim Shared RotMat(0 To 3, 0 To 3) As Integer => {{0,1,2,3}, {3,0,1,2},{2,3,0,1},{1,2,3,0}}

Dim t As Integer
Dim As Integer tile, x, y,z, direction,rot

'tile 0 properties
t = 0
Tiles(t).rotation = 0
Tiles(t).Dir_TRBL(0) = 0
Tiles(t).Dir_TRBL(1) = 1
Tiles(t).Dir_TRBL(2) = 0
Tiles(t).Dir_TRBL(3) = 0

'tile 1 properties
t = 1
Tiles(t).rotation = 0
Tiles(t).Dir_TRBL(0) = 0
Tiles(t).Dir_TRBL(1) = 0
Tiles(t).Dir_TRBL(2) = 0
Tiles(t).Dir_TRBL(3) = 1

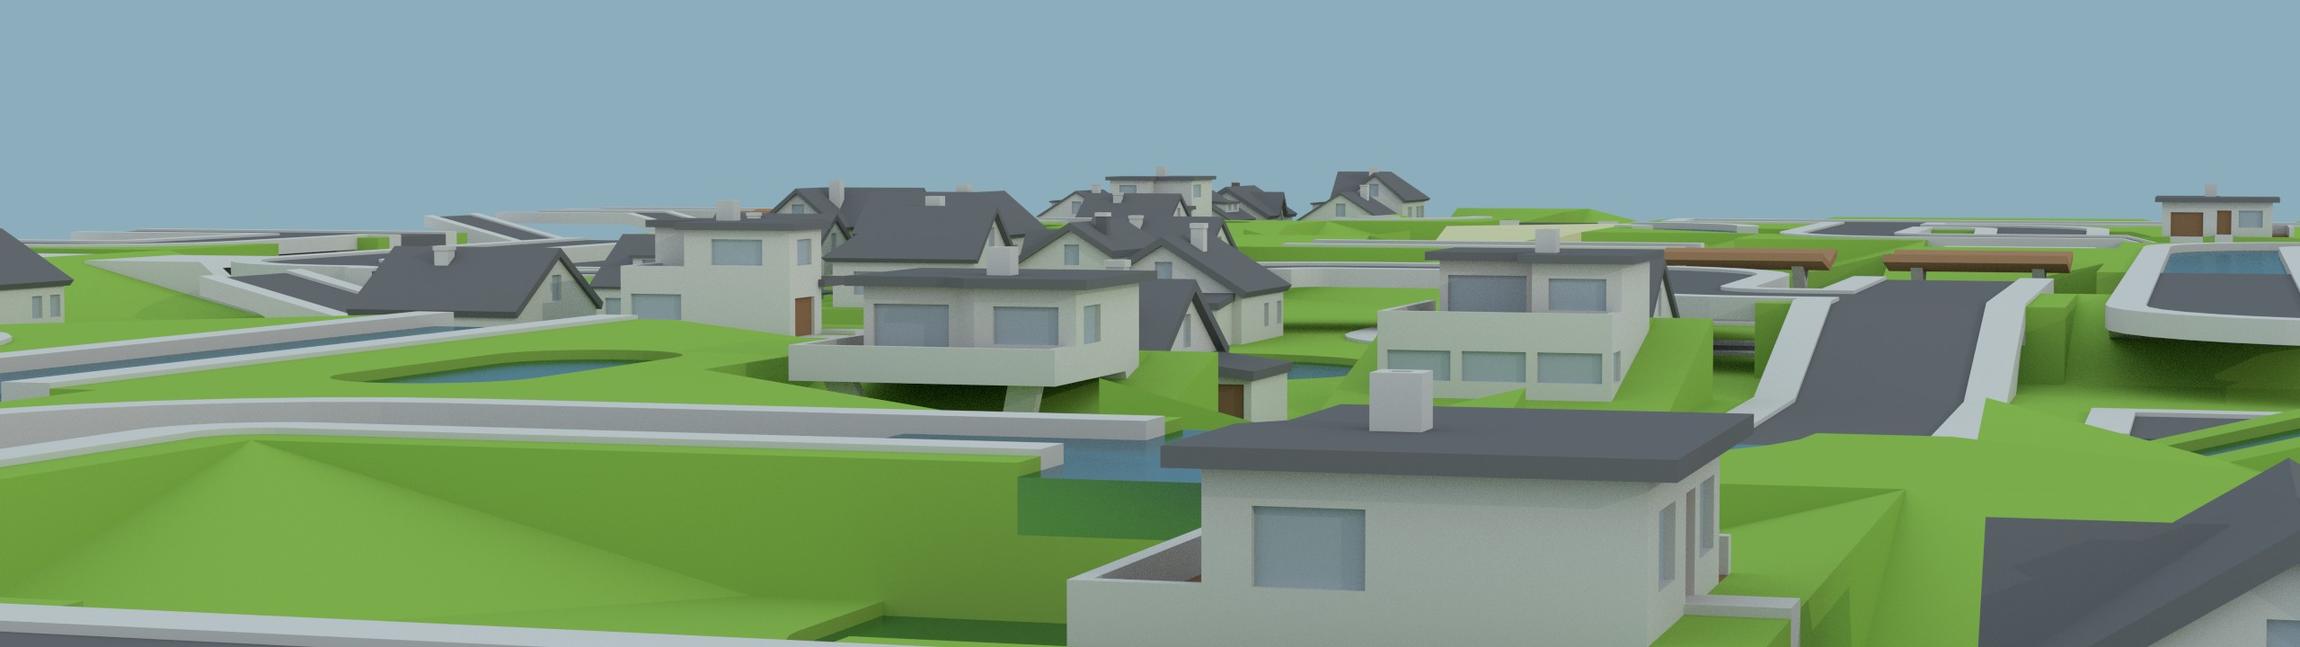
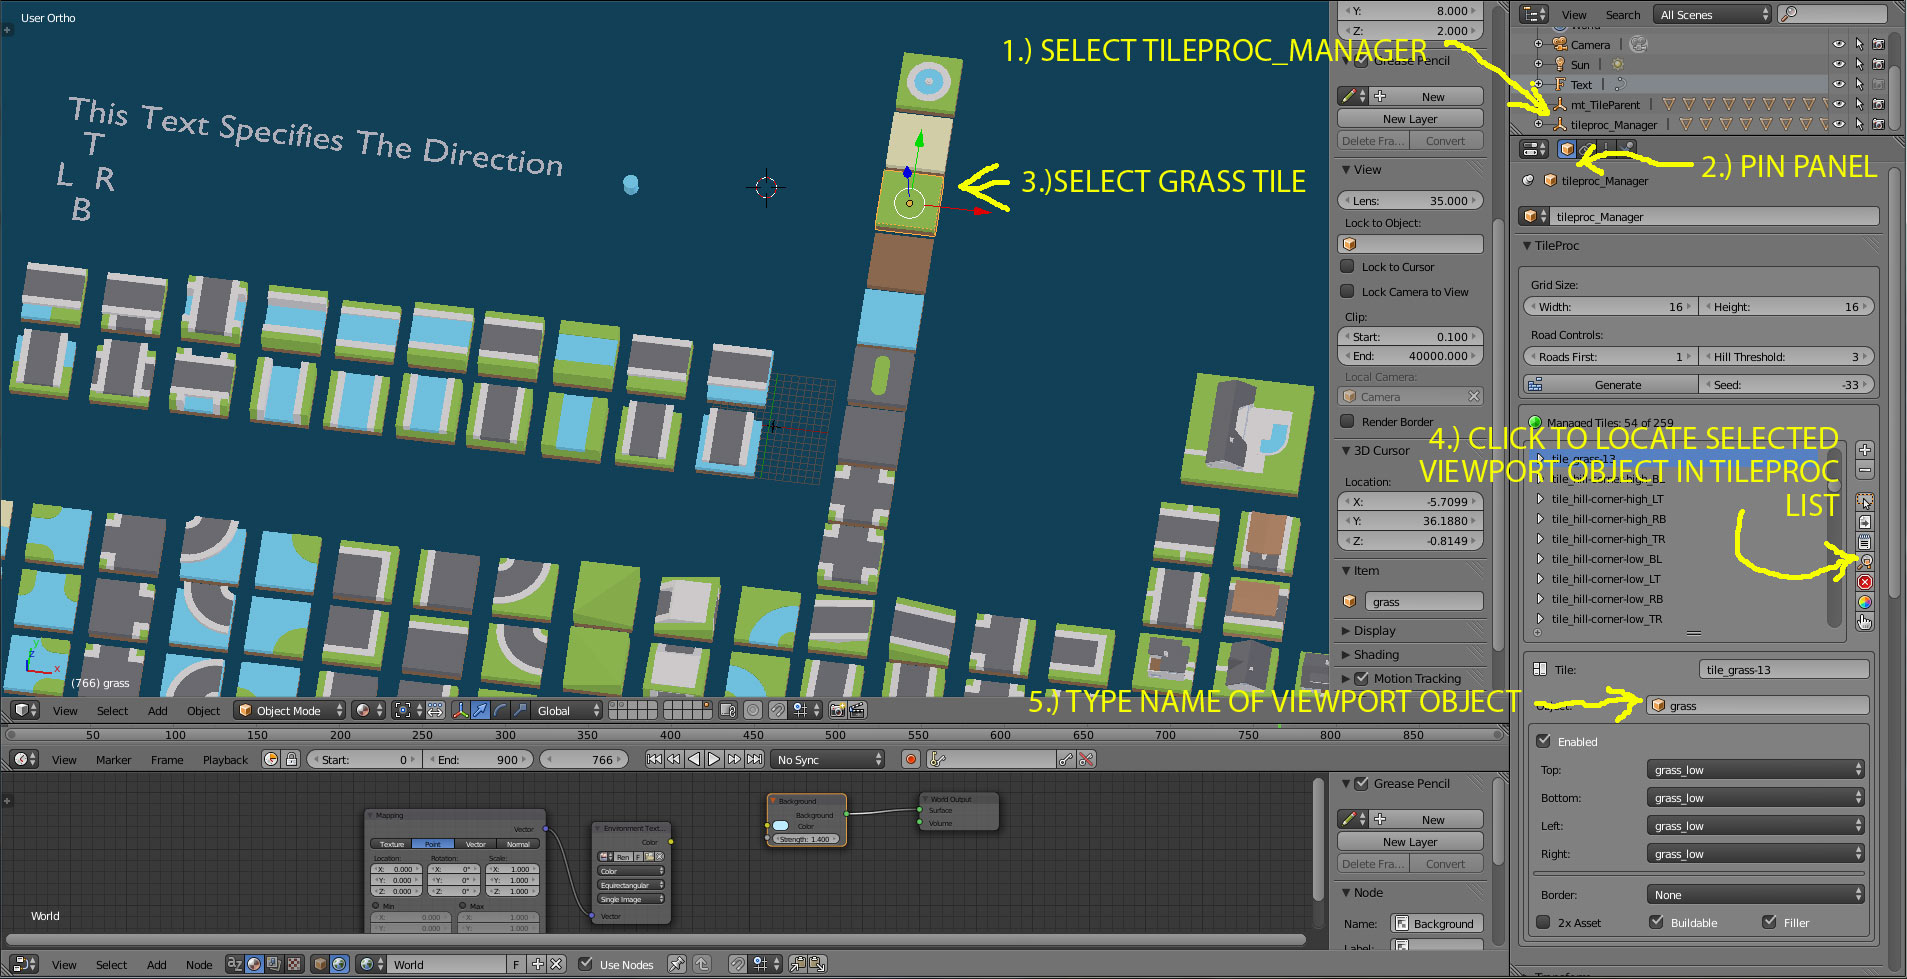
'Direction types examples
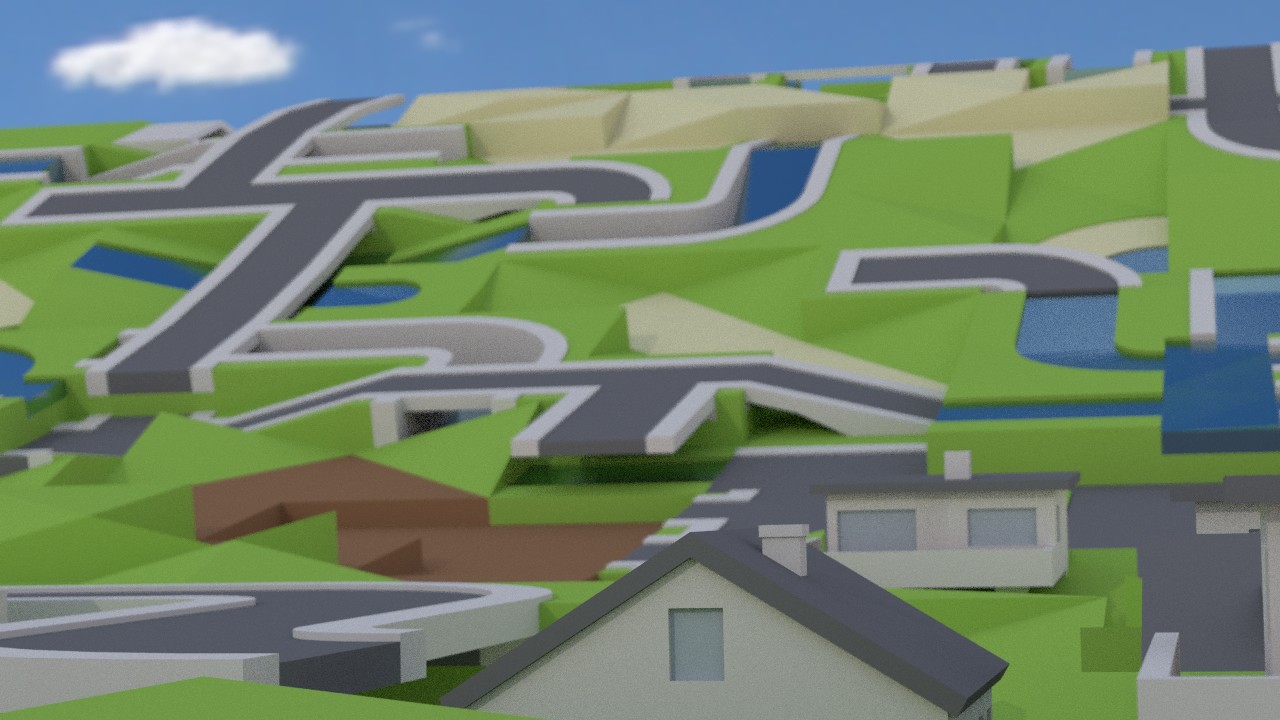
'type 0 = grass
'type 1 = road
'type 2 = water 
'--------------------------------------------
'Set tiles to grid and add property for rotation
gridtile(0,0).tile = 0
gridtile(0,0).rotvalue = 0
gridtile(0,1).tile = 1
gridtile(0,1).rotvalue = 1

'==========================================
'read grid tiles direction types
x = 0
y = 0
For y = 0 To 0
        For x = 0 To 1
            Print "tile";gridtile(y,x).tile
            'all directions (4)
            For z = 0 To 3
                direction = DirectionType(y,x,z)
                Print "tile direction";direction
            Next
        next
next
'==========================================
Sleep

Private Function DirectionType (y As Integer, x As Integer, direction As Integer) As Integer
    
    Dim As Integer tile, rot, direct
     
    'Tile index
    tile = gridtile(y,x).tile
    'Rotation value 0-3, 0 = no rotation
    rot = gridtile(y,x).rotvalue 
    'Right Direction type, 1 = right 
    direct = Tiles(tile).Dir_TRBL(RotMat(rot,direction))

Return direct    

End Function

@JuhaW: I do have rotation from a single tile bouncing around in the back of mind as an operator that might pre-rotate a tile to make it compatible with the current system but I just can’t see spending time re-writing all the detection code to take into account Z rotation and then I have to pass another variable Z. I did start out that way but came to the conclusion that simpler code is better. This just means a little more manual setup time, however.

But in the mean time I have been making progress on roads as a layer. It uses a simple maze generator with a branch rate. A low branch rate results in many long straight roads. A short branch rate results in many short bendy roads. I also coded in a long strip detection algorithm. So if a long strip is detected in the in the horizontal or vertical direction it becomes a candidate for a “high_road” which can include hill road, bridge road or bridge over canal or water.

This gives you essentially drivable roads.

Road superimposed upon secondary generation (i.e. original generation code)


Without secondary tile generation.


New road style generation.


Ah ha. You tease. Looking really passable for legitimate roads.

Here is a similar implementation for rivers. I have created a separate branch rate for the road and river layer. The roads sit on top of the rivers but each one can have it’s own branch rate.

River branch rates changes while road branch rate remains the same.


Canal estates! Someone must generate a sea rise or tsunami with this.

Oh nice, with good cityscape tilesets it will presents awesome results.