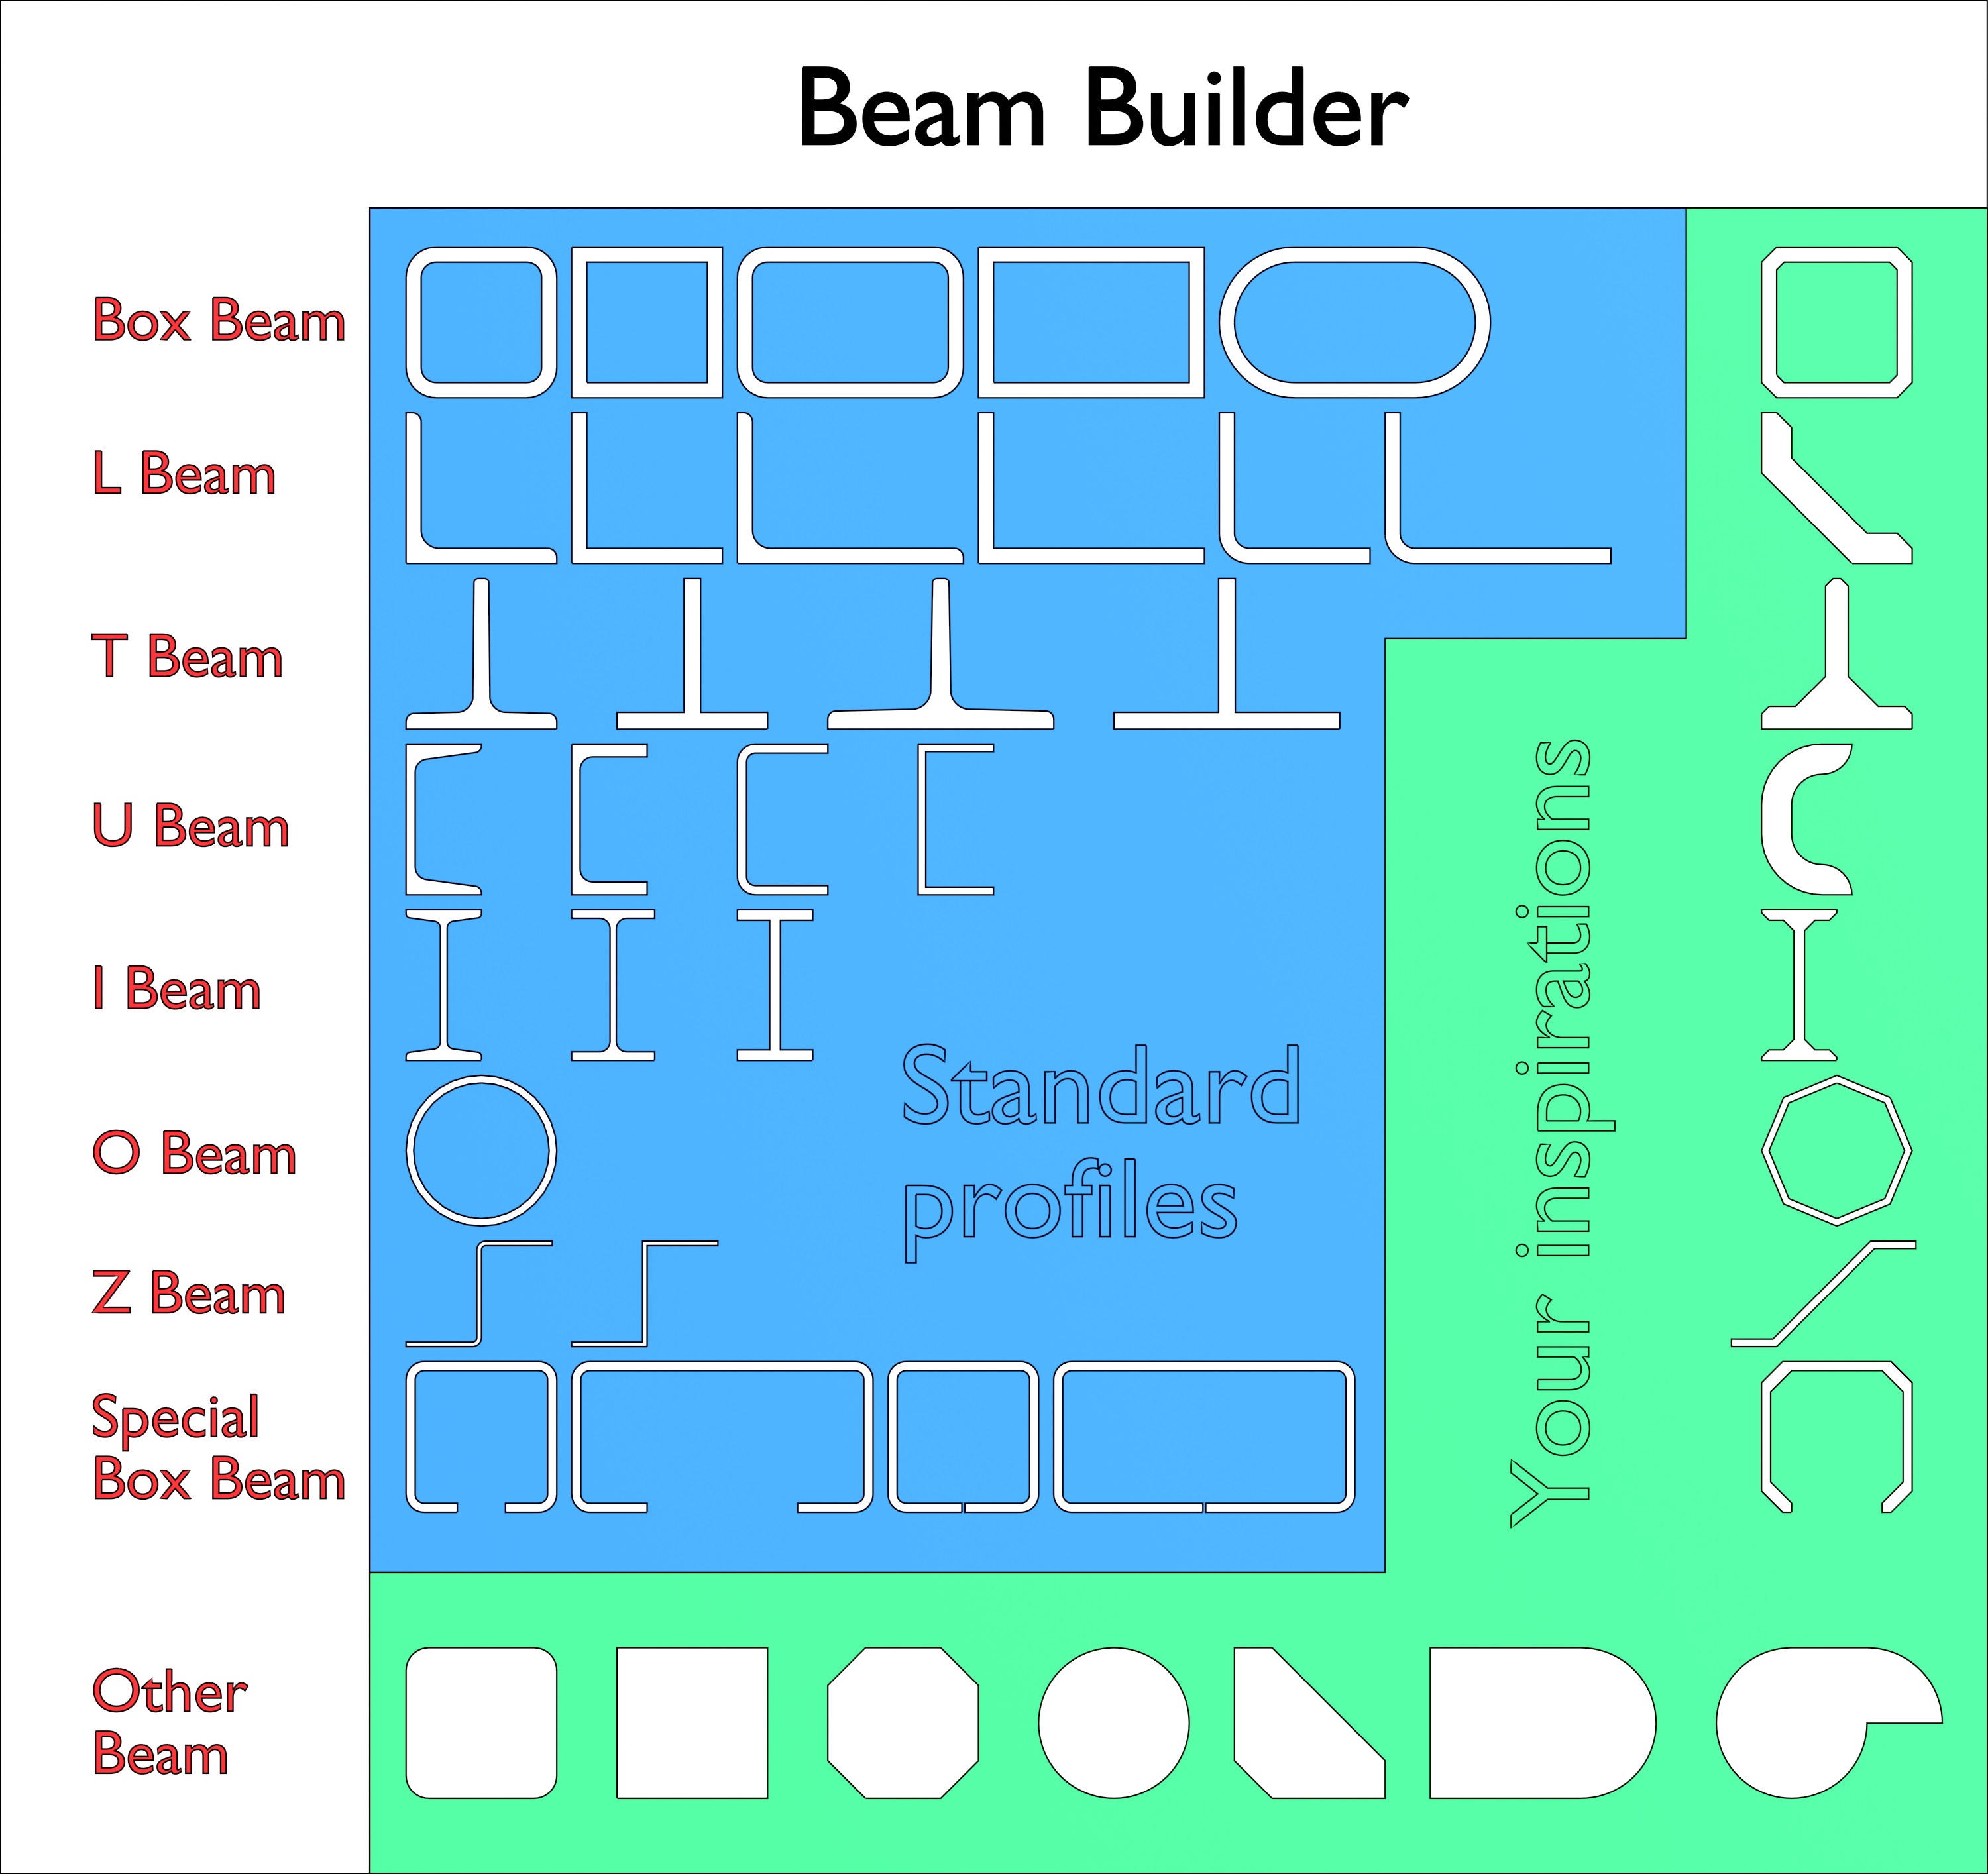
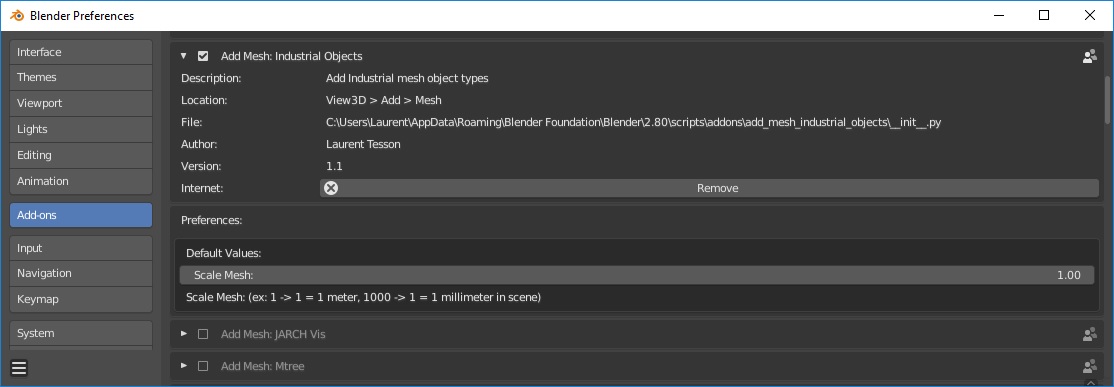
Here is my first addon, an alternative to Beam Builder but more realistic. I work in milimeters with blender so the add object is very small.
The objects are in 2D (XY plane), that’s normal.
To add a beam, we now need to press shift+a and then: Mesh > Industrial Objects > Beam Builder > choose Beam: U,L,T, etc. Could you take away 1 step, for example skip Industrial Objects. The path is a bit to long.
The beams are quite small, I think most users want to scale it up to real world size beams. (20 to 30 cm?)
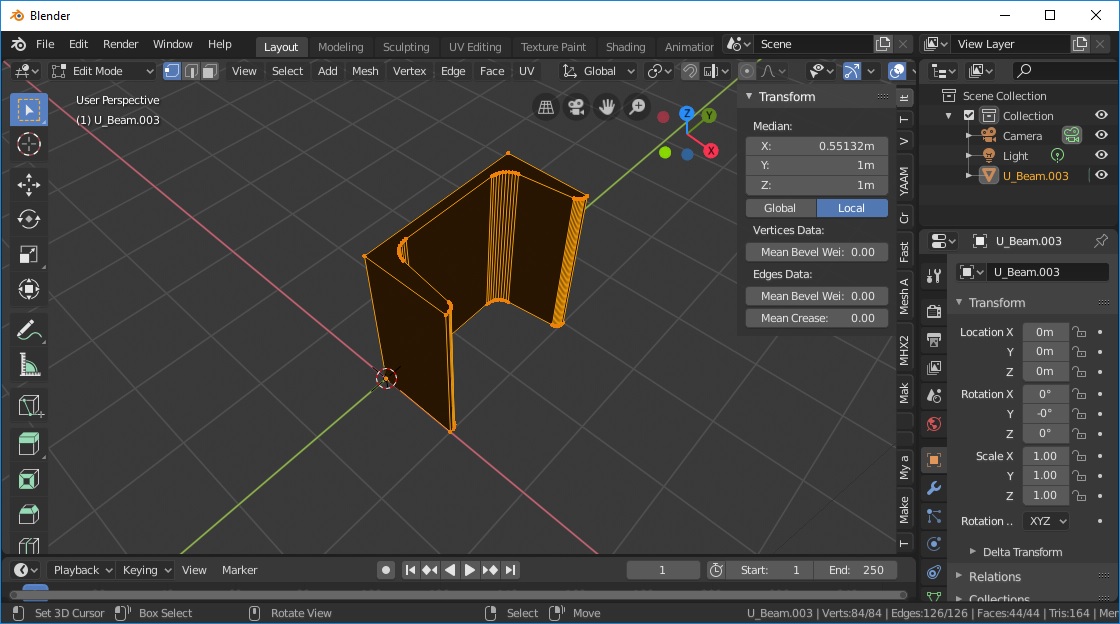
When you extrude in Edit mode, and check the normals, some normals are pointing outwards and some in. What if you put an option in your addon to extrude and then point normals outwards (bpy.ops.mesh.normals_make_consistent(inside=False). Or somehow make sure that users don’t need to fix normals.
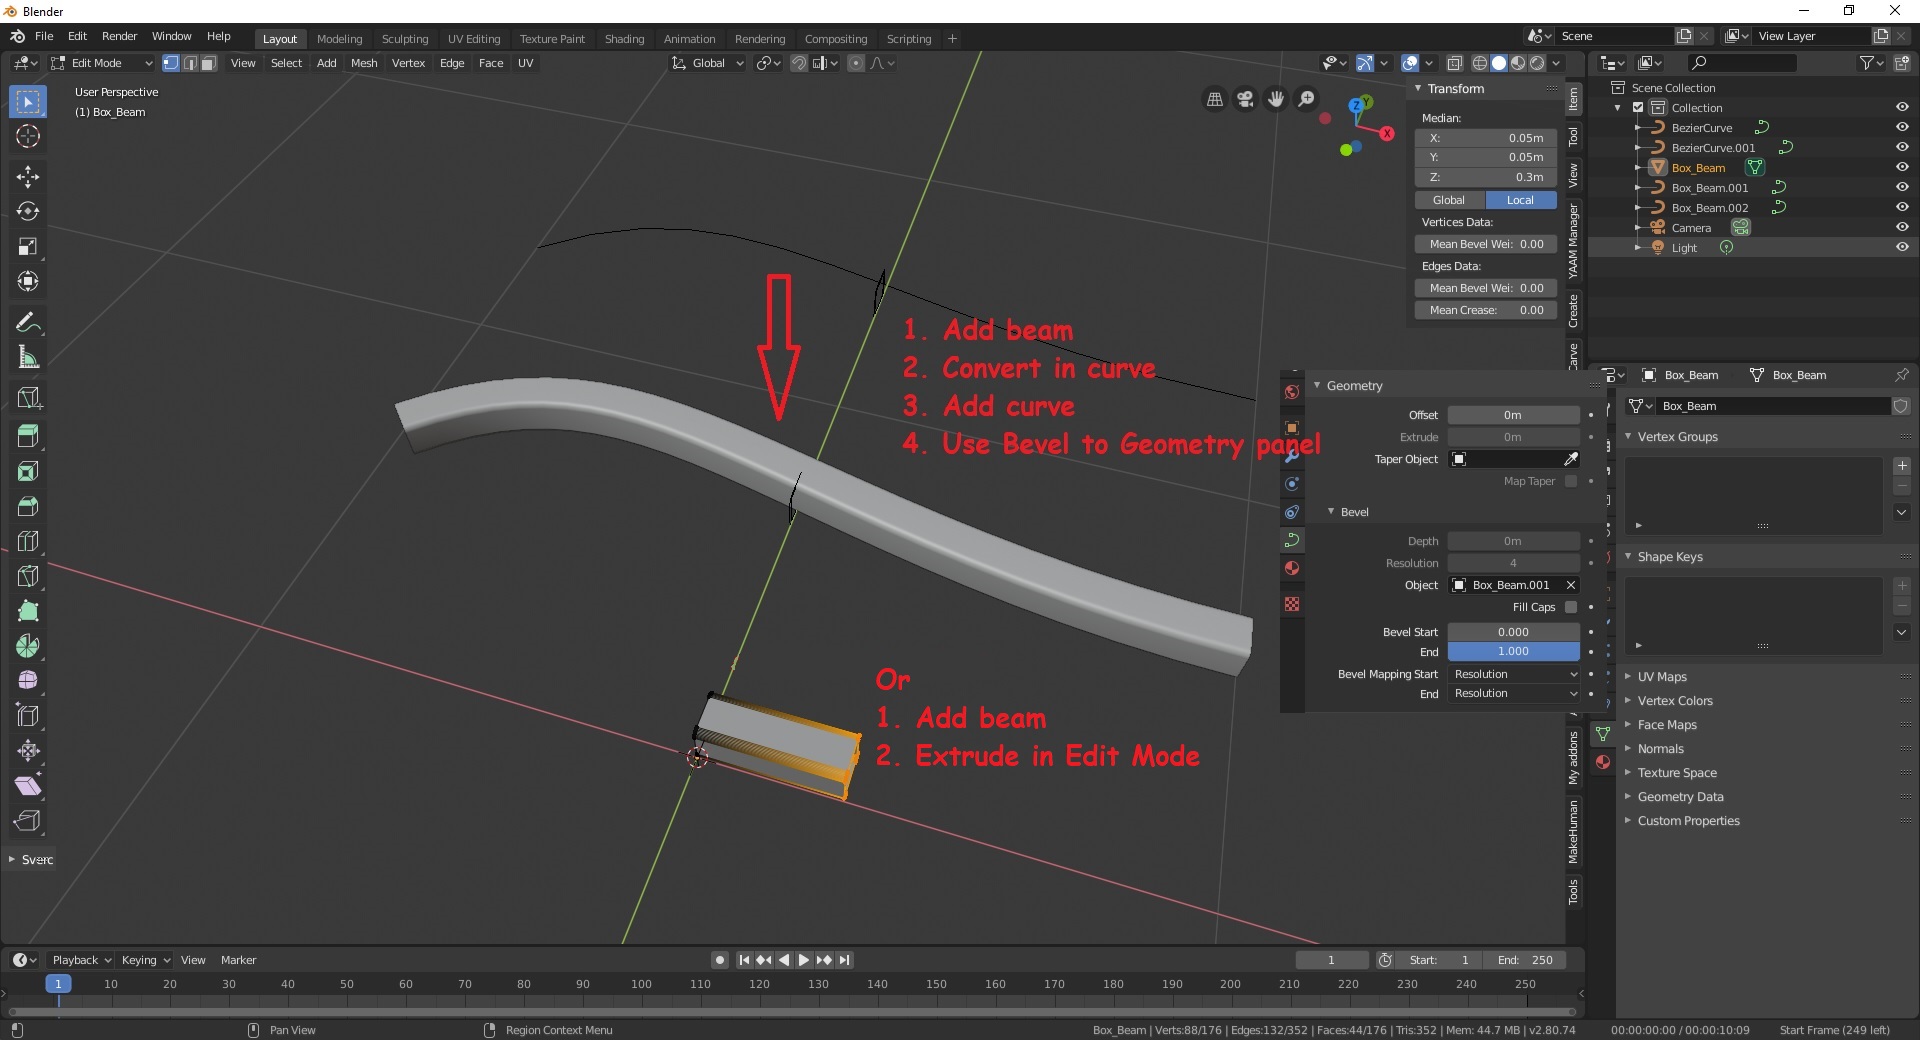
Is it an idea to let modifiers do their work for beveling so the bevels are non-destructive? What if you use also a solidify modifier and To Curve modifier.
This because I think a Beam-addon is useful but this add-on as it is now, has to work a bit more convenient for users I believe.
Update: When I use a solidify modifier instead of extruding face in edit mode, then all the normals are pointing outside.
Hi, and thanks for your feedbacks Skuax and Peetie.
Peetie,
Ok, I’m removing Industrial Objects for now. I added a second level because I want to create other categories in the future (Bearing, Sprockets-chains, Pulleys-belts,…).
Ok, I change to work in default meter - I remove the scale setting - I might add a combobox to work with different units (mm - cm - m).
Ok for the normal problem, I change the code. For the extruder option, I add the setting ‘Length Z’ with the possibility to put 0 if you do not want to extrude.
‘Is it an idea to let modifiers do their work for beveling so the bevels are non-destructive?’ Yes it’s a good idea, I change the code of certain profiles so that it is possible for everyone. On the other hand I keep the possibility to do it from the addon because with the Bevel Modifier it is necessary to create Vertex Groups.
Question: If everyone prefers to use the Bevel Modifier, do you want me to set the Radius settings to 0 by default?
‘What if you use also a solidify modifier and To Curve modifier’. As I understand it, Solidify Modifier -> apply -> Loop cut in Edit Mode -> Curve Modifier. It’s a great solution, I hadn’t thought about it.
For the normal problem, I changed the code. To test
A little question:
When I add an object to the scene, switching to edit mode the object is all black. I switch to object mode and then edit mode and the problem is solved. What for?
Thanks for the update. For me it is way more convenient now. Such a huge difference, especially scale, and it’s extruded already.
I noticed black shading with the Landscape addon (build in) today. I suppose that is a bug at the moment.
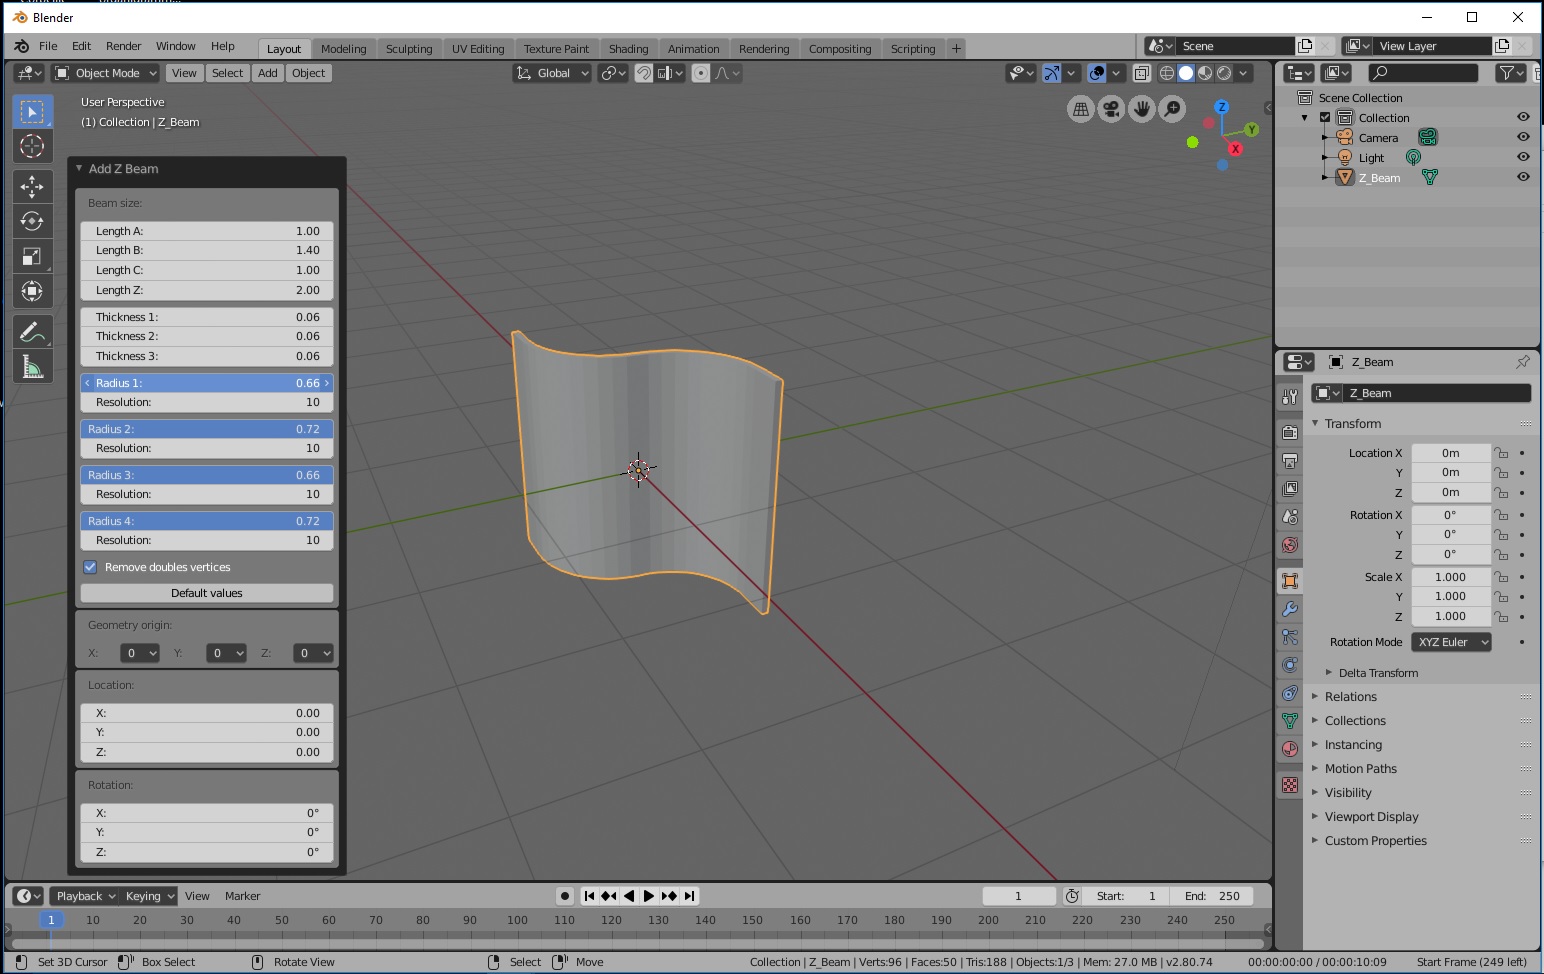
Is it an idea organize the radius of the bevels so, that we are able (with vertical drag of mouse) to adjust all bevel radii in one go. In other words, in the UI, if you put the radii for bevels below each other.
If I understood your suggestion, it is already operational. All dimension parameters are ‘FloatProperty’ except ‘Resolution’ which is an ‘IntProperty’. So all ‘FloatProperty’ can be selected at one time with the vertical drag of the mouse and then drag to the right or left to change the values or enter the values directly.
For each Radius a Resolution is associated, that is why the radii of bevels are not one under the other. But it works.