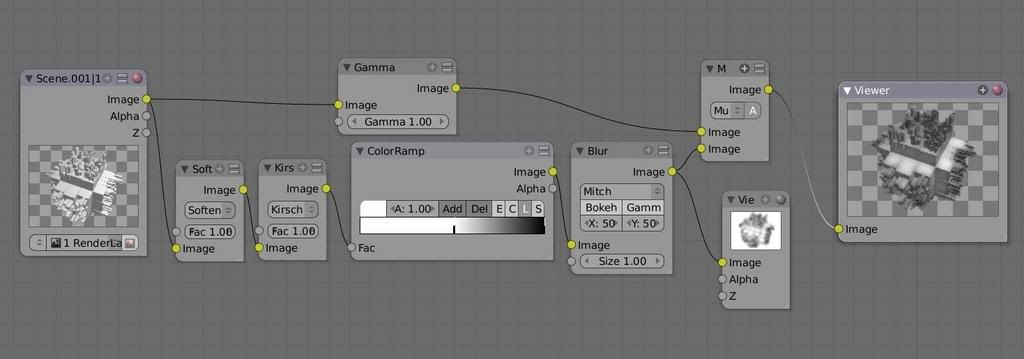
Actually, it was just that I was working on. After looking back at mpan3’s method, I put together a small set of nodes that, basically, edge-detects the z-buffer data rather than the image itself. This means that textures with render normals and the whole lot will not affect the final value.
Soften - Brings out hidden edges in the z-data.
Kirsch - Edge Detects z-data
Color Ramp - Determines the amount of AO effect.
Blur - Blurs the lines so they fill in the corners.
Multiply - Rather than subtracting I tried multiplying, seems to produce a better result. However, black and white must be switched in the Color Ramp for this to work.
Thoughts?
Cheers,
John
PS, For slightly sharper results, reduce the Blur to 20x20, turn gamma correction on for blur, and move the white value towards the black in the Color Ramp.
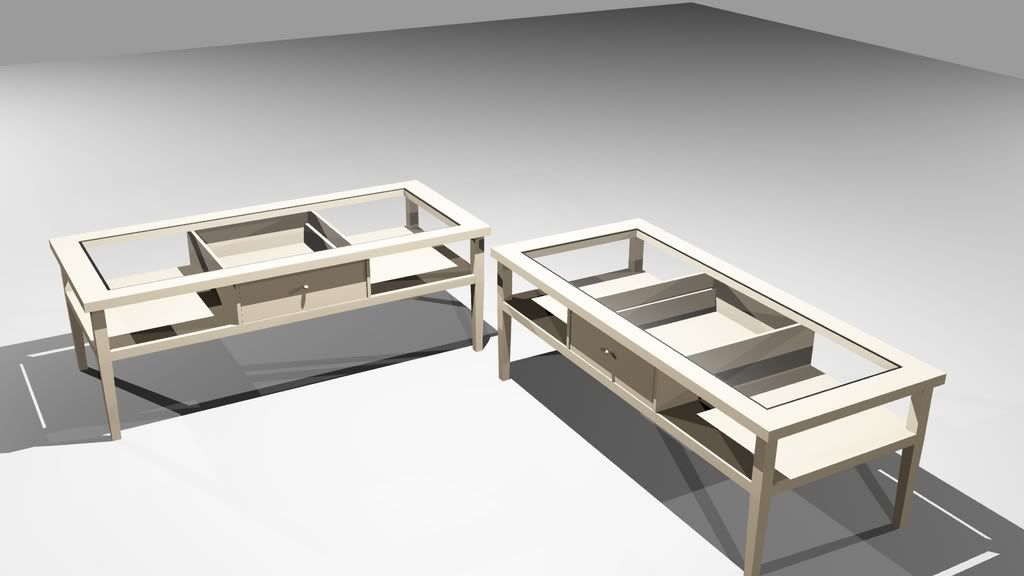
Thanks Japper Zet for your example! This is really great, the difference is nearly unnoticeable. I think that your one is maybe the best one. All edges seems very clear. Does it work well also for animations because MPPIC had some problems when I have tested it?
Could you be also so kind to describe GI Noise you have mentioned or post blend? Thank you in advance.
I’m not sure whether this is some sort of joke. Perhaps I didn’t make the difference as clear as I had hoped. Rather, on my screen it looks noticeably different. But it just may be the contrast.
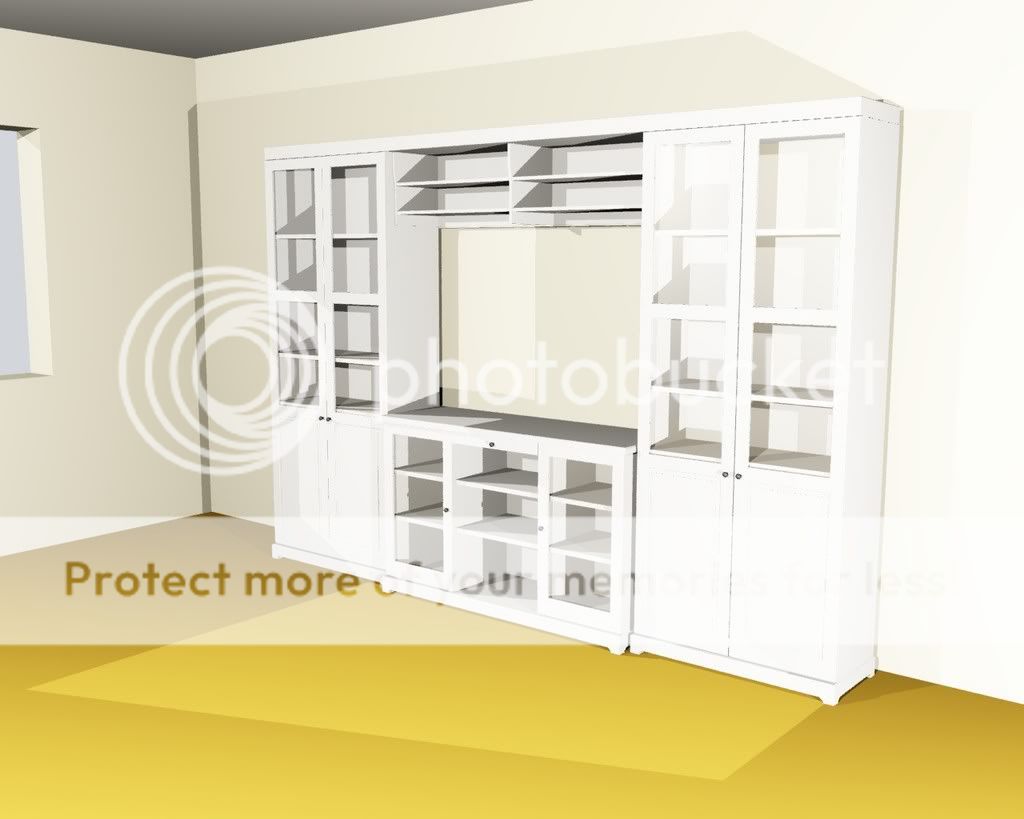
Here is a better example, again, the model is not mine:
The fake GI noise is done by making a “noise” texture and using nodes to mix it into the scene. Basically, it mimics the irregularities of GI lighting.
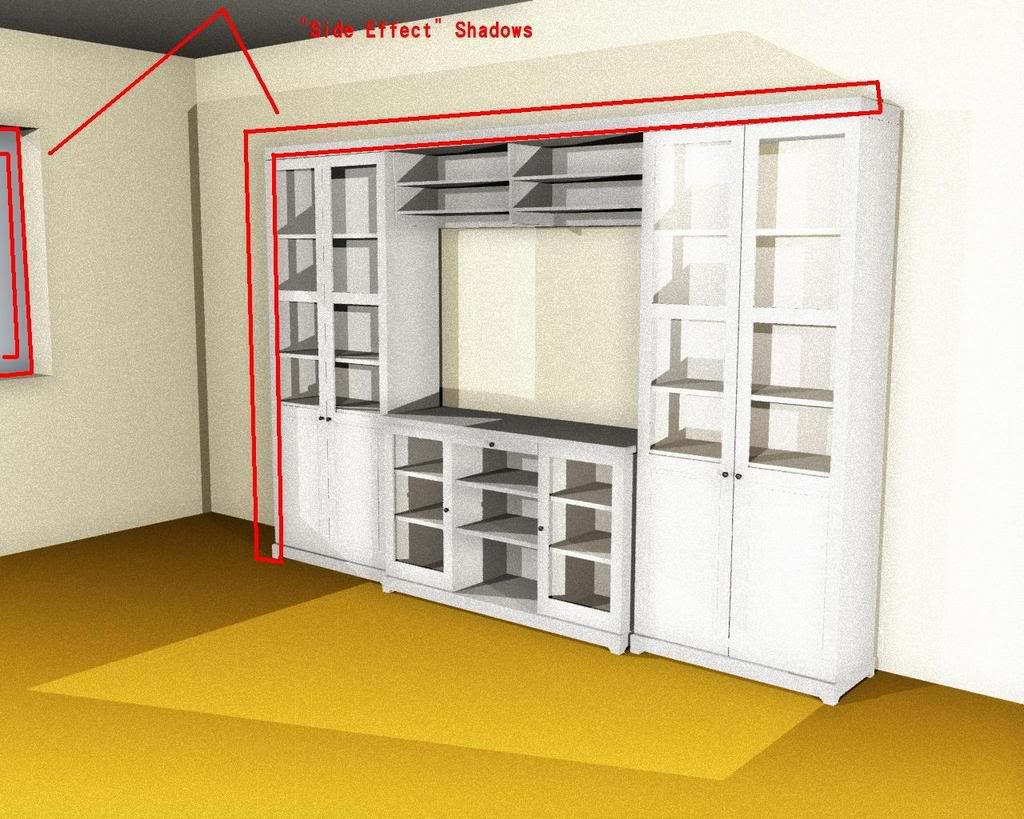
The shadows in there are are something I can’t fix. It’s there because of the edge-detection.
No joke Zapper. On my screen (not calibrated) tables example looks really very well. On you next one the difference is really obvious. It may help to blur the fake noise or reduce its size?
As far as I know the only way to remove them is to use an alpha to set the size of the blur or something to that effect, but doing so would mean compositing every single object on a separate layers.
Other than that, the GI grain can be removed. I just added it because I liked the effect. Applying a “Soften” filter at the end before the viewer node helps blend it into the scene.
Here’s a vid explaining the process. Sorry for the poor quality. It was crap on my computer and it became crappier after YouTube upload: http://youtube.com/watch?v=hHZ0cLuUzqc
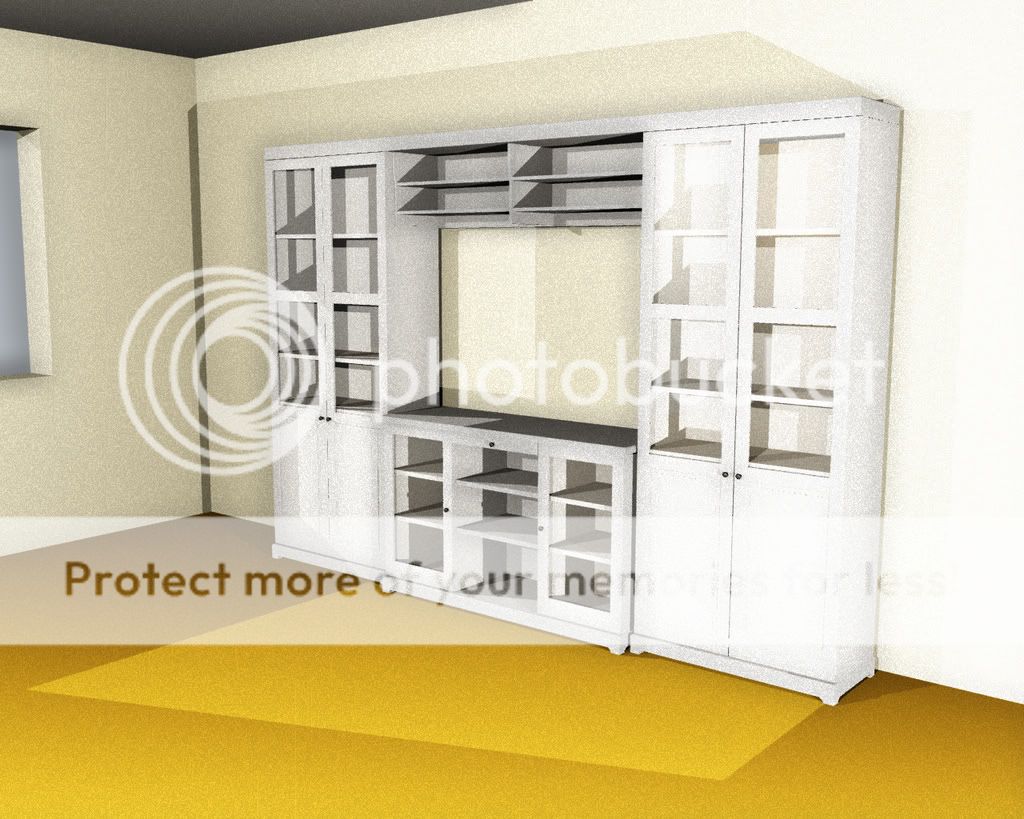
hey Zapperjet, great work.The FAO really adds depth to the cabinet. IMO this approach works best when you combine the fake AO with lots of geometry and detailed texture to hide the inaccuracy of the AO method. (like for movies!)
But interior pictures, i would stick with proper AO, or even a photon-tracer rendering engine.
I think this would look better if you put the Z-buffer output through an edge detection and used the inverse of that (probably softened) as a mask. You don’t want so much shadowing on edges that are a long way apart.
The Z-buffer is what is edge-detected. Simply put, the Z goes through soften -> kirsch -> Sharpen to achieve the results I have shown. Not using the z-buffer means that any textures and shadows will effect the AO.
The only way I can think of that will eliminate the side-effect shadows in nodes is to somehow get only the corners of two adjacent objects to be edge-detected, rather than every edge in the scene. As far as I know, this can only be produced by using actual AO data, where the edges are found by shooting rays at them.