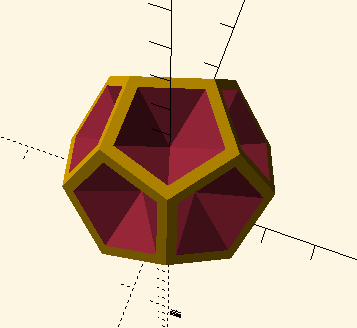
through which “anti-stellations” in this case
an anti-stellated dodecahedron can be created.
It is what it’s name suggests, the opposite
of stellate. Rather than points expanding outward,
in this case it’s points expanding inward.
On any polygon it would be possible to Alt-P (in Edit mode)
to create a collection of points converging in the center of
a face. Is there a way using, I don’t know, inset, extrude, or
the G command in conjuction with other settings to select
similar faces and pull them inward rather than outward to
create such an anti-stellation in Blender comparable to what’s
shown?
I know it can be done in Openscad. How do you do the
same in Blender? Or can you?
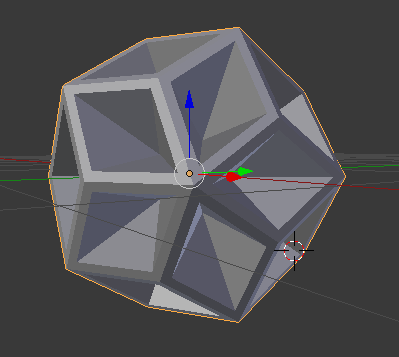
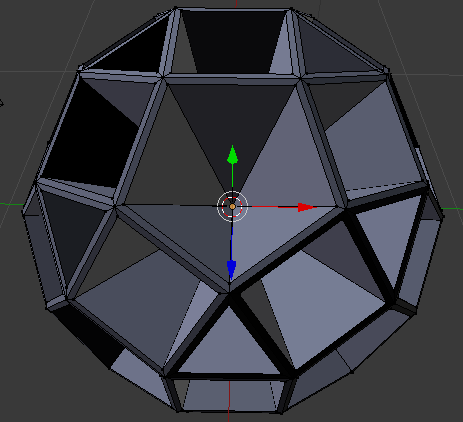
Create a dodecahedron. For example, using the Add Mesh: Extra Objects add-on: Add -> Mesh -> Math Functions -> Solid, select Dodecahedron as Source in operator options. Go to edit mode, switch to edge selection, select an edge inside a pentagon (the one that separates a quad and a triangle), Select -> Select Similar -> Face Angles. This will select all such edges. Now from the delete menu choose “Dissolve Edges”. This will leave you with a dodecahedron made out of five-sided ngons.
Select all, activate Inset Faces tool (default hotkey I). Escape out of it, open operator options, check “Individual” and adjust the Thickness to your liking.
With smaller pentagons still selected, poke them (Alt+P).
Switch to vertex mode, shrink selection (Select -> Less).
This should leave you with only the “poked” vertices selected, which you can now scale inwards or outwards.
Dodecahedron
Edit Mode
Select All -
Del - Limited Dissolve
Alt P
A - Unselect all
Vertex Select - Select Center Vertex
Select Similar -
Amount of Adjacent Faces
<font size=“1”>Ouch, these time zones… I saw once a proposal for returning to something Flat on Three Whales or Elephants (not both species for the simplicity and Cost Estimate) for the Blender’s users.</font>
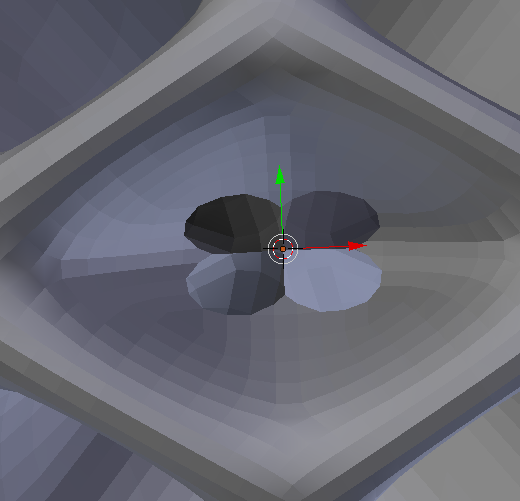
Just briefly- instead of using Inset on faces i started from Ctrl-B bevel on edges. Alt-s or s likely doesn’t matter here - in the default state (3d cursor at Origin) scaled verts will go center anyways.
Didn’t think to try Bevel. I was keying in
on Stan’s tutorial.
Tried Bevel with a dodecahedron. And Alt-P
after that. Couldn’t then figure out how to
“Select - Similar” the center vertex.
Not so troublesome when working with a dodecahedron
or something with few sides. The more complex the
polygon though, the more work that’s involved in that
case (unless, once again, there’s a shortcut I missed -
NOT out of the realm of possibility).
Bevel, face mode, invert selection, delete faces, edge mode, select non-manifold, pivot to individual origins, extrude, scale 0, vertex mode, remove doubles, pivot back to median point
I see you like these math shapes hence I suggested topmod , not because it’s easy to make it there.
In topmod you can create some cool abstract models .
Now I give you a challenge to make this voronoi twisted torus :), are you up for it ?.