OK, Got impatient (these things happen in old age…) Here is a picture:
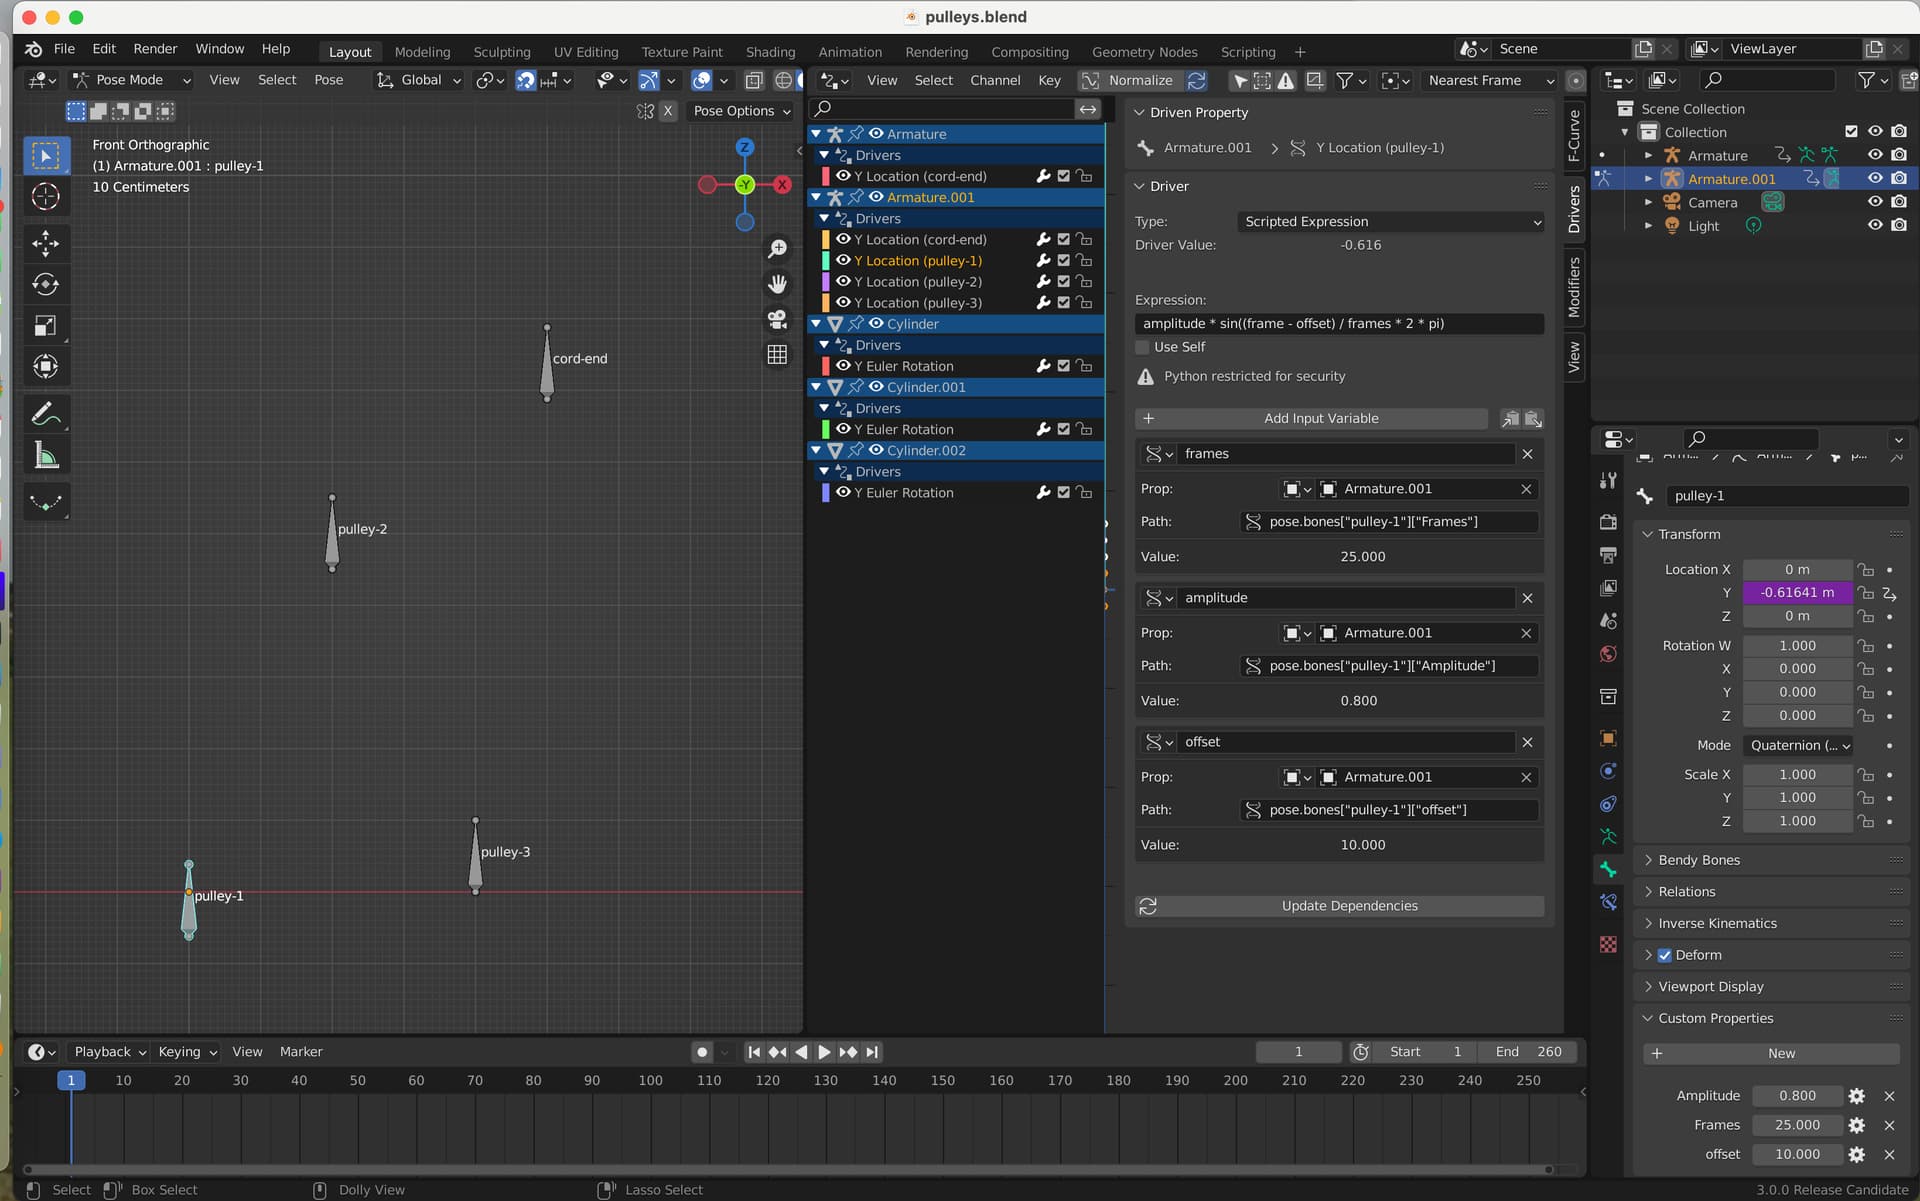
As you can see I have added a driver to the bones to move them sinusoidally up and down. I have also added three custom properties to each bone, namely Amplitude, Frames and Offset. Amplitude is the maximum deflection of the bone, and therefore its pulley, Frames is the number of frames over which a complete 360 degree cycle is performed, Offset is the number of the first frame in your animation where the value of the driver is 0.
So the driver is this: amplitude * sin((frame - offset) / frames * 2 * pi)
All you need to do to change the amplitude, cycle length, or offset is alter these Custom Properties for each bone, NOT edit the drivers… The Offset is in effect your Phase setting. So for example if you have a cycle length of 30 and a Phase Shift of +90 degrees your offset would be 7.5.
Blend File now: pulleys.blend (1.0 MB)
Hope this helps!
Cheers, Clock.
I guess now I need to look at how to make the trace line work… I would use a Curve Object (with a Bevel Object for the section) and Hook Modifiers I think.