Hi,
Kitchen cabinets are on the pipe (swissnorm and euronorm but not limited to), probably strong enougth to handle most cabinets needs.
For other furnitures you should rely on static assets as variations make the parametric way unefficient.
Goodmorning Stephen,
When do you plan to add a kill parameters button? as you have suggested.
When models are well advanced it is useful, so that one can edit window door component geometry.
Thank you
Hi Christos,
Kill parameters buttons are implemented in geos branch, find them under “Archipack Tools” tab.
There are 2 buttons, kill on selected objects and kill on all objects. I’va added a warning icon and confirmation popup.
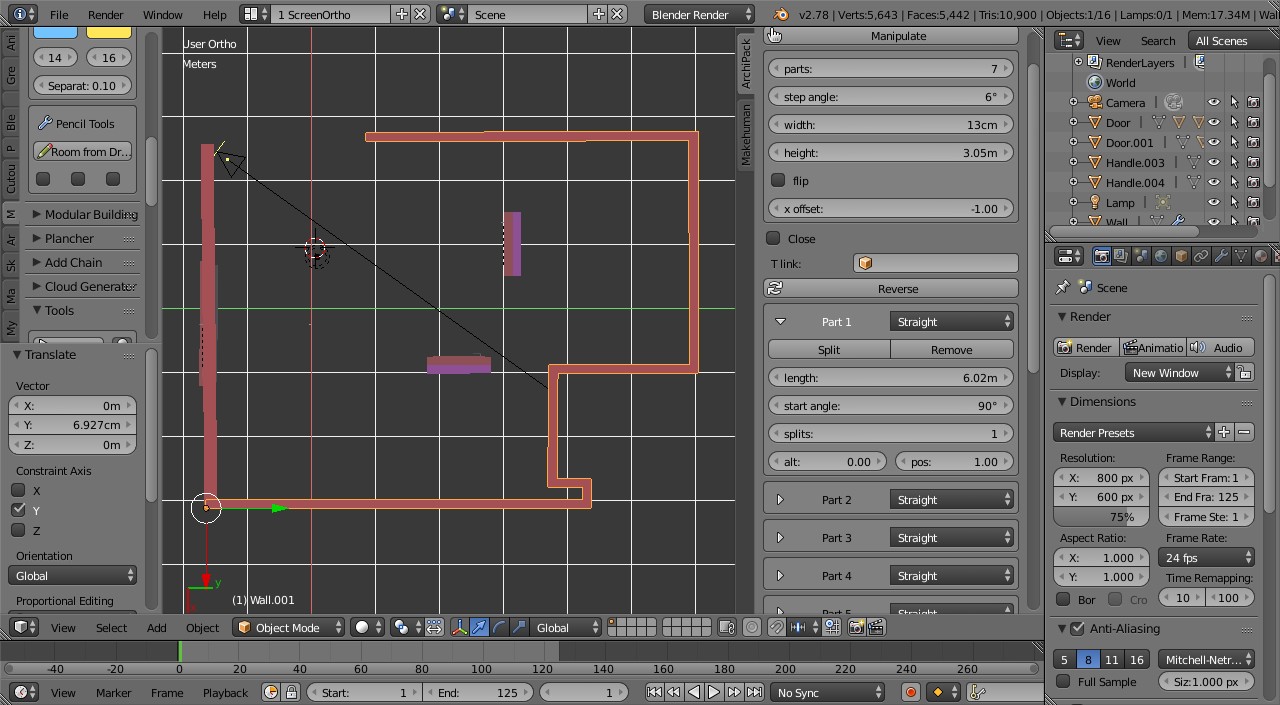
Is there a way to rename the sections of one continous wall after you create it. If you look at the image I have made a start on the outline for my apartment but now I need to adjust the dimensions to be exact. But I each wall is called “Part1, Part2, e.t.c” And the only way I can determine whic part is which is to adjust the length of each part and see which one moves in the 3d viewport. If that is the wrong part then I have to adjust the length back to what it was and move on to the next part.
There has got to be an easier way.
Hi SHABA1,
Hitting “Manipulate” button, does show part number and size for each segment. (manipulate mode, press manipulate or right click to exit)
In this mode, you may drag & drop small blue handles on edges of the wall to move parts right on screen.
(able to usie constraints, snap and keyboard entry as with transform translate)
You also are able to set angle and real width of segments using white arrows as handles,
or select a text and enter wanted size.
Hi everybody !
Pushed version 1.3.5 on github, with great improvements on 2d to 3d part now available everywhere.
Download from master branch
See documentation here
Added 2d to 3d video tutorial and boolean, offset and buffer demos
Magnificent!
Hi Stephen!
Great news! This 1.3.5 version incorporates al the things that geos branch has?
Really nice work!!
Cheers!
Thank you !
Thank you so much Stephen… this is wonderful… buffer tool can be used for to do roads and streets. If already dont have, can you add bevel/chamfer option on road intersections segments? would be big time saver to construct streets like the Lucas3D ‘road creator lite’ script for 3dsmax ( https://www.youtube.com/watch?v=xmxPPyuyDzY ). So bad this cant to be implemented as modifier for interactive update from the base curve editing. 2Dto3D is a masterpiece. 
Hi,
@patoaltaco
Yes, i’ve merged geos branch into master
@wilBr
Buffer operation is a pretty complex code using 2d booleans under the hood (offset too).
So unfortunately it is far from easy to include such modifications right in this operation.
You probably have to rely on mesh editing to do so.
Thanks stephen_ledger. I had not even noticed that button. I feel like a fool now.
This may not apply to this particular post. I have been using archipack. But I have avoided using the 2d aspects because you have to have shapely installed. The only format I found for shapely was something called a ‘wheel’ file. I have searched on line on how to install that type of file using windows 10 and everything was confusing so I just skipped the 2d part.
Hi SHABA1,
Archipack now provide a pure python shapely replacement.
So 2d to 3d does work everywhere out of the box with archipack 1.3.5+
How can i change the angle of the laying direction of the planks of a floor ?
Hi Alain,
Rotating floor patterns is not implemented, but probalby should be.
Until then, rotate the floor object, then presss “Manipulate” and adjust boundary according your needs using small white squares manipulators on floor edges (press ctrl to snap while moving).
Hi Stephen
Thanks for the tip
Thanks. I am rushing off to do something right now but I will check it out tomorrow.
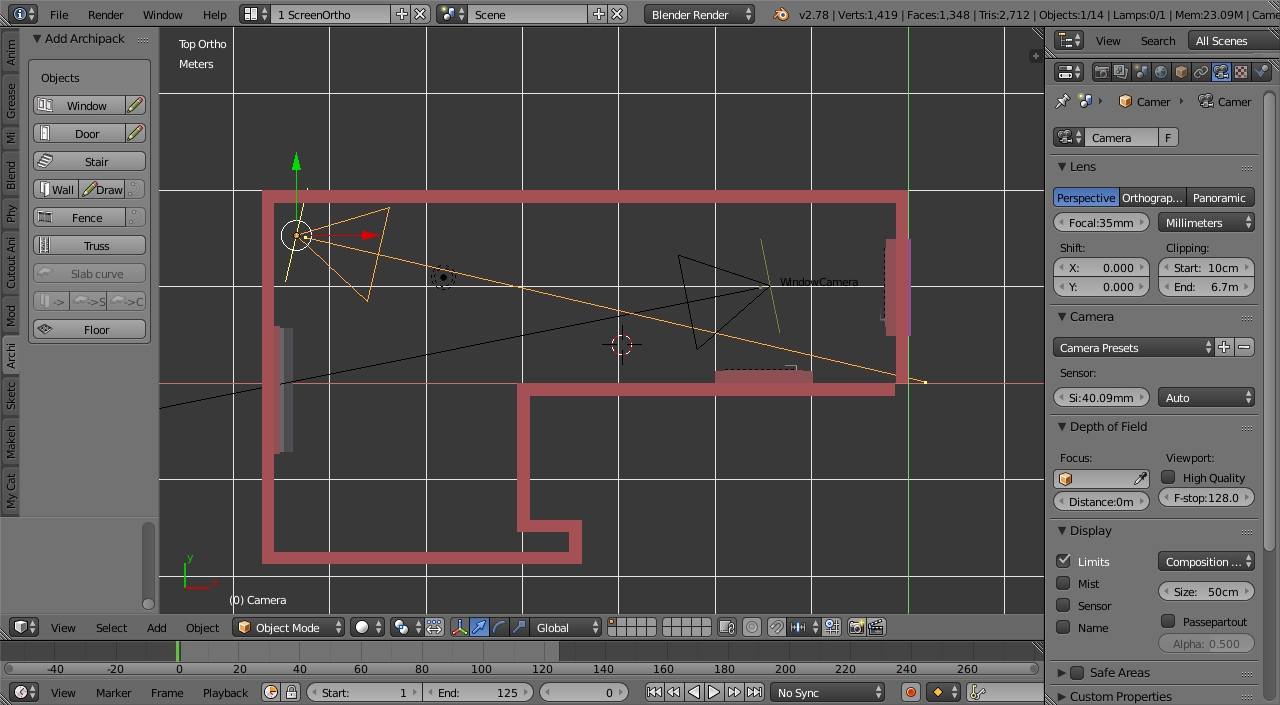
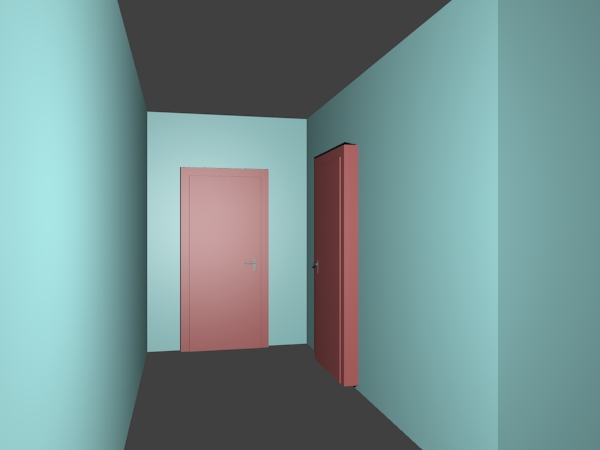
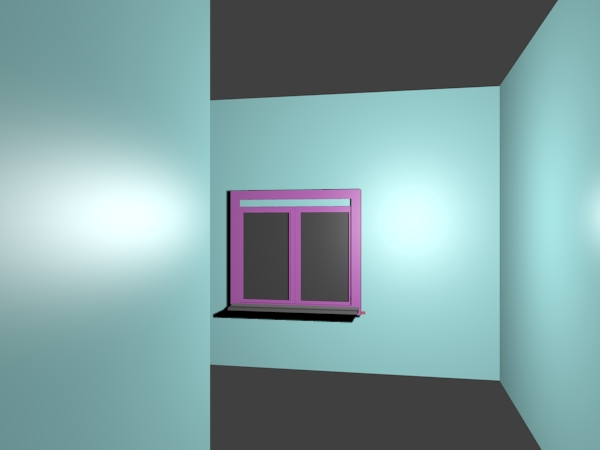
This may not have to do directly with archipack but is somewhat related. I am using archipack to make a 3d model of my own studio apartment ( could not think of anything else to model where I would have 24/7 access to do mesurements  ) Anyway hear are two test renders from two different camera angles that I have done. and here is a screen shot with my camera settinngs.
My question is that the renderings seems somewhat narrow. From what I can actually see everyday that I get up. If I acutually lived in this room that I am rendering it would seem clausterphobic. The measurements are generally pretty close to real life. I am going back and double checking just to make sure but so far they are within 0.01cm of what I actually live in.
So I am pretty sure its my the blender camera setting. I have never really adjusted a blender camera in the 12 years that I have been using blender other then its position and angle. Can someone help me out.
Human field of view is pretty large, (near 120° horizontally and 125° vertical)
You may try camera with Parnoramic Equirectangular and set latitude and longitude according, then use only center of image (part without evident deformations). 16:9 image format and ±30 for camera latitude and ± 60 for longitudes.