Stephen would you like me to make you a diagram of what I mean?
Stephen here is a top view. The top diagram is the way your door insrted…the bottom one is the way it needs to be. Are there settings in Archipack to adjust the door the way I have it in the bottom picture? As well, how do you adjust the glass in Archipack windows so they don’t show reflections of for example other windows across the room. Can you turn gloss off in the glass object settings? Do click on the top casing and then disable glossy in the object ray visibility settings? What works for you? For now I disable glass and enable light portal.
Thanks
Hi,
Use “offset” on door main parameters to move the door panels beside jambs.
Window glossiness is a material property, so select your window and try to edit your material according your needs. As Chipp said, unless your plane a night version for the images, as long there is more light in the outside than inside, you may simply disable the glass (wich also helps eevee a lot).
I always use light “portals” on windows, note that “portal” is cycles gi related word for such setup and basically is a guide so the render engine is able to cast samples on the inside where it is relevant to do so.
Eevee also takes advantage of those lights so they are important for realism on daylight scenes.
1 Like
stephen I want to have blue lower cabinets and green upper cabinets. Currently they are gloss paint white on the uppers and lowers. How do I change this so the uppers are a different color than the lowers? Thanks
1 Like
Here I managed to set things up so the baseboard would be blue and the walls yellow. The same principles and naming conventions can be applied to the lower and upper cabinets.
The stove is from the Poliigon texture site and the rest of the furniture and appliances including the venthood are from Chocofur.
How do you make the inside of the cabinets the same color as the outside?
Edit: I went into edit mode, choose the faces of the inside and applied texture.
Hi,
In cabinet parameters you’ll find “Override Cabinet Materials” toggle, when enabled you may set inside / outside and sides material as per cabinet.
Same for each door, when “Override Door Material” is enabled you may set outside, border, glass and handle material.
Usually i do setup material before growing number of cabinets as settings for new cabs are copy of last one.
Editing mesh should only be the last solution, as any change in parameters will override the mesh and loose your changes. In order to be safe with edited mesh, you may use “Kill parameters->selected” in tools panel to remove the parameter editing ability from your object.
Thank you stephen. I did it the hard way. Here is a 12 minute render…a 2000 sample render will be done in 4 hours. My graphics card is not working so I am rendering on my CPU. It will be a 5 hour render. The stove is from Poliigon and the fridge and the rest of the furniture are from Chocofur. The counter material is from Blendfab. 11 kronospan black concrete. Thanks for your great advice and the terrific addon and for getting back to me. I wiil send you the finished render when it is done.
The EG dishwasher is from 3dsky.

The reason the vent hood is emitting light and you can see light in the corners is because the stove wall had glossy disabled in object/ray visibility. Once I enabled glossy all these light artifacts disappeared.
In Archipack is something enabled when it is blue or grey in color. So “Overide Cabinet Materials,” is it enabled once you have pressed the blue button and it turns grey. Then you make your material changes for say “green upper cabinets” and then is there a save button to save your changes? Then if you want “blue lower cabinets” are there parameters to change the material of the lower cabinets and a save button? stephen can you write out the steps to make these changes from the default white cabinets? If I recall correctly when you disable glass in windows you press a blue button to disable it. Is “Overide Cabinet Materials,” the opposite, “enabled” after you press the blue button instead of disabled as with the window glass? Edit: What is the exact process to get and save blue lowers and green uppers?
Override buttons are blue when enabled, and show setttings to do so, nothing needed to save, but keep it enabled all the time when it does apply.
In order to setup such configuration (blue lower and green upper), i’ll start from a single cabinet, setting blue on regular material parameters, then increase the number of cabinets required for lower part.
Once done, i’ll add another cabinet, set “Reset location” and set type to wall, enable override and setup materials according my needs, then, i’ll increase the number of cabinets to fit needs for upper ones.
Here is a new picture of my kitchen scene. I modeled the 3d tiles using Mark Kingsnorth’s plating and greebles generator. I also modeled the rounded tiles on this window using the addon. Works great. Thanks for your reply stephen.
See post 148 above for credits. See this threads last post to see the window with rounded tiles. It has some characteristics similar to the windows Enrico Cerica’s old brewery scene. Tissue by Alessandro Zomparelli - #304 by bkjernisted How can I improve my kitchen render? EDIT: How do I make the beams the same color as the tongue and groove panels in the kitchen doors? The beams are reddish and the panels are blondish. I have tried for hours to change this. The tongue and groove is WoodPlanksNatural008 from poliigon.


1 Like
Hi Stephen !
First, I want to thank you for such a great addon !
I wanted to try the .ifc export but I didn’t manage to make it work. Is it to be expected due to the experimental stage of this functionality, or am I missing something ?
Thanks for your answer !
Hi ocganzer,
Ifc export currently only support archipack’s objects.
Reference points are ifc “level”, one single building supported until i expose a building helper entity.
Any error in the console ?
Ok, so I had to elements wich were not archipack’s objects (a custom chimney and some metal coping -couvertine in french-).
I deleted it and tried without.
If i just select the archipack collection and try the export, I have some error in the console (error following)
Traceback (most recent call last):
File “C:\Users\OCG\AppData\Roaming\Blender Foundation\Blender\2.80\scripts\addons\archipack_20\archipack_io_export_ifc.py”, line 2233, in execute
ifc_export(context, self, self.filepath, self.selected_only)
File “C:\Users\OCG\AppData\Roaming\Blender Foundation\Blender\2.80\scripts\addons\archipack_20\archipack_io_export_ifc.py”, line 1951, in ifc_export
bm_from_object=export_materials)
File “C:\Users\OCG\AppData\Roaming\Blender Foundation\Blender\2.80\scripts\addons\archipack_20\archipack_io_export_ifc.py”, line 1617, in create_Meshrep
bm.from_object(c, context.depsgraph, deform=True, cage=False, face_normals=True)
AttributeError: ‘Context’ object has no attribute ‘depsgraph’
If I apply all holes, references, and if i kill parameters, the export “work” but the file is 2ko (with nothing in it) but seems to me it might be normal as the object exported are no longer archipack’s object
Ok i see,
there is a bug related to recent depsgraph changes in blender 2.8
Allready working on a fix, will be part of next release.
Thank you for reporting !
1 Like
Ok !
Thanks for your work !
Stephen!! Just wanted to say THANK YOU for making ARCHIPACK!!!
I’ve been busy using it to help design tiny houses in California. Here is a bathroom design I just setup this week:
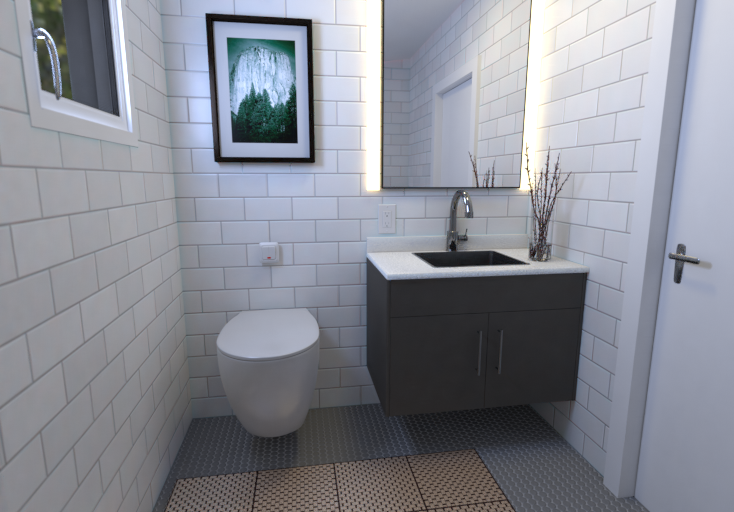
And here’s a kitchen:
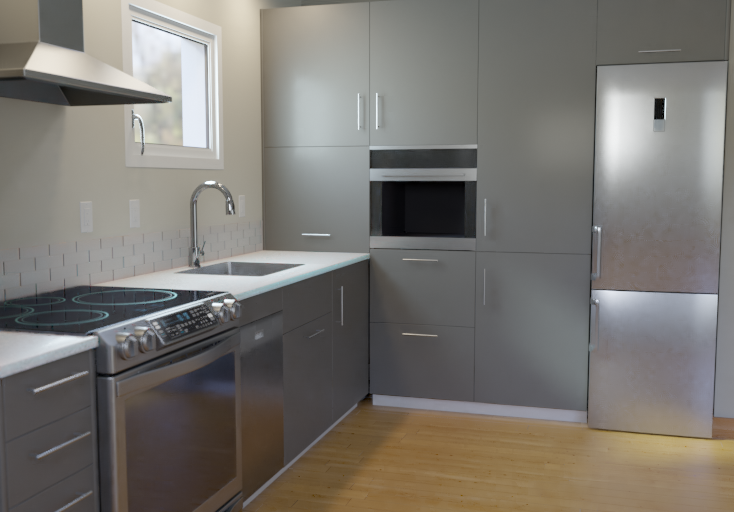
I absolutely love this addon. Thank you Stephen!!!
4 Likes
Really nice renders,
thank you for sharing !
1 Like
Hi,
Quick start guide for archipack 2.x videos tutorials are available on youtube chanel.
This movie is the first one of the “Quick start” series aimed at smoothing common newcomers issues.
In this video you’ll learn basics of draw walls tools and manipulators usage.
7 Likes